Up next in 10

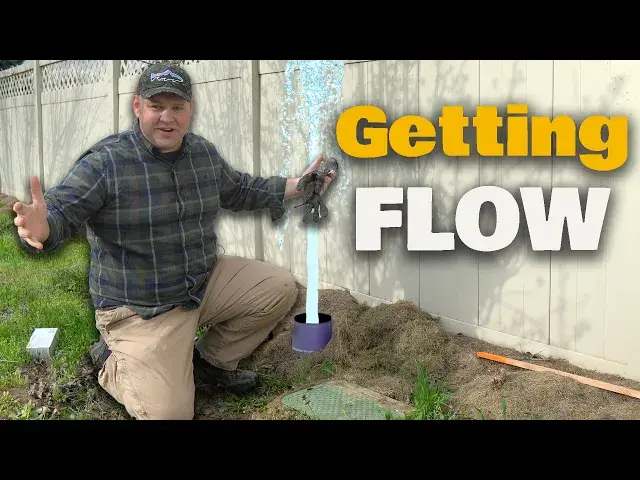
Gear up for the next level in garden efficiency as we dive into the nuts and bolts of hooking up your automatic sprinkler system to the city's irrigation. 🌱🔧 This video is a direct follow-up to our comprehensive installation tutorial, focusing on leveraging municipal water for optimal garden care.
What you’ll master in this video:
-The advantages of tapping into city irrigation for your garden’s water needs.
-A no-nonsense, detailed walkthrough to securely connect your system to city water.
-Tips to ensure a solid, leak-free setup and maximize water efficiency.
This guide is crafted for the practical gardener who values precision and sustainability. Whether you're looking to save on water bills or make your watering routine more efficient, this tutorial has got you covered.
Smash that like button if you find the tips useful, drop your questions or insights below, and subscribe for more hardcore gardening tutorials!
Check out our Easy Food Storage Plan: https://pantrypreparedness.com/food-storage-made-of-the-meals-your-family-loves/
#sprinklers #diy #garden #gardening #preparedness #readyforanything
Pantry Preparedness is a trademark of Income School LLC, an Idaho Limited Liability Company
Show More Show Less View Video Transcript
0:00
All right, so in order to have a fully automated watering system for your garden
0:13
you need to understand how these watering systems work. And if you have pressurized irrigation coming into your setup
0:19
or even if you're using city water, I did this before in Texas when all of our watering was done on city water
0:25
You need to be able to understand kind of how this works and how the connection from your water source works
0:30
So I want to show you this and I'm going to basically we're going to do it, right
0:35
So here's what we've got. This is where the water comes in from the irrigation district for us
0:42
It's this access right here is to a valve that's actually way down there
0:47
We use a really long sprinkler key to be able to turn that valve. And that's where the water comes in
0:54
And it just is piped, comes out of there and comes up quite a way
0:58
So now six to 12 inches underground is where that pipe just kind of ended
1:04
And it just had a cap on the end. It had a screw cap. So what I did was last year when I was getting ready for this, I dug up right here and I connected some piping straight to there
1:17
And I put in this box. Now this box right here is where I put in a hand turn valve
1:24
Why do I want a hand turn valve if there's already valve here? well we've had situations before where we needed to be able to turn off the water pretty quickly
1:33
and if the sprinkler keys in the garage or a shop somewhere or lost or in our case we were putting
1:41
in a brand new sprinkler system in a backyard at a newly built house and we had the trencher
1:47
and we hit the line that already existed because they already had water to the front yard
1:53
and we hit one of those lines because we didn't know where they were and it just started
1:56
fountaining water. And my dad was like, go get the sprinkler key. And I was a teenager and I'd
2:02
never done this before. And I was like, I don't know what that is or where it is. And he's like
2:07
oh, there should be one in the garage. There was not. So it took us like 15 minutes to get one from a
2:11
neighbor. Meanwhile, there's just water going everywhere in a backyard that's just dirt. So most backyards
2:19
a lot of backyards will have this. I always do this. I put in a hand turned valve in a box here
2:23
followed by we've got we've got a filter now I'm going to show you what this looks like
2:29
right now I dug a bunch of this out by hand yesterday as we were starting this project I
2:36
just to be able to get to this and that end down there I'm gonna dig all this out right now
2:40
completely but you got the little spider crawling around down there um see that guy anyway it got totally filled up by gophers they crawling around under
2:51
there they filled up my box so now I got a dig it all back out. But after this filter is where we can just run the line over to our sprinkler
2:59
valves. And that's what I want to show you today is the rest of this process of connecting this up
3:04
I'm going to put in a hose. So we're getting ready to do that as well. I'll show you all of that
3:09
today. But I got to dig this out. I'm going to have to cut a little bit more access on that other
3:13
side for the pipe to go through and dig a hole over here. So you're going to see it all
3:23
I could remember that this, if the handle is going perpendicular to the pipe, that means off for valves in plumbing
3:43
So that's off. And that is how it's supposed to look. So now we're done with that
3:51
Now I've got to dig a hole right here so that I can. connect a pipe coming out and we can get started with our trench and we'll be good to go
4:00
But all right. Let's dig a hole. Here I going to use Here I going to use a smaller trenching shovel I doing a trench here because I going to have a line that tees off right here and goes to a valve
4:33
Actually, the valve box will probably actually be right here. So maybe I'll use the real shovel
4:38
And that's going to water all of our trees. Sweet, more than deep enough, and more than wide enough
5:01
We're in good shape. I'm going to put that hose right here, actually
5:10
So you can see in here that the hole that comes in the valve box doesn't actually line up
5:15
that's because this filter's too big. I had to put it off to one side and put the filter off at an angle
5:21
It's pretty normal. So I need a hole for the side. That's why I brought my reciprocating saw
5:29
So we're going to cut out that hole. Go ahead and cut this off right here too
5:45
There we go. So then I'll run it as hard PVC out to about here and then I'll switch it over to flexible tubing
5:55
I had to buy a whole stick of one and a quarter PVC for this much
6:09
Oh well. Okay now got my PVC glue. my PVC glue. This stuff, by the way, no matter how tight you tighten it, unless you're
6:20
going to use it again really soon, this always dries up. The primer is fine, but this always dries
6:28
up. So like, every time I do a project, I basically have to buy a new can. And that's just
6:33
how it is. It's often easiest to glue on, like, the little fittings first, and then
6:41
glue it all in to the existing setup. So that's what we're going to do here, which is nice
6:46
because it means I can show you how this works out here in the open. All right, so this purple stuff
6:52
is primer, and it actually is really helpful. It kind of etches the PVC. It cleans it and kind
7:01
of etches it. It makes the glue work better. This also works a lot better if everything's good
7:06
and dry. We're also going to put primer on the inside of the coupling that we're attaching
7:14
This coupling is going to connect us from this stuff to the black poly tubing that you're
7:19
going to see in a second. I'm going to let that dry for just a sec. I don't like getting
7:25
that stuff all over my fingers. It kind of burns. Not bad, but like I get little cuts all
7:31
over my hands and stuff, but also it like dyes your skin purple. And that can last
7:36
at least a day or so. Okay. Then with that done, we're going to put some on the outside here
7:46
And on the inside here. Okay. Then we're going to stick it on and we're going to give it a good at least quarter turn
7:54
to half turn or so as we slide it on. So now it's on there all the way and I know that the glue is basically spread out everywhere
8:04
That's going to give me the best seal. That's what I was taught by the plumber that I worked for when I was in college
8:11
We're going to do the same thing on the other end and attach it in to the end of this filter
8:17
I want to glue all the way around outside and inside. Oh, crap. I was wrong
8:32
So one a quarter inch, that's one and a half. I need a bushing adapter
8:38
So we going to have to come back to this in a little bit I going to go ahead and wipe off the glue So it doesn dry on there and make it hard to attach later
8:50
So we'll attach this in a little bit. I'm actually going to go ahead and keep going and do the next part
8:55
And then we'll attach that last. We're going to pretend I did that on purpose because it's going to make it easier for you to see what I'm doing next
9:04
Okay. This is the poly tubing that we're going to be using
9:08
for most of the main irrigation line. We're going to run it all over the place here
9:16
I'm running an inch and a quarter. And what we want to do here is I want to attach really just enough
9:23
to be able to come off of here. And then I'm going to attach a T, which is going to run to my first valve
9:30
Then we'll come off the T and go to run a supply line to the whole next
9:34
all the other stuff. Yeah, that's what we'll do. So I'll take off this. This is just a little cap that they used for keeping it clean
9:45
Then I'm going to use crimp rings. You can use these or you can use screw rings. Crimp rings are cheaper and easy. And then I'm just shoving this in all the way
9:57
Now, it's easier to push this on to this big pile of tubing rather than if I just cut that little section
10:05
and that is why I left it on. I really want to get it on all the way if I can
10:12
or at least as far as I can. And then I'm going to put this crimping, not right on the end, but close
10:19
Then we'll crimp that down. Screw rings you can take off, but I find that pulling that off
10:26
with those barbs on there is really hard anyway. So basically it's permanent
10:34
And I could always cut that. if I needed to, like right there on the crimp, I could cut that like with a wire cutter
10:40
So it's not that big of a deal. Then I'm going to cut. I'm going to leave a little extra
10:45
I need enough for that barb and enough for a whole other barb
10:49
And then I'll leave just a little extra beyond that just to be safe. And I find you get that tight enough and then you just kind of work it around
10:57
And then once it's really in, then you can tighten it down a little more
11:03
And then by this point. it's easier to kind of work it around
11:09
All right. There we go. That's going to go in right there
11:16
And then we'll have a T coming right off of it to that first valve. So I need a T
11:24
All right. We're back. So I've got some T's here. I'm going to go ahead and tee off
11:29
It helps me to be able to orientate. So I'm going to put this little, there's a little nub there
11:35
from the crimp. I'm gonna treat that as straight up. This is gonna need to come in a little bit of an upward angle
11:42
so not totally straight to the side. So I'm gonna come up a little bit
11:48
And then we'll put another piece on. I'm gonna come off that way for a hose bib
11:53
So what we wanna do now is before, before I shove this in here
12:04
I slide on the next crimp ring. You don't want to miss that step putting on the crimping first
12:12
I find that rocking these can help. You can also tap on it with like a rubber mallet
12:17
but you don't want to be like banging that up too much. So just use like a rubber mallet or something
12:24
Or you could bang it on like some plastic like this. Just a little bit
12:28
I'm being kind of gentle. But it can be kind of a pain to get those all the way in
12:35
The farther in, the less likely you're going to get leaks. And it has little nubs on it that tell you when it's in all the way
12:49
All right. We'll crimp this on. And get this off, this plastic off of here
12:58
I want to be careful. I don want to be scoring or cutting any of the barbs Because again that an opportunity for leaking So just need to get it started so I can get a finger under it
13:11
and start peeling. Okay, so that's ready to go off this way
13:15
I'll put on one more piece and then another tee for the hose and we'll be good for this part
13:23
Again, crimping first. See you? Here you can see this rocking motion slides right in
13:36
It's a lot easier when it's attached to something that won't move on you
13:52
Let's see, this one. See, this one. It's because plastic pipe like this is fairly forgiving
14:06
You can kind of bend it a little bit and it doesn't have to be as precise
14:11
If I were doing like steel pipe or anything like that, there's no forgiving
14:16
You have to measure like to the eighth of an inch. That's going up this way
14:23
The other one's going to come up a little bit of an angle this way
14:29
Okay, crimping first. It's like I've made that mistake before. Mostly that, yeah
14:44
Perfect. Just how I want it. Crip. I just need to go get a bushing adapter now that will go from one and a half inch to one and a quarter inch so I can glue this in
15:05
And then this is a supply line. I'm going to run off this with a huge line of tubing and run it all over the place
15:12
And I'll just have T's running off to each of the individual valves. And I'll show you that step in another video
15:18
I'll show you why I'm doing it the way I'm doing it because I'm putting little valve boxes everywhere instead of putting one main valve box
15:26
I'll show you how you connect them to the valves, how you do the wires, how you do the wire. setting setup and everything like that
15:31
And I'll also show you the host connection that I'm doing off of this in another video
15:36
as well. So make sure you check those out. And also make sure you check out the video where we show you the whole story behind this entire project that we're doing
15:44
It's a pretty cool one. I hope to see you in those videos. Okay, so I picked up one of these bushing adapters
15:50
I'll go ahead and put on my primer and adhesive and everything. Cool thing is I can just slide it into the one and a half inch pipe coming right off of that filter
15:58
And then I can go ahead and I can, we'll get it slid in right here real quick
16:04
You see, it just goes right in. And then I can go ahead and I can prime and add adhesive and everything to my one and a quarter inch pipe coming off of there
16:13
And it slides right into the bushing adapter. So I don't actually add really any length, maybe a quarter of an inch total length to my whole system
16:21
So we'll get that in there, give it a little twist and stuff and then let it dry. And then I can go ahead and connect everything up and we'll be ready to test it
16:28
Okay, I think water's supposed to be on now. So, turn the valve
16:34
Oh, yep. Whew. Hoo. Okay. All right, water's running
16:50
I can hear all this air is just like blowing out of the tubes. It's filling up like all the supply lines. So
16:57
Ah, see, there we go. Now it's good. All right, so 해서
17:04
We're gonna call that good. It's working. Working
17:15
So, now we have a functioning hose
#Home Improvement
#Plumbing