Up next in 10


I'm sharing with you what it costs to have an epoxy flake or polyaspartic flake coating done on a garage floor. The cost to hire someone like me will vary a lot depending on where you live, but what we charge is for hiring a professional floor coating contractor.
This garage floor had a lot of prep that added to the cost, but as you'll see, the garage floor was completely transformed into a showroom-looking garage floor.
I can show you how to fix & repair the concrete so you'll get a brand new-looking floor like this one.
Check out my course below and I can help you learn how to do these coatings the right way.
//Creative Commons Attribution Licence video (Reuse allowed)
Show More Show Less View Video Transcript
0:00
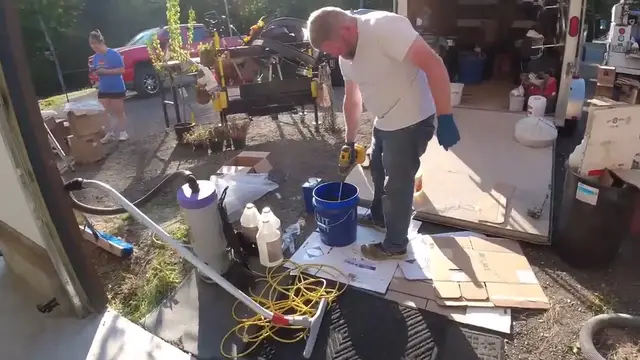
And now we're getting ready to mix the base coat
0:02
We're mixing the color. It's going to be a black base coat. So we're getting ready to mix that color
0:07
Actually, he's mixing the color in now. We've got about five gallons of base coat going down
0:19
200 square feet a gallon. And we're going to get ready for that in just a minute
0:27
Hey everybody, thanks for tuning in. tuning in this is Mike here now me and the crew are getting ready to install our
0:33
polyospartic flate coating that's Darren right there he's usually the mixer and
0:38
then he dumps the product out that's Luke in the background there's Tia here
0:42
today and I'm right there kind of cutting in edges under that oil tank so a crew
0:49
of four when doing these floors makes things really really nice it actually makes
0:53
things pretty easy you know when you got a couple people cutting in you got one
0:56
guy dedicated to mixing and one guy won the 18 inch roller and then throw in flake these floors go pretty fast
1:05
now I'm gonna be talking a little bit about cost at the end of the video what's a floor like
1:09
this cost to do this floor if you haven't seen the prep video for it I'll link it at the end of
1:14
the video but this garage floor was in pretty rough shape had a lot of spalling a lot of chips and
1:20
divots and a lot of cracks and we repaired all of them I showed you how I repaired all of them
1:26
And that's kind of normal up here in Maine on a lot of these older garage floors to have, you know, quite a bit of repair to them
1:34
So we can make a floor that's in really rough shape look like brand new, look like a showroom floor when we're done, you know, just knowing how to do them, how to fix repairs and the products to use
1:48
And then, you know, just the experience about how to do it and make it make it a worthwhile tight job to do
1:56
So if you're wondering if your floor looks pretty bad if it's in pretty rough shape can it be fixed
2:02
Can it be made to look like new this video and the prep video you can watch afterwards is going to show you
2:08
Just what you can do to your garage floor So the customer the customer picked out the flake on this
2:16
This isn't one of our stock flakes So we when they don't have any when they don't like anything we have in stock we can turn them on to a website where
2:26
they can go pick out right from the company the flake they want and then we have to special order it
2:32
that is an extra charge we charge extra for that for special order stuff because it's more than likely
2:38
we'll never use this flake again and we always have to order enough flake to make sure we
2:44
we do the job so there's usually always some left over and then there's some flake that you
2:49
recover when you when you broadcast flake to rejection like we're doing
2:56
That's what you want the flake to look like
3:08
You don't want any wet spots, like shiny spots like this coming up through the plate
3:14
If it looks dull like that, like the flate looks dry, then you know you've got enough coverage
3:19
if you start seeing some wet spots and you just throw a little more flake on it. I Looks like the king can be hard to see the nuts and bolts when he drops them now
3:57
So that's what I mean by throwing the flake to rejection, you know, throwing enough flake into the base coat that the base coat doesn't expose itself up through the flake
4:09
Now, after we get done, after we scrape it, vacuum it, top coat it, you will get, you will be able to see like tiny parts of the base coat through the flake
4:18
But for now, you know, we want to completely cover it. And that black base coat, that isn't a normal base coat we use
4:27
I mean, usually we'll use a gray or a tan for base coat
4:31
You know, most people pick flakes that have some grays, some whites
4:35
maybe a little bit of black in it or some tans and browns. So the black base coat was kind of a special order thing too
4:42
But you can see how that goes down. It goes down really nice. Now, the comment I made about the nuts and bolts
4:48
the guy that owns this works on a lot of vehicles in here
4:53
So, I mean, if he dropped something on this flake, it's probably going to be a little difficult to find just because of the darkness of it
5:03
But it is coming out really, really nice. These are the colors they wanted, so these are the colors we gave them
5:09
Oh, Darren's our mixer. We're using our Polyarmor 70. We get from Deco-Crete Supply in Ohio
5:16
We really like this product. We can use it. We can mix the pigment pack into the Polyarmor 70 to get the base coat
5:24
and then we can use the same Polyarmacemite for the top. So they have, the 70 stands for the solids count
5:31
And the 70 is actually their faster drying one. They have an 80, they have a 90, and they have 100
5:36
If you want to use them for a little bit higher solids, a little bit slower curing times
5:41
A lot of times what we like to do is if we can is do these jobs in a day
5:47
And it's possible to do them in a day if there's not like a lot of repair to do
5:51
If we can just come in and grind the floor, clean it, prep it without hardly any repair
5:56
then we can get right onto the base coat and flake and that usually cures up this what we're doing
6:02
right now usually cures up in about an hour and a half then we can get back on it and do the finishing
6:07
process which is scraping it you'll see that here in a minute but scraping it vacuuming it
6:13
putting the top coat down right now I mean we're just we're just moving along we like mixing small
6:21
kits at a time that do you know a certain amount of square feet so we can
6:26
just continually have a wet edge. We don't like to get too much of the product rolled out at once
6:31
before we flake into it. We want to make sure the base coat is really good and tacky
6:37
you know, still good and wet when we broadcast the flake into it. So the flake really settles down into the base coat
6:44
and we don't have any light spots. I mean, if you wait too long
6:50
the base coat, which is also the primer coat, could sink down into the concrete a little bit too much
6:56
and just not be quite as sticky or as tacky as in other places
7:01
And you get what we call like lighter looking spots after you flake it after you scrape it and vacuum it We don want that That why we go in these we mix small kits that only go a certain amount of square feet
7:13
You know, we have that all measured out on the wall to make sure we get the same coverage throughout the whole floor
7:20
And then the process continues. Luke generally does the 18-inch roller, you know, and I generally do the flake
7:29
and then Tia who's helping us out is doing most of the edges
7:35
and Darren will just mix and help cutting edges when he can on this garage
7:43
we're actually going outside the garage doors on the little part that tips down
7:47
that's kind of an option for the homeowner whether they want to do that
7:51
or just leave it the plain looking concrete when the doors are closed
7:54
some people don't want the colored flake look on the outside of the garage doors when the doors are closed
8:01
because, you know, the flake might not really match the outside of the house
8:05
or the siding or the trim color. So they don't want that kind of funny looking
8:10
but these people wanted it to come outside. And that's basically how we finish up the flake right there
8:18
So this is the next process. I think we actually came back the next day for this
8:23
because we weren't in like a crazy hurry to get this done and we were pretty close to the shop
8:27
So we'll just grab some floor scrapers Just lightly go over it and
8:33
That's kind of how we get rid of all that excess flake right there
8:37
And then we can save that we could use it over again if we if we need to there's nothing wrong with that flake
8:45
Alright, so we get everything scraped We always scrape north to south and east or west so we get it scraped two ways and that
8:52
That really flattens the flake out gets any little sharp pieces that is sticking up nice and
8:57
flat and smooth. Well this is perfect now and the next thing we do is we obviously pick up
9:04
whatever loose lake we can when we're scraping but now we'll vacuum up anything that's left over
9:08
get everything really nice and clean and get it ready for the top coat. So this, you know
9:15
generally one person will go around the edges and then one person will do the body of the floor
9:20
just a little bit faster that way. Let's take us a few minutes and then we're going to get right
9:24
on this top coat. So we'll be back with you and just a couple of the top of the floor. minutes. It's all right after you vacuum it's always a good idea just to take your
9:33
little blower and just blow over the floor real quick see if you missed any. It's kind of easy
9:38
to miss a few spots. Everything blends in so that's what we like to do anyway. It just helps
9:44
keep any loose flake from sticking to the roller when you're rolling the top coat on
9:49
You're going to get 99% of them this way but you're always going to have a couple little
9:55
loose ones here and there and that's not really going to bother much. Right, this is how we do it. Get a couple vacuums going. Get a person with a blower and
10:04
we clean these floors up pretty quick. Get them ready for the top coat. Alright, so we're using the Polyarmor 70, which is the same
10:25
Same as the base coat, but just clear for the top coat. Mixing one to one ratio, he's mixing in there trail because there's shade in there
10:32
We don't want to mix in the sun. We got we going down at 130 square feet of gallon with this so a little thicker than the base coat We got everything measured out it 27 feet across so 130 is about 27 by 5 so I got my
10:48
five foot marks with a blue tape every five feet. So that's kind of what we're shooting for here
10:57
We'll be cutting in the edges, rolling the edges, and using the 18 of the body
11:03
All right, so if we want to talk about cost a little bit
11:11
like what's it cost to have something like this done, I mean, in order to get a really, really nice job
11:18
that's going to last for years and years, you're going to have to pay a little bit of money for that
11:22
because you want to hire somebody that really knows what they're doing
11:26
that can handle problems like the prep on this one. Once you watch that prep video, you'll see what I mean
11:33
There was a lot, a lot of repair on this one. Not all of them have that repair, but the cost, you know, there's, as far as equipment goes to do this and do it right, you know, you need the grinders, you need the hepa vacuums
11:48
The seven-inch grinders we use, you know, they got these big diamond cup wheels on them
11:52
The four and a half, five-inch grinders, we use the diamond cup wheels. And then we got walk behind grinders, big walk behind grinders, you know, that also use diamonds
12:01
So having the right equipment, having the right vacuums to get the prep done first
12:07
And then as far as any repair materials, you know, you want to use really good repair materials
12:12
They're going to last. That won't fail underneath the coating. So you want the coating and the repair materials to kind of agree with each other
12:23
And then you want to use really good coatings. I mean, the polyspartics we use are good
12:27
They're expensive, but they last a long, long time. So for us, you know, typically the cost is for a garage without a ton of repair
12:35
It's between 750 and 8.50 a square foot to do everything, to do the prep, to do the coating, you know, materials, labor, travel, all that stuff
12:44
And then if there's a lot of repair like this one, we'll add another dollar to a dollar 50 a square foot
12:48
So it could get up to around 10 bucks a square foot to have a garage like this done
12:53
But as you can see what it looks like, it comes out looking like showroom after
12:59
All right, that's the finished look right there. That's going to cure up, dry up, it's going to look nice and shiny, just like that
13:08
Went on about 140, 150 square feet a gallon, so a little bit thinner than 130, but it still
13:15
felt really good. We scraped the flake really flat, so that's why we got just a little bit more coverage out
13:19
of it. So tell them to stay off it for a few days, and then they can get in here and start using it again
13:26
Hey everyone, if you'd like to learn more about how to install these garage floor flake coatings using polymers
13:33
or using epoxy. I've got my course right here. You can check it out
13:37
There's a link for it down in the description. I have many on-the-job training from how to prep the floor, how to repair the floor, how to put the base coat and flake down, how to do the top coat
13:50
So this is where you can learn if you just want to do your own floor or if you want to maybe get into this as a
13:56
business then you have access to me too for all kinds of questions for estimates for bidding and all that
14:02
stuff so this is where you can go there's a link for it down in the description go check it out
14:07
and we'll see you inside the course guys
Construction & Maintenance
Home & Garden
Home Improvement
Flooring