Up next in 10

#freecad #freecadtutorial #freecadpartdesign
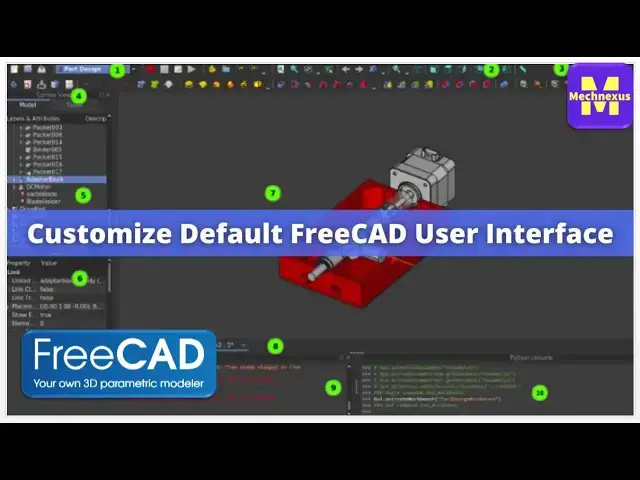
In this video I have explained How to Customize Default FreeCAD User Interface.
▶️ Visit my website for more info on FreeCAD-:
https://mechnexus.com/
▶️ Get my FreeCAD Crash Course for beginner-:
https://ko-fi.com/s/db924b973e
▶️ Download Source File of Tutorial-:
https://mechnexus.com/mechnexus-youtube-tutorial-source-file/
▶️ Buy Me a Coffee
I am very grateful that you watch my videos and I am constantly trying to improve the quality of the videos on this channel. If you'd like to help me do this, please consider supporting me so that I can to continue to produce content for your enjoyment.
👉 Help support this channel by buying me a coffee: https://ko-fi.com/mechnexus
All donations will be used to purchase equipment to improve my productivity and increase the quality of the content that I produce. Your kind support will help to grow this channel. Even if it's just enough to buy me a coffee every little helps and this will be repaid in full through my sharing of knowledge.
Show More Show Less View Video Transcript
0:01
Hello friends Welcome To freead tutorial
0:03
in our previous tutorial we have learned
0:06
free installation and its user interface
0:10
in this tutorial we will learn how we
0:12
can customize the free Cas user
0:15
interface as per our
0:16
requirement you can also visit my
0:19
website Mech nexus.com where I write
0:22
articles and tutorials on freeat you can
0:25
also download my tutorial Source F from
0:28
the here you can also support my work by
0:32
buying my free CAD crash course for
0:34
beginner it is a very basic level course
0:37
for the beginner user where a beginner
0:40
user can Master the free
0:42
Cad and you can also support my work on
0:46
coffee.com you can buy me a cup of
0:49
coffee you will get my website link and
0:52
my Kofi donation page Link in a video
0:58
description so here I have open freead
1:01
user interface and I have open a very
1:03
simple part to customize the user
1:06
interface go to the edit and then go to
1:09
the
1:10
preferences and uh here on the journal
1:13
tab you will see the language options
1:15
you can change your desired language
1:17
from the here unit systems you can
1:22
select unit from here if you are from
1:25
the US then you can select
1:28
inch or whatever the unit you require it
1:33
it has the mm inches everything is here
1:37
and from here you can select the number
1:39
of decimal
1:42
places if you are using the in system
1:45
then set it to the three decimal
1:48
places number format operating system
1:52
stylesheet stylesheet is nothing but the
1:54
themes you can select your desired theme
1:57
for
1:58
example you can uh select here the pro
2:02
dark and if you apply
2:06
it so you can see that uh my free Cat
2:10
theme has been changed to the Dark theme
2:13
dark themes are very useful uh if you
2:15
are working in a night because it puts
2:19
less stress on your eyes now we again go
2:22
to the
2:25
settings and here I will uh set it to
2:28
the no Style sheet if you select here no
2:31
style sheet means it will use the
2:33
default
2:40
theme and uh size of a toolbar icon so
2:44
these are the toolbar icon if you have a
2:47
visibility issue then you can change it
2:51
to the larger size for example you can
2:54
change it to the
2:56
32 and if you change it to the 32 you
2:59
you can see that uh my icon size has
3:02
been
3:04
increased I will again send change it to
3:07
the medium which is
3:14
okay uh Tree View mode is combo view
3:17
this is the combo view uh when we will
3:20
do we will see it the combo view when
3:22
we'll do any part
3:24
modeling size of the recent file list 4
3:27
if you go here in a free and you will
3:30
see the recent file so here my default
3:33
setting is a four recent file you can
3:36
increase up to the 10 so that whenever
3:39
you hover on the recent file your mouse
3:43
then you will get the 10 recent file
3:47
list and uh here is
3:50
the theme pack Dark theme light theme
3:53
and classic theme you can use any theme
3:57
as per your requirement now go to to the
3:59
document
4:02
section and
4:04
here uh you can uh save Auto Recovery
4:08
information you can increase that time
4:11
or decrease your time so that uh if you
4:15
reduce it to the 5 minutes then after
4:17
every 5 minutes free cat will save the
4:21
backup
4:22
copy and uh keep uh rest of the things
4:27
as default then select setion here uh
4:32
you can also set this settings as a
4:35
default do not change this this
4:42
also here is the report view options
4:46
so report view you can uh by clicking on
4:51
here on report view you can activate the
4:53
report View and here on the setting
4:57
page you can uh select what the report
5:01
view should
5:04
show now we will switch to the display
5:07
sections in a display section show
5:09
coordinate system in the corner so here
5:13
at the corner it will show you the axis
5:16
x y and
5:18
Zed so the show The Cross axis by
5:21
default this is your choice and uh keep
5:24
sitting as default navigations number of
5:28
Tate here so keep this settings as
5:34
default colors colors is
5:38
a your uh depends upon your visibility
5:42
you can change it now go to the
5:45
workbenches so workbenches I will uh
5:48
explain you what are the workbenches
5:51
then we will come to the
5:55
here so workbenches are uh nothing but a
5:59
Tools in a
6:01
freead and some of the workbenches are
6:04
the default workbenches which comes with
6:06
the freead installations and some
6:08
workbenches are uh developed by the
6:12
independent developers so to install the
6:15
workbenches go to the tool then addon
6:19
manager and uh here you will uh get the
6:23
option for the
6:25
workbenches like here I have uh
6:28
installed the a to
6:31
plus I have already installed it so
6:34
install any
6:36
workbenches just select the workbench
6:40
and install it for example this dodo
6:46
workbench you can just click on install
6:48
and you can install the
6:50
workbenches so this is the
6:54
workbench setting which will we
6:57
understand we will go to the edit then
7:00
preferences and the
7:02
workbenches so if you click on the
7:05
autoload options so that uh that
7:09
workbench will load when you restart
7:12
your
7:13
freead then here is the python module if
7:16
you are a python expert then uh you can
7:20
go for the this options
7:24
python then addon manager keep sitting
7:27
as
7:28
default
7:30
and uh from export and import export and
7:34
import
7:36
uh here you will get the supported files
7:40
uh which free cat support for example
7:43
step you can customize the settings for
7:47
the step IGS but I would
7:50
recommend keep setting as default until
7:52
and unless you have the clear idea or
7:55
clear understanding because if you
7:58
misconfigure this settings then uh uh
8:01
you will hardly able to find out what
8:03
went
8:04
wrong so uh most common file standard we
8:08
use is uh dxf DWG and IGS and step for
8:13
3D it is IGS and step and for the step
8:16
file uh you can select
8:19
the schemes available here
8:23
so ap214 is the international standard
8:27
keypad is default and then we will go to
8:29
the start start
8:31
page on start
8:34
page when you start the free C then you
8:37
can set the your default workbench for
8:41
example uh I used
8:44
to uh use a part design workbench a lot
8:48
for part modeling so I want that
8:51
whenever I restart the freead then part
8:54
design workbench should load by default
8:56
so here is you can set your default
8:58
workbench
9:00
bench then here is
9:03
a shape and appearances
9:07
measures you
9:09
can customize the setting and here is a
9:12
major
9:14
setting so I would uh give brief intro
9:17
about it what it exactly is so in freead
9:21
we have the option of a measuring tool
9:24
for example uh I wanted to measure the
9:27
distance between this point to this
9:29
point so I will select the major I will
9:32
select this age and this age so you can
9:35
see that uh free cat showing the
9:38
dimension in x y and Zed
9:41
directions but I want uh to change the
9:45
color of the dimension which you can
9:48
easily do so go to the edit and let
9:54
preferences here in the measure instead
9:56
of this red uh I want yellow for
10:01
example I will say okay and apply I will
10:04
clear the dimensions and I again measure
10:08
it this point to this a so you can see
10:12
that red has been removed and yellow has
10:14
came so you can uh give the color as per
10:18
your
10:21
choice and for the Sketcher Sketcher is
10:25
very important I will uh you the
10:28
Sketcher
10:30
settings let's understand for example I
10:34
create a a part and my background color
10:39
is a gradient type so if I create a body
10:44
and I create a sketch on exit plane and
10:49
I say
10:50
sketch and if I draw a simple
10:58
rectangle
11:00
and I give the
11:02
dimensions so you can see that
11:06
uh my Dimension color is yellow because
11:09
I have set it to the
11:11
yellow but if you are using any
11:15
uh light background then uh this yellow
11:19
color will not be uh look good so for
11:22
this go to the edit and preferences and
11:25
go to the Sketcher and colors so here is
11:28
a dimension constraint color so I Will
11:31
Show You by changing one color instead
11:33
of this yellow I give the pink and I say
11:37
apply so you can see that my Dimension
11:40
color has been changed so in Sketcher
11:42
color uh you can uh change the color
11:46
setting as per the your theme if you're
11:49
using the Dark theme then you should use
11:52
white color or any light color which
11:54
would reflect uh which will looks good
11:57
on your theme so in this case I keep it
12:00
to the
12:05
yellow now uh we have created this
12:09
rectangle now we
12:11
will switch to the part
12:14
design and I close it and I create a pad
12:19
so here on the pad here is
12:24
a we have when we edit any
12:27
feature
12:30
so in a model and task there are two
12:33
tabs in model tabs we get the tree in
12:35
task tabs the current feature which we
12:38
are working
12:40
on now we will go to
12:45
the settings page so we have covered all
12:48
the settings available here and uh if
12:52
you install any workbench then you will
12:55
also get that settings for example if I
12:58
go with the tech draw and I go to the
13:01
edit and
13:03
preferences then I will also get the
13:06
tech draw settings so this settings is
13:09
applicable when we are going to create a
13:12
2d drawing in free
13:15
cat and one more uh thing I wanted to uh
13:20
explain that uh instead of
13:24
uh
13:25
workbenches you can also use the micros
13:29
micros is nothing but the python script
13:32
and uh you can install in the same way
13:35
you install the
13:39
workbenches and you can also customize
13:42
your mouse setting for Mouse setting you
13:45
can use the available Mouse setting
13:49
available here for blender for CAD
13:53
gestures op scad RIT you can visit the
13:57
freead Wikipedia page which I will show
14:01
you you can visit this uh free.or g/
14:05
Mouse navigations you can understand how
14:09
the mouse navigations works for the
14:11
blender CAD navigations gesture
14:15
navigations Maya gesture navigation and
14:18
according to that you can set your mouse
14:23
setting so this is uh all about how to
14:28
customize the free CAD user
14:30
interface thank you for watching and
14:33
thank you for your valuable
14:36
time