Up next in 10


Learn how to crochet heart granny square gloves with this fun and easy tutorial! Shop for yarn - https://www.lovecrafts.com/en-gb?utm_medium=affiliate&a_aid=7f83a24a Shop crochet materials
USA - https://www.amazon.com/shop/lullabylodge?ref_=cm_sw_r_cp_ud_aipsfshop_6NYZ15JWQW8AH4XC7WZZ
UK - https://www.amazon.co.uk/shop/lullabylodge?ref_=cm_sw_r_cp_ud_aipsfshop_6NYZ15JWQW8AH4XC7WZZ
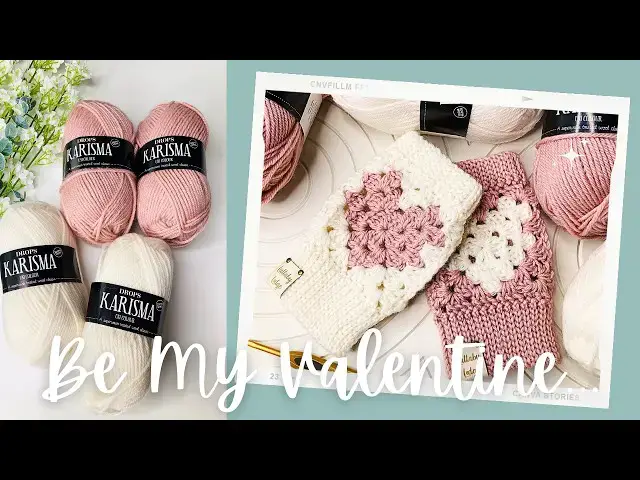
Perfect for Valentine’s Day, the Granny's Sweetheart Gloves feature a charming heart granny square design that’s both cute and cosy. Whether you’re making them as a thoughtful Valentine’s gift or a warm addition to your own wardrobe, this pattern is great for all skill levels.
The tutorial guides you through creating adult-sized gloves, and the written pattern includes child sizes, making it ideal for mummy-and-me sets. The pattern also provides detailed yarn quantities, helpful tips, and instructions to customise your gloves in your favourite colours. By the end of the video you will learn how to crochet heart granny square gloves.
These adorable fingerless gloves are a lovely way to stay warm and share the love. Ready to learn how to crochet heart granny square gloves? Let’s get started!
Get notified of new pattern releases & exclusive deals and discounts by signing up to our mailing list - https://tinyurl.com/3cae89k8
Feel free to join our Ravelry Group where you can share photos of your Lullaby Lodge makes, get pattern support from our lovely community, take part in pattern testing and crochet alongs and much much more… https://tinyurl.com/3crb9ttt
Lovecrafts a great place to buy yarn! - https://www.lovecrafts.com/?utm_medium=affiliate&a_aid=7f83a24a (affiliate link)
You can find all your crochet essentials and video recording equipment in my Amazon Influencer Store USA - https://www.amazon.com/shop/lullabylodge?ref_=cm_sw_r_cp_ud_aipsfshop_6NYZ15JWQW8AH4XC7WZZ UK - https://www.amazon.co.uk/shop/lullabylodge?ref_=cm_sw_r_cp_ud_aipsfshop_6NYZ15JWQW8AH4XC7WZZ (affiliate link)
Show More Show Less View Video Transcript
0:00
add a little bit of romance to your life
0:02
with my sweetheart granny square gloves
0:04
these gloves come in three sizes small
0:07
medium and large and if you would like
0:09
to make them for a child we do have
0:11
child sizes available as well but you
0:13
will need to go and check out the
0:15
written pattern to see those now all
0:18
three sizes are made in exactly the same
0:20
way just using a different hook size so
0:22
if you're going to be wanting the small
0:24
size you will want a 3.5 mm hook for the
0:28
medium a 4 mm h hook and for the large
0:31
size a 4.5 mm hook and I'm going to be
0:34
using double knit yarn I'm using this
0:36
drops Charisma today so we're going to
0:38
start by making our heart granny squares
0:41
so we'll start with the slip knot on our
0:43
hook and chain
0:47
four and join with a slip
0:50
stitch to that first
0:54
chain then going to chain three this
0:57
counts as our first double crochet
1:00
and we're now going to be working into
1:03
the
1:04
ring so I'm going to put two double
1:07
crochet into that
1:13
ring and then chain two for our first
1:17
Corner three double crochet into the
1:20
ring
1:30
chain two for the
1:33
corner and again another
1:36
three double
1:39
crochet into the
1:44
ring chain two and our final three
1:47
double
1:49
crochet all into the
1:56
ring and then we'll do our chain two for
1:59
that last last Corner then going to join
2:01
with a slip stitch to the top of that
2:03
chain three okay so our next round is
2:06
going to be in the same color so we're
2:08
going to slip stitch across to that
2:10
corner space so slip stitch in the next
2:13
two
2:14
stitches and then into the corner
2:19
space we chain three for our first
2:22
double
2:23
crochet and then we're going to work our
2:25
Corner as usual so another two double
2:29
crochet
2:31
into that
2:33
corner chain
2:35
two and then three double crochet into
2:38
that same Corner
2:46
space so you can go ahead and do the
2:49
same into each of these Corners so three
2:52
double crochet chain two three double
2:54
crochet into each of those corners and
2:56
then we'll finish the round by slip
2:58
stitching into the
3:00
chain three from the
3:04
beginning now this next round we're
3:06
going to start the color
3:08
work as you can see from this Square
3:10
here we're just going to be starting
3:12
this corner so we're still in the same
3:13
color this first corner and the first
3:16
cluster along the
3:18
side so first of all we need to get to
3:20
that corner so we're going to slip
3:22
stitch in the next two
3:27
stitches and then into that corner space
3:32
then go to chain
3:34
three and then put two more double
3:39
crochet into that
3:42
corner chain two and then three more
3:44
double
3:54
crochet Okay so we've got this space
3:56
along the side we're going to put three
3:58
double crochet in there
4:03
one
4:05
two and the last double crochet we're
4:07
going to change color so we're just
4:09
going to do the first part of that
4:11
Stitch then we're going to drop the
4:14
cream we're going to pick up
4:19
pink lay the new color over the hook and
4:21
just finish that Stitch off with a new
4:25
color and as you can see here we're
4:28
going to be doing this Corners in this
4:30
pink
4:31
yarn but we do need to carry the cream
4:35
over so we'll hold that to the corner
4:38
and work over
4:39
that you can also work over the pink
4:42
tail as
4:43
well so we're going to put a double
4:47
crochet into that corner followed by two
4:50
more double
4:55
crochet chain two for the corner and
4:58
then three more double
5:02
crochet and we are going to be changing
5:04
color on that last
5:09
Stitch so we'll drop the pink pick up
5:12
the cream finish that Stitch
5:14
off carry the pink
5:17
across and then three double crochet
5:20
into that
5:25
space and then again on this last Stitch
5:28
changing back over to the Pink So drop
5:30
the
5:32
cream pick up the
5:35
pink carry the cream across to the
5:39
corner finish that last stitch
5:42
up and then work a corner as
5:45
[Music]
5:49
normal so that's three double
5:54
crochet chain
5:58
two three three double
6:03
crochet and on that last
6:05
Stitch changing back to the
6:10
cream remember to carry the pink
6:13
across and then we've got three double
6:15
crochet into that side
6:26
space now the next Corner we're staying
6:28
with the cream so we will car carry the
6:30
pink across to that corner make sure
6:32
you're always working over the carriage
6:35
yarn as you
6:36
go so we've got three double
6:40
crochet
6:51
oops chain
6:53
two and three double
6:57
crochet now on this last Stitch we're
6:59
going to change back to the
7:01
pink so we just work the first part of
7:03
the Stitch drop the cream pick up the
7:06
pink finish off that
7:08
Stitch carry the cream across to this
7:10
last space on the side and three double
7:17
crochet now we do need to join with the
7:19
slip stitch to that first to the top of
7:22
that chain three so whoops so I do need
7:24
to change back to the cream for that so
7:27
we'll drop the
7:28
pink pick up the
7:35
cream and then join with a slip stitch
7:37
to the top that chain three and I'm just
7:40
catching the cream the Pink as well so
7:43
we can take that across cuz the
7:45
next round we're going to need the pink
7:47
so we're going to slip
7:49
stitch
7:53
across carrying that pink
8:02
till I get to the corner and then I can
8:04
fasten off with the cream okay so we
8:06
finished with the cream yarn so the next
8:08
round is done entirely in the pink but
8:10
we are going to be picking up some of
8:13
those longer floats and catching those
8:15
up a little bit and trying to um tidy
8:16
those up a bit on the next
8:19
round so we're going to put a hook in
8:21
this corner
8:23
space and we're going to take the pink
8:25
draw it through chain three for that
8:28
first double
8:30
crochet and then we're going to put two
8:32
more double crochet into that same space
8:36
chain
8:38
two and then three double
8:49
crochet now in each space across the
8:51
siid we're going to put three double
8:56
crochet that's one
9:02
two and three now in this next space you
9:05
can see here we've got this float so
9:07
we're going to catch
9:09
that so we're going to put three double
9:11
crochet into the next space we're also
9:13
going to crochet over that
9:16
float so that's
9:19
one
9:22
two and three so it might look like it's
9:25
more visible at the front but you can
9:26
just kind of Tuck that back
9:29
so this corner is going to be worked as
9:31
usual it's three double
9:43
crochet chain two and three double
9:55
crochet so we're going to keep working
9:57
around in the pink
9:59
each time you get to a space at the side
10:02
it's going to be three double crochet
10:04
and you're going to catch up these
10:06
floats as you go around and each time
10:08
you get to a corner it's three double
10:09
crochet chain two three double crochet
10:12
and then we'll join with the slip stitch
10:13
to the top of that chain
10:17
three and fasten
10:21
off now you'll need to go ahead and make
10:23
another Square exactly the same as this
10:25
one and then you want to go ahead and
10:27
make two squares all in one color color
10:30
so just make them exactly the same way
10:31
but without the color work so we're now
10:34
going to start joining our squares so
10:36
using the same color as you're using for
10:38
the main color so for for this glove I'm
10:41
using the Pink as my main color start
10:43
with a slip knot on your
10:47
hook make sure your heart is the correct
10:50
way around and then put your squares
10:53
together right sides together so we're
10:56
going to be
10:57
joining sides here and and then these
10:59
sides here with the top and bottom of
11:03
the heart open where your hand and your
11:04
wrist will
11:09
be so I'm going to go in with a single
11:11
crochet
11:12
into this corner
11:19
space and then we're going to single
11:22
crochet this side together going through
11:25
both stitches on each side
11:35
so you want to work across stitch for
11:37
Stitch with single crochet you can use a
11:38
slip stitch if you
11:41
prefer I like the uh stretchiness that
11:43
you get from joining with the single
11:51
crochet I find my slip stitches tend to
11:53
be a bit tight but you can use whichever
11:55
you like so we're just going to work all
11:57
the way across and then finish with
12:00
single crochet through both of the
12:03
corner spaces and then you can fasten
12:05
off okay so we're now going to join
12:07
these two sides together but we're going
12:08
to leave a gap for the thumb so we're
12:11
going to start off as we did previously
12:13
with a slip
12:15
knot on our hook and we're going to put
12:18
a single crochet into both of those
12:20
Corner
12:23
spaces then go to single crochet into
12:26
the next two stitches
12:30
working through both pieces together so
12:32
that's
12:36
one and
12:39
two now we're going to be working around
12:42
the thumb hole so we're going to just
12:45
flip this front piece back we're just
12:48
going to
12:49
work on the Back Square and we're going
12:52
to slip stitch across now you need to
12:54
make sure these stitches are quite loose
12:55
otherwise you might find there's not
12:57
enough room for your thumb so we're
12:59
going to slip stitch into the next
13:03
Stitch and we're going to keep going all
13:05
the way
13:10
across keeping our stitches nice and
13:15
loose until we get to the last two
13:26
stitches so here we go we've got two
13:28
stitches left and then we're going to
13:29
single crochet both pieces together
13:31
again in those last two
13:36
stitches so that's
13:40
one and two and then our final single
13:43
crochet goes into the corner space
13:46
through both
13:47
Corners now going to turn now we need to
13:50
work our slip stitch just back across on
13:53
the other side now so we're going to
13:55
slip stitch just into the next two
13:57
single crochet
14:02
just to get back across
14:05
there and then we're going to start lip
14:08
stitching across on these stitches at
14:10
the
14:11
back so this is the first one here so
14:14
remember to keep your slip stitches nice
14:17
and
14:20
loose and slip stitch all the way across
14:23
that's our last one
14:26
whoops and then I'm just going to slip
14:28
stitch into the
14:30
this single crochet that first one there
14:33
and then you can fasten off and then
14:35
when you turn it back the right way
14:43
around should look something like
14:51
this so you've got your nice gap for the
14:54
thumb there now I recommend you sew
14:56
these ends in before you start to work
14:59
on the ribbing just to get them out of
15:00
the way but I'm going to carry on with
15:02
the video so flip your glove over so
15:06
that you have so you should have the
15:07
right sides facing now we've turned it
15:08
back the right way around but you want
15:10
to be working from the back and you're
15:11
going to start in this corner here in
15:15
the back this just means because you do
15:17
get a very slight seam when you join and
15:20
it's better if that's on the underneath
15:21
of the glove so you can't see it so
15:24
always join in this Square here so when
15:26
you're working with the other glove it's
15:28
going to kind of be the other way around
15:30
and then you'll be joining here just
15:32
keep that in mind and make sure when you
15:33
join your squares that you've got your
15:35
thumb in the in the right side so you
15:38
don't end the right side so you don't
15:39
end up with um two left gloves or two
15:42
right
15:43
gloves okay so where is I here so here
15:48
so we're going to start off
15:52
here I'm going to show you how to do the
15:54
ribbing at the top and then the ribbing
15:57
at the cuff is done exactly the same way
15:59
but just with a longer starting chain so
16:01
I won't show you how to do this one I'll
16:03
just show you how to do the one at the
16:04
top so we're going
16:07
to joining our
16:15
yarn I'm going to chain
16:18
six that's one 2 3 4 5
16:26
six and we're now going to be working
16:29
into those chains so we're going to skip
16:31
the first one and put a slip stitch into
16:34
that next
16:36
Stitch and in each Stitch
16:45
across for a total of five slip
16:51
stitches and you're then going to slip
16:54
stitch into the next Stitch this this
16:56
first one here
17:01
and then
17:02
turn and then you're going to be looking
17:04
here we're going to be slip stitching
17:06
into the back Loops from now on so this
17:08
first slip stitch this is just where you
17:11
were joining so you don't slip stitch
17:13
into that one but you will slip stitch
17:15
into the next five so it's one 2 3 four
17:18
and five so ignore that first slip
17:24
stitch and then we're working into the
17:26
back Loops only
17:29
that's
17:34
one
17:40
two
17:53
3 and five this first couple of rows can
17:57
be a bit tricky so we're going to change
17:59
one here make sure you keep this chain
18:00
quite tight CU then you it's going to
18:02
give you really nice edges and then turn
18:04
and then we're going to repeat that so
18:06
we're going to slip stitch into each
18:08
Stitch through the back
18:10
Loop all the way across now I recommend
18:13
you count that you've got five stitches
18:16
every row either that or or put a stitch
18:18
marker in the first and the last Stitch
18:20
because it's so easy to miss the
18:22
stitches especially when you're coming
18:23
back up this way and you're keeping that
18:26
chain tight it can make that last Stitch
18:28
can be hidden on I'll show you on the
18:29
next row what I
18:32
mean so that's our five slip stitches
18:35
and then we're going to slip stitch into
18:37
that next
18:40
Stitch and turn and we're just going to
18:43
keep repeating this so it's slip stitch
18:46
into each Stitch
18:49
across that's
18:51
one
18:57
2 3
19:00
three four now here it looks like you
19:03
can't even see that Stitch but you just
19:05
have to kind of get your hook in there
19:08
and find
19:09
it that last
19:12
Stitch and then chain one and turn and
19:14
you just going to repeat that until you
19:16
get all the way around so you go ahead
19:18
and do that and then I'll show you how
19:19
we finish off so I've been working
19:21
around with the ribbing and when you get
19:23
to the seam here where you um join the
19:26
two squares together
19:29
I've just gone down with the slip stitch
19:31
into each stitch in the back Loop here
19:33
and then I'm going to slip
19:36
stitch into this join here and then you
19:39
just carry on as normal with your
19:42
ribbing I've worked all the way around
19:44
with my ribbing I think I forgot to
19:45
mention before that each time you get to
19:47
the the corner spaces that counts as one
19:50
stitch so you put one slip stitch into
19:53
there so you should end up at the top
19:56
here and then I'm going to fasten off
19:59
and then we'll just Stitch that seam up
20:01
leave enough tail just to add those few
20:04
stitches to close that seam okay so
20:07
we're just going to thread your tail
20:08
onto a yarn needle go in on the other
20:11
side and we're just going to go down and
20:13
then
20:15
up then we're going to go through the
20:18
back
20:21
Loop
20:24
there then go down and back out
20:29
this is kind of similar to mattress
20:30
stitch but we're kind of only doing the
20:32
mattress stitch on one side and then
20:34
going through the back Loops of the
20:36
stitches on this side if that kind of
20:38
makes sense so we get through the back
20:40
Loop
20:44
here in and then
20:46
out
20:49
here through the back
20:54
Loop in and then out
21:01
through the back
21:03
Loop and in and out and then if you just
21:08
gently draw that
21:12
together just want the sides to come
21:14
together you don't want it to pull too
21:21
tight it's kind of the the most seamless
21:24
join I found so far there you go and
21:28
then you you can just fasten that off
21:30
weaving your end this is how it should
21:32
look so far so all that's left is now to
21:35
to add your ribbing around the cuff now
21:38
I'll just start you off it is done
21:40
exactly the same way I'll just show you
21:43
how many chains you need to
21:45
do so again you want to start off with
21:49
the wrong side
21:55
facing so I was joining
21:58
just where the thumb the thumb joint is
22:00
so so this is the wrong size so the
22:03
first Corner hole that you've got
22:10
here so you just pull your yarn
22:13
through and we're going to chain 11 1 2
22:18
3
22:20
4 5 6 7 8 9 10 11 and then we're going
22:27
to do the ribbing exactly the same as
22:30
for the top of the the glove so you'll
22:33
skip that first chain and then you're
22:35
going to slip stitch into each chain all
22:38
the way along and then your first slip
22:41
stitch into the side of the glove is
22:42
going to be going in this join here then
22:45
you'll turn and slip stitch in each
22:48
stitch in the back Loop only and just
22:50
keep repeating that until you get all
22:52
the way around and then sew your seam
22:54
together exactly the same as for the top
22:56
of the glove and once your finished it
22:58
should look something like this now if
23:00
you would like to make the child sizes
23:02
or if you want to know all of the yarn
23:04
quantity and specific yarn that I'm
23:06
using you can find all of these things
23:08
in the written pattern and if you love
23:10
these fingerless gloves then be sure to
23:12
check out this video next by bye now
#Hobbies & Leisure
#Crafts
#Fiber & Textile Arts