Up next in 10


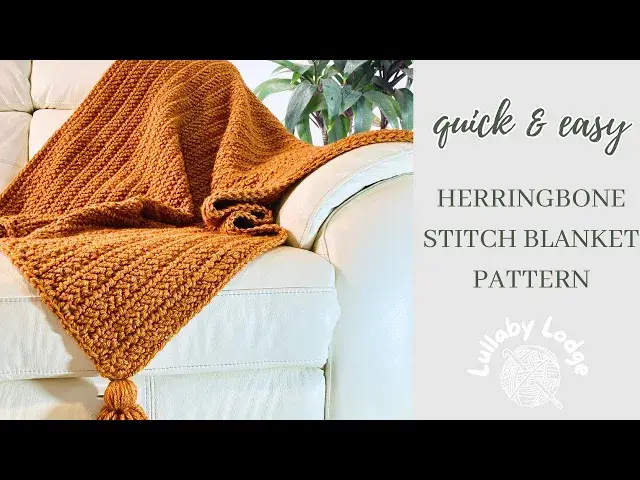
The Stormy Horizon Throw is quick and easy to make with my step by step crochet tutorial. Crocheted in super chunky yarn works up incredibly fast. You can find more infomation and the written pattern in my blog post here...
https://www.lullabylodge.com/2024/03/stormy-horizon-throw-crochet-pattern.html
A PDF version of this pattern may be found in my Ravelry and Etsy stores
https://www.ravelry.com/patterns/library/stormy-horizon-throw
https://www.etsy.com/uk/listing/1699260085/pdf-pattern-crochet-blanket-stormy
Materials
Ten 100g balls King Cole Stormy Super Chunky in colour Horizon
10mm hook
Darning needle
Size
Finished size approx. 150x125cm
As a Lovecrafts & Amazon affiliate I will receive a small commission on qualifying purchases at no extra cost to you.
Buy the yarn - https://www.lovecrafts.com/en-gb/p/king-cole-big-value-super-chunky-stormy?utm_medium=affiliate&a_aid=7f83a24a (affiliate link)
Crochet hook set - https://amzn.to/3UgcS7G (affiliate link)
Video recording equipment - https://amzn.to/4e58U9N (affiliate link)
Show More Show Less View Video Transcript
0:00
Hello everyone and welcome to my channel. Today I'm going to be showing you how to make the Stormy Horizon throw
0:06
Now it's made using a super chunky arm. I'm using this King Cole, Big Value, super chunky and a 10mm hook
0:16
Now to start off with, I'm just going to be showing you a small swatch, not the whole blanket
0:23
So we're making a slip knot, putting it on our hook. And we're going to start off by chaining 93
0:30
or make your chains as wide as you want your blanket to be
0:37
So I'm just going to do a few chains to start. So it's one, two, three, four, five, six, seven, eight
0:45
nine, ten, eleven, and twelve. Okay, so for the foundation chain chain
0:53
we're going to be working into the back bumps. This gives a nice edge for you to work into your order later on
0:59
later on. So the first two chains count as our first herringbone double crochet. So we're
1:06
going to skip those two. So we're turning over, working into the back bumps, skipping the first two
1:11
and we're going to work our first stitch into this third bump. So we're going to yarn over
1:17
insert our hook into that third back bump, pull up a loop. We're then going to pull that loop
1:23
through this second loop on the hook. Yarn over, pull through that
1:29
first loop and then yarn over and pull through two loops that is our herringbone double
1:35
crochet I'll show you one more time yarn over insert your hook pull up a loop pull that
1:42
loop through that second loop yarn over through the first loop yarn over through two loops
1:49
and you're going to continue herringbone double crochets all the way to the end of your chain
1:59
Here we are at the end of our first row. It should look something like this. Of course you will have a much longer chain than me
2:05
We are now going to chain two and turn. This two chains counts as our first
2:14
herringbone double crochet. So we're going to skip this first stitch because this is the first stitch here
2:20
We will yarn over. Insert your hook pull up a loop. Pull that loop through the first loop. Yarn over pull through one. Yarn over
2:29
pull through two and you continue with herringbone double crochets along here we are almost at the end of our second row We have two more stitches to work into Now it may look like you only have one stitch you need to work into here but remember
2:51
the chain two at the beginning these two chains here count as a stitch so we need to work into the
2:56
top of that chain as well. So I'm going to yarn over, pull the loop, pull through that first loop
3:01
yarn over pull through one, yarn over pull through two, yarn over and then I'm going to go
3:06
into this top of this starting chain sometimes can be a bit tricky to get in there
3:12
pull up a loop pull through that first loop yarn over pull through one
3:16
yarn over pull through two so it can be very easy to miss this the chain two at the start
3:23
to work into that you must make sure you remember to work into that otherwise you'll end up losing one stitch every row so now all you need to do is continue crocheting
3:31
into your blanket measures 125 centimeters or as long as you'd like your blanket to
3:36
to be. Okay, so I've had to do a couple more rows to this watch and I'm going to show you
3:42
how to work the border. So you don't really need to fast off. You can just chain one, turn your work
3:48
and we're going to start in this top corner. Now you're going to add a single crochet into that
3:53
first stitch. We're then going to single crochet into all of these stitches across
4:01
top of this edge of your blanket. Right, once you get to your last stitch that's going to be a corner
4:06
So we're going to put three single crochets into this one stitch here
4:12
Sometimes the chains can be a little tight to work into. That's one, oh, one
4:24
two and three single crochets. And now we're going to work along the side of your blanket
4:33
So you need to crochet evenly along the edge. So how many stitches? you will need to crochet along the edge will really depend on your tension
4:39
So I'm going to put one stitch, one single crochet in here. So this is one row
4:45
I'm going to put two around the post of the next stitch, which is the end of the second row
4:50
One, two. And then I'm going to put one single crochet around the next
4:57
And then two around the next one. This amount of stitches worked well for me, but it might be a bit of trial and error
5:05
If you find your edge is getting a bit wobbly and wavy, you've got too many stitches
5:10
and if it's tight and pulling in, you've got too few stitches. So we get to the next corner we going to put three single crochet in the next corner Single crochet all the way along in each stitch along the bottom Three single crochet in the next corner and then the same as we did here we going to continue along this edge and finish with two single crochet in this same space that this first single crochet was in and then we join with a slip stitch
5:38
I've worked all the way around my swatch and I'm simply going to join with a slip stitch to this first single crochet like so and
5:47
and fasten off. When you first fasten off, just pull your yarn through that loop
5:55
then always go through this back bump and pull your yarn through again
5:59
This makes it extra secure and you're not gonna have any problems
6:03
with any unraveling. Just pull that tight. And there we go. So all that we're left to add to your blanket
6:10
will be to add the tassels to the corners. Okay, I'm gonna show you how I like to make my tassels
6:17
I like to use a DVD or a game case and you simply hold your yarn wrap it around the
6:26
case but these particular tassels I did 50 wraps okay so we've got our wraps we're
6:31
just going to cut that off there right we need an extra strand of yarn
6:39
I'm going to thread this under a dye needle, which can be a bit tricky with this chunky on
6:52
There we go. We're going to thread underneath your loops through to the other side and then we can take that off
7:08
and kind of wiggle your way up to the top and then we're going to tie very securely here
7:15
I want to give it a few knots like so
7:31
Then we're going to need another strand. like this
7:41
Now we're going to cut through these tassels here. If you're using a db case, you do get a little indent, but it does help with cutting the tassels
7:51
So you just cut straight through all of those strands. Like so like so Okay so
8:09
Okay, so keep this, we're going to use this to sew your tassel onto your project
8:17
So you just want to kind of smooth the tassels down and then with the other strand of yarn
8:23
about an inch or so down from the top. going to прод a knot
8:34
Flip it over, tie it again on the other side. And then once more just to make sure it's secure
8:46
And then you can go ahead and trim your ends just to make sure that you have a nice tidy. castle
8:56
there you go one so all
9:06
all we need to do now is attach this to our blanket so at the corners
9:15
what we're going to do is thread this on going to just spring that through that corner loop and then we're going to do the same with
9:31
this one at this time we want to go through the stitch next to the corner stitch through here
9:44
then you can just tie double knot then we can weave those ends in
9:54
Oh, yarn splitting a bit. See if I can get that through
10:01
There we go. So I'm just going to take this through to the other side
10:11
And just weave in through the backs of your stitches here. And then back the other way
10:21
all you do is just the same with the other end and then make three more tassels for your blanket and then you are finished
10:31
I hope you enjoy this video and if you would like to see more please like and subscribe and I'll see you all again very soon with another tutorial
10:39
bye now
#Online Video
#Hobbies & Leisure
#Crafts
#Fiber & Textile Arts