Up next in 10

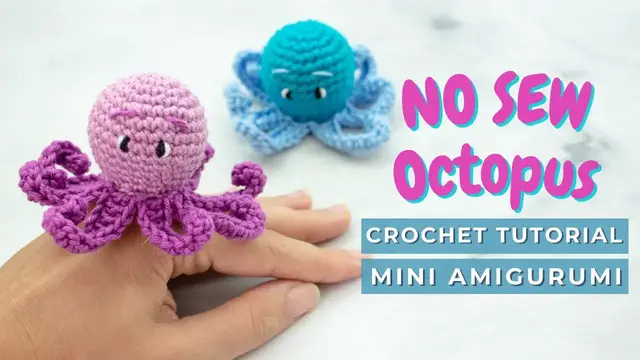
How to crochet a Baby Octopus amigurumi pattern! This little no-sew octopus crochet toy is part of the No-Sew patterns available here on the channel! Perfect for fast crochet projects, keychains, bag charms, crib mobiles...
Chapters:
00:00 Amigurumi baby octopus materials
00:51 Octopus head
07:52 Tentacles
16:10 Embroidering the face
You can find the complete mini baby octopus crochet pattern free on my website here:
https://littlecrochetfarm.com/no-sew-baby-octopus-free-amigurumi-pattern/
For a low cost (3 USD) and printable pattern, you can find it here:
Ravelry: https://www.ravelry.com/patterns/library/baby-octopus-no-sew-amigurumi
Etsy: https://www.etsy.com/listing/1193008458/amigurumi-octopus-pattern-baby-octopus
If this video was helpful to you, consider supporting my channel by doing one of these little actions below:
★ You can like this video, or
★ You can share it with your friends on social media, or
★ You can purchase a low-cost printable version of this baby Octopus crochet Amigurumi pattern to follow along here:
https://www.ravelry.com/designers/ana-carolina-figueiredo
Show More Show Less View Video Transcript
0:00
Hello there, it's Anna here and welcome to Little Crochet Farm. Today I will show you how to make
0:06
this tiny octopus. It's a no sewing pattern so you won't have to cut and sew any pieces of this
0:13
pattern. I used 100% cotton yarn, 2mm crochet hook but you can adapt and use any materials
0:22
you would like and you if you want to make it bigger or even smaller. The written pattern is
0:27
in the description below with all information you may need. And there is also in the description
0:34
links to every stitch and technique I use for creating this pattern, so in case this video
0:40
is too fast for you, just check it out there. Now let's start the pattern
0:44
Alright, so here we'll start with the magic ring
0:55
So for this octopus we will need two colors. So I'm taking here my color A, which is a light purple, and you will work 6 single crochet
1:05
inside a magic ring here. If you don't know how to make the magic ring, check the links in the description below, there
1:13
is a complete tutorial showing you very slow and detailed how to crochet this
1:22
Now let's pull this tight and close this magic ring and start our second round. So you will work
1:29
six increases and you should have 12 stitches at the end. So here when I say increase means
1:36
that you crochet two single crochet inside each off stitch so this is one increase along here on
1:45
my next stitch again two single crochet inside this stitch and so on until the end of this round
1:57
and once you've finished here i like to just double secure the beginning of my tail
2:01
I take a tapestry needle or a sewing needle and I insert this beginning of the tail in the first
2:09
round of the toy. Okay so this makes sure that you see the central part here is very nice and tight
2:18
Now add my stitch marker here, in my case I just use a different color piece of yarn and we'll move
2:27
for round number three you will work one single crochet one increase repeat six times and you
2:33
should have 18 stitches at the end of this round so here I make one single crochet and here one
2:43
increase okay and this you will repeat all along so here you see one single crochet here one
2:50
increase one single crochet one increase one single crochet one increase you repeat this all
2:56
the way until the end. Once you're done with round number three this is how it
3:01
should be looking like and now for round number four you will work two single
3:06
crochet, one increase, repeat six times and you should have 24 stitches at the
3:10
end of this round. Okay so this is my increase so let's show this here for you
3:17
one single crochet, two single crochet and increase here. Repeat all the way
3:22
around. Once you finish round number four, this is how we should be looking. And now
3:29
for round number five you will work three single crochet, one increase, repeat six
3:33
times and you should have 30 stitches at the end of the round. Okay, I always
3:39
suggest you to count how many stitches you have at the end of each round. So
3:45
let's see here one two three and then increase here. Repeat all the way and I'll
3:50
catch you up here. Super good! Now we'll work here the length like the height of
3:57
the head of this octopus. So for round 6 to 8 you will crochet 30 single crochet
4:03
so there is no increases nor decreases here just a single crochet so work your
4:09
rounds here and I will catch up once you're done with the round number 8. So
4:15
pause your video and come back for round number nine. Okay, this is super good so
4:22
now let me show you here very fast. You see this is the last round with increases
4:26
this is one increase. So here one, two and three rounds, alright? So now we are
4:33
moving on for round number nine. And here you'll work eight single crochet, one
4:40
decrease and you repeat three times only and you should have 27 stitches at the end of this round
4:48
Okay, remember to count how many stitches you have at the end of each round just to make sure
4:54
you not skipping or eating up some stitches on the way And here for the invisible decrease I used in amigurumi toys you grab only the front loop of the next 2B stitches and you continue with a single crochet Okay
5:13
If you don't know how to make the invisible decrease, there is a link in the description
5:17
showing you a complete tutorial on how to invisible decrease in crochet toys
5:23
Now for round number 7, you will work 7... round number 10 you'll work 7 single crochet and 1 decrease okay here once
5:33
again I will do the first repetition you work three repetitions here
5:39
this is my first decrease so you repeat this until the end this is great now
5:47
let's move on for round number 11 here you will work 6 single crochet 7 6
5:54
single crochet one decrease repeat three times and you should have 21 stitches at
5:59
the end of the round. Alright here again we are decreasing three stitches on
6:07
every round here and we'll be almost done with the head of this octopus. Okay
6:15
now for round number 12 you'll work five single crochet one decrease repeat three
6:22
times and you should have 18 stitches at the end of the round. Remember here to
6:29
count how many stitches you have, so it's very important to know that you are
6:34
right on track. Okay, so here is the first decrease, then you repeat three times and
6:40
I will catch up here for round 13. Super good! Now for round 13 you'll work seven
6:48
single crochet and one decrease. We repeat this two times. We want to achieve 16 stitches here
6:55
at the end of this round, okay? That's the count of the stitches we want, so we won't need to sew
7:03
any part of this toy, okay? And I will show you this in a minute. Here is my first decrease
7:12
super good now we'll continue I'll catch you up at the end and this we have the head of our octopus
7:22
okay so we'll stop here a little bit just to add some stuffing material here is optional to you how
7:29
much of stuffing material you'd like to add in your toys super good now once you're finished
7:37
stuffing we will do a color change here, okay? Again there is a link in the
7:43
description showing you the four most used ways to change colors in crochet
7:47
toys. You can take a look there and choose the one that is the best for you
7:52
Here I will do a basic color change because we will work the tentacles, okay
7:58
Let me just quick stop here to secure this beginning of the yarn and we will
8:06
not cut the color A here, the light purple we will leave it because we will use it again, okay
8:12
And I'm giving just a simple knot here because it will be facing inside of the toy
8:19
so it doesn't matter how the knot is looking like, all right? Super good! Now let me explain
8:25
you here what's gonna happen for the next round. You see those are the stitches, right? This is one
8:31
stitch, one complete stitch. Okay? So you have here the front loop, is this one, and you have the back
8:39
loop, which is this one. All right? What's gonna happen is we will work in the front loop of the
8:47
stitch for this round number 14. For the next round, we will work on this remaining back loop
8:54
So let's go slow here. The pattern is here written now on the screen, but I will show you
8:59
slowly how it's done. So first of all we will chain 13 chains, okay? So make 13 chains
9:10
Okay, this is super good, 13 chains and then you skip the first chain and you start crocheting
9:17
the second chain from the hook, you will work two single crochet inside the next four chains
9:25
So this is one chain, two single crochet here, second chain, two single crochet here
9:35
third chain, two single crochet here again, and fourth chain, two single crochet
9:45
Now you will work four half double crochet, okay? So here, let's work on these next four chains
9:53
half double crochet in each of these four chains so this is one half crochet
10:02
two half double crochet three half double crochet four half double crochet now we have four remaining chains here
10:16
all right and you will work four double crochet okay so here one one double crochet
10:26
two double crochet and three double crochet and four double crochet now we reach our round
10:43
all right so what's gonna happen here you will skip the first chain and join with a
10:49
slip stitch in the front loop of the stitch okay slip stitch here great and
10:59
that's it you have one tentacles all right now we need to work eight so I'll
11:05
make the second tentacle here together with you and then you'll have six more
11:11
to crochet to stop this video and crochet the rest okay you let me work
11:17
13 chains. So now skip the first one, start crocheting on the second chain from
11:24
the hook, 2 single crochet here, 2 single crochet on the next chain on the chain
11:35
two, two single crochet in the third chain, and two single crochet in the fourth chain
11:46
Okay, now you'll work four half double crochet. So basically we have three steps here, right? So
11:57
we have 12 chains divided by 3, so we have 4, 4, and 4. So on the first 4
12:06
chains you will make 2 single crochet inside, on the next 4 stitches you will
12:12
work 4 half double crochet and on the last 4 chains you will work 4
12:21
double crochet. So here I'm on my last double crochet so we have one more
12:27
tentacle, you skip one and you join the next stitch in the front loop with a
12:35
slip stitch. Alright so now we have two. So stop the video here, work all the way
12:43
around so you have to make six more and this is how it should be looking like
12:48
once we're finished, I'm catching up here at the end of the last tentacle, okay? So here we skip this
12:55
stitch and we join here with a slip stitch. The difference here now is that we will return
13:02
to color A, so in our case here is the light purple. All right? So when we are
13:10
join with this slip stitch, we are also changing colors. Okay, super good! That's
13:18
great. Now we can cut this dark purple, we won't need it anymore, and I will secure
13:25
this yarn, just to make sure that it will not unravel while I'm crocheting, and
13:30
it's also more comfortable to crochet if this yarn is tight. So let me give a
13:36
simple knot here. Again, these knots will be facing inside of the toy, so it doesn't matter
13:41
if it looks pretty or not. It will be hidden inside the toy
13:50
All right, this looks great. And now remember here explained to you that we would work on the back
13:55
loop of the stitch for the next round, right? And we have here the back loop popping outside
14:01
so the first loop it's a bit tricky because we skip and it's very much
14:07
inside of the toy but the rest of them it's very easy to find it so here you
14:13
will work 16 back loop single crochet okay so just work in the back loop of
14:20
the stitches and count you should have 16 stitches here just make sure that you
14:26
find the first stitch which is the tricky one the rest is very easy for you
14:30
to find. And this is how it should be looking like. So now we will work one
14:37
decrease here, one round with decrease. So for round number 16 you will work two
14:42
single crochet, one decrease, repeat four times and you should leave off with 12
14:47
stitches and this is our last round, okay? So here two single crochet and one
14:54
normal here decrease. Okay, super good. Repeat this four times and I will catch
15:02
you up at the end so we can close our octopus Super good this looks very nice You don need to add more stuffing material here Because of our round 15 is on the back loop once we fasten this octopus it will go inside of the toy you
15:25
will see in a minute. So here we'll just grab in the front loop of the stitch. Also there
15:31
is a complete tutorial showing you how to fasten off your toys. So you grab just the
15:37
front loop of all the stitches here and pull it tight. Okay? Super good! And now I
15:45
will double secure here like you do at the beginning of the toys. Just go once
15:52
inside the last round here in the stitches just to make sure that this
15:56
will be very nice and you can see that is straight this ending that is because
16:03
of round 15 because you crochet in the back loop so it goes inside a little bit. Look at this
16:10
looks beautiful. Now let's work the eyes of this octopus and here I like to embroider the eyes
16:18
but in case you're using safety eyes just check in the written pattern there is the exact
16:24
number of the round and how many stitches in between them I embroider
16:29
the eyes of my octopus, so you can check that out. Here I just go with what it looks symmetrical to
16:37
me or you can also go with what you think is symmetrical to you, if you want the eyes closer
16:44
farther one from each other. And here I just start making a lot of straight lines, here as you can
16:52
see a bunch of them so I make a lot of repetitions here and that's how I
16:57
embroider the eyes. Alright so let's move fast forward all of these repetitions and
17:04
this is one eye already done. You see it's very nice I will embroider the other
17:11
one and I will come back here. Super great! So you see here how I do just to
17:17
secure. I remember that couple of you asked me how I secure the eyes that I
17:23
embroider so when you need to wash or play or something at least it won't
17:28
unravel. So this is how I do. I make a knot at the beginning of the thread and at
17:33
the end of the thread. Alright so now I want to give some life in this octopus
17:39
eyes. So with the white yarn again leave a tail here outside so you secure that
17:46
this yarn will not unravel. All right? And you see here I will go around so to give to give it
17:55
some light into this eyes. This is optional to you. You can make in the way that you want. You can make
18:01
in the sides like I am making. You can make on the down part of the eyes. This is really optional to
18:08
you and how you want to make. Okay, so I'll make the other side here now, super
18:17
good, and I secure the beginning of the thread like you see here with a simple
18:24
knot. So I do the same as we did with embroidering the eyes. You cut the thread
18:33
and you hide this tail inside of the toy. This is looking super good. Now with the
18:42
purple thread here I want to make a eyebrow. This again is optional to you
18:49
you can stop here, you see this it looks super cute already. So let me just
18:57
embroider this real fast. Again we leave the beginning of the tail here so we can
19:08
double secure the yarns. One more time to the other side and bring it back to the
19:18
same stitch where you start. Let me just organize this, it looks super good for me
19:32
And very nice. Now let's secure this thread, make sure it will not unravel
19:38
this is great and that's it now we hide this and your octopus it's ready super good I really hope
19:52
you enjoyed this pattern make as many as you want and I see you for the next time bye
20:08
Thank you
#Arts & Entertainment
#Crafts
#Fiber & Textile Arts