Up next in 10

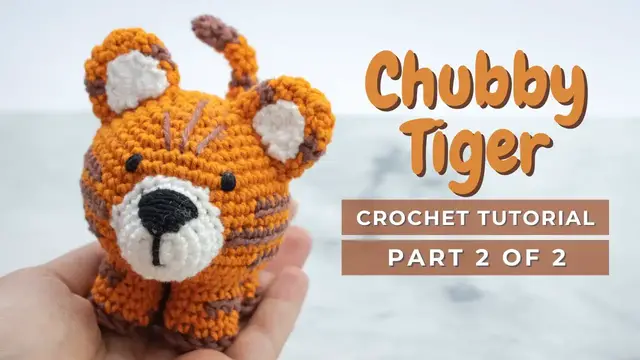
Chubby Tiger amigurumi pattern PART 2. How to crochet a little cute tiger video tutorial
Nov 4, 2022
Chubby Tiger amigurumi stuffed animal crochet pattern! Chubby Tiger is part of the Chubby Animals available here on the channel!
FOR PART 1: https://youtu.be/Cl0c0QBc_bU
Chapters:
00:00 Finishing the Tiger ears
05:43 Tiger nose!
07:01 Tail
09:49 Assembly
16:15 Embroidering the eyes
You can find the complete Chubby Tiger crochet pattern free on my website here:
https://littlecrochetfarm.com/chubby-tiger-amigurumi-free-pattern/
For a low cost (3 USD) and printable pattern, you can find it here:
Ravelry: https://www.ravelry.com/patterns/library/chubby-tiger-amigurumi
Etsy: https://www.etsy.com/listing/1188413525/chubby-tiger-amigurumi-pattern-mini
If this video was helpful to you, consider supporting my channel by doing one of these little actions below:
★ You can like this video, or
Show More Show Less View Video Transcript
0:00
which is here. Look at the detail, you know this already. All right, so for the third round here
0:09
I'm sorry, you will work three single crochet, one increase, and then you will repeat this for
0:14
three times, because we want our ears to have only 15 stitches, okay? So make your next repetitions
0:23
here. And this is how it should be looking like, it's already giving a little bit of curve
0:28
and I will change my yarn here and I will work only with brown. So here you
0:34
make all of the round 15 single crochet in brown, okay? No drama here. So work your
0:43
single crochet in brown here and I will catch you up for round number five. Oh yeah
0:50
and here I'm crocheting just to make sure that this yarn is secured. Super good
0:57
This is how it should be looking like. Now let's change the color. Let's make a color change again
1:02
One more time I'm working the simplest way here and here one more time you will work in the back loop single crochet
1:10
Alright, the whole round it's only in the back loop single crochet. You can cut the brown yarn, you don't need it anymore
1:17
I will crochet it above my brown yarn so it's nice and fast and off and
1:23
here I will catch you up for round number six Which will work single crochet again, but not in the back loop
1:31
Good now for round number six you work just 15 single crochet. Okay, so you have that nice detail of
1:39
Nice stripe of the lion and I will catch you up here for one more small detail for these years
1:47
That's great. You can cut this yarn. You leave a tail for sewing later
1:51
so I'll do as always here I will bring this thread to the back, I'll hide this
1:56
inside. This helps a lot when you're sewing so just bring it this thread back
2:02
here. Super good! What we are going to do here is a small detail for this here. So
2:09
we will work with the white collar yarn, and here it's a little bit different so
2:16
you work here five single crochet in the magic ring, then you're gonna chain one
2:21
one and turn. So let's go slow, we will do all of this detail together. Okay, so here is my magic ring
2:29
Now I'm gonna work here five single crochet. One, two, three, four, and five. Okay, let's pull this tail
2:43
close it tight and we are going to continue working here with this first
2:49
stitch. Okay, so now let's chain one, turn the detail and continue working here. So
3:02
for this time you will work two single crochet, three half double crocheting the
3:08
same stitch and two single crochet again. So I worked here my two single crochet
3:13
now here three half double crochet. So yarn over inside, yarn over inside, okay
3:21
Yarn over inside the stitch, yarn over inside the stitch, yarn over inside the
3:26
three loops. And my third half double crochet here. Great! Now you have two more
3:34
stitches here you work two single crochet following the pattern. Right now this last one a little bit tricky it's very small and tight. Super
3:48
good! Now what you're gonna do here it's closed. Make sure that this is closed
3:52
Insert your needle here cut the thread. This is the detail that we want. Now
3:59
let's cut this, leaving a tail for sewing, a small tail. We will do it this now
4:06
You insert the tail in the needle and you just fasten this tail off the
4:13
beginning of the thread here. So very fast I'm gonna do this, it's very simple
4:18
Okay, now what's gonna happen here is you fold the ears in half and I will
4:25
leave this part, the part that is connecting the stripes, here the color change because the other
4:31
other side is neat, although it's a it's a tiger so you can have uneven stripes, right
4:37
It'll look even nice. Anyway, so you add here and you're going to sew this detail inside this ear
4:43
okay? So I will sew it here, skipping this this last stitch, you see, just to make sure that when
4:51
I'm sewing these ears in the body I have these stitches to sew it on it, so just
5:00
just preserve these chains over there from the stitches, okay? And that's it
5:07
you just sew it all the way around, you don't need to, there is no much job here
5:10
to do. I will move fast forward here so you can see a bit how I do
5:21
All right, almost done and great! Look at this, how it's super good. Let me just hide this inside
5:31
and let fold this real nice and this is how it should be looking like Very cute super good I very happy with the result So you make another one following the same pattern
5:44
Great. Now let's work here the snout. And for this little beautiful nose you'll work
5:51
you will repeat round 1, 2, 3. 1, 2, 3. No. Rounds 1, round 2 and round 3. Okay
6:00
So 6 single crochet in the magic ring, 6 increases, 1 single crochet, 1 increase, repeat 6 times, and you should have 18 stitches at the end of this round
6:10
Go back at the beginning of the video if you need to follow the pattern. So you're just repeating here
6:17
Once you reach the round number 3, for round number 4 and 5 you will work just single crochet
6:23
So you work 2 rounds with 18 single crochet, okay? This is the snout that we are working for and I will catch you up here once I finish this round
6:33
Alright, so this is the final detail how it should be looking like. I will cut this yarn
6:39
and I leave a tail for sewing. That's super great. I will bring this yarn to the inside of my detail
6:48
as always. Okay, super good, this is ready. Now let's move on to the last part of
6:59
this chubby tiger. We are working here now the tail, okay? So for the tail we
7:06
start again with the magic ring but you will do a little bit different this time
7:09
You will work 5 single crochet in the magic ring and 5 single crochet you will
7:14
work until the end of this tail. Okay? So I will go slow here and I will show you how I do like all
7:21
the step by step of this beginning because I know it's a small detail one, two, three, four, five
7:26
and it can be a bit challenging for some of you. So let's close this tight. And now for the round
7:34
number two to four, you will work five single crochet, one on top of another. But here I will
7:42
make the first rounds together with you, because there is a little trick that I
7:46
want to show you. So we're working here 5 single crochet on top of the 5 single
7:51
crochet there is in the magic ring. Alright, the last one. And this is the
8:01
trick that I want to show you. You see the stitches are curling to the outside
8:05
here and you cannot see it pretty well, so let's organize these stitches, send
8:10
stitches to the outside, let's face the right side out here because the tension of the yarn is
8:16
stronger here. So let's just organize here and now you can see the tip of the tail. You see
8:24
This is what I wanted to show you. Now it's easier for you to continue working
8:27
up on the tail. Now we will work this tail and we will change colors between oranges and brown
8:34
So once you finish the round number 4, for round number 5, 6 and 7, you will work 5 single crochet
8:42
in orange. And this is how we will work this tail. You will work 3 rounds in orange, 1 round in brown
8:49
3 rounds in orange, 1 round in brown and so on. Alright? So you'll do this until you complete to
8:58
have 15 rounds. Okay? So once again you work three rounds in orange, one round in brown. For the
9:09
stripes here you don't need to grab the back loop, just grab normally, just work your single crochet
9:14
as you would, no problem. And then you repeat round 8 to 11 one more time until you have the round
9:22
number 15 until your tail has 15 rounds and you can count two stripes in brown so you know that
9:28
you're done and the tail is of the size that it should be. Unless you want to make a bigger tail
9:34
that's up to you, right? You continue, add more stripes, I don't know. Okay, let's send this yarn
9:41
to the back and then start preparing for sewing. Now the fun begins. Great, so here you see this
9:50
side is bigger, the distance between the stripes, this side is smaller. So this is
9:56
the front of our tiger. Okay? So now we'll start sewing first the legs. You see the
10:03
central here, central part. You will work, you will sew the legs with these
10:10
stripes to the side because we want the orange to show a little bit in the front
10:15
Alright, so let's organize this, let's find the best position here. Okay, this is
10:23
looking very nice because we can see some stripes and we can see some stripes
10:29
and some orange, just orange part. This is what I want. Now I'll use lots of pins
10:35
here to fasten this around the central part and I will attach, I will fasten
10:42
this two front paws first, to start with this two one, insert on your sewing needle, and to sew here
10:50
always, always take one stitch from the body and one stitch from the limbs that you were sewing
10:58
so in my case is the legs. So for the legs you know that you have 12 stitches on the final detail
11:04
right So here you know that you need to sew 12 times okay So you grab one stitch from the body one stitch from the legs Always remember this one stitch from the body one stitch from the leg one stitch from
11:19
the body, one stitch from the leg. So here I'm grabbing my stitch from the body and
11:25
now here the stitch from the leg. Okay, this is how you will work all the way
11:33
around. I will leave it a little bit here showing you how I sew my details, okay
11:42
and then I will stop the camera here and sew the rest of the paws outside of the
11:50
camera, because a very very long process. So press play into your series that
11:56
you're watching or put some music, relax a little bit, we have some sewing ahead
12:02
head. Great, I will catch you up once I finish. Super good, I finished, look at this, aha
12:11
this is looking very nice, look the stripes, it's looking great, I'm very happy. Okay, now
12:17
we'll sew the nose, look at this beautiful nose, so here we'll find the best position
12:22
Speaking about the position, in the written pattern that is in the description below
12:28
is all the positions of everything. So if you like to count how many rounds, which
12:33
round I add this, which round I add that, check the written pattern in the
12:37
description. All the details is there. Here I just go how I think it looks
12:41
better. I'm gonna sew all around, leave it a little bit open, and then add stuffing
12:46
material at the end. So one more time here I will start sewing together with
12:51
you, and then I will come back here to show you how I will add the stuffing
12:56
material before, of course, sewing all the 18, 18, right? Stitches we have it here
13:06
Super good! You see I sew it all around here, now we have this part open, it's
13:11
where we will add the stuffing material, okay? So, add a little bit of stuffing
13:17
material here. I always use my needle to help me out. That's super good, this is
13:30
looking very great. Okay, and now you continue sewing this to close this snout
13:40
Okay, all the way here. Now we'll finish this off. So one stitch here from the
13:46
body and one stitch here from the detail. Okay, one stitch from the body and one
13:58
stitch from the detail. Okay, I'll leave you be here and I will come back so we
14:02
can sew the ear. Great, look at this. I already fastened this with pins but I
14:10
forgot this tail on the other side so you need to move it back because the
14:15
stitch, the final and first stitch, it's in the front part of the year because we
14:21
sew it there, remember? Great, and it's good for you to continue with the flow of
14:28
the stitches. Alright, so here you see this stitch is hidden here. Hello! One stitch
14:36
from the body and one stitch from the detail. I will keep repeating this because
14:42
this is how it should be. And I know that sewing it's a big problem for lots of you
14:49
And let's work together so we take this out. That's why majority of my patterns
14:57
are designed to have minimum sewing, but when it's about the chubby animals it's
15:02
hard for me to develop a pattern without sewing. But check out the dolls. Majority
15:07
of my dolls there is no sewing at all so go there. Alright, so okay I'll do a
15:17
couple more to show you here how it's done and we are almost done. I will have
15:23
what? just the tail. The tail has have five stitches to sew super fast and this
15:30
tiger is priceless. I'm so happy with it. I hope you like it. Okay now I'm just
15:37
talking because I want to show you how to fasten off and I don't want to repeat again. One stitch from the body, which I'm doing right now, and one stitch from the
15:46
detail. Okay, so stop here and I will come back once I'm finished. Great, look at
15:57
this! Aha, I did not sew the tail, although I'm not gonna show you here, it's just
16:01
I want to show where I fixed the tail and I want to sew the tail upwards so we
16:06
can see it from the front that's optional that's up to you so the tail now it's sewed and it's very
16:12
easy and super fast because we have only five stitches right now i will embroider the eye so
16:18
here i will show you how i do my embroidering of the eye it's very much simple you cannot believe
16:23
because you only do right you only do stripes at first you don't believe that that's gonna turn
16:29
out to be around eye but it does believe me just keep making stripes you see
16:36
lying is not strike but the lines okay if you're using safety eyes the exact
16:43
position where I embroidered this eyes is in the written pattern in the description below but here let just move a little
16:56
bit here. Okay, so here you will see the repetitions, always make lines, and the
17:03
lines here I'm using the length of the size of one stitch, okay? I always
17:10
embroider the eyes, I never use the plastic eyes. I don't know why, I like to
17:15
work everything with red. Okay, so let's just show you here. Go slow. I always say when you are
17:27
sewing the toy or when you are embroidering the face, you need to be patient, you need to go slow
17:35
and you need to be ready to unravel or erase if necessary. I still do erase a lot of my
17:42
a lot of the faces of my toys. It's not always that I catch from first. Still, even though I
17:49
crochet a fair amount of toys every day. Yeah, okay, so let's move fast forward here
18:02
Super good. So a lot of straight eyes and then you see you'll have this. Look at how beautiful is this
18:08
I'll embroider the other one and And ta-da! Now we have... It's funny because if you look the tiger right now, it looks like he's on mute
18:17
Because he has no nose. Okay, so let's insert the black thread here
18:24
Make sure to secure the beginning of the thread, you see? Like this with a knot
18:28
Pull it inside. And now we'll work a triangle. This is too far
18:34
Let's bring this tail a little bit behind. So here, so one round before finishing the snout, it's where we'll start embroidering the nose of this tiger, okay
18:46
So here how I do is I mark a triangle, so let's do this first
18:51
And I don't go all the way down to the center part, I go between the first and second round
18:58
So that's where I bring my yarn. All right. And don't worry if it's squeezing, if it's running out of its shape. Once you're done with the
19:10
embroidery, you can squeeze it back. So go slow here. If it deforms a little bit, move it back
19:19
Every time that you see that it's a bit squeezed, move it back. Okay, so this is a triangle
19:25
all right our first triangle now here it will work lines you know you see this
19:39
triangle we need to cover fully with black thread okay so you will make a
19:46
couple of fair amount of straight lines here just go making the lines don't worry
19:51
until you cannot see anymore the white underneath, alright? So this is the amount
19:57
of lines that should make here. I will show you the beginning. You see, make one
20:05
line, organize a little bit, squeeze it back, make another one. You need to be
20:11
patient. Crochet is an art, right? Be patient. Great, so one more line here and
20:20
And now I will need to leave you because I need to make again lots of lines here until the tip
20:27
Once you're done, look at this. Very nice, a lot of lines, you see
20:33
And it's a good amount, you can see, because it's even a little bit thick. So now we'll bring this tail to the back here
20:40
This is what we are searching for. So I'll introduce here my needle in between the first and second round
20:48
You can see it here. And we are done with this. Super good. Look, completely different toy, right? So I will
20:59
secure these tails and make sure that it will not unravel very easy. And now we will do some
21:07
final details here on the forehead of the tiger. Okay? For this one, I made several of them and it's
21:14
a very simple way to do. So I'm not going to be showing you the exact how I did because it's just
21:19
couple of lines that you're gonna make it. And I did three different ones until
21:24
I arrived in the ones that I like. And I will show you here because maybe
21:29
the one that I like is different than the one, so I give you three options, okay
21:33
So the first one is this one. I make, you see, these types of lines and I think it's
21:42
looking very nice, but somehow I found it a little bit nervous, so I make this
21:47
second option. This second option I found him a little bit not too nervous, so I
21:55
stayed with the third round, with the third option. This one I think it's
21:59
perfect for him. I hope you like this pattern, I love it and I'll see you on the
22:06
next one. Bye! Thank you
#Crafts
#Fiber & Textile Arts