Up next in 10

Are you still using Ingress in Kubernetes and hitting its limitations?
What if I told you there’s a more powerful, flexible, and future-ready way to manage traffic in Kubernetes?
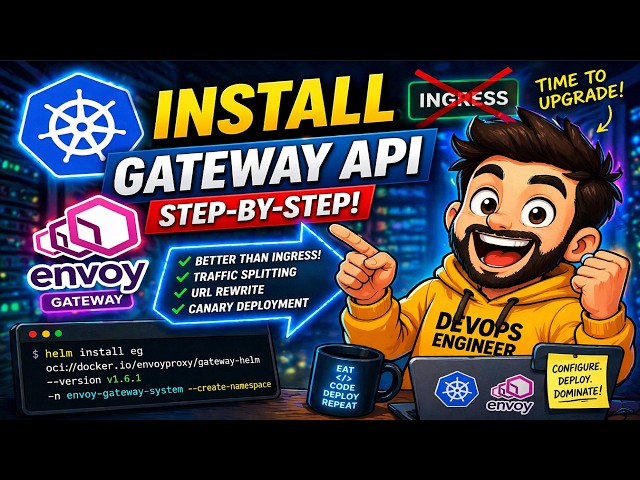
In this video, we will learn how to install Gateway API in Kubernetes step-by-step, understand why it’s replacing Ingress, and deploy it using the Envoy Gateway controller with real-world examples.
What is Gateway API?
It is a next-generation set of APIs designed to manage network traffic routing in Kubernetes clusters.
It is developed by the Kubernetes community as an improvement over the traditional Ingress.
👉 Key idea:
Instead of one resource doing everything (like Ingress), Gateway API splits responsibilities into multiple resources:
GatewayClass → Defines the controller (like Envoy)
Gateway → Defines the actual load balancer
HTTPRoute / TCPRoute → Defines routing rules
This separation gives more control, flexibility, and scalability.
Steps used in this video are
Show More Show Less View Video Transcript
0:00
still using ingress in Kubernetes and
0:02
hitting its limitations. What if I told
0:04
you there is a more powerful, flexible
0:06
and future ready to manage traffic in
0:08
Kubernetes? In today's video, we will
0:11
learn how to install gateway API in
0:13
Kubernetes stepby step. Understand why
0:15
it is replacing ingress deploy it using
0:18
NY gateway controller with real world
0:20
examples. What is gateway API? It is a
0:24
next generation set of APIs designed to
0:26
manage network traffic routing in
0:28
Kubernetes cluster. It is developed by
0:30
Kubernetes community as an improvement
0:32
over traditional ingress. Instead of one
0:35
resource doing everything like ingress
0:37
gateway API splits responsibilities into
0:40
multiple resources like gateway class it
0:43
defines controller gateway it defines
0:46
the actual load balancer. HTTP route or
0:49
TCP route it defines routing rules. This
0:52
separations gives more control,
0:54
flexibility and scalability. Why use
0:57
gateway API? There are multiple reasons
1:00
for that. First one is rolebased access
1:03
control. It means dev team defines
1:06
routes. Platform teams manage
1:08
infrastructure. More aggressive routing
1:11
means it supports headerbased routing,
1:13
traffic splitting and advanced rules.
1:15
There is no vendor locking. It works
1:17
with controllers like NY proxy, STO and
1:20
many more. Future proof means gateway
1:23
API is becoming the standard for
1:25
Kubernetes networking. Before we start,
1:27
make sure you have a running Kubernetes
1:29
cluster. In my case, we have mini cube
1:31
installed on Ubuntu 24.04
1:34
cube kettle configured, helm installed
1:37
and internet access. Once all the
1:39
prerequisites are met, then we can move
1:41
to the first step where we will install
1:44
gateway API CRDs and NY gateway
1:47
controller. In order to install gateway
1:49
API CRDs and NY gateway controller, we
1:52
will be running one single Helm install
1:54
command.
1:56
Copy this command. I have already taken
1:59
the SS session of my Ubuntu 24.04. So
2:02
I'm executing all the commands from
2:04
here. Just paste that command here. So
2:07
this command will create a name space NY
2:10
gateway system. Under this name space,
2:12
it will install Helmchart. Name of that
2:14
Helm chart is easy. Easy is here. NY
2:18
gateway and this hand chart will install
2:20
gateway API CRDs along with the gateway
2:23
uh controllers like NY gateway in this
2:25
case hit enter
2:29
let's do the validation first see the
2:32
gateway API CRDs for that run cube
2:35
cattle
2:38
all right the output confirms that
2:40
gateway API CRDs are installed can see
2:43
this
2:45
this one http routes API, CRDs, TCP
2:49
routes, TLS, UDP. All right. Next,
2:52
validate the gateway controller here. NY
2:56
gateway controller. For that, you can
2:58
run the command cubectl
3:00
get
3:02
port-
3:05
N and that name space is NY gateway
3:07
system.
3:11
So, this is my gateway controller. Here
3:14
in this case NY gateway controller is up
3:16
and running. This NY gateway controller
3:18
is similar to ingress controller.
3:20
Ingress controller waits for ingress
3:22
resources. Here gateway controller waits
3:25
for the gateway and HTTP routes. We can
3:28
validate this by looking at the logs of
3:30
this port.
3:43
So this output confirms that this
3:45
controller is waiting for the gateway
3:47
class and HTTP routes. All right, move
3:49
to the next step. In the next step, we
3:51
will deploy the sample application. For
3:53
the interest of time, what I have done,
3:55
I have created the manifest files that I
3:57
will be referring it in this video
3:59
tutorial. I have uploaded those manifest
4:02
to my GitHub repo. I will share the
4:04
GitHub repo URL in the description of
4:07
video for your reference. Let me clone
4:09
that repo first. So this is the repo
4:12
name gateway API demo. This is created
4:15
under my account
4:18
with this link and clone it.
4:26
Now go to this manifest folder. First go
4:30
to this repo. Under this repo I have a
4:34
folder with the name manifest.
4:37
First create the service account. This
4:40
service account will be used for doing
4:42
all the deployments.
4:46
So we have service account dotl. So
4:50
service account name is back end. Just
4:52
run cube kettle create f service
4:57
account. Hit enter. It will create one
5:01
service account with the name back end.
5:03
Next do the deployment. We already have
5:06
a deployment file. add this deployment
5:09
first. This is one of the sample
5:11
deployment. Whoever is trying to access
5:13
this application using curl command then
5:16
it will give the response in JSON format
5:19
and that JSON format output will have a
5:22
request method whether the request
5:24
method is get or post request path or
5:26
URL headers client IP port details and
5:29
environment variables. All right, let's
5:32
do the deployment. For that run cube
5:34
kettle create
5:38
f deployment file. Run cubectl get
5:42
deploy.
5:44
Okay, it will come online within a
5:47
minute or so. Meanwhile, let's deploy
5:49
its service as well.
5:52
This service file will expose this
5:55
deployment using the cluster IP type and
5:59
the backend port is 30,00. All right,
6:02
let's apply this file. cubectl create or
6:06
apply - f service.
6:11
Let's validate the status of deployment
6:13
along with a service. Run cube kettle
6:18
get to deploy.
6:24
All right, deployment is up. Service is
6:26
also up and running. This means our
6:29
application is deployed or deployment is
6:31
exposed using the cluster IP and this is
6:34
the port for our application. Now move
6:37
to the next step. In the next step we
6:39
will create the gateway class gateway
6:41
and HTTP route. As our application is
6:44
deployed now we will be exposing it to
6:46
the external world. For that we need
6:49
gateway class gateway and HTTP route
6:51
resources. First create a gateway class.
6:53
For that we already have a gateway class
6:56
file.
6:59
If you see carefully the kind is and
7:03
this gateway class name is easy. Easy
7:05
means NY gateway and this is using the
7:08
controller that is NY proxy. This means
7:12
whosoever is calling this gateway class
7:14
with the name easy. Ultimately it will
7:16
be using NY proxy controller. Let's
7:19
deploy this.
7:26
validate the status as well.
7:32
All right, this is our gateway class and
7:35
this gateway class is using this
7:37
controller. Next, deploy the gateway.
7:39
For gateway, we already have one gateway
7:42
file.
7:44
Kind is gateway means our deployment is
7:47
gateway type. Name of our gateway is EG
7:51
and we are using the gateway class for
7:54
this gateway is again EG that we have
7:57
defined above and listeners specifies
8:00
here the load balancer means how what
8:04
are the back end for our applications
8:06
which protocol it is using let's deploy
8:08
this gateway run
8:13
and if you run cubectl get gateway Our
8:19
gateway name is easy. It is using this
8:21
gateway class. Next, we need to define
8:23
the HTTP route. First view the HTTP
8:27
route dotl file. This define the back
8:30
end is service and the service name is
8:33
backend and the post name for our
8:36
application is ww.demoapp.com.
8:39
rules specifies that our backend service
8:42
name is back end and the port is 3000
8:46
and it will use the gateway as easy and
8:49
this app will be accessible via load
8:51
balancer only when we type this host
8:53
name ww.demoapp.com.
8:56
Let's deploy this HTTP route.
9:05
All right, we have one HTTP route with
9:07
the name back end. And for this HTTP
9:10
route, we have the host name
9:12
ww.demoapp.com.
9:14
So whenever we define this HTTP route
9:16
gateway system name space, it will
9:19
create a load balancer for this HTTP
9:21
route. How you can validate? You can run
9:24
cube kettle.
9:30
So this is the load balancer. I mean
9:33
this is the port which automatically
9:35
created under this NY gateway system
9:38
when we define this HTTP route and this
9:42
is exposed via the service type load
9:45
balancer. We can validate this one as
9:47
well. If we type ubectl get port,
9:52
svc
9:55
you will see for this port
9:58
it has created a service with the type
10:01
load balancer and this is cluster IP and
10:05
external IP is pending because we are
10:08
using onprem kubernetes cluster and we
10:11
have not we don't have any load balancer
10:14
configured yet that is why it says
10:16
pending. If you are using this gateway
10:19
API setup in public cloud providers like
10:22
Azure or AWS then it will automatically
10:26
assign one public IP to this load
10:29
balancer. Let's try to access this
10:31
application as we don't have the load
10:34
balancer ready for this on-prem
10:36
Kubernetes cluster. So what we will do?
10:38
We will do a port forwarding in order to
10:41
access this application. Let's do the
10:44
port forwarding first. ubectl
10:48
port forward
10:52
svc
10:54
service name. So this is the service
10:57
name
11:01
space - n name space
11:09
let's say I want to use this port and
11:13
map it to port 80
11:18
address
11:21
0.0 0.0.0
11:24
hit enter.
11:26
Let's open one more session for this
11:29
mini cube cluster and from here I will
11:32
try to access this application.
11:39
So we are executing a curl command with
11:42
the verbose options and header. In the
11:45
header we are passing the host should be
11:48
host name should be ww.demoapp.com
11:49
demoapp.com
11:51
and this is our local port forwarding
11:55
as we are getting the response what does
11:57
it mean it mean our request is sent to
11:59
the load balancer from there request
12:01
went to the HTTP route and from there it
12:03
went to the post and you can see this
12:06
our application is returning the result
12:09
like method what method is used here and
12:14
from which name space this board is
12:17
responding and this HTTP P 200 okay
12:20
means we are able to access our app
12:22
let's take some more advanced realtime
12:25
examples like URL rewrite traffic
12:28
splitting weight based traffic splitting
12:31
let's talk about URL rewrite first this
12:34
URL rewrite is needed when your
12:36
application endpoint changes and we
12:39
don't want end user to face the issues
12:41
so in that case we can use this URL
12:44
rewrite feature let's go to this URL
12:46
rewrite folder first And there you have
12:50
rewrite HTTP route EML file. So in this
12:55
route if anyone is accessing the our
12:58
application with the name path dot
13:01
rewrite.demo app and it specifies the
13:05
value/get
13:07
it will be replaced by /patch.
13:10
So we are using filters here and under
13:13
the rules we have mentioned that the
13:16
path if the path is less get apply this
13:19
filter and rewrite this get with bet and
13:24
the backend service name is back end and
13:27
which is exposing the application on the
13:28
port 3000. Let's apply this HTTP route.
13:42
All right, we have our new HTTP route
13:46
with a name HTTP filter URL rewrite and
13:49
this is the host name for this our HTTP
13:53
route or for our application. Let's try
13:55
to access our application with this uh
13:58
host name.
14:06
If I type here get slash
14:09
origin
14:11
/ path / extra. If I hit enter this get
14:18
in this path will replace with pat hit
14:21
enter and validate up. This was our curl
14:25
command. It is hitting this URL.
14:29
In this URL we have get word right and
14:32
if you see we got 200 okay and the path
14:36
got changed you see this path starts
14:40
with get now it's get re replace with
14:42
patch and method is get all right and
14:47
from this port we are getting the
14:50
response and this port is in this
14:53
default name space this means our URL
14:56
rewrite HTTP route is working fine as
14:59
expected. All right, let's move to the
15:01
next advanced example like traffic
15:04
splitting. It is needed where we need to
15:06
send 50% traffic to the new deployment
15:08
and rest 50% will be served via old
15:11
deployment. Once we are confident then
15:13
we can move the whole traffic to the new
15:15
deployment. So in our case the first
15:18
deployment that we did it did for this
15:20
sample deployment we are calling it as
15:22
v_sub_1 and we will deploy one more
15:25
backend to deployment we will call it as
15:27
v2. For that I have created one more
15:31
folder
15:33
traffic splitting.
15:35
Under traffic splitting I have this
15:38
backend two folder.
15:41
Again first I need to do service account
15:44
creations. Then I do the deployment and
15:46
then I will expose this deployment using
15:48
the service. And again we are using the
15:50
service account name as backend 2. Let's
15:53
create the service account first.
16:00
Sorry service account first.
16:04
Let's do the deployment.
16:08
Validate it.
16:14
All right. Now we have two deployment
16:17
back end and backend two. This back end
16:20
we can consider as a v_sub_1 and this
16:22
back end to consider as v_sub_2. These
16:24
deployments are exposed with the cluster
16:27
IP and the service name for these
16:29
deployments are back end and back end
16:32
two. So what traffic splitting will do
16:35
this traffic splitting will 50% send the
16:37
request to this backend deployment and
16:40
50% will send this back end too. Let's
16:43
see how this splitting is working. Now
16:46
go back to the previous folder. Here we
16:48
have traffic splitting http route yml
16:52
file. Again if you see this kind as
16:55
route we are defining the app name or
16:58
the host name for this deployment is
17:00
backends dodemo app. It will match this
17:04
path and the back end for this
17:07
application or the host name is true.
17:10
One is back end, another one is back end
17:13
2. Both are running on 3,000 W. Let's
17:16
deploy this.
17:24
We should have one more HTTP route that
17:28
is HTTP headers and the host name for
17:31
this HTTP route is backends. Demoapp.
17:35
Let's try to access this one.
17:44
If you try to access this deployment or
17:46
this application using the host
17:48
backendsdemo app, if you hit this
17:50
application using this host, the request
17:53
will be served 50% from the backends
17:57
deployment and 50% from back end too.
18:00
Let's say if you hit this request 10
18:01
times. So out of 10 five will be from
18:05
the deployment back end and five will be
18:08
from the back end too. Let's validate.
18:11
So this is back end. If you see the
18:13
port, this is back end. If I hit enter
18:16
one more time, you will see back end
18:18
two. Back end back end to back end. So
18:23
it means our traffic splitting is
18:26
working fine. Let's talk about weight
18:28
based traffic splitting. It is similar
18:30
to canary based deployments. So x
18:33
percentage traffic is served by one
18:35
service and y percentage traffic is
18:37
served by another service. Let's see
18:39
this in action. Go back to the previous
18:42
folder. Go to this weight based traffic
18:45
folder.
18:47
Get this file. So again the kind is http
18:51
route as we are defining the http route.
18:54
Name for this HTTP route is weight http
18:56
headers and it is referring this gateway
19:00
as easy that is NY gateway proxy and the
19:04
host name for this app is backends way
19:08
demo app and it will match this / path
19:12
and in the back end it is serving the
19:14
request from two one is a back end and
19:17
back end two and the port the only
19:20
difference is here we have specified the
19:22
word weight here Weight means we are
19:24
specifying how much traffic will be
19:27
served by this service. Here 8 means
19:30
80%. And here weight two means it will
19:33
serve only 20% of traffic. Let's say if
19:36
I hit 10 times to this application using
19:39
the cull command out of 10 I will get
19:43
eight time response from this backend
19:45
service and two times from this back
19:47
end. Let's deploy this HTTP route first.
20:00
Now we have our fourth HTTP route with
20:02
the name weight- http headers and for
20:06
this HTTP route the host name is
20:09
backends weight demo app. All right, try
20:13
to access this application.
20:24
Now first request is served by this back
20:27
end
20:29
the back end two back end back end back
20:33
end back end back end and back end two.
20:37
So this confirms our weight based
20:41
traffic splitting is also working. And
20:43
that's all from this video tutorial. I
20:45
hope you have found it useful and
20:47
informative. Do not forget to like the
20:49
video. Subscribe the channel for more
20:51
Kubernetes tutorials. Post your comments
20:54
and queries in below comment section.
20:56
Bye. See you in the next video.