Up next in 10

How to Create Animated Videos Using ChatGPT and Steve AI - Detailed Tutorial
Show More Show Less View Video Transcript
0:00
What is up, everybody? Welcome into this new video. I'm going to be showing you how to create some videos using Steve AI
0:06
And of course, I could be using another way called the chat DVD
0:10
So this ball with application work with artificial challenges. This one is going to be helping us to create stuff using templates, animation text
0:18
Of course, using the actual intelligence out of the artifices and the challenges
0:23
And the chat DVD is going to be helping us to generate some content. So then later on we can use chat DVD to import that
0:30
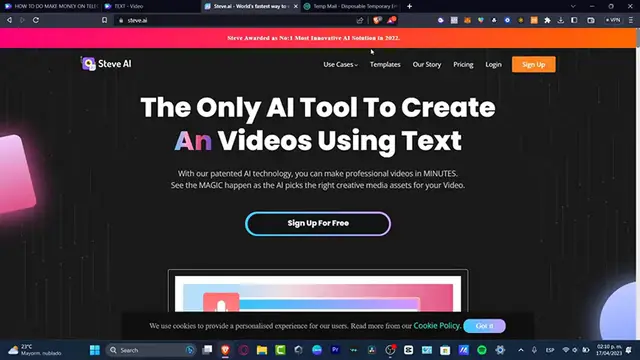
to Steve.AI. The very first thing you want you to do is to go directly into steve.a.i
0:36
I want you to go into sign up. The process is actually really, really simple
0:40
I just want to use creating actual username. Let's go for Stackpress Animations
0:45
I have an actual passcode here. And then later on, I have the sign up
0:51
So I have the sign up. I hit into sign in. And then we are now inside
0:55
So as almost any kind of applications, we need to verify our actual account
0:59
actual account in order to continue. So now we are here, we have the free boson, we have the
1:04
premium access, and we have much more. So I want to focus now into the free version for this
1:09
tutorial. So what I want to do is to start by creating a video for YouTube. So let's see for example
1:16
that I'm creating some tutorials, for example, some videos like I just used to do here into this
1:21
actual channel. So I want to be focusing into let's create some videos. Here's my dashboard. I have the all
1:27
the live animation blog voice in social media. Let's go and focus into animation
1:32
And here I have text to animation. This is something that I wanted to use
1:37
I'm going to hit into text to animation, use script from the library, or copy and paste a text
1:42
So I choose that option and then later on this one is going to be redirecting us into the edit mode of the apt
1:49
With that being said, I'm going to go back now into the chat GPD
1:54
So here into the chat GPD, this is what. what, this is a tool that almost anybody that makes video wanted to use. So let's see, for example
2:02
that I using actually the same step It called text press Audiences are going to learn the basics about e marketing social media creation and much more That I have the intermark
2:18
So, ChanDBD is going to be helping me to create a solid introduction so I can copy this information
2:25
and paste that into the steve.AI. So, for example, I have the Welcome to TechBress, the channel that brings you the latest
2:30
insights and strategies for success in the fast-paced world at e-commerce and online marketing
2:35
if you're looking to grow your business, blah, blah, blah, blah. So I think this one's going to be really, really useful
2:41
So I'm going to use the first words from Welcome to Marketing
2:46
I want to copy this one, and let's go back into the steep.a
2:50
So I have the type or video. Type of video, have, of course, animation video
2:55
By default, we only have this one, so just leave it like that. And here into the category, what I want to go and look out for explainer video
3:03
And then here is the title. So here into the title, I want to just wait a few seconds here, and I have the error, auto insurance
3:10
explainer, have the auto explainer. So I want to look out for, I'm going to scroll a little bit down, and look out for something
3:18
like really, really just go into get started from today. So I want to actually delete all of this element, so I don't want to see any of that because
3:25
we have our own actual script, right? I hit into the enter mark, and then we have now seen number two
3:33
So what we're going to be doing here is just to use this element to paste it into the actual steeped
3:40
So if you're looking to grow your business, blah, blah, blah, you're in the right place
3:45
Let's copy this information and paste that into the scene number two
3:49
So I'm going to go back now in here and use the same stuff
3:54
There we go. So I have now my three scenes. So what I want to do now is to choose what is your video about
4:00
I'm going to go here and let's go for Textpress Intro Animation Sources
4:09
you hit into the O If you want to add a music you can do that If you want to add a Bose over by yourself
4:15
You can do it as well I actually just won't do that at the moment It going to focus into get started with the actual script So I going to focus now into next Choose your design So it really important to choose the one that benefits for your company for your brand or the type of videos that you
4:30
going to be creating. So that's the reason why you wanted to explain the application, what kind of
4:35
content you are going to be creating so you can get like the most accurate themes for your brand
4:41
for your company, for your videos. So in my case, I'm going to be focusing into something like this
4:46
for example, or like this. So then later on, I can change the back. I can change the images, I can change the guys, the characters and all that
4:53
So I just want to be focusing into something like too easy. For example, this guy
4:57
I clicked my theme and now we have going to be opening the actual workspace
5:02
So as this application is actually working, sometimes might take a few minutes when you create your script
5:08
and you choose the themes and the animations. So you can take the time, go back into the actual chatypd and then start to generate your own content
5:18
For example, I told the app, create a fast 10 steps to start as a YouTuber influencer
5:24
So this one says sure. Here's a 10 quick steps to get started
5:28
It helps choose number one. Choose a niche. Step number two, create a YouTube channel, plan and produce high quality
5:33
Make sure your videos have a great consensus message. Promote the channel, engage, collaborate, yze, stay content
5:40
So if you think these actual steps bring value to the actual content you want to do up into your video
5:48
then you can just try to. make this a little bit more details. So let's say that I want to use all of this element to have
5:55
an actual full video, full 10 video, so I can go and ask for something a little more details
6:02
There we go. This is the part we want to actually start to customize our video because I think
6:06
is actually looking really bit really basic, but it's actually working so far. So here what I want
6:12
to do is to edit the text if I want to or I can change the color, I can change the theme
6:17
I can hit into the X mark and then go back and add different audio. If I want to do, The actual alien of one girl just fading in in the actual element of the text and of that I think is actually working well but I going to try to make this a little bit more smaller I can change the size day and later on but I think I just needed to just redrag a little bit like that So actually not looking that bad I can add even an outro if I wanted to
6:44
but I needed to pave horse for different premium plants. And I don't want to be focusing there a lot
6:49
So lastly, guys, what I can totally just do if you want to export this and you don't want to use
6:54
the force, you don't want to see this actual watermark. What I can tell the gesture is to
6:58
redrag, for example, this character here. like this, and I'm going to redrag it like this
7:06
So then later on, what I want to do is to delete the actual element like this
7:12
by using Kamba as we just did before into another video. And check it out that this here, we have the actual watermark
7:21
So that's the reason why I just told you that we need to redrag all our elements into the left pod
7:26
So then later on, we can just redragged and hide the watermark so we don't have to see this anymore
7:32
and boom, voila. We didn't have to pay for absolutely anything. We just retract and drop
7:37
and all our elements are actually appearing into Kamba. Even if you don't like
7:43
you see that there's actually some elements that you cannot change. For example, you want to make this smaller
7:49
you want to change the actual font of all or whatever. What you can do is just don't use that elements
7:57
You use these elements. You input them in here, and then you can use Kambat
8:02
change your actual custom titles, funds, and all that. So here you have more liberty, but you're using all of the steep.com
8:12
Until then later on, you can change that inside Kamba, and this one is going to be helping
8:15
us to make your videos a little bit more with more creation, more complex, more creativity
8:21
And at the end of the day, we don't have to pay absolutely for anything. So with that being said, we have now covered the basic of how we can get started into steep.a
8:28
of course you're more than welcome to upgrade to the premium version to see what more elements
8:33
than those steve.a.i has to offer to us so don't forget to like and subscribe to this channel
8:38
if this was very useful information for you guys thank you so much for watching the video and i think i'm going to be seeing you guys on the next video see you soon guys
#Comics & Animation
#Flash-Based Entertainment
#Movies
#Voice & Video Chat
#Online Goodies
#Clip Art & Animated GIFs
#Animated Films