Up next in 10

How To Use MidJourney To Create Images For Presentations (2024) Complete Walkthrough
Oct 6, 2024
Discover how to harness the power of MidJourney to create stunning images for your presentations in 2024. This comprehensive walkthrough guides you through every step of the process, from generating initial concepts to refining and incorporating your AI-generated visuals into professional presentations. Learn tips, tricks, and best practices to elevate your visual content and captivate your audience using cutting-edge AI technology.
Show More Show Less View Video Transcript
0:00
Hello everyone, welcome into this new video
0:02
In today tutorial, let's take a look how we can get used to Metjoney to implement that
0:07
to use that for our documents, for presentations, and for actually much more
0:12
So as you can see here, I'm using Canva. Now, Canba is a tool that I use a lot to create some documents and ideas
0:21
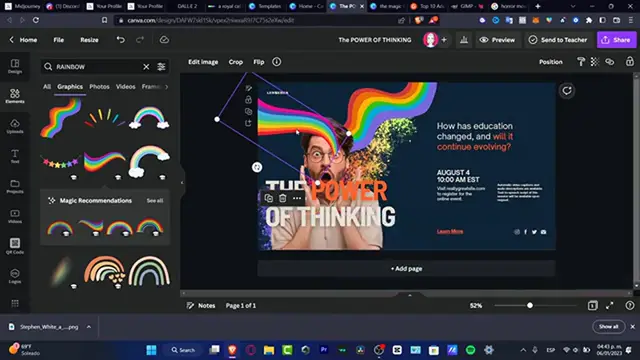
So what I was actually trying to do here is to create like an old man having like a rainbow
0:30
emerging from his head. So this is something that I created here and I kind of don't like this so far
0:37
I think that this can be looking much better. But just showing this is an example of the before and after
0:46
So what I want to do is to duplicate this page and I want to make like a quick comparison between
0:53
this one and the one that we're going to be creating today into, into
1:00
So here I want to delete my elements and I want to create something new based into my idea
1:04
So the first thing you want to do of course is to have your idea. You want to look for a gentleman or like an old man, actually a rainbow emerging from an old man's head
1:18
So this is something that I want to do into Met Journey
1:22
So Met Journey is going to be creating images for us and we don't have to be worrying about the copywriting and all that
1:28
So I'm going to hit into Join to the Beta Mode, but before you hit in the, what you do
1:33
want to do of course is to have a Discord account, otherwise this just won't work
1:38
So once we do have a Discord account, you just need to provide an email, provide a phone
1:43
number, and you're actually good to go. So with that being said, now I am here into Join to the Video Mode
1:49
Here as you can see, just need to accept and authorize that inside the Discord
1:53
And now that I'm in here, what I just need to do is to either work in here as almost ever
1:58
everybody is doing or to send this directly into my own server so I can start to do like my own just see my own stuff So to doing that just hit into add a server hit into create my own
2:12
And once you create my server, as you can see, I have this one that says AI networks
2:16
I want to go back into my room of newbies, just focus into newbies, of course, whatever you want to do
2:21
but just make sure that this one says newbies. Hit into the members list in the upper side
2:26
And here you want to look for the MET Journey bot. Inside the METJoy bot, hit in to add the METJoony bot, hit in to add the
2:32
to the server and here I want to choose my server here's AI artworks and he needed to continue
2:39
Now as you can see this is all the images that were generated for me by actual Metjoni
2:47
So as you can see it says welcome Medjoni, say hi, Medjoni is now inside here
2:51
So in order to get started what you want to do is to tap the forward slash and as you can see
2:57
we want to type Metjony butt and here are all the comments that you can't
3:02
and use in order to create your ideas. But today's I'm going to be focusing into Imagine
3:08
So here into Imagine, we do have prompt, and I can type the text idea that we created
3:13
in the first part of the video, remember? So I want to look for a rainbow emerging
3:19
from an all man's head. Click into Enter, and I just need to wait
3:27
to see what the computer has to offer to us. I actually ask the computer to
3:32
create before a unicorn emerging from a phone device to use this into an advertisement to, let's
3:41
say like for movies into your phone. So this is what the computer generate for me. This is something
3:48
that actually it's looking really, really great. If you want to see like an iPhone, you can do that
3:53
Let's say for example emerging instead of saying an phone, just say an iPhone. That totally
3:59
depends on what you're trying to look for. I'm going to go into the X mark and as you can
4:04
see we do have here different options, different variations of what the computer just created for us
4:09
So based on our idea as you can see here is our idea I actually want to go back into the one that we just created Based into this idea what I want to do is to make myself a little bit more descriptive in order to get this idea
4:26
So for example, as you can see, we do have this guy amazed or surprised
4:32
If I just type old man, of course, this guy is going to be showing me an old man with no intentions with no feelings
4:38
But here's the rainbow implemented into his head like this. So what I want to do is to change my description
4:48
Let's say I want to type into Imagine. Once again, and here I want to correct a few things
4:55
For example, a rainbow in a shape of a smoke. All right, so I think that we have some much more interesting things in here
5:05
So as you can see, I have four versions of what I have. here. I have this old man, I have this old man, I have this one, but I don't want to see this
5:13
one smoking. So I think like the best option for us is the latest one. So this is the pod
5:19
when we get interested here. So what I want to do is to go back here. I want to just focus in
5:24
here and here we do have the U options and the V options. Now U stands for upscale and B stands
5:32
for variance. So if I choose B4, what is the computer is going to be doing
5:38
is to make variations of the image number four. So that's the reason why B stands for variations
5:45
and four stands for the image number four. If I asked for U4
5:49
this one is gonna be telling the computer to upscale the image number four
5:54
Now as you can see, this is the work that the computer has been doing. We have the 55% here
6:00
and this is the variations that were created. So I went to click in here
6:05
and once again, I'm gonna see which one, fits for me the best. I think like the best option of course is the fourth one and what I want to do
6:13
is to upscale my image number four So with that being said now what I can do is to go back into my image And what I can do is to just implement that in here into Canva
6:28
And actually, this is the part when we are just using the Metjony to our documents
6:35
to our presentations, to make this look a little bit more professional
6:39
On the best part, is that we don't have to spend any kind of money
6:43
But if you want to take a look into the prices that appears into the Metjourney, you can check it out the basic plan, the standard plan, and the pro plan
6:50
These are depending, of course, and the features that are available for you to have limited generations only 200 a month
6:56
general commotionate terms, access to the member gallery, and optional credit tab apps. So with that being said, I'm going to go back into my Discord
7:03
And this is the upscale boson of my image. So lastly, what I just need to do is to select this one and hit into save the image
7:11
And I'm going to hit into save. Now, I'm using Canba because I'm actually using
7:16
Camber Pro, one of the great features about Camber Pro is that I can upload wherever image
7:21
that I want to do and I can delete the background as I wanted to. So I can select this one
7:28
I can upscale this. Let's see, for example, like this. And what I want to do is to either leave
7:34
it like that or hit it to edit image and choose the background remover. So we're going to wait a couple
7:40
the second here and I'm going to just move that like that and I'm going to move it like this
7:46
And just like that, here is my image. We have a background. So we're going to just leave it like that
7:52
Here I have my text here. And with that being said, guys, if you want to make like a quick comparison of which one is best
8:00
of course you want to choose the second option. I mean, this is really and much more professional
8:06
So this is how we can implement that into our documents. presentations and much more so without being said guys don't forget to like and
8:14
subscribe to the channel if you don't want to see more amazing tools about made journey thank you so much for watching the video and I will see you on the next video
#Photographic & Digital Arts
#Clip Art & Animated GIFs
#Photo & Video Sharing