Up next in 10

How To Create a Newsletter On Substack (Substack Tutorial)
Show More Show Less View Video Transcript
0:00
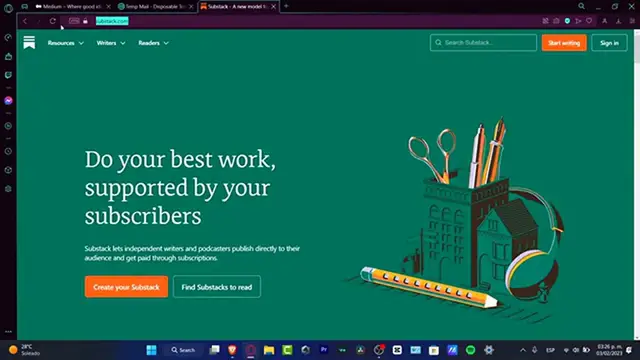
So, you want to get started into the Substack, in this step by step tutorial I'm going to
0:05
be showing you how you can create a newsletter for your writers, for your readers, whatever
0:09
you want to do in a very simple and easy way. So, if you were trying to find a platform where you can get started really really fast
0:18
and easy, you can publish directly to the right audience and actually get paid through
0:23
your own subscriptions and organic subscriptions, you did find the right application for you
0:30
So Substack is an amazing place where we can get started with you actually, like, you just
0:35
want to figure out how you can start writing articles, newsletters, feeds, blogs and much more
0:41
So, in order to get started guys, I'm just going to be showing you what I do to actually
0:46
start writing. And the very first and easy part is to just sign up
0:50
So what I want to do to get started here, I'm going to hit into sign in, what you want
0:55
to do is to either choose an email, hit to I don't have an account yet and hit into sign up
1:02
Now, you don't have to worry about to get spammed and all that, this is only for actually
1:08
starting creating an account and to be notified when people start to follow you and to subscribe
1:14
to your own channel. So I'm going to go into get started, I'm going to hit into dive into your interests, this
1:20
is only for recommended top publication based on the topics that we wanted to select
1:26
Let's say for example that I am really interested into news, literature, education and philosophy
1:31
I'm going to hit into continue and I'm going to hit into subscribe to them
1:37
Here's my email address, subscribe and join. So with that being said, now I can start by creating my very first post
1:45
So I'm going to go and type here the name of my channel. And here into the bio, you want to say something about what you're actually, let's say you
1:53
want to be inspired. Let's say I want to talk about the world
1:59
I believe you can do so much more than that. But here you can continue, I'm going to go into start reading
2:04
And as you can see, it's now been able to new post section button that appears into
2:09
the left part of our website. Hooray. Now, in order to get started, I'm going to hit into new post
2:16
And here I do have the created my very first newsletter. So it says create your account, your email address, hit into agree and continue
2:25
And just like any other place is going to be asking to create your web URL
2:30
So here you want to import your username. And if you see this checkmark, it means that nobody used it before
2:38
So you're actually good to go hit into continue. And of course, you want to just complete the capture, which is really, really annoying
2:44
But here to continue once again, and you're actually good to go
2:48
Now speaking about the mailing list, speaking about the newsletter, if you already have
2:54
people from Patreon, from ghost for the mail team from tiny letter, for your website or
3:00
whatever, you can import a CSV file, or you can do that manually
3:05
If you don't have any people in there, you're getting started like us, you don't have to worry about that, just get into skipped, and we can continue
3:11
Now here into subscribers, I'm going to get into skipped once again, we have the recommended
3:16
if you want to have more people into your self stack community, or you can go into recommended
3:22
one and get into finished. Now, I'm now able to go into the sub stack section as a poster as a writer, not as a reader
3:32
So let's probably say great launch post said in here, are you ready to get started
3:37
No, you don't have to worry about that, because it's really, really easy to just getting started
3:41
So if you want to receive money, you want to turn out the paid section that appears
3:47
in here. So I'm going to click to resist turn up, I'm going to hit into connect to striped
3:52
And this one is going to be sending us into the striped up section, which you need to, of course, to sign in
3:57
So once you sign in, you just want to connect your account from striped into sub stacked
4:02
and we're actually good to go. Now I'm going to close this for a second
4:06
And here you can import emails and connect Twitter. Once again, it's totally optional
4:11
Show your self stack wherever you have another places wherever you have your community
4:15
And lastly, we have the write your first post, we're going to write your first post and this
4:21
one is going to be sending us into the editor section where we can actually get started
4:25
If you used medium before, we can, let's say start to do exactly the same thing, you might
4:31
be a little bit familiarized with all of the features and tools that appears into newsletter
4:35
If you don't, you don't have to worry about that, because it's going to be really, really easy
4:39
So I'm going to go into not now. And here I can edit email header and footer
4:45
So if I choose this option, it's going to be popping up how it's going to be appearing
4:49
my email, my banner image, and my header for all the posters
4:54
Here's my email footers of how people are going to be receiving my sub stacked free section
5:00
And here you have the send test email. So if you know how to add this, what you can do is to look out for a free designer, for
5:07
example, Canva. Canva is a place to decide almost anything totally for free
5:13
And you can do almost whatever you want to do. So go into let's say, for example, all the templates that appears in here to choose whatever
5:20
you want to totally for free once again, and you can import that into your sub stack
5:26
Here is the part where I actually want to start talking about my actual subject
5:30
So is it really worthy to buy an iPhone these days? So as you can see, I do have the upper side where I can have a few tools
5:45
So if I click into the enter mark, for example, I want to add a new image
5:50
So I'm going to type here where I do want to actually start creating my image
5:55
So I'm going to go in the insert image. And here you can choose add image
6:01
And here you can add the image that is, let's say, create from your computer
6:05
Or you can go into the ad gallery, and you can just drag and drop
6:09
Or what you can do is to hit into the search bar. And here's going to be appearing on Splash, a place where we can find all your assets
6:16
totally for free. So if I type my keyword, for example, iPhone, is going to appear in all of these different
6:23
images, and I can choose totally for free. So you just need to type the option that says insert
6:28
And automatically is going to appear in the credits and down in here. So I can just start to write my very first post
6:35
Now, if you want to figure out how does this actually works, for example, here, let's say
6:40
this is a title, the beginning are hard, I'm going to hit into this button
6:45
And here into style, you can choose, let's say, for example, heading number two, and it's going to be popping up like that
6:50
And you can bold this so you can be a little bit more highlighted like that
6:55
I'm going to delete this. There we go. Now, lastly, I'm going to be showing you something else is going to be really, really accurate
7:01
So in speaking about a newsletter, let's say that I want to make people buy something or
7:08
just hit into a review or make some Amazon affiliation program. So for that, I'm going to scroll a little bit down
7:15
And you might see here, let's say, ignore our advice, I'm going to select this option
7:20
like I'm going to type something like if you want to buy this item, you can go in here
7:28
And here what I want to do is to input a button. Can we add that
7:31
Yes, we can. If I scroll all the way down up, sorry, I can see the buttons
7:37
And here you can have the subscribe, the custom button, the share this post, blah, blah, blah
7:41
So I want to look out for a custom button. And here to enter text, let's say I'm going to type by now
7:48
And here I want to type apple.com. So lastly, I want to add just the HTTPS file like this and hit into OK
7:58
And here as you can see, it's been generated my actual banner. So if I clicked in there, it's going to be sending me into the actual link that it totally works
8:07
And now I just want to go back here and I want to preview how it's going to be looking
8:11
into my mobile as well as a website inside a desktop. So this is my newsletter
8:18
As you can see, it doesn't look very, very bad. It actually looks really, really great
8:23
If I go into the desktop, this is how it's going to be looking inside a computer
8:27
Once again, it does look really, really great. If you want people to see your content as a paid subscriber, you want to choose the
8:35
option that says paid subscribers. So with that being said, guys, this is how we can get started by creating some newsletter
8:41
inside Substack. As you can see, it was really easy, nice, creative, and of course, we can get paid just
8:49
to hit on some subscribers if you wanted to. So it's totally up to you how you want to share this into your social medias, into some
8:55
of the blogs, into some Facebook community sections, wherever you wanted to
9:00
So don't forget to like and subscribe to the channel. Hopefully this was very useful information for you
9:05
And with that being said, guys, I'm really, really happy to see you on the next video, guys
#Photo & Video Sharing
#Podcasts
#Video Sharing