Up next in 10

Shopify Appointment Booking Tutorial 2024 (Step by Step)
Show More Show Less View Video Transcript
0:00
Welcome everybody into this new Shopify video tutorial
0:03
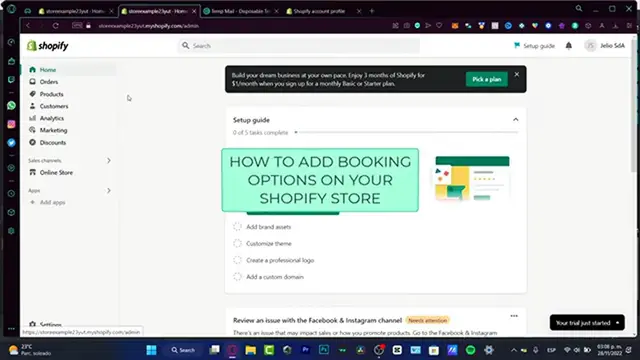
In this video, let's take you look how we can add a planner, a calendar booking into our Shopify store
0:11
So there's actually two ways that we can do this, but I'm going to be showing you just one way that is actually really, really simple
0:17
because the other option is to actually add that into the edit page and adding a lot of code
0:24
But since we are just starting with the Shopify store and we want to do things
0:30
more easier. We just don't want to print our own ideas, right? So let's get started
0:35
What we want to do is to sign into our Shopify store. We do already have this opened
0:41
So if you don't have an account, if you don't have a store already set it up, you don't have to
0:46
worry about that. I'm going to leave you a link down below in the description, guys. So you can
0:50
get a up to 15 days of the Shopify and see all the elements that connect can be connected into
0:57
your own store. So what I want to do here is to, after I sign it in, I'm going to see my dashboard
1:04
I don't want to be focusing in here into the setup guide. What I want to do is to follow the app section
1:11
So in here, what I want to do, first of all, is to go into all the applications
1:18
And I want to go directly into the Shopify App Store. Here into the Shopify App Store, there are a lot of applications that can be helping us
1:27
to improve the quality of our store. But in today's video, I want to focus into the search bar
1:34
If you want to find an application that can fill all you need
1:39
you just need to tap into a specific keyword. For example, here I want to go for the booking application
1:47
something like that. So I'm going to hit into enter. Now, I do have these different options where I can add
1:56
For example, here I have the easy appointment booking. I have the easy appointment booking for proble commerce
2:05
I have typo or typo. And I do have a lot of options But here I going to be focusing into these two applications that I already know how to be worked on if you want to check it out like there are so many ways you just want to want to make sure that it says free plan available because
2:23
you don't want to pay for more options right so I'm going to be focusing here into the
2:28
easy appointment booking then I want to choose the ad app so this going to be
2:34
redirecting into the requestment section to connect your store into the easy appointment booking I'm gonna be closing this and choose
2:42
install application now we do have access into this application if you go into
2:49
the apps here is the easy appointment booking you can pen that to your
2:53
navigator if you want to do and then I'm gonna be closing this for second and
2:58
choose creates your first event so select a product that you want to take
3:03
appointments for if you don't have any product you can create a new product so
3:07
what we want to do is to create a new product just to start here to making bookings and all that
3:15
So I'm going to go into Add Your Products and in here I'm just going to tap something like
3:22
Example File 1. Then what I want to do is to put a small price and hit into Safe
3:34
Let's see if there's something that I needed to create my product
3:38
you can see has been created successfully so once again into your applications
3:42
open your easy appointment booking so what I want to do is to create my first
3:47
event select a product here is my example file let's say that this is like a
3:53
service that you want to provide to your customers so I'm gonna go into add and
3:59
here it says create an event for and this is the name of your service or a
4:04
product or wherever you're selling into your store choose that and what's going to happen here is the dashboard of the event
4:13
So here into the event name, you want to change our name. Let's say, for example, booking for example client
4:22
Here you have some variant This is just for different tools different products that you might be have a variance I do only have one option so you don have to be worrying about that
4:35
Team availability. This is something that can be added as you have more slots that work with your schedules
4:43
So since we are only one person here, we don't want to be focusing in here
4:48
But if you want to add a new availability, let's say, for example, we want to
4:52
focus into the person who's going to be managing here the appointment so the
4:59
first name of this one let's say this is Tom Tom Hacks and then the email here
5:04
is the phone number contact linked the location the word you want to make this
5:10
casual and here as you can see on Mondays Tuesdays you can customize this as you
5:15
wanted to and then you can go into set your specific hours so you can add
5:22
those, for example, I have an override that it's not available. And then if you want to connect the Google Calendar, you can do that, but you need a pro
5:33
feature, but I don't want to focus in here. I think it's more than enough that I have the easy motorcycle section, so I just want to go
5:41
into Safe. And once I have that option, what I want to do, you want to define how long the appointment
5:49
will be. Let's say that there's going to be up to 60. minutes and maximum number of the 10s I'm going to choose only one the buffer
5:58
sometimes the buffer goes into five 10 minutes I'm going to get into 10 and here
6:05
you can input the event details of your own appointment after that you can see the notes
6:15
if you want to add notes for your customer you can see the location here into the
6:20
location you can add a personal location and you can add this into a Google Calendar invitation
6:27
So if the Google Calendar invitation is synceded, this section is going to be enabled
6:32
And if this is just like a Zoom call, something like that you can just avoid this and paste the custom link form from your Google Meet or your Zoom or whatever you going to be using And here we have the customer booking options
6:47
So you can choose on a specific date just in case that you already took an appointment
6:53
I can select on a start today here or starting today. And we can allow the customer to book any time until I explicitly disabled the event
7:02
until a specific date, until a specific number of days into the future. So I do want to focus into the second option
7:08
And in here, let's say, want to focus into eight days into the future
7:14
Do you need lead time before the customer book with you? Here's how many time to prepare before booking, let's say, just 20 minutes
7:22
The checkout options are to don't require to checkout to check out to confirm the booking
7:26
And this comes going to be looking at a customized appearance. We can see week by week or a monthly calendar
7:33
You want to just focus in here. in here kind of looks like more professional and here you can enable the
7:40
notifications if you just want to stick around with all the notifications of
7:45
your customers and all that you can go into save and publish this event I'm
7:50
going to just wait a few seconds and then what's going to happen here that the
7:56
booking has has been published so what I want to do is to take a look into my
8:02
store just to make sure everything looks right so as you can see here is the example file here's the store as you can see
8:11
appears as sold out because I put that into calendar of today and here you can
8:16
choose select a time and here's gonna be appearing our sections our files our
8:22
event details let's say that I choose this option at 2 p.m and I can choose book now and
8:28
the person just needs to first email last name phone and confirm the booking just
8:33
easy PC guys so hopefully guys was a very useful video for you don't forget to like and
8:39
subscribe to the channel if you want to see more about this uh applications for shopify good luck
8:45
with you store thank you for watching this video and i'll see you next time
#E-Commerce Services
#Retail Trade
#Retail Equipment & Technology
#Shopping
#Consumer Resources