Up next in 10


My very best Oatmeal Sourdough Bread Recipe
Buy Foodgeek Merch: https://fdgk.net/buy-merch
Patreon: https://fdgk.net/patreon
The recipe:
https://fdgk.net/oatmeal-sourdough-bread-recipe
Ad links!
In this video:
Small spatula for starter: https://fdgk.net/buy-small-spatula
Medium bowl: https://fdgk.net/buy-rosti-bowl-4-liters
Medium bowl lid: https://fdgk.net/buy-rosti-bowl-4-liters-lid
Cambro Container 4 qt/3.5 liter: https://fdgk.net/buy-cambro-container-4-qt
Spray Bottle: https://fdgk.net/buy-spray-bottle
Round Proofing Baskets: https://fdgk.net/buy-proofing-baskets
Oval Proofing Baskets: https://fdgk.net/buy-oval-proofing-baskets
Walnut Lame: https://fdgk.net/buy-walnut-lame
Razor blades: https://fdgk.net/buy-razor-blades
Baking Steel: https://fdgk.net/buy-baking-steel
Show More Show Less View Video Transcript
0:00
Today I'm going to show you how to make an oatmeal sourdough bread
0:03
It's wonderful and moist. Hi, I'm Sune and I'm a food geek
0:18
Today I'm going to show you how to make an oatmeal sourdough bread
0:22
It's made by first making oatmeal, which is an oat porridge that's made by cooking rolled oats and water
0:28
In many parts of the world, oatmeal is eaten as a nutritious breakfast
0:33
It's both cheap and healthy, and it tastes great with a bit of sugar and a good knob of butter
0:39
When it's put into a bread dough, it acts like a tangzhong
0:43
Some of the moisture is trapped inside the oat grain and will help the bread to stay moist for longer
0:48
It also makes for a softer crumb. If you're new to this channel, I bake a lot of sourdough bread, and I make delicious food from all over the world
0:56
If you want to see more of this content, please join me by subscribing and ringing the bell so you won't miss any future videos
1:04
The dough is made using 70% bread flour and 30% whole grain svelte flour
1:09
The amount of oatmeal is 32.5%, the inoculation is 20% and the salt content is 2.5% because I think otherwise it can taste a bit bland
1:20
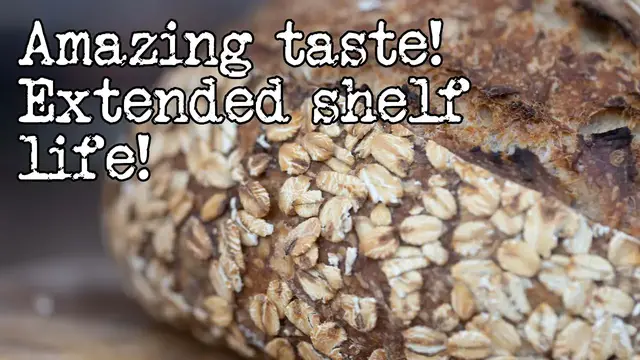
The bread is topped with thick rolled oats which gives the bread a gorgeous appearance
1:24
If you'd like to support the channel, please consider becoming a member at Patreon
1:29
You can also buy some merch or use the links in the description for tools and ingredients
1:34
Those were the words. This is the recipe. There's a link in the description for the recipe on my website
1:42
The first thing is to make the porridge. In a microwave safe container, add 65 grams of rolled oats
1:50
130 grams of water. Give it a quick mix. Microwave it on full until it bubbles
2:03
It took about 2 minutes in my 900 watt microwave. Then give it a good stir to make it cohesive
2:15
Put it away and allow it to cool off. It's important that it's time to come down to at least room temperature or else it might
2:21
speed up the fermentation, which is not what we want. You can put it in the fridge to speed up the
2:27
process or the freezer if you're bold, but don't let it freeze. When it comes down to temperature
2:32
you can mix the bread. To a medium bowl, add 450 grams of bread flour
2:39
200 grams of whole grain spelt, 16 grams of salt. Mix it up to combine it
2:51
Then add the cooled oatmeal. It'll probably be clumpy, so it's important that you break it up with your fingers
3:03
so it doesn't sit in clumps in the dough. Bye 130 grams of soudo starter fed and grown to its peak
3:28
Then start by adding 350 grams of water. That takes the bread to 70% hydration
3:35
If you feel like it can take more, you can add up to 75 grams of more water
3:39
which will take the dough to 80%. My flour can take it, so I just add the entire 425 grams all at once
3:47
Break down the oatmeal chunks even more before mixing. Mix it with your hands until all the flour is hydrated
4:11
As you can tell, even though my dough is 80% hydration, I actually need to knead it
4:31
Put it back in the bowl and let the dough rest for an hour. When the hour's up, put the dough in a see-through container with straight sides, like this Cambro container
4:52
Level the top of the dough. And mark where the top of the dough is and where it will have grown 50%
5:08
Then put it somewhere warm. I put in my broad and tailor proofer set to 30 degrees Celsius, 86 degrees Fahrenheit
5:15
It took about four and a half hours for my dough to grow 50%. If you aren't using a proofer, this might take substantially longer
5:22
When it's grown, take the dough out of the container and split it in half
5:26
Then shape each dough piece into a loose ball using your bench scraper
5:30
Or you can use your hands if the dough is as stiff as this. Then let them rest on the counter for 20 minutes
5:44
When the 20 minutes are up, prepare a dishcloth with thick rolled oats
5:53
Then it's time to shape the dough. I'll show you how to make a round bread, a so-called boule, and a longer bread, also
6:00
known as a batard. Did you know batard means in French
6:04
First the boule. Flip the dough over and stretch and fold each side up and into the middle
6:14
Flip the dough over and shape it into a ball using your bench scraper
6:18
It's important that you don't have any flour on the counter when you do this
6:22
You need the dough to slightly stick to the counter so when you pull it over the table
6:26
it be pulled underneath the dough in the front To apply the oats mist the top of the dough with a spray bottle Then flip the dough onto the oats Roll it around to get the oats all over the surface
6:50
Then put it into a 7-inch round proofing basket. It can be lined or not, doesn't matter
6:55
Then fold the sides in to create a bit more tension on the top
7:05
All right, now the batard. This is more advanced when it comes to shaping
7:15
but it'll also give you a bread that gives you more uniform slices
7:19
Flour the top of the dough ball. Remove any excess flour from the counter
7:29
Flip the dough over, then tease it out into a rectangle. Oops
7:52
Notice how there's a whole piece of oatmeal right there in the dough
8:00
I should be less sloppy when breaking up the oatmeal next time. Then fold the dough up a third from the bottom and in from each side
8:19
and then fold the dough down and tuck it into each side. Then roll it up and seal it using your bench scraper
8:33
If you have these rolls showing on the ends, you can carefully fold the dough down to hide them
8:50
Then miss the top of the dough. Flip the dough onto the thick rolled oats
9:00
Roll it around to get oats up the sides of the bread. Then put it in a 25 by 15, 10 by 6 inches oval banneton
9:09
Give the dough a quick stitch to create more tension on the top. then put the dough in the fridge for at least 8 hours 48 hours at the most when it's time to bake
9:26
heat your oven to 260 degrees celsius 500 degrees fahrenheit with a baking steel and a dutch oven
9:33
inside i'm using a challenger bread pan which isn't technically a dutch oven it's made specifically
9:38
to bake bread and has some advantages. If you're interested, you can watch my review of the Challenger
9:44
linked in the card above. Let it heat for an hour to make sure that both the baking steel
9:48
and the Dutch oven are completely saturated with heat. When the oven is screaming hot..
9:54
No not like that Grab your dough from the fridge Don let it come up to temperature Dust the bottom with rice flour to make sure it slides off the peel Flip it onto the peel
10:13
Score the dough using a lime. then remove the top of your dutch oven grab the dough on the peel
10:26
and place the dough inside the bottom of the dutch oven put the top back in place
10:32
turn your oven down to 230 degrees celsius 450 degrees fahrenheit and bake for 20 minutes
10:41
then remove the top of the dutch oven close the oven and bake for another 25 minutes
10:52
then take the bread out of the oven and let it cool on a wire rack
10:58
place the top of the dutch oven back on and reheat your oven to 260 degrees celsius 500
11:05
degrees fahrenheit then i'll show you how to bake the batard it's really the same way just with a
11:11
different score. So grab your dough from the fridge, dust it, flip it, score it, bake it
11:22
And then take the bread out of the oven and let it cool on a wire rack
11:29
Let me show what kind of crumb you can expect. All right
11:46
Want to see just how gorgeous this bread is? Doesn't that just look amazing
12:46
I love this bread. It's perfect with any topping, but it tastes wonderful with just a good amount of butter
12:53
This bread can easily be baked in a tin, but in that case, I'd ferment it to 100% instead
12:58
so that the bread doesn't crack on the top while being baked. I hope you learned something today
13:04
See you next time
#Cooking & Recipes
#Food
#Healthy Eating