Up next in 10

This tutorial was contributed by creator Softoni! Subscribe to their channel: https://www.youtube.com/@softonimotion
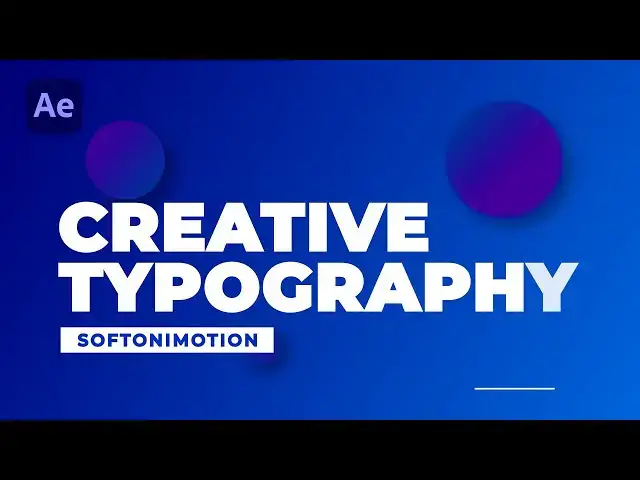
Here's more from the creator: 'Learn how to create captivating typography text animations in After Effects with this step-by-step tutorial! Watch as I demonstrate various techniques to bring your text to life, adding style and personality to your designs. Plus, we've got a cool background to enhance the visual experience.
Subscribe now for more tutorials on creating captivating typography text animations in After Effects! Don't miss out on valuable insights, practical tips, and creative inspiration. Hit the subscribe button and join our community of aspiring motion designers today!'
View Softoni's store here: https://filtergrade.com/vendor/softoni/
View all After Effects Templates on FilterGrade: https://filtergrade.com/product-category/after-effects-templates/
- - - - - - - - - - - - - - - - - - - -
Follow FilterGrade!
Instagram - https://www.instagram.com/filtergrade/
TikTok - https://www.tiktok.com/@filtergrade_
Facebook - https://www.facebook.com/filtergrade
Twitter - https://twitter.com/filtergrade
Pinterest - https://www.pinterest.com/filtergrade/
Newsletter - https://filtergrade.com/filtergrade-newsletter/
Show More Show Less View Video Transcript
0:00
hello guys soft Tony here welcome back
0:02
to this brand new After Effects tutorial
0:05
and in this one I'm gonna be showing you
0:07
how to create this awesome and creative
0:09
text animation with core background
0:11
these Cool Shapes and everything else
0:14
you can use it into your intros promos
0:17
and so many more
0:19
so if you haven't subscribed to my
0:21
Channel please hit that subscribe button
0:23
also leave a like and without any
0:25
further Ado let's jump into after
0:28
effects and start to create this really
0:31
really awesome project
0:33
all right
0:34
[Music]
0:44
for hearing After Effects and first like
0:47
always let's create a new composition
0:49
hit Control Plus and or this little icon
0:52
here to create a new comp I will rename
0:54
it to final
0:56
you can of course type your own text for
0:58
width and type 90 20 by 1080 full HD
1:02
comp duration 6 second long frame rate
1:05
30 frames per seconds
1:07
hit OK and now it's time to create a
1:09
solid layer right click find here new
1:11
and click solid I will type
1:14
background hit OK and now it's time to
1:18
add our first effect go here in the
1:21
facts and preset and if you can't find
1:22
it go here in window menu and you'll
1:25
find it here okay I'll go here in the
1:27
facts and preset type
1:29
ramp effect
1:31
drag and drop onto our background layer
1:34
and now it's time to make a few
1:36
adjustments for the start of the ramp uh
1:38
go upper left corner for the end of the
1:41
ramp code to right lower corner and we
1:46
will of course find our suitable colors
1:49
for this particular video tutorial I am
1:52
going to be choosing this dark blue
1:56
color you can also use eyedropper like
1:59
this and for the second color we will do
2:02
maybe slightly different one like this
2:05
for the first one maybe
2:07
a few adjustments even more
2:10
like so and now it's time also to add
2:13
our second effect find here noise hls
2:17
drag and drop here on our background
2:20
layer and for the Hue lightness and
2:22
saturation type
2:24
0.2 I will just copy it Ctrl C and then
2:28
paste it Control Plus V to just add a
2:32
little bit noise on our blue background
2:35
okay now let's create our first shape
2:38
hit Q on your keyboard or go here on
2:41
this rectangle tool icon uh left click
2:45
hold and then choose this ellipse tool
2:47
and we will draw just make sure to our
2:50
fill color is set to solid color solid
2:53
white okay and hold shift while you're
2:57
drawing the shape like this okay and now
3:01
I will rename it just hit enter I will
3:03
rename it to Circle
3:07
o1 like this okay then go again here in
3:10
the facts and preset find here ramp
3:13
effect drag and drop onto our Circle 01
3:16
and for the start and then color do like
3:20
this
3:21
okay and find the suitable color I will
3:25
do maybe dark a purple one
3:27
like this you can also use eyedropper
3:30
and for the second one maybe this kind
3:33
of blue bluish color okay now it's time
3:37
to add our uh another effect go here
3:40
again in the facts and preset filed here
3:43
drop shadow drag and drop onto our
3:45
Circle o1 and for the distance go around
3:49
40 softness to around 100 and now we
3:53
have this awesome looking shape like
3:56
this for the opacity go to around 30
3:59
percent and this is looking really cool
4:02
our next step is to create a movement
4:05
for our first Circle hit P for position
4:08
then hold alt on your keyboard and click
4:12
on this little stopwatch and type here
4:15
wiggle expression open and close bracket
4:19
1.50 and now when we hit 0 in our
4:23
timeline we have this cool little
4:25
movement of our Circle okay our next
4:29
step is to duplicate this circle o one
4:32
hit Ctrl D or go edit and then duplicate
4:35
and you can drag this second just make
4:40
sure to select it and you can drag on
4:43
the left or right side on our comp like
4:46
this just make sure to hit again here
4:49
and to adjust this ramp like this again
4:53
okay you can slap color if you want and
4:57
now we have this really cool gradient
5:00
okay also hit this little triangle here
5:03
then open this contents menu and then
5:06
open up this ellipse or one ellipse pad
5:09
and for the size you can play around to
5:11
maybe around 350.
5:13
it's up to you okay and also one next
5:17
the fact that we can add is to blur
5:20
effect I will find gaussian blur just
5:23
drag and drop on our Circle O2 and you
5:26
can play around with the blurriness to
5:28
maybe around 20 and this is looking
5:32
really cool to me okay
5:34
what we can do again is to duplicate
5:37
this once again Ctrl D hit V on your
5:41
keyboard and move this shape maybe
5:44
around here also hit W and then find
5:49
here a size to around maybe 100.
5:53
okay now we have maybe 130 this little
5:57
circle and for the blurriness go to
6:00
around five percent you can readjust in
6:03
every moment our shapes to around here
6:05
it's up to you okay now let's create our
6:09
first text here Control Plus t on your
6:11
keyboard or go here on this little icon
6:14
and I will type my first text
6:18
creative
6:19
okay make sure to move it on the right
6:23
side of our composition you can use
6:25
shift and right arrow on your keyboard
6:28
for the font I'm using this monster at
6:31
bold maybe to do extra bold or black
6:35
like this this is looking even better
6:37
like so move to the right just a bit
6:41
again
6:42
like this okay also we will duplicate
6:46
this creative text once again hit Ctrl D
6:49
or go here edit and then duplicate and
6:53
just move this creative to text
6:56
use a down arrow on your keyboard like
6:59
this and for the creative two text I'll
7:03
just type another text
7:05
tutorial
7:07
and this is looking even better now okay
7:11
now we will also create our third text
7:15
but before that let's create a new solid
7:18
layer right click go to new find here
7:20
solid layer I will rename it
7:23
text BG for now color doesn't matter for
7:27
now hit OK and now we have black solid
7:31
layer make sure to select it just turn
7:34
off the visibility and then go again
7:37
here on our ellipse tool hold left click
7:40
and then just find here rectangle two
7:42
then again select this text background
7:45
and just draw a mask like this
7:50
according your needs of course
7:52
and now when we turn on the visibility
7:55
back you will see this text box for our
7:59
third text okay hit again here go in the
8:01
fax and freeze it find here fill effect
8:04
drag and drop onto our text background
8:07
and find your suitable color I will
8:10
choose white one you can of course
8:12
readjust the size of this mask just hit
8:15
again on this text background then hit m
8:18
and zoom it a little bit and of course
8:22
you will leave this background text
8:25
background size according your text size
8:27
maybe something like this will be good
8:32
okay
8:33
and when you're happy with your result
8:35
just make sure that your background is
8:39
aligned with our creative and tutorial
8:41
text okay now let's create our third
8:44
text hit Control Plus T again or go on
8:48
this little icon here I will just type
8:51
my new text Maybe
8:54
motion
8:58
for the text size maybe go to around 50
9:01
uh for width okay move it around here
9:05
and just go here again in the facts and
9:08
freeze it find fill effect uh drag and
9:11
drop onto our Tony motion text and just
9:15
you can use eyedropper for our color
9:17
like so you can also play around maybe
9:21
to do brighter brighter one brighter
9:24
blue color hit OK then double click
9:27
again and instead of this black find
9:31
maybe answer at semi bolt okay also next
9:35
thing what we're gonna do is to open
9:36
this uh Little Triangle go here and text
9:39
find here animate also tracking and for
9:43
the tracking amount according your text
9:46
size maybe to around 10. okay you can
9:50
also use arrows on your keyboard again
9:53
like this
9:54
maybe to loom even
9:57
smaller one to seven
9:59
this is looking really cool
10:01
and also to maybe
10:04
readjust a little bit more to go with
10:08
darker one darker blue
10:11
but of course I'm just showing you the
10:14
way you will of course choose your own
10:16
color
10:17
uh this is looking really really cool to
10:20
me
10:21
hit OK and now when we hit zero as you
10:24
can see we have this moving shapes with
10:28
our creative text okay our next step is
10:32
also to animate our creative tutorial
10:34
and soft tone emotion text open up this
10:38
creative text just choose it to go here
10:41
in the facts and press it and find here
10:43
type writer effect just make sure that
10:47
your playhead is set here to uh zero
10:51
frames drag and drop our type writer
10:54
effect
10:55
uh W to show all of our keyframes
10:59
and maybe go to around 2 seconds and
11:02
move the left keyframe here to maybe two
11:06
seconds then choose them uh both hit F9
11:10
on your keyboard go to graph editor if
11:13
you can't see curve like this go right
11:16
click and just hit here edit speed graph
11:18
and draw a curve like this now when we
11:22
hit zero we have this really cool text
11:26
movement now it's time to also animate
11:29
this second one this tutorial open up
11:32
here go here in text go and animate find
11:36
here opacity and then go here uh to add
11:41
another property find here and position
11:44
like so and then also go to around uh
11:48
two seconds open up this arrange
11:51
selector for this offset setup our first
11:54
keyframe and type of 100 then go to zero
11:58
frame and type here minus 100 okay
12:03
uh now let's select both of the those
12:08
keyframes again F9 on your keyboard go
12:11
to graph editor and draw the same curve
12:13
like before one thing we have forgotten
12:16
to do is to lower down our opacity to
12:19
zero percent to find here uh in animator
12:22
one opacity and lower it down to zero
12:25
and in our finals when we hit zero on
12:28
our keyboard This is looking really cool
12:31
okay now let's create a movement for our
12:35
text background okay select this text
12:38
background hit M on your keyboard or
12:41
find a mask like here or just shortcut M
12:45
for the mask path to go to around two
12:49
seconds of course set up our first
12:51
keyframe go to zero frames Zoom it a bit
12:55
then double click on our mask in our
12:58
finals and move it to the left like here
13:03
okay okay also choose all of our
13:06
keyframes hit F9 again go to graph
13:10
editor and draw the same curve like
13:13
before now when we hit zero we have also
13:16
this background movement
13:18
and now we will duplicate this text
13:20
background edit and then duplicate or
13:23
Control Plus T move it above hours of
13:26
tone in motion text this will use as our
13:29
math I'll just rename it matte and just
13:32
for the track map for this of Tony
13:35
motion text find here Alpha matte if you
13:38
can find track matte just hit here on
13:40
toggle switches and nodes find here
13:43
Alpha and now in our finals when we hit
13:46
zero we're getting this really cool
13:49
animation
13:51
all right our final step is gonna be to
13:55
create our lines in our edges hit G on
14:00
your keyboard and find this pen tool
14:03
like here make sure that our field is
14:07
set to none and for stroke we will do
14:10
maybe around 5 pixels and draw the line
14:14
like this
14:16
okay and now for the shape layer I will
14:20
rename it to line 01 okay open up this
14:24
uh go to here and add find here dream
14:27
pets also go to around two seconds open
14:32
up this trim pads set up our first
14:34
keyframe for and and then go here on
14:38
zero frames at zero frames and type here
14:40
of course zero also hit F9 and draw the
14:46
same curve like before
14:50
now when we hit zero we have also this
14:53
uh cool line movement
14:56
what you can do next is to duplicate
14:58
this one control plus d you can use
15:01
arrows on your keyboard to move it left
15:04
or right whatever you want you can play
15:07
around to get results that you want okay
15:11
now when we hit zero we have this really
15:14
cool
15:15
animation also you can play around with
15:17
the blending modes instead of normal try
15:20
overlay for the second one
15:22
this is looking maybe even better you
15:25
can also add blur colors whatever you
15:29
want
15:30
okay all right guys that was everything
15:33
for today's tutorial you can play or
15:35
play around with the colors you can add
15:38
another shapes or lines here according
15:41
your needs uh if you like these videos
15:44
please leave a like also comment down in
15:47
the comment section uh just one
15:49
important note all the links of my stock
15:51
sites uh and everything else is in
15:54
description so take a look uh also take
15:57
a look on my profile on my channel for
15:59
even more great tutorials and until next
16:03
time stay creative and bye bye
16:07
[Music]
16:14
thank you