Up next in 10

This tutorial was contributed by creator Softoni! Subscribe to their channel: https://www.youtube.com/@softonimotion
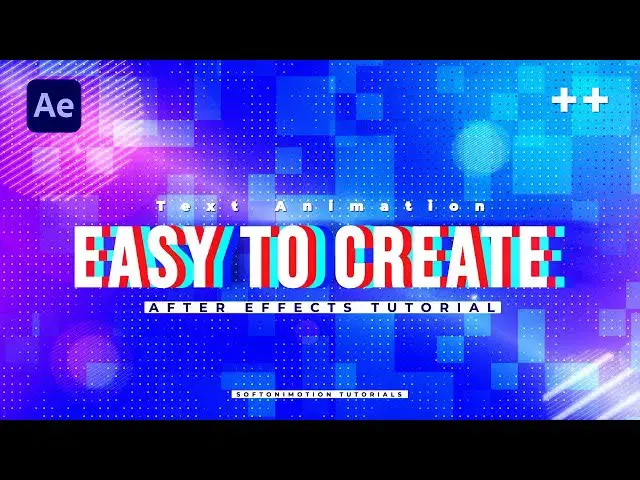
Here's more from the creator: 'Hey folks, Softoni here! 🌟 Welcome to a brand new After Effects tutorial on my channel. In today's session, we will be creating Cool Text Animation here in After Effects. Get ready to infuse your projects with creativity and character through looping text effects!
⚙️ What We'll Cover:
Creating a background and modern text animation from scratch.
Adding a touch of personality to your text with dynamic effects.
Tips and tricks for achieving that perfect looping look in After Effects.
👍 Don't Forget to Engage:
If you're enjoying this tutorial, hit the subscribe button and give it a thumbs up. Your support keeps the creative tutorials flowing!
🚀 Let's Craft Some Magic:
Follow along as I guide you through the entire process, step by step. Transform your text and bring it to life with that modern and captivating vibe.'
View Softoni's store here: https://filtergrade.com/vendor/softoni/
View all After Effects Templates on FilterGrade: https://filtergrade.com/product-category/after-effects-templates/
- - - - - - - - - - - - - - - - - - - -
Show More Show Less View Video Transcript
0:00
hello guys soft Tony here and in today's
0:03
tutorial we will be creating a cool
0:05
looking text animation heing After
0:07
Effects step by step before we start
0:10
make sure to subscribe to my channel hit
0:12
the like button and turn on the
0:13
notification Bell so you don't miss any
0:15
of my upcoming video tutorials and
0:18
without any further Ado let's jump into
0:21
after effects and start creating this
0:23
cool text animation
0:26
[Music]
0:36
all right we're here in After Effects
0:38
and first like always let's create a new
0:40
composition hit on this little icon or
0:42
control or command plus n to create new
0:44
composition this is going to be final
0:46
like usual and for the width and height
0:48
90 20 x 10 80 30 frames per seconds and
0:51
duration it's pretty much up to you I
0:53
will leave to around 10 seconds hit okay
0:56
and now let's create our solid layer go
0:58
right click to create new solid layer
1:00
find here solid and let's type
1:02
background also 90/20 by 1080 and then
1:06
hit okay now go here in the facts and
1:08
preset and if you can't find this option
1:10
just go window and you will find effects
1:12
and presets here and let's type here for
1:15
color gradient find it here on generate
1:17
and just drag and drop onto our
1:19
background solid layer for the first and
1:21
fourth color let's change to blue color
1:24
you can use ey dropper here for the
1:25
first color and for this third color I
1:28
will change maybe to this red red color
1:30
hit okay and for the second color I will
1:33
use this type of orange color hit okay
1:37
of course you can play around with your
1:38
own colors but those are looking good to
1:41
me okay now let's close this FX control
1:43
for now I will just hit control+d on
1:46
this background solid layer or go edit
1:48
and then duplicate this second one is
1:50
going to be Ball action okay go here in
1:54
the fact and PR it again and find CC
1:56
Ball action drag and drop onto this
1:59
first solid layer and let's also delete
2:01
this Four Color gradient and let's add
2:04
fill effect here in the effects and
2:06
preset type fill drag and drop above
2:08
this ball action effect change color to
2:11
white hit okay and for the grid spacing
2:14
and B sides let's type 10 now as you can
2:17
see we have this cool looking wi Dots
2:19
here in the final composition okay now
2:22
let's duplicate this ball action once
2:24
again hit control+ D okay and go in the
2:27
fact and preset again find fractal noise
2:30
effect okay drag and drop onto the ball
2:33
action to and for the fractal noise
2:36
let's make further adjustments for the
2:38
contrast instead of 100 type 800 okay
2:42
and now let's animate the evolution
2:44
option hold alt on your keyboard and
2:46
just hit on this little stopwatch and
2:48
let's type here time asterisk 200 okay I
2:53
will close this ball action tool for now
2:56
it's zero and as you can see we have
2:58
this cool looking dots movement in final
3:01
composition this is looking cool I will
3:04
close this one again and let's create
3:07
now first adjustment layer go right
3:09
click to create new adjustment layer
3:11
this is going to be light sweep okay go
3:14
in facts and PR it find light sweep
3:17
effect drag and drop onto the adjustment
3:20
layer and here let's also make further
3:22
adjustments for the edge thickness and
3:24
Edge intensity type zero for the
3:26
direction type minus 62 okay and for the
3:30
center let's try Min - 85 and for this y
3:35
parameter let's type 15 and now as you
3:38
can see we have this cool looking light
3:40
sweep line that is expanding all the way
3:42
from the left to the right okay and also
3:45
for the width let's type
3:47
195 and this is looking cool maybe
3:51
185 this maybe too much and this is
3:55
looking awesome now it's time to create
3:57
our text hit control+ t or hit on this
4:00
little icon I'm using this Bas no font
4:03
and let's type our text I will just type
4:06
easy to create of course you will type
4:09
your own text align it to the center
4:11
somewhere around here and if you can
4:13
find align option just go window and you
4:15
will find aligned here okay now let's
4:18
animate this text go here at zero frames
4:21
hit P4 position set up the first key
4:23
frame here at zero frames and then go to
4:26
around 1 second and move this text
4:29
slightly to the left or to the right
4:31
side I will go maybe somewhere around
4:33
here okay now grab both of our key
4:36
frames hit F9 or go right click key
4:39
frame assistance and select this option
4:42
easy easy and now when we hit zero we
4:44
have this basic move of our easy to
4:47
create text now let's also add
4:49
expression to our easy to create text
4:51
hold alt on your keyboard and then hit
4:53
on this little stopwatch for the
4:55
position and let's type Loop out open
4:59
close bracket parenthesis and then just
5:02
type here ping pong okay hit zero again
5:05
in the finals and now we have this
5:08
looping animation of our easy to create
5:11
text okay for the next step let's
5:13
duplicate this easy to create text hit
5:15
control plus d and then hit U to show
5:17
all of the key frames grab the key
5:19
frames and just move them five frames
5:22
ahead somewhere around here hit control+
5:25
D once again this is going to be easy to
5:27
create tree hit U to show all of the key
5:29
frames again and for this one move this
5:32
10 frames ahead if you want you can
5:35
duplicate once again hit control+ D hit
5:37
you repeat the process and for this one
5:41
move somewhere around 15 frames ahead
5:44
like this okay and just grab this first
5:47
text easy to create move all the way to
5:49
the top okay select two three and four
5:53
and go here in the effects and preset
5:55
find fill effect and just double click
5:58
to apply on all of them and for this
6:00
second one let's leave it to this red
6:02
color for this third text let's change
6:04
maybe to this Orange play around with
6:07
the colors and for this fourth one let's
6:10
change to maybe this blue one hit okay
6:13
and now when we hit zero in the finals
6:16
we have this really cool and really
6:18
awesome easy to create text animation in
6:21
the final composition okay now it's time
6:24
to precompose our text select them and
6:27
then go right click precompose this is
6:29
going to be Text Plus elements hit okay
6:34
hit P4 position and just move it
6:37
slightly to the left somewhere around
6:39
here to center it okay and then hit
6:41
ctrl+ D once again and for this lower
6:44
one let's rename this one to
6:47
Shadows okay go into effects and pres it
6:49
find F effect drag and drop onto the
6:52
Shadows composition change color to
6:55
black color and let's add CC radial fast
6:59
blur drag and drop onto the shadows and
7:02
here basically you can play around with
7:04
all of the options for the center let's
7:06
go somewhere around here amount let's
7:08
type maybe 88 you can also hit T4
7:12
opacity if you want let's go somewhere
7:14
around 60% and now as you can see we
7:17
have cool looking Shadows here in our
7:19
final composition this is with and this
7:22
is without our shadows composition and
7:25
this is looking cool okay now it's time
7:27
to create another adjustment layer go
7:29
right click to create new adjustment
7:31
layer this is going to be lens flare
7:34
okay go here in effects and preser find
7:37
lens flare effect drag and drop onto the
7:39
adjustment layer for this first one
7:41
let's play around maybe somewhere around
7:43
here okay let's duplicate this
7:45
adjustment layer control plus d this
7:48
second one let's go somewhere around
7:50
here and let's change lens type from
7:52
this first option to this 35 mm Prime
7:56
and you can also duplicate this one and
7:58
this is looking awesome just play around
8:00
if you're not satisfied just delete
8:03
let's also animate this maybe second
8:05
lens flare go here at zero frames and
8:08
for the flare Center set up the first
8:10
key frame go all the way to the 10
8:12
seconds or so and just reposition our
8:15
lens flare to somewhere around here now
8:18
when we hit zero we have this cool
8:20
looking easy to create text with our
8:23
lens flare you can also animate this
8:25
first lens flare set up the first key
8:27
frame for flare Center also here at zero
8:30
frames go somewhere around 10 seconds
8:32
and let's also reposition to the
8:35
opposite side and now when we hit zero
8:38
we have these two cool looking lens
8:40
flares and our scene is looking awesome
8:45
play around with those options you can
8:47
also add more adjustment layers to add
8:49
curves light wipe and so many more
8:52
effects all right guys that was
8:55
everything for today's tutorial hope you
8:57
learned something new in this one like
8:58
always if you haven't subscribed to my
9:00
Channel please hit that subscribe button
9:02
also take a look on my channel for even
9:04
more great tutorials like this one if
9:07
you found this video helpful hit the
9:09
like button and also turn on the
9:11
notification Bell so you never miss any
9:13
of my upcoming video tutorials and until
9:17
next time stay creative and bye-bye
9:22
[Music]
#Online Media
#TV & Video