0:00
so everybody is mad here again from
0:02
filter grid and today I'm going to be
0:04
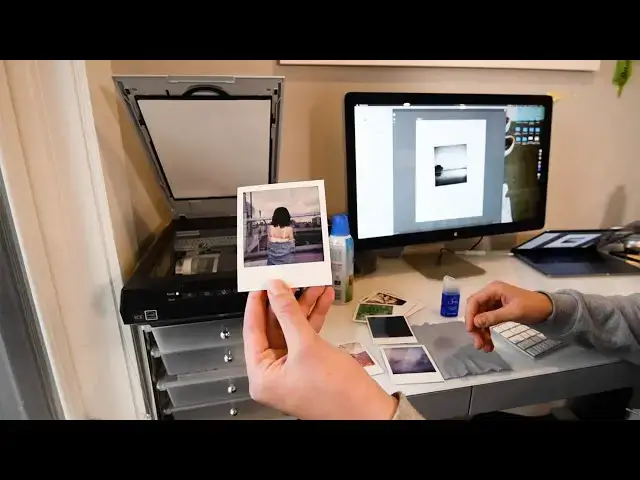
going over how to scan Polaroids at home
0:07
with the apps on perfection v5 fifty
0:09
photo scanner so to get started we're
0:13
gonna just take a look at some different
0:14
Polaroids I'm just gonna pick a few and
0:17
then let's go ahead and load up the EPS
0:23
on perfection or the EPS on scan two
0:25
software all right so to get started
0:34
you're gonna switch it to document mode
0:37
because we're not standing on the
0:39
negatives and then go ahead and load up
0:43
the scanner I usually like to start off
0:45
by getting the dust out off of it and
0:50
then I use some like eyeglass spray or
0:54
alcohol wipes just make sure whatever
0:56
you use is safe on the scanner because
1:00
you don't want to be brewing and ruining
1:01
a glass or anything like that so just
1:04
wipe it down and then give it one more
1:07
pass and then I usually just suck the
1:12
polar right down as in the center as I
1:15
can get it but if it's not perfect I'll
1:18
just drop it later so go ahead and click
1:20
on preview to see where exactly the scan
1:26
is another thing okay
1:30
as you can see you might get something
1:32
that's wrong and that's because I forgot
1:34
to change this setting to document and
1:40
so I'm gonna go ahead and head change
1:44
this to color okay perfect and then I'm
1:48
gonna do another preview just gonna
1:50
still think it looks a bit off we'll
1:52
just start okay so I'll go ahead and
1:57
zoom in to get a better look on it
2:05
alright so now we're a bit more zoomed
2:07
in and you can see all the details on
2:10
the corners the edges you can even see
2:12
the drop shadow just so that you can see
2:16
the whole folder you didn't get all the
2:18
details all the colors so we can go
2:22
ahead and change this to scan it at
2:25
whatever you want whether it's TIFF or
2:27
JPEG I prefer scanning and tip because
2:30
then you can blow things up a bit larger
2:32
but for right now just scan it as a JPEG
2:35
and then I'm gonna go ahead and change
2:36
the file name I usually try and label it
2:40
by year that month and day and then
2:44
whatever the file is so today I'll do 20
2:47
20 30 and then I'll just eat
2:59
as usually charm state consisting the
3:01
numbering and then we're gonna go ahead
3:05
and find the folder see what we get
3:22
question I'm standing at 300dpi right
3:26
now just for this test but you can go up
3:30
as high as you want depending on the
3:31
quality you need so it goes it goes to
3:34
open up the folder right away and there
3:36
you got there's your first Polaroid skin
3:39
looks super nice there's a little bit of
3:44
background stuff that was on my white
3:48
backdrop but you can edit that out of
3:50
post and then so usually from here I'll
3:54
take the Polaroid into Lightroom or
3:56
Photoshop crop it if I want to or just
3:59
readjust everything but let's go ahead
4:02
and scan another Polaroid maybe a black
4:06
and white one this time so usually when
4:10
I'm standing Polaroids
4:11
I try not to scan with the black and
4:15
white setting because it can come out
4:17
wonky a bit like how it just lost so
4:19
let's go ahead and zoom back in on this
4:20
okay so this is what you get when you're
4:27
scanning the black and white Polaroid I
4:29
like to scan it in color for the image
4:32
type because when you scan in black and
4:33
white they can come out a bit wonky like
4:36
this because it doesn't render the
4:38
colors properly in the document mode but
4:41
I've tried grayscale before which gives
4:45
you that full black and white tone
4:47
however just off of a preference thing I
4:51
like scanning the my black and white
4:54
in color for the image type because I
4:57
think it gives it more of a hazy kind of
5:00
brown like painted tone look but that's
5:03
that's purely off of preference so I'm
5:06
gonna go ahead and click scan and then
5:15
I'm gonna go ahead and scan it as well
5:17
in grayscale mode just to give you a
5:20
look all right so now you can see the
5:28
difference between these two so on the
5:31
Left we have the grayscale which gives
5:33
you the full black and white Polaroid
5:35
and then on the right we have a black
5:38
and white Polaroid that would scanned
5:40
with a color image type in apps on scan
5:44
settings which gives you a little bit of
5:47
a brown a brown tone and let's go ahead
5:52
and also scan one of the color Polaroid
5:57
film photos with the grayscale to see
6:01
what that looks like as well so I'm
6:02
going to be using this color film photo
6:04
and I'm gonna go ahead and scan it with
6:07
the grayscale image type let's go ahead
6:26
okay so as you can see with the great
6:29
skill that'll take all the color out of
6:31
it similarly similar to Lightroom or
6:34
Photoshop but you can just do it um
6:36
and apps on scan to get that look
6:38
beforehand so just again here's the
6:41
color difference and I'm gonna go ahead
6:44
and just also play around with some of
6:47
the settings you can change the
6:48
brightness and contrast a bit if
6:51
something looks a bit off some of the
6:55
times you need to be careful though
6:56
because this could also affect the
6:58
border as you can see you lose some of
7:00
the shadow detail right here let's put
7:03
it back to zero you can still see it
7:06
again so just be careful about that if
7:09
you start to play around with the
7:11
brightness and contrast because you
7:13
don't want to lose the film but if
7:15
you're just scanning for example right
7:18
inside then it might be something you're
7:23
looking for but something I would
7:27
recommend is just always keep an eye out
7:29
for the border because many times with
7:34
Polaroids the reason that there are
7:36
physical photo is so that they this
7:38
should it be edited or anything like
7:39
that so I usually for me at least I try
7:44
to keep it as clean consistent as
7:45
possible so to understand this
7:52
so let's go ahead and open this up and
7:55
there you can see the the color Polaroid
7:59
that I shot and I scanned it in black
8:01
and so that's about it that's how you
8:04
scan your Polaroids at home and if you
8:06
have any questions feel free to drop a
8:07
comment below or reach out to me on
8:09
Instagram I'll see you next time guys