Up next in 10

Learn how to develop color (C41) film at home in 20 minutes with Matt Moloney. In this tutorial we'll go over the five steps required for color film developing and also show you the scans afterwards.
Read the full tutorial: https://filtergrade.com/develop-c-41-color-film-at-home/
Follow Matt: https://www.instagram.com/matt_moloney/
Developing Process:
Step 1: Wash Film (0:00-1:00)
Step 2: Developer (1:30-5:00)
Step 3: Blix (5:30-12:00)
Step 4: Wash Film (12:30-16:30)
Step 5: Stabilizer (16:45-17:45)
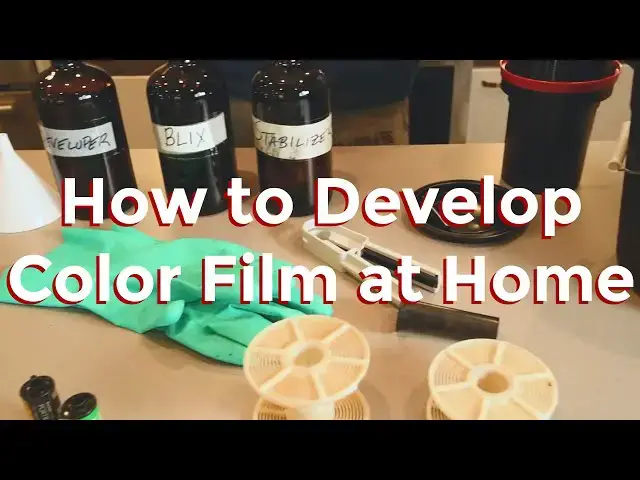
Materials for Developing:
Show More Show Less View Video Transcript
0:00
alright what's up guys my here again
0:02
from filter grid and today I'm gonna be
0:04
going over how I develop my color film
0:06
at home it's just super easy process
0:08
that a lot of people are intimidated by
0:10
just because of the chemicals and all
0:12
the equipment but I promise once you put
0:15
the upfront cost into it and you kind of
0:18
get a better understanding of everything
0:20
it's gonna save you a whole lot of time
0:22
and money so let's go ahead and jump
0:24
into it what you're gonna need to start
0:26
developing your film is first and
0:30
foremost the chemicals these are going
0:33
to be linked in the description it's
0:36
just a classic color 40 or c41 color
0:40
negative film chemistry kit will put a
0:42
picture of it on the screen you'll need
0:45
a funnel a thermometer that is capable
0:49
you know staying in liquids with Celsius
0:52
or Fahrenheit you need a pair of gloves
0:54
that are rubber with you can use the
0:58
disposable ones but I like to use these
1:00
just because you don't have to throw
1:02
them out every time you'll need to film
1:04
a film squeegee a bucket and the dirty
1:09
rag in case you spill anything
1:10
you'll need a Paterson tank and all this
1:14
will be linked in the description we
1:16
have an article on it on the blog for
1:18
how to do everything and it's all links
1:20
through there so if you have any
1:22
questions just go there it's easy to
1:24
find it but the Paterson tank will this
1:27
will all come together you can either
1:28
get one of the small tanks which does
1:32
two rolls of 35 millimeter film or one
1:34
roll of a format film or you can get one
1:37
of the larger tanks it doesn't matter
1:39
something
1:39
but this will come with the agitation
1:42
stick the lid the light seal lid and
1:46
then also all the reels which you can
1:49
load the film onto will be loading on
1:51
the one row of cars porch of 401 of
1:55
security extra 400 today so we'll go
1:58
ahead and do that in a second and then
2:01
lastly though to get the film onto the
2:04
reels you'll either need a darkroom bag
2:07
which you can buy on Amazon and I don't
2:10
really use those but you can also go
2:13
into your bathroom or closet wherever
2:15
it's dark enough and you can use just a
2:20
candle or a bottle opener i pair of
2:22
scissors to open the film and then
2:25
manually load it on the reel just in a
2:28
darkroom once you get it onto the reels
2:31
and put it back into the tank cover it
2:34
with the lid and everything and you can
2:36
do the rest of it with the lights on so
2:39
it's a super easy process you don't have
2:41
to be in the dark the whole time that's
2:43
a big misconception a lot of people have
2:45
so I'm gonna go ahead and load my film
2:49
onto the reels and then I'll meet you
2:51
back at the sink
2:53
[Music]
3:18
[Music]
3:27
[Music]
3:38
they know that I forgot to mention is
3:40
that usually it's good to set your film
3:43
or your uh get your chemicals to the
3:46
right temperature we're going to be
3:48
using about 102 degrees Fahrenheit for
3:51
the developer and the Blitz
3:53
to start so go ahead and get your water
3:56
get your water as hot as it can go and
3:59
then go ahead and put the to the
4:03
developer and the clicks into the bucket
4:05
so that these can get up to 102 degrees
4:08
Fahrenheit as fast as possible
4:10
[Music]
4:17
alright so now I'm going to go ahead and
4:19
go into my bathroom turn off all the
4:22
lights and put a blanket over the edges
4:26
so that no light gets in and then put
4:29
the film on the rails and I'll be right
4:31
back to start alright so I'm back in the
4:36
darkroom and the film is loaded up on
4:39
the reels in my Patterson tank and we're
4:43
gonna be following a process that is
4:45
it's just on the direction sheet that
4:47
comes with the film chemicals that I
4:49
bought that's linked in the description
4:51
we'll post a picture of that here and
4:53
also down below so you can just follow
4:55
it it's super easy
4:57
there's only on five steps first is
4:59
water for about a minute and a half next
5:02
distant developer which is about five or
5:05
so minutes three or four minutes
5:07
I'll put I'll put everything in on the
5:09
screen
5:10
next is the blex which is basically like
5:13
a bleaching process that's for about
5:15
seven minutes or so then there's water
5:17
again rinse for two or three minutes and
5:20
then you finish it off with a stabilizer
5:22
for about a minute
5:23
like I said everything I'll put it below
5:26
in the description and also I'll just
5:28
have it on the screen so it's easy to
5:29
follow let's go ahead and check the
5:33
temperatures to make sure that
5:35
everything is right you're gonna want to
5:37
have the developer and Blix set to about
5:41
102 degrees Fahrenheit a lot of times it
5:48
takes a while to get to the exact
5:50
opposite of looking for
5:51
and I've experimented with using like
5:53
anything from between 90 degrees
5:55
Fahrenheit to 110 degrees and you're not
5:59
going to see that much like a huge
6:01
difference regardless of what your
6:03
temperature set at but I know there are
6:05
a lot of photographers out there that
6:06
like to be kind of precise with their
6:09
temperatures but it's up to you so we're
6:13
at about 98 degrees so I'm going to go
6:16
ahead and get started like I said the
6:18
first step is water and the water should
6:21
be about 100 degrees as well around
6:25
there so just use your thermometer and
6:28
check it out and then we'll go ahead and
6:30
start the target I'm just going to be
6:34
using my phone for stopwatch timer you
6:40
can buy one of the darkroom timers but
6:42
seems like a bit of a wasted morning in
6:45
there all right so we're at about a
6:49
hundred degrees
6:55
and I'm gonna go ahead and just fill up
6:58
the bucket with water I usually start
7:00
the timer
7:01
after the bucket on the floor
7:11
okay so the timer started and I'm gonna
7:14
leave this go for the first minute
7:18
from zero until one minute and then
7:21
we're gonna dump the water out and
7:23
switch in with the developer okay so my
7:29
next step is usually just put the gloves
7:31
on because we're about to start working
7:33
with the chemicals now that I know my
7:36
chemicals are at the right temperature I
7:38
usually like to give them a good shake
7:41
just to make sure everything's mixed
7:43
around and not settle at the bottom
7:46
we're coming in at about a minute right
7:48
now so go ahead and turn off the water
7:54
[Music]
7:56
I'm gonna just dump the water out
7:58
sometimes you'll see a little bit of
8:00
color depending on what film you might
8:03
get a rat or brown tent but usually
8:06
it'll just be clearer a little orange
8:08
now we're gonna just dump the developer
8:11
in and be mindful of what time you're
8:13
putting it the developer in I usually
8:18
I'm done putting the developer in my
8:21
tank by one minute and thirty seconds
8:23
and I start my agitation for ten seconds
8:29
and we're gonna be leaving this in the
8:33
developer until five minutes and we're
8:37
gonna be agitating every 30 seconds and
8:40
I'll show you what an agitation will
8:42
look like once you're done with the
8:44
agitation stick you can go ahead and put
8:47
the lid on
8:54
make sure it's all the way closed you
8:57
don't wanna spill in and then after that
9:01
first 15 seconds so I started at 1
9:06
minute 30 seconds I added with the
9:09
agitation stick until 1 minute and 45
9:12
seconds and then every 30 seconds after
9:15
that you're gonna give on just some some
9:19
flips with the Paterson tank to make
9:21
sure that the film doesn't get stuck or
9:23
kind of settle at the bottom and you
9:27
don't want to shake the tank you just
9:29
want to kind of gently rotate it around
9:31
do this about four terms and then I tap
9:34
it and leave it and then once I'm done
9:38
tapping it I wait another 30 seconds and
9:41
then I repeat that same process I'll
9:44
just keep doing that until I hit the
9:45
five minutes and then I've dumped the
9:48
developer back into the back into my
9:51
glass because it's reusable for a good
9:54
amount of times and after that I'll be
9:58
using the Blitz and I'll show you that
10:00
in a little bit at four minutes and 15
10:03
seconds so 45 more seconds this will be
10:05
my last agitation and then I'll let it
10:09
sit for a little like 30 more seconds
10:11
and then dump out the developer at this
10:17
point I usually like to start washing
10:20
off the top just to make sure nothing
10:23
cross-contaminate so we're at five
10:33
minutes I'm going to go ahead and dump
10:35
out the developer back into the
10:36
development thing and then next I'm
10:50
going to be putting the blech into the
10:53
container make sure that's well shaken
10:55
up as well so the Plex I usually do from
11:05
about five minutes and thirty seconds
11:08
until twelve minutes with the same kind
11:11
of repeated process with the agitation
11:13
stick for the first ten or so ten to
11:17
fifteen seconds and then put the lid on
11:22
and do flip agitations every 30 seconds
11:26
after that
11:30
[Music]
11:35
[Music]
11:41
a lot of people really like being kind
11:45
of precise with their timing and
11:46
everything but it doesn't have to be
11:48
perfect it'll get the job done kind of
11:50
if you mess up a little here and there
11:53
if you're a few seconds off it's not the
11:54
end of the world if anything you might
11:57
see some different results but it's not
12:00
such a difficult process that if you
12:03
mess up a few seconds then you won't be
12:06
able to see your photos at all so kind
12:09
of eliminate that fear um they need to
12:17
be worried about with the flicks not as
12:19
actually sure what the chemicals inside
12:21
of the the blips are but they tend to
12:26
kind of bubble up when you flip the
12:28
container over like a soda would so
12:31
every once in a while you kind of have
12:33
to burp it just open up the lid and let
12:36
some of the air out so that it doesn't
12:37
like burst on you and spill everywhere
12:41
just blips is not a good chemical to
12:44
just spill on on your hands or anything
12:47
like that
12:48
[Music]
13:06
all right so we're back and with that
13:09
about 11 minutes and 15 seconds so I'm
13:12
gonna go the next step is washing the
13:16
felt because you don't want anything
13:18
blech left on film when you put a
13:21
stabilizer on some stabilizer on it so
13:24
what I'm doing now is just getting the
13:27
the water set to about 90 to 100 degrees
13:34
Fahrenheit because we're gonna be
13:37
washing it for about three minutes after
13:40
this and then after that will be our
13:43
last step so let's go ahead and dump out
13:50
[Music]
14:03
and then the next step is gonna be water
14:06
we're at almost 90 degrees and I'm sure
14:12
it's heating up so I'm going to go ahead
14:13
and start it I'll leave it there until
14:16
the time it hits about 15 to 16 minutes
14:19
you can leave it for longer water the
14:22
washing processes don't really matter
14:23
but I like to give it at least two or
14:25
three minutes to make sure you kind of
14:28
get everything you need to out you can
14:29
dump the water out and then restart it
14:31
every once in a while too as well just a
14:33
fresh bath and then I'll check back in
14:36
and about five or so minutes and we'll
14:39
be doing the last step which is the
14:42
stabilizer which can actually be at room
14:44
temperature so I just like to shake that
14:47
out beforehand and then that's the last
14:49
step all right so what about 16 minutes
14:53
and I'm just gonna finish up with the
14:56
water go ahead and dump it out
15:00
and we're going to the final step which
15:03
is a stabilizer go ahead and shake that
15:07
off one more time you can dump it in and
15:12
then the first 15 seconds so I'll do
15:15
from 16 minutes and 45 seconds until 17
15:21
minutes flat I'll be agitating with the
15:23
agitation stick and now I'll let it sit
15:25
for another 45 seconds and then after
15:29
that we can go ahead and dump the
15:31
stabilizer and check on the phone all
15:48
right so we're rounding about a minute
15:50
with the stabilizer in I'm going to go
15:52
ahead and dump it out
16:03
let's go ahead and check out the film
16:11
awesome so we'll take off the first row
16:14
sometimes they might get caught on the
16:16
reels a little bit one of my reels is
16:18
kind of broken so sometimes it gets
16:21
stuck but you can see the photos now go
16:30
ahead and use the squeegee to wipe all
16:33
the stabilizer off so you don't get any
16:36
water marks or anything like water broom
16:39
[Applause]
16:49
all right and then the next step is
16:51
gonna be just to hang the film up I like
16:54
to do it in the bathroom as well because
16:56
it's the area in my house with the least
16:59
amount of dust so you can use um weights
17:02
to hold the film so that it kind of
17:05
dries out nice and flat and straight but
17:08
I usually just kind of hang it by the
17:10
top and make sure you don't get any
17:12
water or any duster don't don't really
17:16
get anything on it you can just keep it
17:18
as clean as possible
17:19
so I'm gonna go ahead and hang a first
17:21
roll up
17:27
[Music]
17:45
so now you can see the photos and you
17:49
can see there's still fluids all over
17:52
these so we need to use the the film own
17:56
thing off of it before everything is dry
17:58
if you don't use a squeegee before you
18:01
hang it dry you will have a lot of water
18:04
burns if you try and scan the photos
18:08
which is it can be a cool look if that's
18:11
what you're going for but just something
18:13
to be cautious oh just give it one of
18:18
three classes with the squeegee and I
18:21
usually kind of knock off the excess
18:24
liquid stock in and squeeze you all
18:29
right so let's go ahead and take a look
18:31
at the negatives and zoom in on this you
18:34
get these top ones some fisheye shots
18:39
with these these few shots awesome
18:49
all right so that's it for how much
18:51
develop my color film at home make sure
18:53
you check out the tutorial that we have
18:55
linked below on the blog if you have any
18:58
other questions you can leave a comment
19:00
below as well also if you're interested
19:02
in seeing how I scan
19:03
go ahead and leave a comment because
19:05
we're thinking about making a video for
19:07
that but anyways we'll see you next time
19:09
guys peace out
19:12
[Music]
19:20
[Music]
19:28
[Music]
19:34
[Music]