Up next in 10

Learn how to use your new DJI Mini 4 Pro drone in this getting started video.
In this walkthrough we cover how to initially set up your drone, charging the device, plugging the battery and MicroSD card in, connecting the RC and drone together, and much more.
Watch this video if you've been looking to take your first flight with the Mini 4 Pro from DJI and want to learn the basics quickly.
Read the full guide: https://filtergrade.com/dji-mini-4-pro-drone-getting-started-guide/
Featuring Mike Moloney https://www.instagram.com/mjmolo/
Shot by Moloney Creative Agency: https://moloneycreativeagency.com/
Filmed by Matthew Moloney https://www.instagram.com/moloneymatthew_/
Check out LUTs for DJI Drones on FilterGrade here: https://filtergrade.com/?s=dji+luts&post_type=product&title=1&excerpt=1&content=1&categories=1&attributes=1&tags=1&sku=1&ixwps=1
View all LUTs: https://filtergrade.com/product-category/video/luts/
View All Premiere Pro Presets: https://filtergrade.com/product-category/video/premiere-pro-presets/
View all RED LUTs: https://filtergrade.com/red-cinema-camera-luts/
View all Arri LUTs: https://filtergrade.com/arri-luts/
View more Animations and Stock Clips on FilterGrade: https://filtergrade.com/product-category/video/animated-icons/
Show More Show Less View Video Transcript
0:02
[Music]
0:08
hey what's going on YouTube it's Mike
0:10
here from Filter grade again and we've
0:12
got a great new video today for you
0:14
recently we bought the DJI mini4 Pro
0:17
drone and we've been having a ton of fun
0:18
with it flying it around learning
0:20
different shooting techniques how to use
0:22
it uh enjoying the advanced battery life
0:25
which this drone has that a lot of other
0:26
drones don't and so today we're putting
0:29
together a video for you on just the
0:30
basics how to get started how to charge
0:32
it how to turn everything on connect it
0:35
make sure you can fly safely and
0:37
ultimately get great footage so let's
0:39
get right into
0:41
it all right so now we're going to get
0:43
into unboxing your drone once you get it
0:45
the first thing you'll find in the
0:46
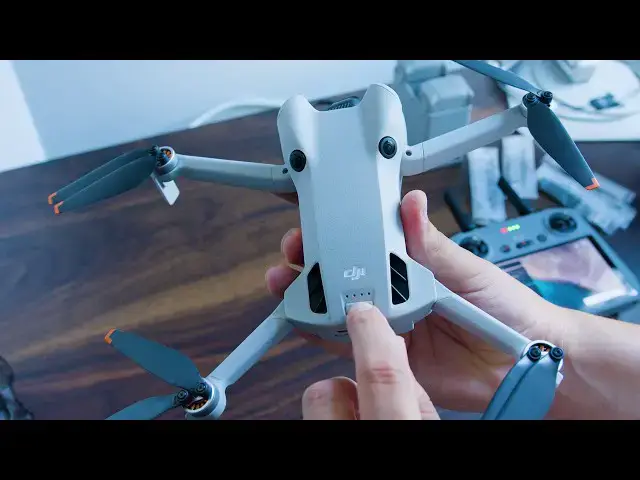
package is the Drone itself all you need
0:49
to do for this is add a Micro SD card
0:51
into the back of it and screw on the
0:53
wings those will come with the package
0:55
you'll find them and you can attach them
0:56
very easily the next thing you'll want
0:58
to do is make sure all the batteries are
1:00
charged and also make sure the RC
1:02
controller is charged you charge this
1:04
separately and that just controls your
1:06
flying time and everything like that the
1:09
batteries themselves plug directly into
1:10
the bottom of the Drone and that
1:12
controls how long it can stay in the air
1:14
other than that the only other things
1:15
you'll get are going to be some
1:18
protective casing for your drone that
1:20
you can put on while you're traveling
1:22
but you don't really need to do that
1:24
necessarily as long as you have it very
1:25
safe and
1:27
secure now let's move on to setting up
1:29
the DJI Mini 4 Pro when you're first
1:32
getting started the number one thing you
1:33
need is batteries so charge those up
1:36
you'll put the the charging dock which
1:38
is right here into the wall this uses
1:41
USBC charging and it doesn't actually
1:44
come with a physical wall plug so use
1:47
one of your Apple Chargers or Android
1:49
Chargers or whatever wall plug you have
1:50
that supports a c Toc or a Toc cable and
1:54
then your device will charge C Toc is
1:55
going to charge it faster so keep that
1:57
in mind once you charge your battery
2:00
also turn on the RC controller and this
2:03
is going to allow you to connect the
2:05
Drone to the controller so you can fly
2:08
safely and sync up your
2:11
footage once you've powered on your
2:13
aircraft now we're going to connect it
2:15
to your RC controller first unfold the
2:17
front and rear aircraft arms make sure
2:20
you're careful when you do this cuz
2:21
they're pretty sensitive and one of the
2:24
the two of the arms will fold down and
2:25
you don't want to pull them off and
2:27
they'll break very easily so be careful
2:29
second you're going to remove the gimbal
2:30
protector this goes over the camera and
2:32
the Gimbal and it just keeps it safe
2:34
third Slide the battery into the back of
2:36
your drone and once you do that you'll
2:39
short press the aircraft power power
2:41
button and then long press it and kind
2:43
of hold it and when you hold it down
2:44
you'll see all four of those lights
2:46
light up that's how you know the Drone
2:47
is on then after it turns on you'll see
2:50
the the wings kind of like twitch and
2:52
flutter and then you'll see on the RC
2:54
controller that it should automatically
2:56
connect to your drone as long as you're
2:58
on a Wi-Fi network or if you're out in
3:00
public it'll work with hot spots on your
3:03
phone and sometimes with just 4G setting
3:06
up the controller this is what it's
3:07
going to look like so the first thing
3:08
you're going to do is pull the little
3:11
knobs off the back of your controller
3:13
they're hidden
3:14
behind neatly on this RC controller so
3:17
you can always store them and they won't
3:18
get broken if you put it back in the
3:20
package but you just grab the left and
3:22
right
3:23
controller put it on and screw it in
3:25
it's pretty simple just doing that right
3:28
now and as soon as you finish attaching
3:30
it then you can start practicing with
3:32
the different
3:33
motions before you do that though and
3:36
before you connect to the Drone make
3:37
sure your antennas are up this will
3:38
increase your signal when you're flying
3:40
there's been a few different times where
3:42
I've been flying and I've lost signal or
3:44
things like that and if you're not
3:46
careful your drone truly could you know
3:47
fall or other issues could occur so
3:50
always try to have the antennas up and
3:51
make sure you're in a place where you
3:53
can be as close or at least as like
3:56
pointed towards your drone as possible
3:58
once you do the antennas the next thing
4:01
you're going to do is play around a
4:03
little bit with the the joysticks so the
4:05
left joystick is going to focus on
4:07
altitude and rotation what that means is
4:09
if you go up and down it's going to
4:11
literally go up and down the height of
4:13
the Drone rotation is left and right so
4:15
if you go left or right the Drone will
4:17
spin in a
4:18
360° uh track the right joystick is
4:21
going to focus on forward backward and
4:24
sideways movement so if you're looking
4:26
to get a shot of let's say coming into
4:29
into something like a house or a boat or
4:32
an object you're going to push forward
4:34
same goes for pulling back and if you
4:36
like to get shot sideways you move
4:38
sideways with the controller once you
4:40
start to get more advanced using this
4:42
drone which I'm still not quite there
4:44
yet it's taken me some time we've only
4:46
had it about 3 months then you can
4:48
combine your movements between your
4:49
hands have maybe the Drone going up and
4:52
forward at the same time up and backward
4:54
all these different combinations and
4:56
that will help you get more cinematic
4:58
shots and beautiful shots and so so in a
5:00
future video we're going to go over
5:01
different Advanced Techniques but we
5:03
kind of have to learn them first you
5:05
know so there's a few things on the
5:07
screen that you're going to want to
5:08
focus on the first simple one is
5:11
recording when you record you're going
5:13
to click the red button on the right
5:15
side and you just tap it once you'll
5:17
hear a little a little sound and then
5:20
you'll know that it's recording and
5:22
you'll see a countdown timer you'll see
5:24
a timer under the red record button that
5:26
is going up based on how much time
5:28
you've been filming
5:30
next you can see a few other things next
5:32
to that where you can change the focus
5:34
and the zoom if you click the zoom
5:37
button you can go between one two and
5:38
three times zoom zoom excuse me and then
5:41
if you click the AF button that's how
5:44
you can change the different Focus
5:45
formats they have I don't know what the
5:47
other one is called but it looks like
5:49
they have AF or they have a landscape
5:51
option outside of that most of the other
5:54
settings you're going to want to focus
5:56
on before you take flight these will be
5:58
things like your resol resolution and
6:00
your frame rate I usually will shoot in
6:02
4k 30 frames sometimes you might want to
6:04
shoot in 60 or if you want to lower it
6:06
to 1080p you can also do that if you
6:08
want to save some space the only other
6:12
editing stuff I usually do is you can
6:14
adjust the exposure um and bump it up or
6:17
down there is a way to change it from
6:19
Auto to PR mode where you will set all
6:21
the different settings I personally have
6:23
not experimented with this a lot yet
6:25
because you don't really need it the
6:26
auto mode is pretty high quality there's
6:28
been a few uh circumstances where it
6:31
might be a little too dark or too bright
6:33
but typically it will adjust
6:34
automatically based on where you're
6:35
filming and it's kind of tricky to do
6:38
that midair so I'd recommend leaving
6:40
Auto on unless you're very sure you need
6:42
to adjust it other than that the only
6:45
other screen controls that you should
6:47
really pay attention to are going to be
6:49
in the top right and these are less
6:51
controls and more about um sort of like
6:55
indicators so there's the timer of how
6:58
much battery life you have left
7:00
as you can see on mine it has almost
7:02
full battery life but it slowly goes
7:04
down and you can keep track of this
7:05
while you're flying next to that you'll
7:07
see the RC signal this just gives you a
7:10
little bit of an indicator of how good
7:12
the connection is between your drone and
7:13
the RC controller which is very
7:16
important because you do not want that
7:17
to fade to the right of that there's a
7:19
few icons that are meant to show the
7:21
amount of satellites in the area and
7:23
right now where we are we're inside I
7:25
don't think it can read it it's showing
7:27
very weak zero GPS signals
7:30
I typically will not recommend filming
7:32
if you ever get that outside try to go
7:34
somewhere and try to film during
7:36
daylight so that the satellites are
7:38
present for some reason at night
7:40
something with the sensors throws it off
7:42
so it can be pretty risky and you may
7:44
not have that GPS
7:45
connectivity one final thing to look for
7:48
on your remote controller screen is
7:49
going to be the distance and kind of
7:51
like the mapping features it's in the
7:53
bottom left of your screen and it's
7:55
pretty simple when you're flying the
7:57
height and the distance will show so you
7:59
always how high or low you are and how
8:01
far away you've gotten it it kind of
8:03
gives you a Direction but generally
8:05
speaking this is just good as a gauge of
8:07
how far away your drone is or how close
8:09
it
8:10
is in a different part of the video I'm
8:12
going to walk through taking off and
8:13
some of those features but this is more
8:15
just an overview of getting started some
8:17
of the basics with the controllers later
8:19
on I'm going to talk about some of these
8:21
other parts of the RC uh the remote
8:24
control on the back where you can change
8:26
the camera you can change the zoom and
8:28
you can change the
8:30
angle okay now I'm going to go over a
8:32
few more parts of the remote controller
8:34
where you need to know just in case
8:36
while you're filming you can use the
8:38
touchcreen if you want to take a picture
8:40
or record a video but some people prefer
8:42
the bumpers and so if you want to record
8:44
video the left bumper up here is going
8:47
to be the one that you click and that
8:48
starts recording or stops recording if
8:51
you want to take a still picture while
8:52
you're up in the air the right bumper
8:54
does that now behind that you'll notice
8:56
two slider Wheels the left slider wheel
8:58
is for adjust justing the camera angle
9:00
whether you want to look up or look down
9:03
this is really good when you're flying
9:04
overhead stuff and you want kind of like
9:06
that 45° angle down so you can see a
9:09
little bit of it but also kind of not be
9:11
looking just straight out the right side
9:13
is for Zoom this this drone particularly
9:16
has a five time zoom which is pretty
9:18
insane so if you want to zoom in or out
9:20
you just adjust the right slider and
9:22
then the final two parts they're like
9:24
little bumpers on the back you're going
9:26
to see C1 and C2 C1 is going to adjust
9:30
your camera to be either straight out or
9:32
straight down so essentially it's a a
9:34
90° angle down that it just changes
9:37
instantly when you click it so this
9:38
works really well if you're trying to do
9:40
those top down drone shots where you're
9:42
coming up or if you're like flying above
9:44
stuff and just showing what's right
9:45
below you and then the other bumper C2
9:50
is for switching the camera from
9:53
landscape to portrait mode and so this
9:55
can be good if you're going to film some
9:57
social content it might be good if you
9:58
want to film different angle of
10:00
something I'm not really sure but it's a
10:02
a handy feature you just click that
10:04
button it'll switch and then you click
10:06
it and it switches right back so it's
10:08
it's very fast and reliable there's a
10:10
few more uh buttons on the home screen
10:14
they are for different modes like sport
10:16
mode with the Drone or cinematic mode I
10:19
haven't used these yet but we're going
10:20
to make a tutorial in the future on more
10:22
advanced features of this drone and
10:23
that'll be in it so make sure you
10:24
subscribe to the channel and keep up
10:26
with our videos so you can see that when
10:27
it comes out
10:29
so I just want to say a few quick tips
10:31
for new users before we wrap up this
10:33
video when you're starting out always go
10:35
somewhere with a lot of open space I
10:37
made this mistake one of my first drone
10:39
flights ever I was in a place where
10:41
there was netting around and I remember
10:43
specifically the Drone I accidentally
10:45
flew it into the nutting cuz it was
10:47
windy and I did happen to catch the
10:49
Drone but that could have been
10:50
catastrophic and this was before I got
10:52
the DJI mini4 Pro but I just wanted to
10:54
mention it as a kind of point of
10:57
remembrance from when I was a beginner
10:59
so remember Open Spaces try not to go on
11:02
a windy day the Drone is pretty powerful
11:05
and it can counteract the wind but
11:06
obviously it's easier without the wind
11:08
and then other than that I would say fly
11:11
during the day in the beginning you know
11:12
once you get more advanced you can try
11:14
Sunset maybe Sunrise other things like
11:17
that but if it's low light it's a little
11:19
harder to use the Drone it's also not
11:21
going to have as good of a connection so
11:23
for your Safety and Security I recommend
11:25
flying midday or during the day when
11:27
it's plenty of light other than that
11:30
stick with some simple shots in the
11:31
beginning have fun I recommend recording
11:34
your entire flight rather than getting a
11:36
bunch of Clips it can be tedious to keep
11:38
turning on and off the record button and
11:40
it's honestly not the ma like they're
11:42
not massive file sizes if you're worried
11:44
about that shoot in 1080P get the whole
11:47
flight cut it up when you're done in
11:48
Premiere Pro or Da Vinci resolve and
11:50
then you have a great video okay that's
11:53
wrapping up our video about the DJI Mini
11:55
4 Pro and this is all about the basics
11:57
so this video we covered how to get
11:59
started how to turn on your drone
12:01
connect it to the remote controller
12:03
charge it flying and everything else in
12:06
the next future video about the DJI
12:08
mini4 Pro we're going to go over some
12:10
more advanced things like cinematic
12:11
flying panoramas sport mode and a lot of
12:15
other fun cool features that you learn
12:16
once you kind of dig it in the meantime
12:18
though do me a favor like this video
12:20
comment below about how your experiences
12:22
with the Drone And subscribe to our
12:24
channel to see more videos thanks so
12:26
much
12:53
[Music]
12:59
for
#Arts & Entertainment