Up next in 10

This tutorial was contributed by creator Softoni! Subscribe to their channel: https://www.youtube.com/@softonimotion
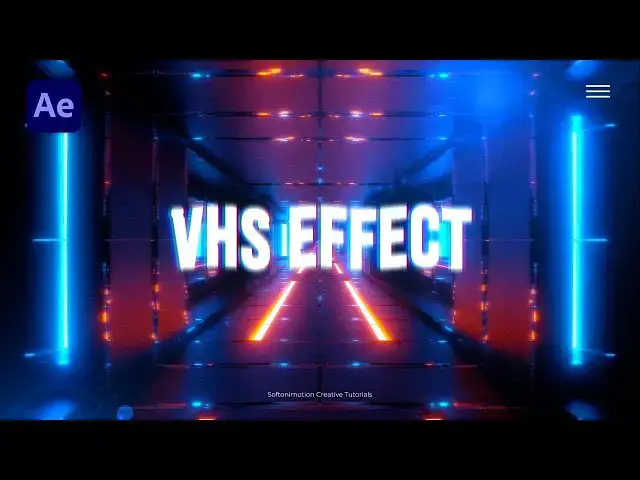
Here's more from the creator: 'Hello, everyone! Get ready to step back in time with my latest After Effects tutorial, where we'll be creating a nostalgic VHS CRT Effect.
⚙️ What to Expect:
Discover how to recreate the vintage VHS CRT effect using After Effects, bringing a touch of retro charm to your videos.
Learn essential techniques to simulate the distinctive characteristics of old VHS tapes and CRT monitors, including scanlines, noise, and color distortion.
Unlock step-by-step instructions to master the art of crafting authentic VHS CRT effects, allowing you to transport your audience to a bygone era of analog nostalgia.
👍 Stay Tuned:
If you're excited to add a retro flair to your videos and relive the glory days of VHS, hit the subscribe button and give the video a thumbs up. Your support fuels the creation of more nostalgic content!
🚀 Let's Get Started:
Join me as we embark on a journey to recreate the VHS CRT effect in After Effects, where we'll bring the warmth and fuzziness of analog technology back to life.'
Show More Show Less View Video Transcript
0:00
hello guys soft Tony here welcome back
0:02
to my channel and in today's video we
0:04
will be creating a VHS text effect with
0:07
a cool looking scene and achieving great
0:09
results in a simple way step by step we
0:12
will create the vintage looking
0:13
animation and this is truly a technique
0:16
that everyone can use and before we
0:18
begin make sure to subscribe to my
0:19
channel hit the like button and turn on
0:21
the notification Bell so you don't miss
0:23
any of my future video tutorials and
0:26
without any further Ado let's jump into
0:28
after effects and start
0:33
[Music]
0:42
creating all right we're here in After
0:44
Effects and as always let's create new
0:46
composition hit on this little icon or
0:48
control or command plus n and this is
0:50
going to be final like usual 9020 x 1080
0:54
and for this tutorial we will do 24
0:56
frames per seconds and for the duration
0:58
let's go to around 15 seconds hit okay
1:00
and now let's drag and drop the media of
1:02
course you will import your own I
1:04
already have this free footage from
1:06
pixels.com all right and now let's make
1:09
this media 01 kind of old and noisy
1:12
footage go here in the facts and preset
1:13
and first effect is going to be noise
1:16
just Dragon drop on the media and for
1:18
the amount of noise I will do maybe to
1:20
around 20% our next effect is going to
1:23
be cross blur CC cross blur Dragon job
1:26
also on the media 01 and for the X
1:29
radius I will do maybe around 20 and now
1:32
as you can see our media is looking
1:34
different than our first and untouched
1:37
original footage all right now it's time
1:40
to create our text I will hit control+ t
1:42
or go and hit this little icon and I
1:45
will just type random text
1:48
VHS effect okay I'm using this Bas no
1:51
font of course you can use uh whatever
1:53
font you want okay go here on a line
1:55
align it to the center if you can't find
1:57
a line just go window you will find a
1:59
line here
2:00
okay now go here again in the effects
2:02
and preset find wave warp effect drag
2:05
and drop onto the VHS text all right and
2:08
for this wave type let's change to noise
2:11
and for the wave height type here one
2:14
and for the wave WID 150 you can also
2:17
play around with the speed I will do
2:19
0.1 all right now let's duplicate this
2:21
wave warp effect hit control+ D or go
2:24
edit and then duplicate and for the wave
2:26
height instead of one let's Ty five and
2:29
for the wave type change from noise to
2:31
sign like so and for the speed you can
2:34
also hear play around I will do maybe
2:36
0.5 and now when we hit zero we have
2:39
this cool effect of our VHS text all
2:45
right now let's precompose this VHS
2:47
effect go right click to precompose this
2:49
is going to be just text 01 and then hit
2:53
okay and for the first effect this is
2:55
going to be fail effect on our new
2:57
composition drag and drop change color
2:59
to p pure white color like so and let's
3:02
also add past box blur Dragon drop onto
3:05
the new composition and let's also
3:08
change here blue Dimensions from this
3:10
first option to the vertical and for the
3:12
blue radius type five and iterations
3:15
change to 7 and now here as you can see
3:18
in the preview we have this Blu-ray lock
3:20
of this VHS text now hit t for the
3:24
opacity I will do 50% and also change
3:27
blending mode from normal to add like so
3:31
and let's duplicate this text o1 hit
3:33
control+ D hit T4 opacity this is going
3:35
to be 60% and let's hit control+ D once
3:38
again and let's change this one to 70%
3:41
now let's duplicate this text o1 this is
3:44
going to be our main text like so you
3:46
can also change the color here change
3:48
here whatever fits to you all right and
3:51
just delete this fast box blue effect
3:54
for this first text 01 now hit zero and
3:58
our effect is looking looking great next
4:01
thing what we're going to do is to
4:02
create solid layer go right click to
4:04
create new solid layer okay I will just
4:07
rename this one to FN for fractal noise
4:10
we will create here fractal noise effect
4:12
and this one we will use as a reference
4:14
hit okay go here in the effects and
4:16
preset find fractal noise effect drag
4:19
and drop onto this solid layer and here
4:21
let's make further adjustments for the
4:23
contrast let's type 300 brightness minus
4:27
100 okay complexity leave it down to two
4:30
open up this transform option andcheck
4:32
this uniform scaling and for the scale
4:34
width let's go to around 200 okay and
4:37
for the scale height let's try maybe 40
4:40
now let's animate this Evolution hold
4:43
alt on your keyboard and left Mouse
4:45
click on the evolution stopwatch and
4:47
type here time asterisk 1,000 okay now
4:52
hit zero we have this type of animation
4:55
and let's also animate this scale with
4:57
hold alt left Mouse click and type here
5:00
expression wiggle open and close
5:03
brackets and type 2 comma 10 okay and
5:07
also for the final step let's animate
5:09
offset turbulence set up the first key
5:11
frame here at zero frames and then go
5:14
all the way to around 15 seconds and for
5:16
this y parameter let's type
5:19
3,000 hit zero again to show the preview
5:22
we have this reference fractal Noise
5:24
Okay now we can turn this off and let's
5:27
add adjustment layer go right click to
5:29
create adjustment layer all right and go
5:32
here in the F and preset and type
5:34
displacement map effect drag and drop
5:36
onto the adjustment layer and here let's
5:39
also make further adjustments change
5:41
this vertical displacement to zero all
5:44
right and for the reference we will use
5:46
this fractal noise solid layer okay also
5:49
change this from source to effects and
5:50
mask and now when we hit zero we have
5:53
this really great looking VHS text
5:56
effect in every moment you can go here
5:58
in fractal noise change options to get
6:02
the look that you want for me this is
6:04
looking cool and for the next step let's
6:07
also precompose everything all the way
6:09
from this text o01 to the fractal noise
6:11
select everything and then go right
6:13
click precompose this is going to be
6:16
Text Plus elements hit okay and as you
6:20
can see this is looking great if you
6:22
want to add a bit of colors here you can
6:25
just duplicate this text plus elements h
6:27
control+ d hit T4 pity change it to 40%
6:31
and for the blending mode instead of
6:33
normal change here to screen and let's
6:35
add our next effect type here shift
6:38
channels drag and drop onto this first
6:40
text plus elements you can of course
6:42
change colors maybe I don't know I'll do
6:44
just this random color red and now here
6:47
in the shift channels effect let's
6:49
change few options take Green from Green
6:51
change to full off also this take Blue
6:54
from also change to full off and hit P4
6:57
position let's type here 900 and 70 or
7:00
move the position slightly to the right
7:02
or to the left and as you can see we
7:04
have this cool looking red color now
7:06
let's duplicate this once again let's
7:09
change here composition color and also
7:11
let's make another adjustment here take
7:14
red from Red just go here and fall off
7:17
and for the second option change here of
7:19
course green now hit P4 position and
7:22
instead of
7:23
970 type 950 now we have also this cool
7:27
looking green color let's do duplicate
7:29
this once again change this one to I
7:32
don't know blue like this and let's
7:35
repeat everything go here on this Stay
7:37
Green from change to full off and also
7:40
take Blue from find here blue now hit P4
7:43
position and instead of 950 let's try
7:47
940 like so and we have also this cool
7:50
looking blue color and now when we hit
7:53
zero our VHS effect is looking great one
7:58
thing that we have also forgotten to do
8:00
open up our text we can also animate it
8:02
open up this Little Triangle go to
8:04
animate find here scale and let's also
8:08
set up the first key frame for scale
8:10
here and type zero and then go to maybe
8:13
1 second or so and let's type here 100
8:16
now go here also on ad find here
8:19
property and let's find BL okay and
8:22
let's also go here at zero frame set up
8:24
the first key frame type 100 and then go
8:26
all the way to 1 second and let's type
8:29
for the blur zero now select all of the
8:31
four key frames go right click key frame
8:34
assistance and let's go here and find
8:37
easy is option or just hit F9 on your
8:40
keyboard and now when we hit zero we
8:42
have also animation of our VHS effect
8:45
and in the final composition hit zero
8:48
and this is looking really great all
8:52
right guys that was everything for
8:53
today's tutorial and as usual I hope you
8:55
learned something new in this one and if
8:58
you haven't subscribed to my channnel
8:59
Channel please consider to subscribe and
9:01
also if you found this video helpful
9:03
please hit that like button also take a
9:05
look on my channel for your more great
9:07
tutorials like this one and you can
9:09
leave me also comment Down Below in the
9:11
comment section also all the links are
9:13
in description so until next time stay
9:17
creative and bye-bye
9:21
[Music]