0:00
Hi, welcome to day eight of the mixed
0:03
media craft card challenge. 30 days.
0:06
I've set myself 30 cards. So, we're
0:08
going to use all those craft supplies
0:10
you've got, things around the home. And
0:13
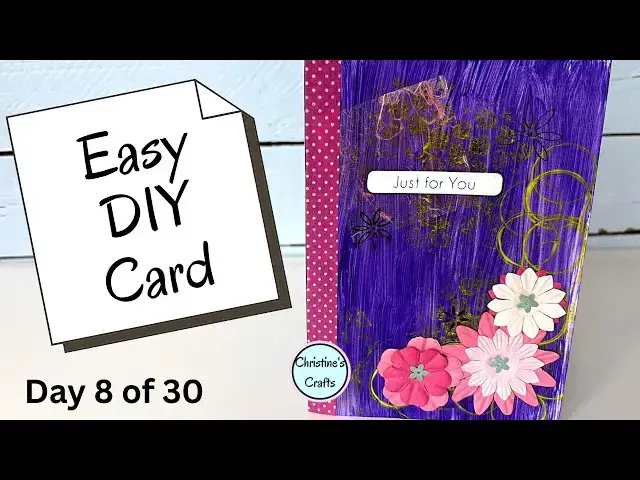
this is the card we're making today. So,
0:18
So, all I'm using is some ordinary card.
0:21
Now, it could be a card blank you've
0:22
bought or just a piece of card you've
0:24
folded in half. Mine's 7 in x 5 in 5 in,
0:27
but you can do any size you like. And
0:29
all I'm going to do is take some acrylic
0:31
paint and cover the front. Now, I quite
0:34
like the brush strokes. And you'll see I
0:35
keep adding water so it's not just one
0:38
solid mass of dark purple. Uh you could
0:41
use watercolors. You could use pencil
0:43
crayons, felt tips. It's entirely up to
0:46
you, but I'm just trying to get that
0:48
block of color um as a base and then we
0:52
can build on top of it.
0:55
And as I say, I like those vertical
0:59
And then to add a little bit of detail,
1:01
I'm going to take some yellow acrylic
1:03
paint. And then I'm going to add that
1:07
So the first thing I'm going to do is
1:10
use some bubble wrap. You know the stuff
1:12
that your parcels come in. And I'm just
1:14
going to put a little bit of the yellow
1:16
acrylic on there and then use it like a
1:20
little stamp just to give some texture.
1:23
I'm not being fussy about how much goes
1:25
on or indeed how hard I press it on. So,
1:27
we'll get some different effects. So,
1:29
gently, we'll get those nice spots.
1:31
Press it on quite hard, you'll get the
1:33
paint in between. And if you don't keep
1:36
putting more paint on, you get less and
1:38
less. And then I'm going to use an old
1:41
cotton bobbin, but you could use a
1:43
toilet roll or indeed anything you've
1:44
got around the house. So, go get looking
1:47
and use it to simply make some circles.
1:51
Now, you can go find things of different
1:53
shapes and use them as little stampers
1:55
like that. Do you remember cutting out
1:57
potatoes to give you the shapes you
1:59
wanted? Well, it's the same idea. And
2:02
I'm just adding it in one corner as I
2:04
think that's quite sweet. And to build
2:07
up, which is all we're doing here is
2:09
just building up more effects to give it
2:11
more depth. I'm using a stencil and I'm
2:14
purely using a black mark pen. So, it's
2:18
not dramatic. It's not going to make a
2:19
huge difference, but it's just adding
2:21
that bit more detail. I'm just adding
2:23
some little flowers. I just quite like
2:27
Then next I've got some tissue paper.
2:30
Now tissue paper is great to put on
2:32
because if you just put a thin layer on,
2:34
you can actually see the color through
2:36
it as well as getting the effect of the
2:38
paper. So I'm just going to use some
2:40
decopage glue, which is a PVA glue,
2:44
and just glue that down.
2:47
And just glue that over the top. And
2:49
when it dries, you'll be able to see
2:51
through the tissue paper to the purple,
2:54
but also be able to tell the tissue
2:55
paper's there. And I rather like that
2:57
effect. So that's why I've put a square
2:59
of that on. So I do encourage you to
3:02
experiment with tissue paper and doing
3:04
effects like that. And I'm going to glue
3:07
on these flowers. Now, I've had these
3:08
flowers so long and I never use them. So
3:12
I'm just using some multi-purpose glue.
3:14
You could use your glue stick. You could
3:16
use your PVA glue. The reason I've gone
3:19
for a multi-purpose glue is because I'm
3:21
going to put some little tiny stars in
3:23
the middle as flower centers and I've
3:25
realized as I've done this and decided,
3:29
oh yeah, I better talk over it or you'll
3:31
not have a clue. I didn't film the
3:34
stars. So, I apologize in advance when
3:36
they appear as if by magic. But that's
3:38
why I've swapped to the multi-purpose
3:40
glue. You just use whatever glues you've
3:42
got and whatever you've got to stick on
3:44
the front. The only reason I'm using
3:46
these is because I've still got them
3:48
after a long, long time. And I do think
3:50
they go well with the purple. But then,
3:53
as if by magic, the centers appear. So,
3:56
I apologize for that.
3:58
And then, finally, I'm just adding some
4:00
washi tape. Now, if you've never come
4:02
across it, it's fabulous. You can get it
4:04
in so many designs and it's so
4:06
inexpensive. And I'm just going to put a
4:08
strip up that side. I just think it adds
4:11
a certain balance. And then it's time
4:14
for a greeting. Now, you can get these
4:16
greeting greetings that I'm using for
4:18
free off my website. There'll be a link
4:19
in the description and on the screen.
4:21
And you could add any greeting you like
4:23
and wherever you like. I like to use
4:26
these little foam pads to raise it up.
4:28
But you could just stick it straight on
4:29
with whatever glue you've been using.
4:32
So, I hope you've enjoyed making your
4:34
card along with me, and I hope you're
4:35
feeling inspired, and you're going to
4:37
use your supplies to get creative and
4:40
make something that's special to you.
4:42
So, good luck with your card and
4:44
hopefully I'll see you in the next