Up next in 10


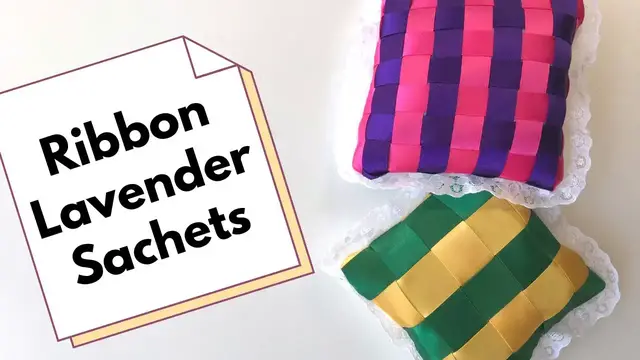
Lavender sachets are a simple and elegant way to add a touch of fragrance and beauty to your home. They are also a great gift for friends and family. In this video, we will show you how to make ribbon weaving lavender sachets using a beginner-friendly technique.
They are also a great gift for friends and family. With a little creativity, you can create unique and beautiful sachets that everyone will love.
If you enjoy crafting my blog is full of great ideas and tutorials. Plus if you subscribe you gain access to my free resource library, which includes a home crafts e-book, planners and much more, and get to hear about my latest projects first. Take a look at https://christines-crafts.com/
Enjoy watching and sewing your own ribbon weaving lavender sachets. Please leave me a 'thumbs up' if you enjoyed this video and subscribe so that you get to see all my videos as they are posted.
You can also find me across social media. To see all my information and ideas find me at https://linktr.ee/Christines_Crafts.
If you are thinking of opening an Etsy store then use this link and get off to a great start with 40 free listings https://etsy.me/32xoPdg
Show More Show Less View Video Transcript
0:00
In this video, let's make some ribbon weaving lavender sachets
0:04
You don't have to put lavender in them, but it certainly makes them nicer. So what will you need? You need some backing cotton
0:10
So I've made mine 5 1⁄2 inches square. You don't have to, but if you want it to be exactly the same, you do
0:16
And you're going to need some interfacing, the iron-on kind. It's important it's got the gluey side, because that's what we're going to glue our ribbons to
0:24
And then you're going to want your ribbons. And these need to be 6 inches long
0:30
Mine are an inch wide, and I've used 5 of each. But obviously, if you use a narrower ribbon, you're going to need more of them
0:37
And if you wanted to put a frill on, you're going to need some lace or similar to go around the edge
0:43
And in my opinion, that really does make them very pretty. And then you can get started
0:49
I'm using a padded ironing pad, I suppose, because I need to pin to it
0:55
I'd normally use an ironing board, and that's sufficient, but I find it very difficult to film on
0:59
So make sure you place your interfacing with the glue side up
1:04
We're placing the ribbon onto the gluey side. Choose one of your colours, and place a piece of ribbon directly in the middle of the interfacing
1:14
And pin it at either end. You'll see it's slightly longer than the interfacing, and so you can pin it just beyond
1:20
And then take the other colour, and put it the other way, in the middle
1:24
So you've basically made a cross. And then take one of your colours, and decide whether you want to weave up or down first
1:34
Now, it really doesn't matter. All that matters is that you follow your routine of weaving
1:41
So that yellow one's gone under the green, so this green one has to go over the top of the green one that's across
1:48
And pin it in place. And then we'll put one horizontally. So this one, because the green goes under, the yellow's going to have to go over the green, and then under the yellow
2:04
And pin it at either end. And you can see what matters is that it's exactly the opposite of whatever it's next to
2:13
And you just keep going. It doesn't matter what order you do these in, so do what suits you
2:20
So I'm just going to do a vertical one, but you can see that I'm weaving it in and out
2:25
And just make sure you're thorough, that they really do all weave correctly
2:31
Now if you're getting near the edge and you're having a bit of trouble, just take one of your pins out, release it
2:36
Then you can get your ribbon in, and then pop the pin back in
2:40
You'll see that I do some horizontal, some vertical. It's just because I find it easier to see it building up, and that it's looking how I want it to look
2:50
You can see, just sometimes a little bit tricky to get them in
2:57
And you need to make sure that your ribbons are just lying next to one another
3:01
You don't want, at the ends, one of them overlapping the other
3:05
But you will have a little chance to sort that out before you glue it down
3:09
So you can see I still need another one. So I'm just going to do that one, they get a little bit tricky at the edge
3:18
And there we go. Pin it in place, and I've got all my ribbons woven and my patterns there
3:25
Now you can see at the corner, I've got little squares where I've still got the glue sticking up
3:29
And you need to be very careful if you've any glue on show. Because we are going to use the iron to fasten that ribbon down
3:37
So I can't stress enough, be careful, you don't want it on the bottom of your iron
3:43
So take a pin off, perhaps two, and just put the iron on the very ends
3:50
You're just making sure they're secure. We're not gluing the whole ribbon down at this point
3:56
If you find it's not gluing, you may need to increase the temperature
4:00
But because you're dealing with ribbon, I really recommend starting with a very low temperature
4:04
And perhaps hold the iron on for a bit longer. You don't want to melt any of your ribbon or damage it
4:10
So you're probably going to have to experiment a bit. If you're nervous, have a piece of ribbon at the side and try it
4:18
Before you start on your actual cushion. But you can see I'm just working my way up that side
4:24
Checking all the time that the ends have just glued down. All we're trying to achieve is that they'll stay there while we turn the whole thing over
4:35
So then once you've got one side secure, work your way around to another one
4:41
And you can see I'm just holding the iron in place until the glue has melted and stuck the interface into the ribbon
4:55
And then that final edge. You can go back as many times as you like just to make sure they are secure
5:05
And then once they're all secure, you'll be able to lift it
5:09
Turn it over and iron the whole thing. And this is where you're really gluing it down forever
5:16
So take your time, hold the iron as long as it takes for the glue to melt
5:21
You don't want any steam ever during this process. You're just melting the glue
5:28
And then you need to wait for it all to cool and the glue to set
5:32
And there you've got the front of your cushion. Or your sachet, depending on what you're making
5:38
Then if you're putting some trim on, which I really recommend, it's time to sew it on
5:43
So make sure the fancy edge that's going out for everyone to see is facing into the square
5:50
So the edge that's running along the edge of the square is the edge you're not going to see
5:56
You also need to make sure as you're pinning that your pins are where you're going to sew
6:01
And that they go through the interfacing as well as the ribbon to make this nice and secure
6:06
When you get to the corner, simply turn the corner and pin the other side
6:13
When it comes to sewing, you have to be very careful with the corners not to catch those in
6:18
But at the moment, it's quite straightforward just to pin round. So make sure your pins, I'm going to repeat that, are laying exactly where you want to sew
6:28
On both the ribbon and the lace. If you're enjoying this video, please give me a thumbs up below so it'll spread to more people
6:37
And everyone can be making their ribbon weaving. Now when you get back to where you started, it's up to you
6:43
But I tend to cut my lace a little bit longer so there's a small overlap
6:47
Just make sure I don't end up with a gap. And then once you're happy with it, it's over to the machine
6:56
Do just do a quick check and make sure before you set off that your pins are exactly where you want to sew
7:04
So over at the machine, just pick a side and set off
7:10
You don't need to reverse because you're going to come back over that bit. And just work slowly down, taking your pins out as you go
7:18
Now as you approach the corner, take care. Get yourself right to the corner, put your needle down, lift the foot and turn
7:26
But as you can see, you need to make sure that lace is out of the way
7:31
You don't want to catch it down, otherwise it won't stick out nicely at the end
7:35
You won't get that effect on your cushion that you're hoping for
7:39
So repeat that for each of your corners. And you can see at each corner, I'm taking my time to move that lace out of the way
7:51
And then when you get back to where you start, make sure you run over the stitching you started with
7:57
Do a little reverse and then it will be secure. So you probably find now you've got plenty of ribbon that you can trim off those edges
8:06
Because it was a little bit longer than the interfacing. So just trim those off
8:11
If you want to, you can trim the corners. But you don't need to because we will be doing that right at the end
8:17
I am just getting rid of a little bit of the bulk now. But you will get another opportunity
8:24
So now we're going to sew the back to the cushion. And those corners are the thing you have to be really careful with
8:32
So you're placing your back onto the front of the cushion. But you need to just squash your lace so that it lies inside carefully
8:43
And you're not catching any of it in your pins. And the same as before, make sure your pins are exactly where you want to sew
8:54
So just start on one side, it doesn't matter which. Pin your way along
9:00
And at the corner, make sure that lace is in. Folded in carefully and can't get caught in your stitching
9:07
And just work your way all the way around. But once you've got all the way around, remember that when you stitch this
9:14
you need to leave an opening to turn it through. I really do recommend leaving a good 2 or 3 inches to turn it through
9:21
Because your ribbon will be quite stiff and it's got that interfacing on it
9:25
So you might want to mark it now to make sure you do leave that opening for you
9:32
Otherwise just be careful to make sure you do. So you can see I'm just checking that those pins are in exactly the right place
9:39
So I catch the lace everywhere and it's going to look great
9:43
So it's back to the machine to sew our way around. But not all the way around this time
9:49
Remember we're sewing through all the layers. So wherever you were going to start, remember you're leaving a gap
9:56
You want to go forwards and reverse this time. Because you want a nice secure end
10:01
Now you'll notice before I come to every corner, I lift the corner of the fabric and check that the lace isn't going to get caught in
10:10
That's experience. I have done this before and caught the lace in
10:15
No matter how careful I've been pinning it. So I always just check
10:19
You don't want to be having to unpick when you've sewn ribbon
10:23
It's not pretty. So do just do that moment's check and make sure your lace is out of the way
10:31
And then just work your way all the way around. And remember, don't go back to where you started
10:37
Leave your 2 to 3 inches to turn your cushion through. So I'm then a little reverse to make sure that one's secure
10:52
And it should be sewn. So then clip those corners. Obviously we've got some more fabric there now
11:00
So even if you've already clipped them, you're probably going to clip them again. It just makes for a better finish when you turn it through
11:07
And then turn the whole lot through. Now it's going to be stiff
11:11
So just be careful and just take your time. You don't want to damage anything as you're going
11:17
And then it's about getting those corners poked through. So you might want to use a chopstick or a blunt end of the pencil
11:24
But you can also use your lace to gently pull those corners
11:28
And I do say gently. But you should have something that's looking like your lavender sachet or cushion
11:36
Depending on what you're making. So now it's time to fill it
11:42
So whether you're going to use lavender or not, you want to get some filling in there
11:49
And really try and get it into those corners. And then add as much filling as you want
11:54
So if you want a really roughy-toughy cushion. You want it quite thick, then put loads in
12:00
If you want quite a slim cushion, then put less in. Now if you want to put some lavender in, I recommend putting it in an organza bag and placing that in
12:09
Or like I'm doing here, I'm just placing some inside some wadding
12:13
And wrapping it in there and placing it in. It's just so that it's a little bit nicer than it just being pressed against the fabric on the bag
12:23
So as I say, put as much filling in as you want. Check it
12:27
Then when you're happy, it's time to sew the opening closed. That's not a difficult thing to do
12:35
And you can just do it by hand with a little ladder stitch or slip stitch
12:39
Depending on what you call it. You are just going to have to take a little bit of time of making sure you line everything up properly
12:46
So that you get a nice finish. So once you're happy, it's time to get those edges together
12:54
So the backing from your cushion, you just need to fold where that seam would be if it was sewn
13:01
And then you need to do the same with the other. To just fold it in and make sure you're catching everything in as you ought to
13:08
So make sure that lace is caught in. And the ribbon is folded in on the front
13:12
So spend a little bit of time just looking front and back. And then you want to needle and thread with a small knot at one end
13:19
And then you're going to take the needle inside the cushion. So that the knot disappears inside there
13:27
And then come up to that top edge that you folded right at one end
13:32
On the back of the cushion. And then what you do is you work your way along the whole gap
13:39
Taking a little bit from the front and a little bit from the back
13:44
Now take care to make sure you don't just catch the lace. Make sure you go through some of the ribbon from the front
13:50
It's just going to make it stronger. Just sewing to the lace is going to make it a very weak seam
13:55
So it's a little bit of the backing. And then a little bit of the front
14:00
And you just repeat that all the way along. Little tiny stitches
14:04
The smaller your stitches, the tidier that seam will be. And no one will ever know it's there
14:12
So just work your way along. Keep refolding if you need to
14:16
Just cutting off the thread that's come through. And then when you get to the other end
14:20
For the final stitch. Just do your stitch as normal. Then thread your needle through the loop
14:26
And it forms a small knot. Then put your needle into where you're sewing
14:32
And out of the back of the cushion. And that will just stop the knot pulling undone
14:37
And then cut off your thread. And you're finished. Well done. Congratulations
14:44
Enjoy your ribbon woven lavender sachet. And thank you for watching
#Hobbies & Leisure
#Crafts
#Fiber & Textile Arts