Up next in 10


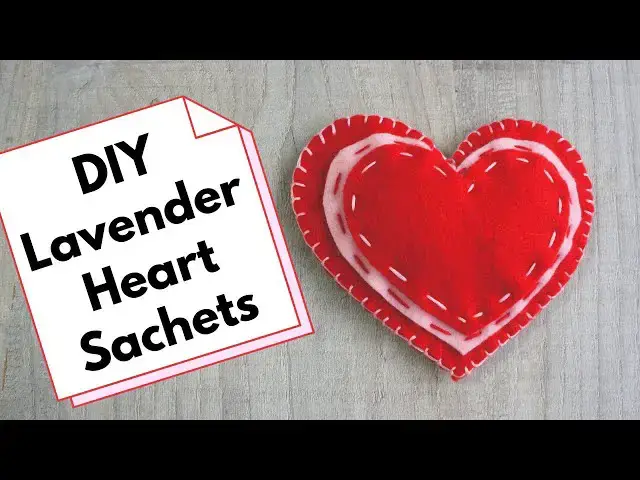
This video will show you exactly how to make your own heart shaped lavender bags. This one is made from felt so really easy to make with no fraying fabric. Add as much decoration as you like. In the video I show you how to do all the stitches you need including the blanket stitch.
If you want the heart template then head over to my blog post with written instructions and you can download and print off the pdf for free. Just go to https://christines-crafts.com/lavender-bag-hearts-to-sew-for-valentines-day-gifts/
All you will need:
Felt
Thread
Needle
Scissors
Dried lavender
Heart template available for free from https://christines-crafts.com/lavender-bag-hearts-to-sew-for-valentines-day-gifts/
So good luck with your hearts and I hope the lucky people you give them to like them. They are a great token of affection and can easily be posted for a great gift.
If you enjoy crafting my blog is full of great ideas and tutorials. Plus if you subscribe you gain access to my free resource library, which includes a home crafts e-book, planners and much more, and get to hear about my latest projects first. Take a look at https://christines-crafts.com/
Enjoy watching and making your own lavender heart bags. Please leave me a 'thumbs up' if you enjoyed this video and subscribe so that you get to see all my videos as they are posted.
You can also find me across social media. To see all my information and ideas find me at https://linktr.ee/Christines_Crafts.
Show More Show Less View Video Transcript
0:00
hi and welcome to christinescrafts.com
0:02
today i'm going to show you how to make
0:04
some cute little felt lavender heart
0:05
bags
0:06
great for a little gift for a loved one
0:08
this is what we're going to make it's up
0:10
to you whether you add the detail on the
0:12
front but i'm going to show you the
0:13
whole project
0:15
so you're going to need if you're going
0:16
to do the whole project two kinds of
0:17
felt i've got a nice red one and a pink
0:19
one
0:21
and as you can see just ordinary felt
0:24
i'm going to need some scissors to cut
0:25
your felt out
0:28
some thread i'm using embroidery thread
0:30
because it's great for all that
0:31
detailed work so that you can see your
0:33
stitches some dried lavender to put
0:36
inside your bag
0:38
a needle to do your actual sewing
0:41
and then you'll see i've got three paper
0:44
heart templates
0:45
if you click on the link below that
0:46
takes you to my blog post you'll be able
0:48
to find a downloadable pdf for free to
0:50
get these
0:51
or you can draw around some hearts
0:53
you've already got
0:55
if you only want to make the bag you
0:56
just need the big heart
0:58
and you don't need the other two if
1:00
you're going to put the decorative
1:01
hearts on the front you're going to need
1:02
all three templates
1:04
so let's get started first thing we're
1:07
going to do
1:08
is cut out our hearts you can see that
1:11
i've sped this up
1:12
because otherwise you'd get bored pin
1:15
your templates to your felt
1:18
and then just cut around them
1:21
it's worth taking a little bit of time
1:23
and being careful about your cutting out
1:26
because obviously those edges need to be
1:28
nice and smooth because those are the
1:30
edges that you're going to be able to
1:31
see
1:31
on your lavender bag there's no seam
1:34
allowance here
1:35
the edges that you cut are the edges
1:37
you're going to see
1:38
so i'm cutting out those two red hearts
1:41
the large one
1:42
and the small one
1:50
and then obviously i need another large
1:52
red one
1:53
could have done the two at the same time
1:54
with the felt folded or two pieces be
1:57
one behind the other
1:58
i chose to do them separately
2:01
just cut around there and that's all the
2:04
red pieces you need
2:06
two large red ones and one small red one
2:09
for the pink we're going to need one of
2:10
the middle sized hearts
2:12
and we're just going to need one of
2:14
those
2:17
cut around carefully
2:23
and then you can remove all your
2:24
templates
2:28
and you can see how your lavender bag is
2:30
going to look
2:32
and that's what we're looking to build
2:34
so to start with we'll get rid of that
2:36
bottom heart
2:38
and then we'll get rid of the other big
2:40
heart we've just got the top two hearts
2:42
now
2:42
a middle sized pink one and a small red
2:45
one
2:46
you're going to take a long length of
2:48
embroidery thread you want to make
2:50
sure it's long enough to sew all the way
2:53
around your red heart
2:55
without having to stop and start again
2:57
because it can make a bit of a mess and
2:59
we want it to look very pretty
3:01
so cut your thread and then thread up
3:05
your needle
3:08
once you've got your needle threaded my
3:09
advice is to put a knot in the end of
3:12
your thread
3:13
because that's the easiest way of
3:15
stopping it from pulling through
3:17
you just need a little knot in the end
3:20
and we can hide that
3:22
behind the the felt so the first thing
3:25
you're going to do
3:27
is get your needle and bring it up
3:29
through
3:30
the top layer a small red heart
3:33
a little distance from the edge how far
3:36
from the edge is entirely up to you
3:39
place it carefully where you want it on
3:41
the pink
3:42
heart and then push the needle back down
3:46
through to form your first stitch
3:49
then come back up a little bit further
3:50
along
3:53
and you're starting to form a running
3:54
stitch that's all it is a nice simple
3:56
running stitch
3:58
if you prefer you can do it as a stitch
4:00
straight in
4:01
and out if you're having trouble getting
4:03
your needle through
4:04
just poke it down and pull it through
4:06
and then pull it up
4:08
and pull it through and do them
4:09
separately as you can see
4:11
i'm running with a normal running stitch
4:13
in out and out
4:15
so again speed the video up so you don't
4:17
get bored but
4:18
just going to show you going all the way
4:20
around
4:21
you see i keep checking it pulling it
4:23
flat making sure it's sitting exactly
4:26
where i want it
4:27
and that i'm not pulling it out of shape
4:29
as i go
4:32
get halfway around you can see it's
4:33
forming that beautiful heart with the
4:35
little stitch detail
4:39
and just keep going keep turning your
4:41
work as you go in make it as simple as
4:43
possible for yourself
4:45
until you get all the way back down to
4:47
the point
4:49
and then all you're going to have to do
4:51
is tidy up at the end
4:52
so that you don't get your stitches
4:54
coming undone take your thread through
4:56
onto the back
4:58
do a little stitch that won't show from
5:00
the front
5:01
and then poke your needle through the
5:03
loop that you make
5:04
that'll form a little knot on the back
5:07
and cut your thread off so that it won't
5:09
appear onto the front no one will ever
5:11
see it
5:12
and that's it your decoration is done
5:14
for the top
5:17
so now we need to attach that to one of
5:20
our main big red
5:21
bag hearts so put on
5:25
make sure you're happy with it with its
5:28
position
5:30
and decide on the embroidery thread you
5:32
want to use
5:33
now i've opted to get a red one so that
5:36
it'll show up nicely
5:37
onto the pink heart you could just do it
5:39
all with the pink thread and then this
5:41
little running stitch will not be so
5:43
obvious
5:44
but as you can see i've chosen a red one
5:47
i'm doing it in exactly the same way
5:49
as i did the first row of stitching
5:52
i've started at the bottom at the point
5:55
and i'm working my way around
5:58
again i'm going to show you this for
6:00
completeness so you can see exactly what
6:02
i'm doing
6:03
but i've sped it up i'm just working my
6:06
way around
6:06
keep smoothing it keep making sure it's
6:09
all laying flat
6:10
keep checking it's exactly how you want
6:12
it to be nothing's moved
6:16
turn the work round and progress around
6:20
again you're going to bring it all the
6:22
way around to the bottom to the point
6:25
and then finish it off in exactly the
6:27
same way as you did before
6:30
you throw onto the back make a little
6:32
knot cut off your thread
6:34
so that's your front of your lavender
6:35
bag ready simply going to place it
6:38
on to the back lavender bag heart and
6:41
we're going to sew the two together
6:43
make sure you have a really long length
6:44
of thread
6:46
on one side of the heart poke it through
6:48
from the back
6:50
of the front piece of the bag
6:53
and away we go now
6:56
take your needle around to the back and
6:58
bring it up through both layers
7:01
in pretty much the same place as she
7:03
came out to start with
7:05
you're going to get a loop that goes
7:06
around the outside of the bag
7:10
now poke your needle through that loop
7:12
that's just to get you started
7:13
for your blanket stitch
7:16
now move a little way along again coming
7:19
from the back to the front which is what
7:21
you're going to do for every single
7:22
stitch
7:23
poke your needle through but this time
7:26
wrap your thread around the needle
7:28
and then pull all the thread through and
7:31
you should end up with a nice little
7:32
blanket stitch
7:35
again needle in the back right through
7:37
to the front
7:40
loop the thread around and
7:43
pull another blanket stitch and you can
7:48
see you get that
7:48
lovely edge onto your back very pretty
7:52
work on trying to keep all your stitches
7:54
the same size
7:56
and work on trying to always take the
7:58
loop around the needle the same way
8:00
you'll have noticed i just went the
8:01
other way because i wasn't really
8:03
concentrating well enough
8:05
if you can try and do them all the same
8:06
you'll just get a neater job
8:08
but you can see from mine it didn't
8:10
really make any difference
8:12
still got a nice blanket stitch
8:15
and on we go so again you just keep
8:19
working all the way around
8:21
try and keep it neat and tidy try and
8:23
keep those stitches the same
8:25
size and you'll get the best overall
8:26
effect
8:28
try not to let your yarn get twisted and
8:30
tangled up but it is difficult when
8:32
you're dealing with a long thread
8:35
work your way around you'll see that i
8:38
do keep getting twists and tangles and
8:40
have to sort them out
8:41
don't worry that's part of the process
8:44
i started partway down one side of the
8:47
heart
8:48
so that i can leave the pointed end open
8:51
and i'm gonna do that so that i can get
8:53
my lavender in that's how i'm going to
8:55
fill it
8:56
and i just find it easier to do it at
8:58
that point
8:59
so you can see i'm halfway around
9:03
just keep going all the way around
9:08
nice tidy job it's just a repeat of the
9:12
same stitch
9:15
you see i also keep waving it around and
9:17
that's where i just
9:19
let the needle dangle and it untwists
9:22
the yarn so it
9:23
means we get less knots and then all you
9:26
do
9:26
is open up that end and put in as much
9:28
or as little lavender as you want
9:30
if you want a very puffed up chunky
9:32
pillow put loads of lavender in
9:35
if you want it to lie quite flat then
9:38
simply put less lavender in i'm not
9:40
putting a great deal in here
9:42
you can see i've decided on a little bit
9:44
more than i first thought
9:49
once you've got all the lavender in that
9:51
you want and you're happy with
9:52
it she can decide just give it a little
9:55
squeeze
9:56
you're simply going to carry on with the
9:58
blanket stitch
10:00
to take it all the way around and
10:01
complete the heart
10:03
so that all that lavender is trapped in
10:05
there
10:07
so we just start again with our stitches
10:28
get down to the point just be careful
10:30
get one on to the point
10:32
and then you can just keep coming down
10:33
the other way
10:35
as long as you do one right to the point
10:38
it'll work nicely and make a nice turn
10:40
to come back the other way
10:43
keep going right up to where you started
10:48
and then you're just going to make sure
10:49
you finish off nicely
10:51
last stitch then take the needle
10:55
through the first stitch
10:58
and then do another little loop through
11:01
a stitch
11:02
take your needle through the loop that
11:03
you've made to form a little tiny knot
11:07
and then feed your needle into the
11:09
actual lavender bag
11:10
so that it pokes out of the back
11:12
somewhere
11:14
and then cut it flush with the lavender
11:16
bag and then your yarn
11:17
will just disappear inside but you've
11:19
got a nice long length so
11:20
your knot won't pull through
11:24
and there you go one lavender bag all
11:26
complete and ready to gift
11:28
or perhaps put in your own drawer or
11:29
under your own pillow
11:31
well done i hope you enjoy your lavender
11:34
bag
11:40
so thank you for watching please
11:42
remember to hit subscribe give us some
11:44
comments below
11:45
a nice thumbs up and i hope to see you
11:48
again soon
11:50
happy crafting
#Crafts
#Fiber & Textile Arts
#Fiber & Textile Arts
#Art & Craft Supplies