Up next in 10

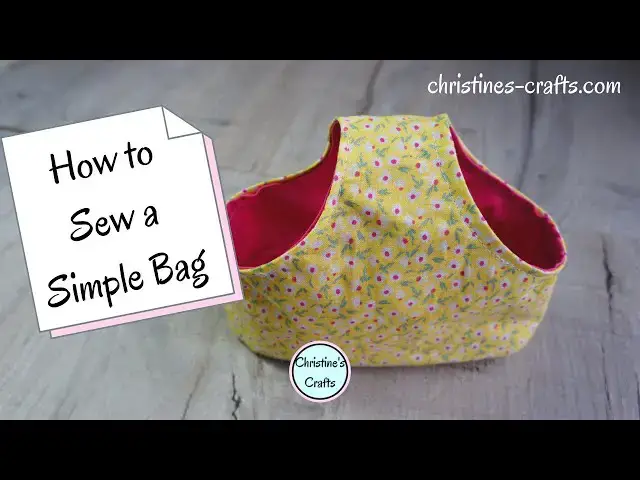
DIY FABRIC GIFT BAG TUTORIAL - Scale it up for a craft or shopping bag | Beginner Level Sewing
Jan 15, 2025

This video will show you how to make this super cute lined fabric gift bag. It can also be scaled up to make a craft bag or shopping bag. Super easy to follow along and make your own bags.
There are written instructions on the blog and the pattern is free and available at https://christines-crafts.com/simple-bag-tutorial/
If you enjoy crafting my blog is full of great ideas and tutorials. Plus if you subscribe you gain access to my free resource library and get to hear about my latest projects first. Take a look at https://christines-crafts.com/
Enjoy watching and sewing your own bags. Please leave me a 'thumbs up' if you enjoyed this video and subscribe so that you get to see all my videos as they are posted.
You can also find me across social media. To see all my information and ideas find me at https://linktr.ee/Christines_Crafts.
If you are thinking of opening an Etsy store then use this link and get 40 free listings: https://etsy.me/32xoPdg
Show More Show Less View Video Transcript
0:00
hi in this video i'm going to show you
0:02
how to make a super cute little bag
0:04
i mean you can make it as large as you
0:05
like but this one's just made up as a
0:07
little gift bag
0:08
ideal for those small gifts very easy to
0:11
sew and you're going to see everything
0:13
you need here including
0:14
a free pattern i'm christine of
0:17
christie's crafts and this channel is
0:18
all about crafting on a budget so the
0:21
first thing you're going to need
0:22
are the pattern pieces as i say they're
0:25
free from my website the link is on the
0:27
screen
0:28
and it's in the description below you're
0:31
going to need two different fabrics one
0:32
for the outside and one for the lining
0:34
of your bag
0:36
and you're going to need some
0:37
interfacing some stiffening so that you
0:39
can give your bag a bit of structure
0:42
this is the iron on type and that's what
0:45
i recommend
0:47
the first thing you can do is print off
0:48
your pattern pieces and cut them out
0:51
so you're going to end up with a main
0:52
bag piece and a base
0:56
pin them onto your interfacing and cut
0:58
out
0:59
one of each so whatever we're doing here
1:02
we only need
1:03
one of each pattern piece so we're going
1:06
to do
1:06
[Music]
1:08
one back piece and one base piece out of
1:10
interfacing
1:12
and then we're going to move on to our
1:14
main bag fabric and do the same
1:18
cut out a main piece
1:21
and cut out a base you're not going to
1:26
be surprised to learn
1:28
that you're going to do exactly the same
1:29
with the lining fabric
1:31
cut out one main bag piece and one base
1:38
so after all that cutting out you're
1:40
going to have
1:42
a main bag piece and a base out of the
1:44
lining
1:45
the main fabric and your interfacing
1:50
and now you're ready to start making
1:52
your bag
1:53
the first thing you need to do is apply
1:55
your interfacing
1:57
to the wrong side of your lining fabric
2:00
so make sure you've got the glue side
2:02
down and that you're on the wrong side
2:04
of the fabric
2:05
and then apply as much heat as you need
2:07
you'll notice i just peel it up and
2:09
check
2:10
make sure it's glued down turn the
2:12
temperature up if you need to
2:14
it's better to start cooler and work
2:16
your way up
2:18
the next thing you're going to do is
2:19
you're going to take each of your main
2:21
bag pieces in
2:22
turn and on the curved edges
2:25
you're going to press back a small hem
2:28
maybe quarter to half of an inch you
2:32
really don't want it very big at all
2:34
it's a little bit
2:35
fiddly pressing around a curve but
2:37
you'll see what i'm doing here
2:39
just persevere keep working round it
2:42
then when you've completed one you're
2:44
going to do the other curved surface
2:46
on this piece of fabric which is your
2:48
main piece
2:49
then you go to the lining and repeat the
2:52
process again
2:53
so you're going to turn that small hem
2:55
back on
2:56
both curved edges
3:00
and you'll need those later so the next
3:03
thing we're going to do is come back to
3:04
our main
3:05
piece of fabric which has got the
3:07
interfacing attached to it
3:09
fold it in half with the right sides
3:11
together
3:13
and pin at the side seams
3:16
so just going to pin carefully down this
3:18
one to hold it together
3:21
and also pin the other side
3:24
seam this is so that shortly we can sew
3:29
them
3:29
and get a nice accurate seam
3:35
so repeat that process for your lining
3:39
piece of main bag
3:43
and then we'll go over to the machine
3:45
and sew those side seams
3:48
so place your main back piece under your
3:50
sewing machine
3:52
do a little bit of backing at the start
3:54
run yourself down the seam
3:56
and remember to do a little bit of
3:57
reverse at the end so that your seams
3:59
don't unravel
4:02
i've just run the edge of my sewing foot
4:05
along the edge of the fabric which has
4:08
just given me a small
4:11
seam allowance the bigger your seam
4:13
allowance that you would you allow
4:15
obviously your bag will come in a little
4:16
bit smaller could give you some
4:19
issues getting your base in so i
4:21
recommend just running alongside your
4:24
foot and you'll get a nice little seam
4:27
allowance
4:29
so you complete both of those side seams
4:34
and then repeat that whole process with
4:37
the lining
4:42
both seams
4:48
and then i'm using this board which is
4:52
for ironing sleeves
4:53
but you can just do it straight onto
4:55
your ironing board or your ironing mat
4:58
but what you're going to do is open up
5:00
each seam in turn
5:02
and press it open it means you get a
5:04
much better finish on your bag at the
5:06
end
5:07
no bulky seams getting folded the wrong
5:09
way or bulking up
5:12
so do one and then do the other
5:17
just open it up with your fingers get
5:19
the iron in and press it
5:21
open and repeat that for the other main
5:24
back piece
5:27
now just be warned when you press iron
5:29
on interfacing back like this you can
5:31
get glue onto your iron so i have a
5:33
special crafting iron
5:34
the other alternative is to be very very
5:36
careful
5:37
so once you've got those both completed
5:40
you're going to take the lining main bag
5:42
piece
5:43
and you're going to pin the base to it
5:46
you pin them together
5:48
right sides together pin either end
5:52
and then pin halfway down each side
5:57
and then just work the bit in between
6:00
carefully you're working on a curve
6:02
so it's not always easy just work it
6:05
and keep re-pinning you could always
6:07
take a pin out and redo it to get it to
6:09
go
6:09
smooth and get a nice surface
6:13
you're working that curve in make sure
6:16
you get pinned
6:17
all the way around so that that base
6:20
will go securely
6:21
into that bag you can see i'm adjusting
6:25
mine
6:27
and then repeat the whole process for
6:29
the main bag
6:30
now this time you've got your
6:31
interfacing on so it's a little bit
6:33
trickier because everything's a little
6:34
bit stiffer
6:35
but it's exactly the same process pin
6:37
all the way around
6:41
and then not surprisingly you're going
6:42
to go over to the machine
6:44
and sew those seams again running the
6:46
edge of the zipper foot
6:48
along the edge of the fabric just going
6:51
short
6:51
bursts you're going to work your way
6:53
around a curve things will try and move
6:55
out of the way
6:56
just keep making sure everything's right
7:00
and keep working a bit more on your
7:02
curve you may
7:03
need to adjust it's absolutely fine to
7:06
lift the foot
7:08
providing you always make sure your
7:09
needle is in through the fabric first to
7:11
hold it in place
7:13
so if you feel the need to adjust get
7:15
the needle down through the fabric
7:18
lift the zipper foot lift the foot of
7:21
your sewing machine
7:22
not a zipper foot at all and
7:25
adjust your fabric place the foot back
7:28
down and then carry on
7:29
sewing you'll see that i do it several
7:31
times while i'm working around the
7:33
curves
7:33
it helps you to get a nice smooth curve
7:36
when you get back to where you started
7:38
run over the sewing you've already done
7:40
and then do a little bit of reversing
7:42
to make sure nothing unravels
7:46
once you've completed that you're going
7:48
to repeat the whole process with the
7:50
lining
7:51
so basically at the moment it looks
7:52
remarkably like you're making two
7:53
separate bags
7:55
which basically you are but you're going
7:57
to bring them together shortly
7:59
so again just keep working your way
8:01
around
8:02
nice and steady make sure you get good
8:04
seam
8:05
and you've now got two bags
8:09
all the way around that seam you've just
8:11
sewn with the base to the main bag
8:14
clip it that means make little cuts into
8:17
your seam allowance making sure you
8:18
don't actually reach your seam
8:20
you don't want to cut your seams to do
8:22
this slowly and carefully
8:24
the most important is that you're doing
8:26
it on the curves at the end
8:28
because it'll allow your curves to sit
8:30
nicely when we get this bag completed
8:35
so now we're going to take the main bag
8:37
piece and turn it the right way out
8:39
so we're starting to see our bag and how
8:40
it's going to look
8:42
just run your finger around those seams
8:44
at the bottom
8:45
and make sure you get that nice bag
8:47
shape
8:49
the lining piece you keep it the way out
8:52
it already is inside out
8:54
and feed it inside the main bag piece
8:58
and just poke your hand in and get it to
9:00
lie
9:01
reasonably flat now remember those seams
9:04
we pressed on the curved edges
9:06
we're going to use those now so make
9:09
sure you
9:10
press back onto those folds
9:15
and line up the side seam of
9:18
the liner with the side seam of the main
9:21
bag
9:22
and pin them together go straight
9:25
opposite that and pin at the top
9:27
and then you're going to pin all the way
9:29
around these curved edges
9:31
so this can be a little bit tricky
9:33
curves are often tricky
9:35
so just work steadily and slowly and
9:38
keep making sure your
9:39
fold is exactly where it should be
9:42
you'll see they keep popping out
9:44
just fold them in and get them to line
9:47
up
9:49
it's worth taking a bit of time on this
9:51
you don't want your lining
9:53
fold poking out from your main bag
9:56
equally well you don't want it too far
9:58
in
10:00
once you're happy with it you're going
10:02
to go to the other hole
10:04
and repeat the process so i've sped this
10:06
up a lot so that you don't get bored
10:08
watching me
10:09
but you're going to get to the point
10:10
where you've got them both pinned nicely
10:12
making sure everything lines up and
10:13
everything is smooth
10:15
if you're not happy just undo some pins
10:17
and redo it
10:18
now is the time to make sure you are
10:20
happy with all of these bits for this
10:22
bag
10:25
happy with around there and then we're
10:27
going to sew around them both
10:30
now when you're making the small version
10:32
of this bag
10:33
this is really quite tricky because
10:36
you've got to squeeze that stitch that
10:40
seam that you're going to do
10:41
under that foot without any of the other
10:44
rest of the bag getting
10:46
caught it can be a challenge
10:50
but just set off and then move your way
10:53
along taking your pins out as you go
10:56
keep turning around that curve keep
10:58
adjusting the bag making sure nothing
10:59
else gets caught under there that
11:01
shouldn't
11:02
and you're just going to work your way
11:03
slowly around the seam
11:05
if you don't like pins and you're using
11:07
clips that's absolutely fine
11:10
just work your way around slowly and
11:12
steadily
11:14
it is fiddly don't get too frustrated
11:17
you'll get there i recommend doing the
11:19
seam as close to the edge as you can to
11:22
make sure that you're catching both
11:25
um folds in nicely and you don't miss
11:27
anything
11:28
you don't get any edges poking out
11:32
and if you're working on the right side
11:34
of the bag you're seeing exactly what
11:36
you're going to see at the end so you're
11:38
making sure it looks how you want it to
11:40
look
11:42
work your way along until you get back
11:45
to where you started and just go over
11:48
the stitches from the start slightly
11:50
do a little bit of reversing just to
11:51
make sure nothing comes undone
11:56
you'll see i'm getting back to my
11:57
threads now
12:00
just make sure it's all lined up over it
12:03
reverse and then you can remove it from
12:06
the machine
12:08
and cut your threads off
12:12
once you're happy with it you're gonna
12:14
do exactly the same with the other one
12:16
okay so i've sped this up but it's a
12:19
repeat
12:19
you're just gonna work your way around
12:21
that seam
12:23
really carefully
12:26
and then that's it your bag should be
12:28
completed
12:30
and you can enjoy it for whatever you
12:32
want to use it for i use these tiny bags
12:35
as little gift bags but you might choose
12:38
to put your cotton wool pads in them
12:41
or anything else that you can think of i
12:44
use a larger one of these to put yarn in
12:47
and they just work really nicely and
12:49
i've known people make a bigger one
12:50
again and use it for a shopping
12:52
bag so feel free to scale your pattern
12:54
up or down and make your bag for
12:56
whatever you need it for
12:58
so thank you for watching and i hope
13:00
you've enjoyed this tutorial and that
13:02
you're going to enjoy making your bags
13:05
please give me a thumbs up below leave
13:07
me some comments
13:08
and remember to subscribe so that you'll
13:11
catch all my videos in the future
13:13
thank you
#Crafts
#Fiber & Textile Arts
#Fiber & Textile Arts
#Custom & Personalized Items