Up next in 10



Cookie cutters aren’t just for cookies! #cakedecorating #cake #cakes
Show More Show Less View Video Transcript
0:00
Let me show you how to use cookie
0:01
cutters to make a very easy but very
0:03
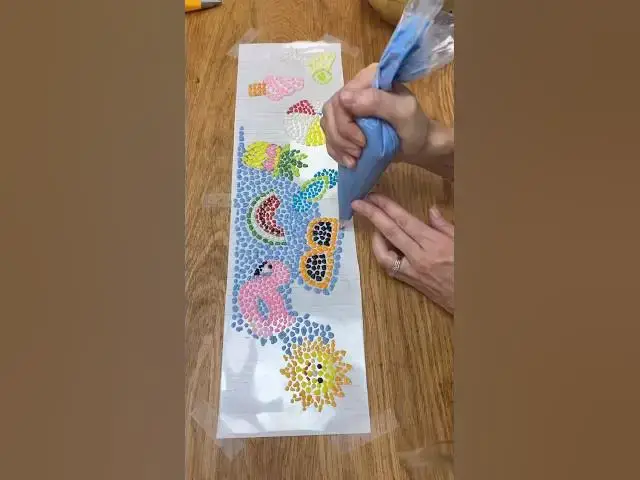
elaborate cake design. Line up your
0:05
cookie cutters on a strip of paper
0:06
that's long enough to wrap around your
0:08
cake later. Pencil in any details that
0:10
you want to follow or you can freehand
0:11
this later. And then lay a sheet of
0:13
acetate over the top. You can use
0:15
parchment paper instead, but acetate is
0:17
thicker and stronger, so it's much
0:18
easier to wrap around the cake neatly
0:20
later. Use piping bags with a small
0:22
round piping tip like a number three or
0:23
a number four or you can use a ziplock
0:25
bag with a corner cut off. To pipe
0:27
different colors to fill in your design.
0:28
This is time consuming, but it's one of
0:30
those mindless tasks that's really
0:32
therapeutic. Fill in the background with
0:33
whatever color you like and then put
0:35
this whole piece of acetate into the
0:36
freezer for about 10 minutes to set the
0:38
buttercream before spreading a
0:40
background color over the top. You're
0:41
aiming for a thin, smooth layer. Take
0:44
your frosted cake out of the fridge and
0:45
wrap the acetate around it straight away
0:47
while the background color you spread
0:49
on, the white for me, is still soft and
0:51
sticky, so it attaches to the cake. I
0:53
like to make my design a little bit
0:55
taller than my cake so that I can fill
0:56
in the top afterwards for really sharp
0:58
edges later. And then put the
1:00
[clears throat] whole cake into the
1:00
fridge for about an hour so that it
1:02
attaches properly to the cake. Now when
1:04
you peel the acetate off, it will come
1:05
off neatly leaving your design behind on
1:07
the cake. Tell me in the comments what
1:08
you think and comment cookie for the
1:10
link to these cookie cutters.
#Hobbies & Leisure