Up next in 10


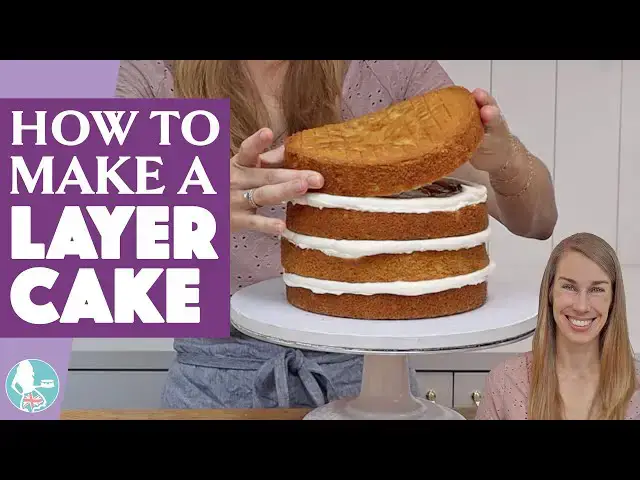
In this tutorial I'll show you step by step how to make a layer cake that doesn't slide around on your cake board and that won't lean or bulge! In Part 2 (coming next week) I'll show you how to crumb coat a layer cake and in Part 3 (coming in 2 weeks) I'll show you how to frost a layer cake with perfectly smooth frosting.
🎥PART 2 of this tutorial: How to Crumb Coat a Cake
https://youtu.be/XJbO09-G4CA
🎥PART 3 of this tutorial: How to Frost a Cake
https://youtu.be/4LCinnwDxz0
💫Start your FREE 7 day trial on my cake school
https://britishgirlbakes.teachable.com/p/all-you-can-cake/
🎂LEARN The Basics of Cake and The Basics of Buttercream in my most popular online courses!
https://britishgirlbakes.teachable.com/
👩🏼🍳My 4 Minute Buttercream recipe
https://www.britishgirlbakes.com/recipes/buttercream-frosting/
📄READ a written version of this tutorial (with photos!)
https://www.britishgirlbakes.com/how-to-make-a-layer-cake/
👍Please LIKE and SUBSCRIBE to my channel for a new cake decorating tutorial every week!
Show More Show Less View Video Transcript
0:00
I'm going to show you step by step how to make a layer cake
0:04
Now to make a layer cake, of course, you'll need your cake layers and you can bake each one individually in a pan
0:09
or you can bake tall cake layers and then divide them in half to make several cake layers
0:15
To divide your cakes in half, you'll need a serrated knife like a bread knife
0:19
and there is no set way to do this, but I'll show you the way that works really well for me
0:24
Put a cake down on the countertop or a cutting board and use your knife to score around it
0:30
Halfway up, so around the middle, spinning the cake as you go
0:33
And when you've gone all the way around, the beginning of your line should meet the end of the line
0:38
which shows that you've made a level scored line around the whole cake
0:42
Then you can continue spinning as you gradually push your knife closer towards the middle of the cake
0:47
and when you feel the knife moving effortlessly, because you've cut all the way through, slide it out
0:52
Now you'll have two cake layers instead of one. Do the same for all of your layers of cake to divide them in half horizontally
0:59
It's really important to wait until your cakes have cooled completely before you cut into them
1:04
because if they're still warm or hot, they'll dry out. So let them cool for about two hours out of the oven before you do this
1:12
The advantage of using four cake layers instead of just two is that you'll have three layers
1:16
of filling instead of one layer of filling, which means more flavour and also a moister cake
1:22
If you're not going to eat your cake on the same day that you bake it, it's a really good idea to use simple syrup to keep the layers moist
1:29
And to do this, you just drizzle the simple syrup over each of the cake layers
1:33
paying special attention to the ring around the outer edge of the cake, which is where it will dry out first
1:39
Simple syrup is just equal parts of water and sugar, brought to a simmer in a pan or in the microwave
1:45
Now it's time to assemble the cake. And to do that, a turntable is really helpful to make the process more quick
1:50
but you don have to have one And you will need a cakeboard which can be any material cardboard acrylic a cake drum And this is important because it makes it easy to move the cake around later
2:01
and it provides a flat surface when you are frosting your cake, which will help you get straight sides
2:07
But more on that later. Now let's talk about fillings. There are so many different ingredients you can use to fill a cake
2:13
but if you're going to be using anything that is runnier than the consistency of buttercream
2:17
you will need a buttercream dam, and I'll show you what that is for this cake
2:21
The first step is to attach your first cake layer onto the cakeboard because if you just place it straight down on the cake board
2:28
when you come to frost it, any pressure from your offset spatula or your cake comb
2:32
is going to push the cake all over the cake board. So to prevent that, take a little bit of buttercream frosting
2:38
and spread it onto the middle of your cake, and this will act as glue
2:42
Then you can press your first cake layer down onto it and it will hold it in place
2:47
Make sure that it is lined up in the middle of your cakeboard, so it's centred, and then you can continue with your fillings
2:54
This is my four-minute butter cream, and the recipe link is up in the top of the screen and in the video description
3:00
And this is a very thin layer to stop my next filling, caramel, from absorbing into the cake underneath
3:06
Use an offset spatula to spread it up to the edges of the cake, and then hold it at a 45-degree angle as you spin the cake to level it so that there's a flat surface for the next foundation
3:17
I'm going to be using this wonderful, delicious, gooey caramel as my filling, but if I put it straight onto the cake now
3:24
it will ooze out of the edges of the cake and can cause bulges in the frosting later
3:28
It can also cause all of the higher layers of the cake to slip and slide so the cake doesn't stay straight and sturdy
3:35
So what do we do? Make a butter cream dam. Spoon some more butter cream into a piping bag without a piping tip, just with a hole cut off the end of the bag
3:44
Only fill the bag half full so it easy to grip onto and then push the buttercream down to the end of the bag and twist it at the top so it pressed tightly around the buttercream
3:56
which makes it easier to squeeze the butter cream out. Now pipe a ring around the edge of the cake layer, like a dam or a wall
4:04
to hold the runny filling in place so that it doesn't ooze out of the sides of the cake
4:08
Now spoon your next filling into the middle of this and spread it around up to the edges of the ring of buttercream you piped
4:15
This filling shouldn't be higher or taller than the ring, it should stop just below it
4:21
And this buttercream dam technique will work for any runny filling, like lemon curd
4:26
Nutella, jam, the layer of buttercream spread underneath will stop the filling from sinking down
4:31
into the cake, and sort of disappearing when you cut into the cake and eat it
4:35
and the piped dam will hold the filling in so that the cake and frosting stay straight and smooth
4:42
without bulges. Make sure this isn't sticking out over the edge of the cake
4:46
because that will create a bulge in the sides of the cake. Whoops
4:53
Place your next cake layer gently on top, not pushing down yet
4:57
and get down to eye level and spin the cake to check that the cake is directly on top of the layer beneath
5:02
and not sticking out on any sides. After placing each layer on top of the cake
5:07
it's really important to spin the cake so you can check it from all angles to make sure that the sides are straight and it's not
5:13
leaning to one side and that's one of the reasons why using a turntable makes this process so much
5:17
quicker and easier. If you're using just butter cream for the filling, maybe flavoured with another
5:23
ingredient like stirring in melted chocolate or strawberry jam, then you don't need to use a butter
5:30
cream dam if the consistency of your buttercream filling is fairly stiff, the same as you would
5:35
use to frost a cake. You would just spread that on like this layer of butter cream here
5:40
except thicker if you like a thicker layer of filling and then skip the dam and the second filling and add the next layer of cake If you don have a piping bag you can spoon butter cream into a sandwich bag like a Ziplock bag
5:54
and cut off one of the bottom corners and then squeeze the butter cream through that to pipe a ring
5:59
or a dam around the cake. This is probably obvious, but for cooked fillings, like caramel or
6:05
lemon curd, make sure they're cool before you add them to the cake, because a hot or warm filling
6:11
will melt the buttercream dam and completely defeat the purpose of it
6:16
You'll see this in the next part on crumb coating layer cakes
6:20
but I'll mention now that since a layer cake is made up of several pieces stacked on top of each other
6:25
it's really important that they attach to each other before you apply any pressure to them
6:30
like spreading frosting onto them, because that pressure can push the layers off centre and make the cake lean to one side
6:37
The most effective way to attach the cake and filling together is to chill them
6:43
So place your final layer of cake on top and spin the cake to check it's straight
6:48
nudging any layers over if they're sticking out to one side. Then put the cake into the fridge for 30 minutes to set the filling and then it will be ready to frost
6:57
which I'll show you in part two of this video. First, there's a final step which is to smooth the filling around the sides of the cake
7:04
wherever it's sticking out. because you don't want those bulges to get in the way when you frost the cake later
7:11
In the next part of this video, I'll show you step by step how to crumb coat a cake
7:15
and in the final part, how to frost a cake with super smooth frosting
7:20
I hope this has been useful. Please ask me any questions you have in the comments, and subscribe to my channel for a new cake decorating tutorial every week
7:27
and visit my cake school on British Girlbakes.com to learn hundreds of cake decorating techniques and designs
7:33
to take your cakes from beginner to professional. Thanks for watching
#Cooking & Recipes
#Desserts