Up next in 10

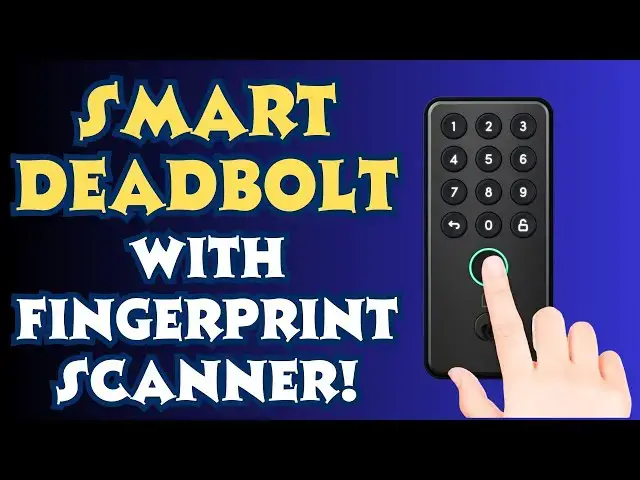
Unlock your new smart home with the Igloohome Deadbolt Go Smart Deadbolt with Fingerprint Scanner
May 29, 2025

Imagine walking up to your front door and being able to have it automatically unlock or unlocking it with a tap of your finger or custom PIN code. The Igloohome Deadbolt Go is a smart lock that revolutionizes your home security. Add an Igloohome bridge and you can unlock your door while on holiday thousands of miles away. Better yet, it's an easy install and programming's also simple with the companion Igloohome app, as tech expert Dave Taylor demonstrates with his own installation!
Check it out at Amazon:
Deadbolt Go: https://amzn.to/3YNsKRf
Wi-Fi Bridge: https://amzn.to/3YMYPZk
Or go to Igloohoom directly:
https://store-us.igloohome.co/products/deadbolt-go
0:00 Introduction
3:22 Lock Installation
6:07 Programming the App
9:08 Fingerprint Setup
9:56 Custom PIN Setup
12:31 Assessment & Conclusion
Visit Dave's Q&A Web site at: https://www.AskDaveTaylor.com/
#igloohome #smarthome #smartlock #smartdeadbolt #deadboltgo #askdavetaylor @Igloohome
Show More Show Less View Video Transcript
0:00
a smart deadbolt with fingerprint
0:01
scanner and a whole lot more let's
0:03
install it program it and check it
0:13
out Dave Taylor here and I'm on an
0:15
endless quest to make my home the
0:17
smartest possible enter these These are
0:22
the igloo home deadbolt go Smart Lock
0:25
with fingerprints and they sent me the
0:27
Black Version and the white version both
0:30
of which also use a Wi-Fi Bridge because
0:33
just out of the box they work via
0:35
Bluetooth so they're easy to program and
0:38
they work just as well but if you're at
0:41
work and 17 miles away and you realize
0:44
oh I need to lock my door or unlock it
0:47
you can't do that without the bridge so
0:49
pretty basic the trade-off there I just
0:51
want to say this right up front is that
0:53
by having these just do Bluetooth
0:55
instead of Wi-Fi is the batteries last a
0:58
whole heck of a lot longer by having
1:01
wifi enabled smart locks you have this
1:04
dilemma that they consume a lot more
1:06
power so you end up changing batteries
1:08
every four or five months so using the
1:11
bridge and the bridge is just a little
1:13
box that just plugs into the wall and
1:16
the bridge actually has power that's
1:18
what's on Wi-Fi so these batteries last
1:21
a lot longer now I'm going to tell you a
1:23
little bit about the lock and then we're
1:25
going to do the install and then I'm
1:27
going to do some basic programming of
1:29
the lock and and then I'll come back
1:31
with some conclusions and thoughts about
1:33
how the whole process went so it works
1:36
with digital Keys remote PIN codes you
1:38
can even do decoy prefixes so if your
1:41
code is 345 which is a terrible code you
1:44
could do one two 3 4 5 and then someone
1:47
wouldn't know wait you know is it that
1:50
five-digit number or you could
1:52
presumably do like 1 2 3 4 5 6 7 8 9 10
1:55
1 2 3 4 5 or something like that and you
1:59
would still get that same benefit so I
2:01
like the decoy prefixes it does have
2:04
fingerprint scanning which is really
2:06
cool the idea that I can just put my
2:08
thumb up to my door and unlock it
2:10
because it recognizes my fingerprint
2:12
really nice you can also unlock it with
2:15
an Apple Watch Once you get everything
2:17
all programmed and get the app all set
2:19
up of course it also has physical keys
2:23
and it's always good to have one of
2:24
those around just in case autolock
2:28
option you can set so you really want to
2:31
have it automatically lock after you've
2:34
unlocked it maybe give it 30 minutes or
2:36
something we'll look in the app we'll
2:38
see how that works exactly it gives you
2:40
a low battery alert CU you don't want to
2:42
have it run out of battery and it takes
2:44
four doublea's that are not included by
2:46
the way so when you get one of these
2:48
when you're ready to do the install you
2:51
want to have some screwdrivers but you
2:53
also want to have four ablea batteries
2:55
handy it is an Grade B and it's made out
2:58
of a zinc alloy and Design designed to
3:00
work in subzero temperatures just
3:02
slightly Subzero but if it gets down to
3:05
10° outside or something your Lock's
3:07
going to be fine so enough conversation
3:11
let's jump into that install and what
3:13
I'm going to do is I'm actually just
3:14
going to narrate a slideshow cuz that's
3:16
much easier than trying to film this as
3:19
I actually do the install and I'll just
3:21
say the install was super easy so let's
3:24
jump in as a first step I always like to
3:26
lay out all the components to see what
3:28
I'm working with and it doesn't have a
3:30
huge number of Parts but you want to
3:32
keep track of which screw and which bolt
3:34
or which and then I have my tools you
3:38
need probably multiple Phillips head
3:40
screwdrivers and I had a flathead
3:43
available just in case now moving to the
3:46
door I have fully removed the previous
3:49
deadbolt and you can see I have
3:52
repainted my door without taking the
3:54
previous dead bolt off so that paint job
3:57
probably could do with an upgrade at
3:58
this point first step is to put the
4:01
deadbolt in and in this first shot you
4:04
can see it's not centered so I pulled
4:08
the dead bolt out and twisted it
4:11
180° and then it was longer it's
4:14
designed to do that and now you can see
4:16
it's centered and in this closeup you
4:19
can also see that up is ingeniously on
4:22
the upper side of the deadbolt that is
4:25
critically important next step is to put
4:28
the keypad and slide it through the
4:32
deadbolt so that that flat metal piece
4:35
is parallel to the ground you can see
4:38
that better on this inside shot also
4:40
notice you have to feed the cable
4:42
through underneath the deadbolt so that
4:45
the front connects with the actual lock
4:48
mechanism
4:49
itself here I have put on the inner wall
4:53
plate it's just two long bolts and again
4:56
you can see that that metal piece is
4:59
parallel to the ground so I have not
5:02
changed its
5:03
orientation on the outside just as a
5:06
check this is the moment to make sure
5:08
that you have it nice and square with
5:10
your door cuz you can adjust it just a
5:12
couple of degrees either way so this is
5:15
looking pretty good back on the inside
5:18
that wire now plugs into the little
5:23
connector on the circuit board and
5:26
gently push it all the way in on both
5:29
sides sort of as a sort of rocking
5:31
motion to get it in place and notice
5:34
just above my thumb knuckle is the slot
5:38
that that metal tongue is going to go
5:41
into this then screws onto the door with
5:44
three screws two that are hidden behind
5:48
the batteries and a third one that's at
5:50
the bottom with that done I can put the
5:53
batteries in and you'll actually hear a
5:55
beep to confirm that it is indeed
5:57
working now on the the outside all I
6:00
have to do is push a button to wake it
6:02
up and I should be able to pair it with
6:04
the app so let's go ahead and try that
6:06
part out it's installed now let's get
6:09
this thing working with the app and as
6:11
you can see I have a variety of igloo
6:13
home devices I'm going to do plus and
6:16
we're going to pair a lock or device and
6:19
it tells you to push a button to wake it
6:22
up so we'll do that and let's see there
6:26
we go and you can see it immediately
6:28
shows up here so we're going to pair it
6:31
and I'll just call it front door it's
6:36
pretty easy
6:38
done let's see select which home it's
6:41
going to be in it's going to be in this
6:43
home and finish pairing let's see how it
6:46
goes product disclaimer okay well I'll
6:50
read that
6:51
later or maybe not at all who knows and
6:55
now it's actually doing the pairing and
6:58
I can hear this beeping so some progress
7:01
is happening and hopefully it just takes
7:04
a moment or
7:06
two there we go pairing complete let's
7:09
check for a firmware update and I like
7:12
that they make that automatically one of
7:13
the steps you have to go through
7:16
firmware is up to date excellent open
7:19
and unlock your door then tap on the
7:21
calibrate button so I've already
7:24
actually done that so
7:30
it did want me to actually open the door
7:31
when I did that but since I know it's
7:33
all aligned and everything's in good
7:35
shape it is good to go and it's figured
7:37
out that it is on the right hand side so
7:40
it unlocks if you're inside looking at
7:42
the log it unlocks to the left so all
7:46
looks good it's 100%
7:48
batteries and let's first
7:51
off it's locked so let's unlock
7:58
it and now now it's unlocked and just to
8:02
do the other half of that let's lock
8:08
it and now it's
8:10
locked and I cannot get into my house
8:13
which is a little bit of a problem but
8:14
let's just keep going so now
8:17
access so I can set up a master PIN code
8:21
and then there's logs and there's
8:24
settings so let's see so I have autolock
8:28
disabled um I have sorry auto unlock
8:31
disabled I have autolock not enabled and
8:35
auto unlock is an interesting one it
8:37
basically works with your phone so you
8:39
choose a device and when that device
8:41
gets close then the door unlocks I'm not
8:44
sure I like that idea so I think I'm not
8:47
going to turn that one on um security
8:49
lockout if someone tries three bad codes
8:52
then it's just going to shut down and
8:54
not let them try anymore one that people
8:57
might enjoy is adjusting the volume so
8:59
you can control how loud it is uh let's
9:02
see in otherwise it looks like we're in
9:05
good shape so let's go back to the lock
9:08
unlock and but I want to do access so
9:11
let's create access and let's do a
9:13
fingerprint so ensure your finger is
9:17
clean and dry I'm going to do um
9:21
me
9:23
and
9:25
then I think I'll just do my forefinger
9:27
so privacy notri
9:29
notice accept and
9:34
now I'm just going to be putting my
9:37
finger on it at different
9:38
angles so that it can have a picture of
9:43
a larger sense of my finger the idea
9:46
being that this
9:49
way there we go this way however I touch
9:53
it with my finger that it should work so
9:56
now we have that fingerprint and let's
9:59
create a PIN
10:00
code and we'll do a custom pin via
10:04
Bluetooth and we're going to do remember
10:06
what I said
10:09
3456 let's do 3456 that's a terrible
10:12
code but we'll just go with it and we'll
10:15
have this be a permanent
10:17
code and let's see create access oh and
10:21
this is
10:23
demo so create
10:27
access so PIN code code created I don't
10:30
want to share it with anyone so now
10:32
let's give it a shot so now the door is
10:35
locked ready let's try my
10:40
fingerprint and unlocked sweet now let's
10:45
go into the app and I'm going to go to
10:48
unlock and I'm going to lock it cuz why
10:51
not
10:54
right so now it's
10:56
locked now let's try the new PIN code we
10:59
created 3 4 5 6 and then
11:07
unlock and there it is it's unlocked so
11:10
the PIN code works the fingerprint works
11:12
and then I
11:13
think let's
11:16
see
11:19
H have to figure out how to lock it from
11:22
the outside that's the one thing that's
11:24
not obvious here but be that as it may
11:27
you can see I have now set up a pin code
11:31
that's permanent I could set up another
11:33
one that just works certain hours or
11:34
maybe just for a week and I can set up I
11:38
can use my phone I can use my Apple
11:40
watch there's a lot of flexibility here
11:43
and it's really easy to work with so now
11:46
I can see here's my front door and it
11:49
shows that it's locked let's see so oh I
11:53
see so that's just a generic icon so
11:55
let's push that and now it says it's
11:58
unlocked so it might have gotten a
12:00
little confused cuz as you can see it's
12:03
unlocked but the icon still shows locked
12:06
so I think that is just a generic push
12:08
this button to unlock the door so to un
12:11
to actually lock it I need to go to the
12:13
next
12:17
screen and there it's locked so that's
12:20
pretty straightforward and there must be
12:22
some way I'll figure out there's some
12:24
way from the outside that you can push a
12:26
button and get it to lock the door I'll
12:28
get that figured out but that's the
12:31
basic example here and you know you can
12:33
see that the install was pretty darn
12:36
easy this programming is pretty darn
12:39
easy there's a lot to like here and one
12:42
of the other really cool things is that
12:45
the uh app actually integrates with
12:47
things like Airbnb app and a bunch of
12:50
other rental apps so it could be part of
12:52
that process of I have a new tenant I'm
12:55
going to push a new code I'm going to
12:57
get it into Airbnb I'm going to have
12:58
them share it as part of the welcome
13:01
email that I send people all of that
13:03
really nice comes in two colors this is
13:06
obviously the Black Version the White
13:08
Version would look the same but it would
13:10
be white entirely makes sense um then
13:14
and that Wi-Fi bridge is something I
13:16
will want to plug in inside as close to
13:19
this as I can because Bluetooth range is
13:23
you know 10 to 30 ft but to save power
13:26
and to have those batteries last longer
13:28
I believe this is going to have a fairly
13:30
low range so easily done with I have two
13:33
or three Outlets within like I don't
13:36
know 24 in of the actual inside of my
13:38
door so those will work great the only
13:41
other comment I will make is
13:44
that they probably should be telling you
13:46
how to do that locking piece I'll figure
13:49
that out so that's everything I got for
13:51
you I think it was easy to install I
13:53
think it's pretty darn easy to program
13:56
it's really nice to have this set up and
13:58
even if you don't buy the bridge and
14:00
don't get on Wifi having all this
14:02
flexibility and being able to like have
14:05
Grandma have her fingerprint open the
14:08
door means that she doesn't have to
14:09
Fumble with a key or worry about a pin
14:12
code that she might forget so all of
14:15
that is super beneficial and really
14:17
flexible so this is definitely one to
14:19
check out and at a really good price
14:21
point in fact we do need to talk price
14:24
before we get there though I'm going to
14:26
ask you to subscribe to my channel click
14:28
or tap on that subscribe button and go
14:31
ahead and hit that Bell icon for
14:33
notifications and give me a thumbs up if
14:35
you found this of value certainly hope
14:37
you did great this is the igloo home
14:41
deadbolt go Smart Lock with fingerprint
14:44
and it comes in black or white and it's
14:48
$129.99 amazon.com this a pretty
14:50
screaming deal for something this
14:52
sophisticated and if you want it to be
14:54
Wi-Fi accessible from anywhere in the
14:56
world then you will also need the Igloo
14:59
home Bridge which will set you back
15:01
another $75 so all in all about 200
15:05
bucks for that full setup including
15:08
really light nice long battery life so
15:11
lots to like here it's all I got I'm
15:13
going to go and do some more programming
15:15
of my codes so I'll catch you in my next
15:18
video
15:21
[Music]
15:33
he
#Home Improvement
#Home Automation
#Locks & Locksmiths
#Home Alarm & Security Systems