Up next in 10

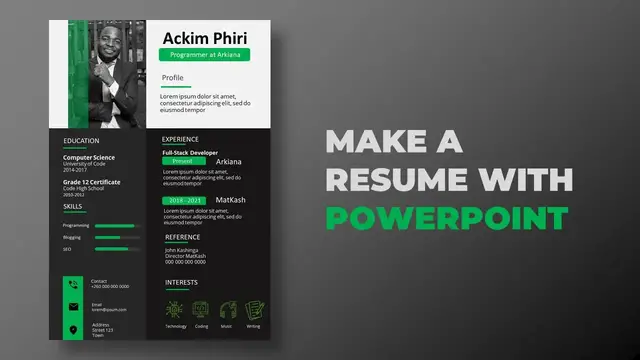
Let us make a Resume with PowerPoint
PowerPoint Template - https://arkiana.com/make-a-resume-with-powerpoint/
Show More Show Less View Video Transcript
0:00
Hi everyone, you are going to look at PowerPoint. It is a very powerful software I used to make
0:05
presentation. But I use PowerPoint for a lot of work, a lot of design work. I use it to make
0:11
infographics, pictures from my blog post, even YouTube thumbnails. Now in this video, I'm going
0:17
to make a beautiful resume using PowerPoint. And even if you're a beginner, you have no idea about
0:23
PowerPoint, you have not used it before, you can learn the basics of PowerPoint through this video
0:28
and in the process you'll be able to build this beautiful resume
0:32
So let's get started. Okay, so these are all the files that we're going to use in this project
0:38
I'll put them in the link in the description below so that you can download them for free and use some of these icons if you want to
0:46
So these are all the files that we need. So I've just opened up PowerPoint
0:50
You have this first screen greeting you. Then you can go on blank presentation
0:55
So you have this slide. So these are slides here. We have slide number one there
1:01
This is what we're going to use to build our resume. But firstly, we want to change the orientation of this slide
1:08
because we can see from our resume, we have it in portrait
1:12
Page one, page two are all in portrait. And because of that, we want this page to be in portrait as well
1:19
So on the tabs here on top, I'll go to design. Then I'll navigate to slide design
1:26
just click the click on it there then you have customized slide okay so here you can change the
1:35
orientation so we have portrait and landscape I'll put it on portrait you can also change the size of
1:42
the slide I'll choose a for here just in case you want to print this resume then just say okay
1:48
you can choose any of these okay then you have our portrait there then I'll go back to the home
1:56
tab i'll just remove these things that i can see here so i'll go on layout just scroll down then
2:03
blank so those are gone i also remove these lines by light clicking on them delete
2:10
light clicking delete so we have our blank space there so when you look at the resume that we have
2:17
so we have some sections we have this white part there then we have another darker one and another
2:23
very dark here so i'm going to design these parts first of all before anything else so when you are
2:33
you are on your slide you can go to insert then insert shape then just choose the rectangle then
2:40
i'll just do any size that i want i'll be able to resize it so i can just do anything like that
2:47
so you can see this one has the outline it's blue not exactly what we want so you can go and shape
2:53
outline and say no outline then you can go and shape fill and choose just choose this light gray
3:01
like that then you can move this however you want so just move it up there and resize it a bit using
3:08
these points like that okay just a little bit okay so we have our first part remember we had
3:17
the second one here which was darker so we can go to insert and get another shape and do the same
3:24
process or we can duplicate this one that we have made however you go about it still remains the
3:30
same so i'll just start from here make that shape it's going to be a little bit smaller than the
3:37
other one again i'll say no outline then for the shape fill it's it's going to be a darker color
3:43
uh okay just this one then i can duplicate this just click on it when it's highlighted like that
3:54
let me just click there so it's not highlighted but when i click on it it's highlighted i can say
3:59
ctrl d to duplicate then i can move this one around so i'll just start it from there
4:05
just put this one towards the end then i can change the shape feel for this one it should be
4:12
darker like that great so we have our template let's make this a little bit
4:19
darker so go for okay that's that's a good one so we have three of these and
4:25
when you look at our sorry when you look at our Desi email we have these three parts so I'll start with the photo I'll put the
4:34
photo then I'll move in to put the rest so go back my files I'll pick this photo
4:41
just drop it there in PowerPoint like that there we are it's very big let me
4:48
just resize it using the corners okay so it starts from somewhere there again
4:54
I'll resize it okay that's just about right okay let me just resize it again
5:01
okay okay up to this point then I'll drag this one a little bit down so that
5:07
it okay start from there even this one wonderful okay so we have our photo if we see in the resume
5:16
keep going back to this one the photo is black and white and so we can just double click on the photo
5:23
then we go where it says color then saturation then just place black and white there boom we
5:30
have our photo like that then what's the other thing we have if i go back to this one we have
5:36
this yellow transparent line so if we can see at this resume the colors are orange yellow orange
5:44
something like that but just for a change and for variety we're going to use green we're going to
5:50
use green so that we have that difference okay so i'll go on insert one small shapes get the
5:58
rectangle started from here there and it's about that size like that okay the same process no
6:07
outline then i can pick the shape color i want it to be green green like that but if you can see this
6:15
this one is not transparent so let me just pull this down so to be able to make it transparent
6:22
you just click on it then right click there's an option that says for match shape
6:31
and once you do that you can go to fill then there's this transparent option so when i drag
6:38
it to the right i increase the transparent you can see what is happening when it goes to 100
6:44
it no longer visible so i just leave it about there so we have our our transparent line there Again when I go back to this one so we have the name there we have what this person does so just do that just write the name and
7:01
I'll bring in this box profile and all those things so we go back to be able to
7:08
write something you go on insert text box then you can just click anywhere and
7:14
start typing so just say akim piri okay you can click ctrl a to highlight everything so that you
7:24
can make it the size that you want so make it bigger like that again and again okay i can drag
7:33
it there just about there let me just get rid of this great so we have our name there
7:41
okay so we need the title underneath it but for the title if we can see there's this yellow
7:50
rectangle then there's the title inside so we'll do just that we'll go on insert shapes then this
7:59
time around we'll pick the rounded rectangle rounded corners rectangle so you click on it
8:04
again you can just put it anywhere so just click like that then you have this yellow circle there
8:13
that you can use to make this more rounded or less rounded so just make it slightly rounded
8:20
like that then i'll be able to adjust this make it a little bit smaller okay great let's put it
8:26
here and see what is happening okay so i can drag it once more okay and even this side great
8:36
again we'll say no outline then we'll choose this green color like that okay so our resume
8:43
is taking shape we just go to insert get the text and write whatever we have to write
8:49
So that one was saying blog at Akeana, you can say programmer at akeana.com or just at Akeana
9:02
Again, you can highlight everything, make it a little bit bigger like that
9:07
Let's see if it fits in there. It doesn't fit very well
9:13
Let's make it a little bit smaller like that. Okay, then I can click on this one and say ignore and just center it like that
9:22
So you can see that black is not very transparent on this green
9:29
Let's try to use a different color for this text. So you go where there's an A and a red down there and you can just click on the drop down
9:38
Then you have the colors that you want. So I think white looks good
9:45
So I'll pick white, I think that's visible. Great. Next it says profile just here. So I can just
9:52
click on these words, I can duplicate them like that. Just drag it somewhere there so that I'm
9:58
able to write properly. So just say profile like that. Then this one would be control O
10:09
and change the color to black okay something like that and make it a little bit bigger
10:18
just drag it over there great okay just smaller a little bit okay wonderful so the next thing is to put the line just underneath
10:32
this profile so you can go again on insert shapes you have a line there but
10:38
what I like to do is to use a rectangular rectangle shape because I can
10:43
easily control it so just put a very small line like that short one for that
10:53
matter then I can say no outline and the color field will be the same one then
10:58
just drag it just underneath this this one push it a little bit this side great okay next just a
11:08
very little bit of some words here so just select all of these and just push them up a little bit
11:16
using the arrow key like that okay so that i leave some space here so for the profile here
11:23
you write whatsoever you want to write about you but what i'll just do is to copy some
11:28
load them ipsum okay you can drag it there just pull it a little bit okay
11:40
great you can just delete this one once more wonderful so we have our text there so this is
11:49
just a short summary about you so i don't like the red i'll just get rid of this quickly then we
11:56
continue okay great now that we are done with this part we can move on to the other parts
12:03
let's look at our template once more so we have done this part that one and that one and you can
12:09
see this name is board so we'll have to do that so the first section will look at the experience
12:16
section be able to fill out this then move on so we have experience we have present from a certain
12:25
year to a certain year so let's work on those things so i'll go back to this one first of all
12:31
make this one board because it's board there okay great then i'll just i can copy this word by
12:40
duplicating it and just moving it here change the color to something visible
12:48
like white and call it experience okay so in the experience I'll just duplicate
13:00
this one once more bring it just down here Just make it a little bit smaller
13:14
Okay, let me just zoom in so that I can make it even more smaller
13:24
Okay, like that. Great. Okay, so now we can get our words
13:33
I can just duplicate this Okay and write whatever I want here so I can say present where we are working right now Okay Just make it a little bit smaller drag it put it on top there okay great
14:01
next just at the end we can put the name of the place where we're working
14:06
okay now just get this one duplicate it because it's much easier that way and i'll say
14:13
a kiana that's where we're working okay by the way before i do that you can see that above this thing that has a position there's a
14:31
title what you're doing at the moment so just do that i'll just highlight these and move them
14:39
down a little bit to leave space for that title okay then i can get this one duplicate it and write
14:49
that title full stack develop okay i just highlight everything make it bold and a little bit smaller
15:05
okay move this one a little bit up okay that's good isn't it okay so now i have your duties what you do at this company so i'll just
15:23
copy this again duplicate it then just write what you do i'll just make this a little bit smaller
15:32
Okay, just put it here, Ctrl O and change the color of this to white
15:46
That's right, isn't it? When we look at this, just what is happening even there
15:51
So we'll put the next company. So to make it easy, just copy everything here starting from full stack there, duplicate
16:01
it and just drag it downwards like that. So this another company worked on it from maybe 2018
16:16
to 2021, something like that. And the name of this other campaign was Madcash. Okay, again
16:31
these are the duties, this is what we are doing. So, so far, we are up to this point
16:38
The next are the references. Okay, so let me just make this one all capital letters
16:44
and the references as well. So when you go to this to the experience you highlight everything
16:50
you can just move on to this tab where it says change case then choose uppercase you can even
16:56
make it board so that it's visible. I think I'll leave it unboarded like that okay then
17:05
you can choose the experience, you can duplicate the experience and say differences
17:18
You can now do the same thing, uppercase
17:30
okay so what i've noticed here is i'm running out of spades what i've written is quite bigger
17:40
than what is uh here so i'll just defactor everything and come back
17:48
okay so i've factored defracted some things to make everything fit in there
17:54
so let's continue with the reference so here's what we'll do I'll just I'll just
18:01
put one reference so this would be let's say John Cashinga okay he's the director of Mattcache
18:20
and these contacts are let's say 0 0 0 0 0 0
18:28
okay so those are the contacts i'm just zooming a little bit
18:37
so that we are able to see what we are doing great and i'll just remove these
18:42
okay so that's our that's our difference you can add another difference here the process is just
18:52
the same so when I go back to this one so you can see these two differences there next we'll
18:58
just add the interest. So do the same, duplicate this, just here and call it interest
19:17
Just put it there then this is where we're going to add our icons. Great so
19:24
here that's where we grab our icons so we have these three icons our interest
19:29
is in technology so just drop it here okay again I'll just resize this like
19:38
that so our first interest is technology so you can see this is not visible it's
19:48
dark so again you can go to colors and just change the color to green like
19:54
that okay so we have that green you can drag another one so this one is for coding
20:05
just put it here besides it just like this one just double click it go to colors choose that green
20:17
then I can add in another one so we have music writing
20:31
okay we do the same and choose green then I can just copy this one
20:38
control also the first one will say technology if I interested in technology just make it a little
20:54
bit smaller so that it fits here, okay so there is our technology, smaller once again
21:01
up to 10 like that great so this part is done again the colors you can change
21:11
them put the ones that you like but I'm just using the same colors on the
21:19
entire template so in this part if we can look at this one we have education
21:25
we have skills and we have this part let me start with this one so just go back
21:30
there they'll just go on and set shapes rectangular shape somewhere here okay
21:39
about this size yep so do the same no outline shape this one will be green
21:51
okay then we have different icons there we have the core icon male icon and the
21:58
location icon so just drag them over from this one the call icon we put it there so just okay
22:10
this one then we can put our details there so just get this one duplicate it bring it over here
22:20
and just write the things i want so the first one is contact so say contact
22:28
then put the number there okay just make it a little bit smaller
22:40
that's our contact city three would do okay wonderful so we have that next we need to have a section for skills okay so we can see our
22:59
resume here is taking shape we have ordered added all the things that we need and now just remaining
23:05
with the skills here so once again go to this one have education then skills so let me put these two
23:12
So, okay, these are the last ones and this I'll leave it for you so that you can make depending with what you have learned on this one
23:21
Okay, so let's go back to this one. I'll just get this, duplicate it and say education
23:33
duplicate it again and say skills okay so for the for education I'll just get this duplicate it
23:52
drag it there okay have that now let's take care of the skills and that should be it so for the
24:02
skills you can look at them we have the skill and the level of the skill this
24:07
side so this one is very simple to do what we need I'll just put three skills
24:13
here so let's say let me just get this text and duplicate it so this would be
24:23
my skill number one let's say programming and skill number three will be let's say SEO
24:37
okay so now for the for the levels there of your skills you're just going to insert
24:45
these shapes so we use a rounded shape so from here up to say there
24:53
so i'm just going to okay that wasn't around the chip and say shape rounded there up to there so
25:04
i'm just going to zoom into this one so that you can see it's rounded i'm going to make it even more
25:11
rounded the move outline and make it the feel be make it even more darker yeah this should do
25:25
so just duplicate the same one just drop it on top of this one and drag it backwards slightly
25:34
and just change the color of this one to the green that we are using so you can see there we are
25:42
giving an effect of the shadow so if you want you can put a small circle here to see where it ends
25:48
okay so just do the same for this one i'll just copy all of them then duplicate and blogging
25:58
do the same there on SEO so let's say programming we're very good at it so almost full blogging
26:10
we're getting there near the half and then SEO just a little bit backwards like that
26:20
so there we have our template we have our resume the first part and this is
26:27
fully editable you can change all the details put you on change your icons you
26:33
can change everything here including the fold and add your own so I've gone on to
26:38
do the second one but this has taken a lot of time already so you can take that
26:43
as part of your work to put together all the knowledge that you have learned in
26:49
in this first part and be able to build the second part
26:53
Actually, the second part is even much more simpler than this one
26:56
You just have this section, this one, that one, the photo there, and this one
27:04
So take that as your work and be able to build this one
27:09
So once you are done, you can even export this, export and export it to PDF and print it if you want
27:17
send it to whoever you may want to review so i will leave all the files and including this template
27:25
in the description below you have a link where i can download it for free and be able to practice
27:32
on your own so thank you so much for tuning in thank you so much i'll see you in the next one
#Jobs
#Career Resources & Planning
#Resumes & Portfolios