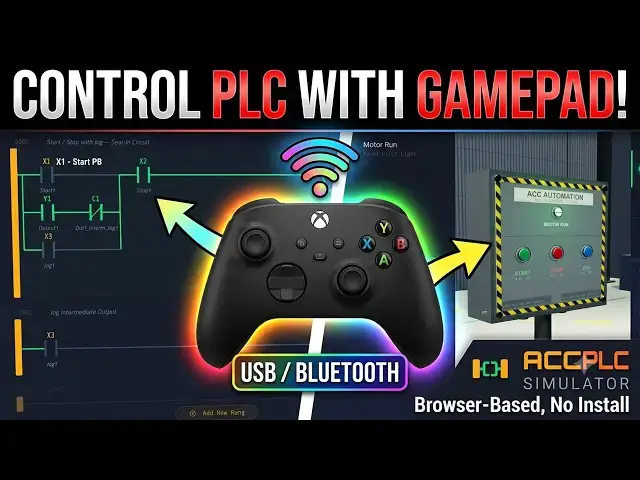

ACC PLC Simulator: Any Gamepad Now Drives Your PLC! 🎮
Jul 6, 2026
Control the ACC PLC Simulator with any USB or Bluetooth gamepad — drive digital & analog inputs, orbit 3D scenes, and run your program. No install.
⚡ QUICK ANSWER
Yes — the ACC PLC Simulator now supports any standard USB or Bluetooth controller (Xbox, PlayStation, or generic) with zero drivers, using the browser's built-in W3C GamePad API. Face buttons act as momentary digital inputs (X1–X10), triggers and sticks map to analog inputs AX1–AX5 across the real-world 0–4095 range, and the system buttons run, stop, and single-step your program. The full button-by-button mapping table, 3D-scene camera controls, and input-ownership rules are in the written guide below.
📖 FULL STEP-BY-STEP + DOWNLOADS (mapping tables, 3D scene notes, coding samples)
https://accautomation.ca/acc-plc-simulator-and-3d-scenes-control-plc-with-gamepad/
⏱️ TIMESTAMPS
0:00 - Introduction
0:45 - Why Use a GamePad?
1:27 - Getting Started (No Install)
1:50 - Digital Input Mapping (X1–X10)
2:20 - Analog Input Mapping (AX1–AX5)
2:49 - System Controls (Run / Stop / Step)
3:14 - Camera Navigation in 3D Scenes
3:41 - Focus Gating Across Windows
4:12 - Input Ownership Rules
4:45 - Try It: Control Panel Scene
5:18 - Try It Yourself
📚 WHAT YOU'LL LEARN
✅ Connect any Xbox, PlayStation, or generic USB/Bluetooth controller with zero drivers via the browser's W3C GamePad API
✅ Map face buttons, D-pad, and shoulder buttons to momentary digital inputs X1–X10
✅ Drive analog inputs AX1–AX5 (0–4095) with triggers and sticks, centered at 2048 with dead-zone filtering
✅ Run, stop, and single-step the program plus zoom and orbit 3D scene cameras straight from the controller
✅ Understand focus gating and input ownership so 3D scenes (like the conveyor's X3/X4 sensors) keep priority
❓ FREQUENTLY ASKED
Q: Do I need to install drivers or software to use a gamepad?
A: No. It uses the W3C GamePad API built into your browser — plug in a USB or Bluetooth controller, press any button, and the toolbar badge turns green with your controller's name.
Q: Which controllers work with the ACC PLC Simulator?
A: Xbox and PlayStation controllers plus most generic USB and Bluetooth gamepads. Any standard HID controller the browser recognizes should map automatically.
Q: Why won't my gamepad button change an input inside a 3D scene?
A: Input ownership — when a scene drives an address through its own sensors or buttons (e.g. the conveyor's X3/X4 proximity sensors), the scene wins. The gamepad still controls every address the scene isn't using.
👉 Full step-by-step, mapping tables & coding samples: https://accautomation.ca/acc-plc-simulator-and-3d-scenes-control-plc-with-gamepad/
🔗 MORE RESOURCES
▶ Try the ACC PLC Simulator (free): https://accautomation.ca/simulator/
▶ PLC Beginners Guide: https://accautomation.ca/programming/plc-beginners-guide/
▶ Free eBooks: https://accautomation.ca (subscribe for download)
🛒 RECOMMENDED HARDWARE
▶ Shop: https://www.automationdirect.com/
▶ Parts Guide: https://www.accautomation.ca/purchase-find-parts/
💬 Questions? Drop a comment below.
🔔 New tutorials every Monday — Subscribe and hit the bell!
#PLC #LadderLogic #IndustrialAutomation #PLCProgramming #ACCAutomation #PLCSimulator #Gamepad #3DSimulation #PLCTutorial #LearnPLC
Regards,
Garry
ACC Automation
http://www.accautomation.ca
Use your Xbox or PlayStation controller with the ACC PLC Simulator for easier navigation and testing. This update lets you control PLC inputs and analog values without a keyboard.
This demonstration shows how to connect any standard USB or Bluetooth gamepad to the ACC PLC Simulator environment. You will learn how to map your controller inputs to specific PLC functions, navigate the 3D scene camera, and run your program hands-free. This setup is designed for engineers and students who want a more tactile experience while testing their logic.
There is no software installation required to get started. Simply plug in your device and begin managing your PLC controller setup directly through the interface. Whether you use a generic USB game controller or a console-specific peripheral, the simulator detects it automatically, allowing for immediate control of your simulated automation environment.
Subscribe for weekly PLC programming breakdowns and leave a comment below if you have questions about specific controller configurations.
Show More Show Less