Up next in 10

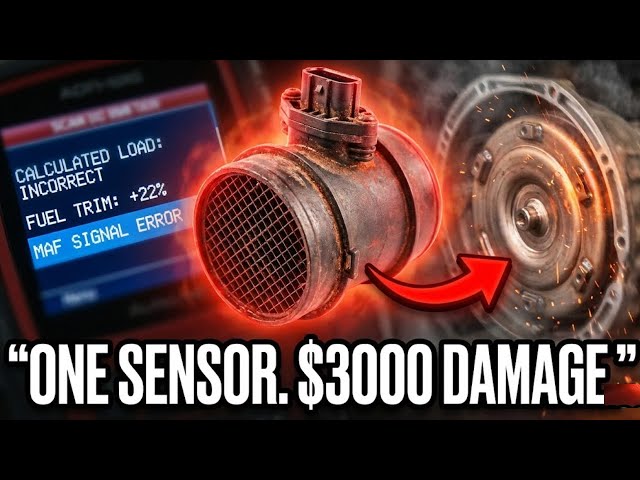
Is your car hesitating, shifting hard, or burning excessive fuel? Before you spend $3,000 on a transmission rebuild or new fuel injectors, check the "Ghost" in your engine. In this deep dive, we reveal how a dirty Mass Air Flow (MAF) Sensor can trick your car's computer into destroying your performance and how to fix it for less than $10.
Most mechanics won't tell you this, but 40% of drivability issues are misdiagnosed. A dirty MAF sensor falsifies data, causing "System Too Lean" codes (P0171, P0174) and confusing your Transmission Control Module (TCM).
In this masterclass, you will learn: ✅ The physics of "Hot Wire" Anemometry (How your car breathes). ✅ How to use OBD2 Live Data (Fuel Trims) to prove the sensor is lying. ✅ The hidden link between Air Flow and Transmission "Line Pressure" (Why it shifts hard). ✅ How to scientifically distinguish a Vacuum Leak from a bad MAF using the "2500 RPM Rule." ✅ The critical cleaning mistake (Brake Cleaner) that instantly kills sensors.
⚠️ Warning: Never touch the sensor element with your fingers or a brush. Always use specific Mass Air Flow Sensor Cleaner based on Hexane/Heptane. Using carb cleaner or brake cleaner can dissolve the potting material and destroy the sensor electronics.
🔔 Subscribe for more honest, technical automotive deep dives
✅ Anti-seize compound (https://amzn.to/3J8to6O)
✅ Dielectric grease (https://amzn.to/3W5p2Ao)
✅ Oil filter cutter (https://amzn.to/43dBAtf)
✅ High-mileage oil (https://amzn.to/4ooSKwl)
✅Throttle Body Cleaner WD-40 (https://amzn.to/4n317gu)
✅Car OBD2 Scanner (https://amzn.to/4o2bhz1)
Show More Show Less View Video Transcript
0:00
Stop right there. Put down the wrench.
0:02
Step away from the transmission pan.
0:04
Before you spend a single dime on new
0:06
fuel injectors, catalytic converters, or
0:08
a transmission rebuild, you need to
0:10
understand the biology of your car. I
0:13
have analyzed repair data from thousands
0:15
of vehicles. And there is a recurring
0:17
statistical anomaly. Over 40% of
0:20
drivability issues, that means rough
0:23
idle, hesitation, and hard shifting, are
0:25
misdiagnosed as catastrophic mechanical
0:28
failures. Owners pay $3,000 for a
0:31
transmission swap only to find the
0:33
problem returns a week later. Why?
0:35
Because the mechanic fixed the symptom,
0:38
not the disease. Today, we are going to
0:40
perform a forensic investigation on the
0:43
most critical yet most ignored sensor in
0:45
your modern engine, the mass air flow
0:48
sensor. I am not just going to tell you
0:49
to spray it. I am going to teach you how
0:52
to read the raw data stream your car is
0:54
hiding. How to scientifically
0:56
differentiate this sensor from a vacuum
0:58
leak using fuel trim mathematics and why
1:00
understanding calculated load is the
1:03
only way to save your transmission from
1:05
an early death. This is not a tutorial.
1:08
This is a master class in engine
1:10
diagnostics. Part one, the physics of
1:13
the hot wire. How it actually works. To
1:15
understand the failure, we must first
1:17
understand the physics. Your engine does
1:20
not measure air volume. It measures air
1:22
mass. Why? Because a cubic foot of air
1:25
at sea level contains significantly more
1:27
oxygen molecules than a cubic foot of
1:29
air in the mountains. If the car only
1:32
measured volume, it would run rich at
1:34
high altitudes and drown the engine.
1:36
Inside your mass air flow sensor, there
1:38
is a platinum or tungsten wire. This is
1:41
not just a wire. It is a thermal enmter.
1:44
The ECU sends an electrical current
1:46
through this wire to heat it to exactly
1:48
200° C above the ambient air
1:51
temperature. Here's the science. As cold
1:53
air rushes past this wire, it strips
1:56
away heat through convection. To
1:57
maintain that precise temperature
1:59
difference, the ECU must push more
2:01
current through the wire. The ECU
2:04
measures that current change down to the
2:06
milliamp and converts it into a digital
2:08
signal representing g/ second of air
2:10
flow. The failure happens when
2:12
microscopic particles, silica dust, oil
2:15
mist from PCV valves, and carbon coat
2:18
this wire. This creates a thermal
2:20
insulation layer. Now the air rushes by,
2:23
but it cannot cool the wire effectively
2:25
because it's wearing a winter coat. The
2:27
ECU uses less current to keep the wire
2:29
hot. So it calculates that less air is
2:32
entering the engine than reality. The
2:34
physics calculation breaks and the
2:35
domino effect begins. Part two, the
2:38
engineering trap, frequency versus
2:40
voltage. Now before we diagnose, you
2:43
need to know which language your sensor
2:45
speaks. This is where DIY mechanics get
2:48
confused. If you drive an older Toyota,
2:50
Subaru, or Nissan, your math likely
2:53
sends a voltage signal. At idle, it
2:55
might read 1.0 volts. At wide openen
2:58
throttle, it hits 4.0 volt. But if you
3:01
drive a GM, Ford, or many modern Euros,
3:04
your math sends a frequency signal. It
3:06
speaks in hertz. At idle, it might be
3:09
2,000 hertz. At full throttle, 8,000
3:12
hertz. Why does this matter? Because a
3:14
voltage sensor can simply drift and be
3:16
lazy. But a frequency sensor is digital.
3:19
It either works or it lies completely.
3:21
You cannot test a frequency math with a
3:23
cheap multimeter. You need an
3:25
oscilloscope or a scanner that reads
3:27
live data. Knowing this distinction
3:29
prevents you from testing the wrong
3:31
wires and frying your ECU. Part three,
3:34
the mathematics of destruction.
3:35
Stoometry and fuel trims. This is where
3:38
we move from theory to hard data. Your
3:41
engine targets a specific chemical ratio
3:44
called stoeometry. 14.7 parts air to one
3:47
part fuel. When a dirty math sensor
3:50
under reportports air flow, the ECU
3:52
injects less fuel to match that false
3:54
lower air number. But in reality, the
3:57
cylinder is full of air. The result is a
3:59
lean condition. The burn is too hot.
4:02
Nitrogen oxides emissions spike.
4:04
Cylinder temperatures rise. But you
4:06
don't have to guess. You can see this
4:08
happening in real time if you own a
4:10
basic OBD2 scanner. I want you to look
4:12
at two data points. Short-term fuel trim
4:15
and long-term fuel trim. In a healthy
4:17
engine, these numbers should bounce
4:19
between -5 and positive 5%. If your math
4:22
is dirty, you'll see your long-term fuel
4:24
trims drift to positive 10, pos5, or
4:28
even 25%. Positive numbers mean the
4:30
computer is screaming, "I am adding fuel
4:33
because the mathematical model doesn't
4:35
match the oxygen sensor reality." If you
4:37
see a system 2 lean code P 0171 or P
4:42
0174 and your fuel trims are high
4:44
positive numbers, do not buy oxygen
4:47
sensors. The math proves your math is
4:49
lying. Always look upstream. If the
4:52
input data is wrong, the output data
4:54
will be wrong. Never replace an O2
4:56
sensor until you have verified the math
4:59
is clean and accurate. Part five, the
5:01
transmission connection, line pressure,
5:03
and calculated load. This is the secret
5:06
transmission shops prey you never figure
5:08
out. How can a dirty air sensor cause
5:10
your transmission to slip or bang into
5:12
gear? It comes down to a data point
5:14
called calculated load. Your
5:16
transmission control module or TCM does
5:19
not have eyes. It relies on the engine
5:22
computer to tell it how much torque is
5:24
being produced. The engine computer
5:25
calculates that torque primarily based
5:27
on, you guessed it, air mass. If a dirty
5:30
math sensor reports low air flow, the
5:33
computer calculates low load. It thinks
5:35
you are gently cruising even if your
5:37
foot is on the floor. Because it thinks
5:39
the load is low, the transmission
5:41
reduces line pressure. It relaxes the
5:43
grip on the clutch packs to provide a
5:45
smooth, comfortable shift. But since you
5:47
are actually accelerating hard, that low
5:50
pressure causes the clutches to slip.
5:52
The engine revs up, the clutch grabs
5:54
late, and bam, you get a violent shift.
5:56
I have seen perfectly healthy
5:58
transmissions rebuilt for $3,000 because
6:01
of a $10 dirty sensor. If your
6:04
transmission is acting up, check your
6:06
calculated load data first. Part six,
6:08
the differential diagnosis. Math versus
6:11
vacuum leak. Now, we must be scientific.
6:14
A dirty math sensor and a vacuum leak
6:16
both cause lean codes and rough idling.
6:19
How do you tell them apart without a
6:20
smoke machine? We use the 2500 RPM rule.
6:24
Here's the test. Plug in your scanner
6:25
and watch the short-term fuel trims at
6:28
idle. Let's say they're high, positive
6:30
15%. Now, hold the engine steady at 2500
6:34
RPM for 30 seconds. Watch the numbers.
6:36
Scenario A. If the fuel trim numbers
6:38
drop down to normal, near zero at 2500
6:41
RPM, you have a vacuum leak. Why?
6:44
Because at high RPM, the massive amount
6:46
of air coming through the throttle body
6:48
dwarfs the tiny leak, masking the
6:50
problem. Scenario B. If the fuel trim
6:52
numbers stay high or get worse at 2500
6:56
RPM, you have a dirty math sensor. Why?
6:58
Because the more air that flows over
7:00
that insulated wire, the more inaccurate
7:03
the reading becomes. This simple
7:05
30-second test is 95% accurate and
7:08
separates the professional
7:09
diagnosticians from the parts changers.
7:11
Part seven, the barometric betrayal.
7:14
There is one more secret function of the
7:16
math sensor. It calculates barometric
7:18
pressure. When you turn the key to the
7:20
on position before the engine starts,
7:22
the math sensor takes a snap reading of
7:25
the air density. This tells you if you
7:26
are at sea level or on top of a
7:28
mountain. If the sensor is dirty, it can
7:30
skew this reading. I have seen cars in
7:32
Florida sea level think they are in
7:34
Denver 5,000 ft. The car leans out the
7:37
mixture to compensate for thin air that
7:39
doesn't exist. Check your Barrow PID on
7:42
your scanner. If it says 25 in of
7:45
mercury and you're at the beach, your
7:46
math is garbage. No amount of cleaning
7:49
will fix a barometric failure. You need
7:51
a new sensor. Part eight, the chemical
7:54
reality. Why brake cleaner kills. We
7:56
have diagnosed the problem. Now we must
7:59
fix it. But this is where 50% of DIY
8:02
mechanics destroy their sensor
8:03
permanently. You cannot use brake
8:05
cleaner, carburetor cleaner, or general
8:08
degreasers. Here's the chemistry. Brake
8:10
cleaners often contain acetone, taluine
8:12
or chlorinated solvents. These chemicals
8:14
are aggressive. The housing of your math
8:16
sensor is made of plastics like
8:18
polybutylene terratholate and the
8:20
potting material sealing the electronics
8:22
is often a silicone or epoxy blend.
8:24
Aggressive solvents can swell the rubber
8:27
seals, dissolve the potting compound,
8:28
and strip the protective coating off the
8:30
hot wire itself. You must use a
8:33
dedicated mass airflow sensor cleaner.
8:35
These are typically based on hexane or
8:37
heptine. These are alifhatic
8:39
hydrocarbons. They are non-polar,
8:41
meaning they dissolve oil and grease
8:43
instantly. But they are chemically inert
8:45
to plastic and rubber and they flash
8:47
evaporate in seconds without leaving a
8:49
residue. Chemistry matters. Part nine,
8:52
the surgical cleaning procedure. Step
8:54
one, battery disconnection. This is
8:56
mandatory. You need to reset the keep
8:58
alive memory in the ECU. The computer
9:00
has spent months learning to compensate
9:02
for the dirty sensor. If you clean the
9:04
sensor but don't reset the memory, the
9:06
car will run terribly because it is
9:08
still applying the old corrections to
9:10
the new clean data. Step two, removal.
9:13
Inspect the electrical connector pins.
9:15
Look for fredding corrosion. Microscopic
9:18
wear on the pins that creates
9:19
resistance. If the pins look green or
9:21
white, electrical contact cleaner is
9:23
needed there first. Step three, the
9:25
clean. Do not touch the element. Even
9:28
the natural oils on your fingertip are
9:30
enough to create a hot spot on the wire,
9:32
causing it to burn out when energized.
9:34
Spray the wire from multiple angles.
9:36
Also, locate the amber bulb on the side.
9:39
That's the intake air temperature
9:41
sensor. Clean that, too, as it assists
9:43
in air density calculations. Step four,
9:46
the cure time. Allow 10 to 15 minutes
9:48
for full evaporation. If you plug a wet
9:51
sensor in and turn the key, the sudden
9:53
voltage spike across the wet wire can
9:56
cause thermal shock and crack the
9:58
ceramic element. Part 10, the final
10:00
verification, the drive cycle. Once
10:02
reinstalled, start the engine. It may
10:05
idle erratically. This is normal. The
10:07
ECU is in relearn mode. Drive the
10:10
vehicle. You need to perform a mix of
10:12
city and highway driving. We are looking
10:14
for the fuel trims to stabilize back to
10:17
zero. You will notice three things
10:19
immediately. One, the throttle response
10:21
will be crisp, not mushy. Two, the
10:24
transmission shifts will firm up because
10:26
the calculated load data is now
10:28
accurate. Three, your fuel economy will
10:30
improve by 10 to 15% as the ECU stops
10:34
dumping excess fuel to be safe.
10:36
Conclusion, the logic of maintenance.
10:38
Modern cars are not just mechanical.
10:41
They are digital. They run on data. If
10:43
the data is garbage, the performance is
10:46
garbage. Manufacturers often state that
10:48
the MAF sensor is a life of the vehicle
10:51
part. My data shows this is false. In
10:54
dusty environments or with the use of
10:56
oiled air filters, degradation starts as
10:59
early as 30,000 mi. Do not wait for a
11:02
check engine light. The light is the
11:04
catastrophic failure indicator. By the
11:06
time the light turns on, you've been
11:08
burning excess fuel and stressing your
11:10
transmission for thousands of miles.
11:12
Perform this service. Check your fuel
11:15
trims. Trust the data, not the guess. If
11:18
this deep dive saved you from a
11:20
mechanics bill, subscribe for more
11:21
honest technical analysis.
#Autos & Vehicles
#Autos & Vehicles
#Vehicle Repair & Maintenance
#Vehicle Modification & Tuning