live_tv
Livestream Starting Soon
00
Hours
:
00
Minutes
:
00
Seconds
Up next in 10

Python 3 Streamlit Project to Merge Multiple Images in Horizontal & Vertical Using Pillow Library
Jan 9, 2025
Get the full source code of application here:
https://gist.github.com/gauti123456/b7747aa79e4c5c26c4bbab77544ca5ab
Show More Show Less View Video Transcript
0:00
uh Hello friends welcome to this video
0:02
so in this video we will look at how to
0:05
merge multiple images in horizontal or
0:08
vertical Direction inside Python and we
0:11
will be using a solution called as
0:13
streamlit which allows you to build web
0:16
applications in Python very easily so
0:19
this is the interface of this
0:20
application where we allow the user to
0:22
drag and drop PNG or JPG files so if I
0:26
choose these four
0:28
Images so either we have two choices
0:30
either we can merge it in the horizontal
0:32
direction or in a vertical Direction so
0:35
if I click merge images you will see
0:37
this button appearing download merge
0:39
image so now all these four Images will
0:41
be joined horizontally so you can see
0:44
all these four Images have been
0:46
concatenated into a single image in a
0:49
horizontal Direction so if you want to
0:50
have in a vertical Direction you will
0:52
click vertical so now the images will
0:55
appear in a vertical Direction you will
0:57
see that so you'll try to build this
1:00
application I will show you how you can
1:02
do this so we will use this open source
1:04
package of python which is pillow if you
1:07
just write p i l w which is a image
1:12
library of
1:13
python so the command is very simple you
1:16
just need to say p install below and
1:20
also stream lit just install these two
1:23
packages pillow and
1:25
streamlit streamlit if you don't know
1:28
it's a free framework of python which
1:31
allows you to build web application in a
1:34
very fast way it's open
1:37
source so once you install this just
1:40
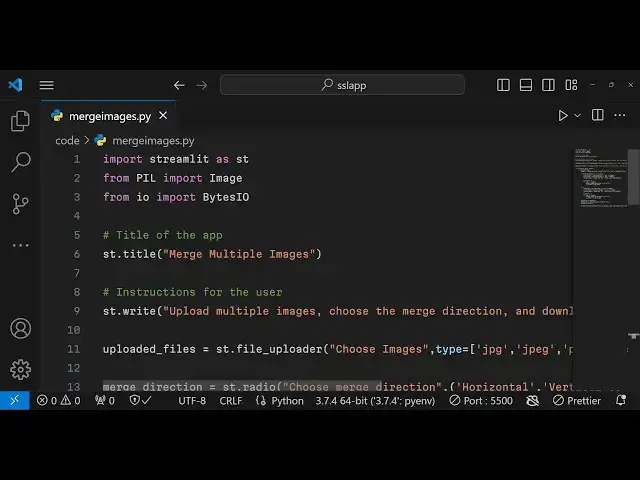
create a simple python file and first of
1:43
all we need to import streamlit as a
1:47
stre all the source code will be given
1:49
in the description of this video so from
1:52
pillow we need to import the image
1:55
class and from input output we need to
1:59
import
2:00
the
2:01
bytes
2:03
iio so after this we need to give it a
2:07
title and a short little description of
2:10
the app so we can do this using the
2:14
title method and the write method inside
2:17
stream
2:23
lit so we have the title method so we
2:26
give the title to this app and the right
2:28
method is short little description
2:31
so streamlit this is the advantage of
2:33
using streamlit it does offer multiple
2:36
methods that you can use now to start
2:39
this application in the command line
2:41
just run this command stream lit
2:43
run and Then followed by the file name
2:46
so file name is merge images. py this
2:50
will automatically start your
2:52
application at this port number 8501 so
2:54
you will see this
2:57
heading so now we need to have a a drag
3:01
and drop
3:03
widget we can
3:05
directly get this using a single line of
3:10
code uploaded file create a variable and
3:13
this contains this function file
3:17
uploader we'll give it a heading which
3:19
is choose images and then the second
3:22
argument the type of images that you
3:24
want to accept we need to accept
3:27
jpg JP and
3:30
PNG files and we will be accepting
3:33
multiple files we give it in this
3:35
attribute accept multiple files to be
3:41
true so if you refresh now you will see
3:43
this widget it is saying that accept
3:47
multiple
3:51
files think we have made a type of
3:54
mistake right here
4:02
sorry this is not an arror this is a
4:04
separate option you need to close this
4:07
arror here
4:11
on so you will now see this drag and
4:14
drop widget where you can choose
4:16
multiple images then we will have a
4:18
radio
4:20
button where we will allow the user to
4:22
select the merge Direction either
4:24
horizontally or vertically so we have
4:26
this method of radio inside streamlit to
4:29
create a a radio button so we give it a
4:32
label to this radio button choose merge
4:35
Direction so you'll have two
4:37
choices we will have this
4:40
parenthesis either
4:42
horizontal so in this easy way you can
4:44
create ver sorry radio
4:47
button so if you refresh now you will
4:50
see this radio button horizontal
4:52
vertical so you will have two
4:54
choices the user can select one choice
4:57
at a time so we have this radio button
4:59
so after we do
5:02
this we will actually have this if
5:05
condition that uh if this button has
5:07
been hit of merge images so we have a
5:10
button below so when the user clicks
5:13
this merge images button we will simply
5:16
check if the files have been uploaded
5:19
then we will create a images variable
5:22
and then we will open E the image using
5:25
this image
5:26
Constructor class that we imported from
5:29
the pillow Library it contains a open
5:32
function we'll open this image in the
5:35
and then we'll convert this image to
5:37
RGB RGB and uh then we will simply say
5:41
for image in uploaded
5:45
files and then we need to determine the
5:47
size of the merged image based on the
5:49
direction selected so we have again if
5:52
condition if the merg direction selected
5:54
double equal to horizontal if the
5:57
direction is horizontal in that case we
5:59
need to calculate the total width of the
6:01
image which will be the sum method which
6:04
is built in inside
6:06
python so we need to merge the images in
6:09
the horizontal direction for this we
6:11
need
6:12
to Loop through all the images and just
6:16
Loop through and calculate the sum total
6:19
width and then the maximum height
6:21
variable for this we'll use the max
6:24
function inside
6:26
Python and image height for image and
6:31
images so we using two functions right
6:33
here just see sum function and Max
6:36
function to calculate the width and
6:38
height and then we need to merge this so
6:41
we'll create a merg image variable so
6:44
image we'll create a new image by using
6:46
the new function inside pillow create a
6:49
new image and we'll pass this calculated
6:53
width and
6:54
height total width and Max height
7:00
this is for horizontal so
7:03
now we also need to paste images side by
7:06
side so for this we need to say we need
7:10
to calculate the offset to
7:12
zero and then we Loop through all the
7:14
images one by one so merged image we
7:18
will use the paste function inside
7:20
pillow and we'll pass this x
7:24
offset zero this will basically
7:27
concatenate all the images in the
7:28
horizontal Direction and then we also
7:30
need to increment the offset by the
7:35
width of the image so this is slightly
7:38
complicated code but it is just a
7:40
mathematics involved in merging the
7:41
images in the horizontal Direction so it
7:43
is calculating the width based upon we
7:46
need to C merge images in the horizontal
7:49
Direction now this will be the reverse
7:51
process if in the else block if the
7:55
images
7:56
are the choice is vertical and for
7:59
vertical we need to first of all
8:02
calculate the max width using the max
8:05
function now image width for image so we
8:09
are just doing the reverse process and
8:11
for total height we will use the sum
8:14
function now because if you see we have
8:17
used the sum function here for width
8:19
here we have used the max function for
8:21
width because we need to now merge the
8:23
images in the vertical Direction and now
8:26
for calculating the height we are using
8:28
the sum function
8:30
image
8:31
height for image in images and then the
8:36
merged
8:38
image you calculate a new image image
8:41
new you create a new image RGB um the
8:46
calculated Max width and the total
8:49
height and once again we'll create this
8:52
offset variable I will call this offset
8:55
as y
8:57
offset just call this
9:00
here we call this offset X because we
9:02
need to merge the dire Direction was
9:05
horizontal here the direction is
9:07
vertical so that's why again we'll Loop
9:11
through all the images for images
9:15
images the merged
9:17
image again you use the paste function
9:20
this will concatenate the images now in
9:23
the vertical Direction so 0 comma y
9:27
offset and then we need to
9:31
increment this y offset variable by the
9:34
height of the
9:38
image and lastly after we do this we now
9:41
need to save this
9:43
image so that the user can download this
9:47
you can C just create a new variable
9:49
image buffer and use the byes
9:52
IO and merged image and it contains a
9:56
save function inside uh pillow Library
9:58
it will save this image and we need to
10:02
specify the format here and format is
10:05
jpg you can even provide PNG as well
10:09
image buffer seek zero and now you'll be
10:13
providing a download button for the user
10:15
to download the image
10:18
so streamlit does provide this function
10:21
download button it takes four arguments
10:24
first is the label of the buttons so you
10:25
simply say download merged image
10:31
and then the data here so what data you
10:34
want to download you need to download
10:35
the
10:36
image the third argument is actually
10:39
your file name file underscore name so
10:43
we'll say merged jpg and the MIM type
10:48
for jpg is image/
10:51
jpg that's all that you need to do for
10:54
this
10:55
application at last you can see we are
10:57
showing the download button which takes
10:59
four arguments MIM type file name data
11:02
and the
11:03
label so if you refresh your application
11:06
now select multiple
11:12
images you can see images selected if I
11:14
select the direction vertical click on
11:17
and now you will
11:19
see the image is downloaded and the
11:22
images are being concatenated joined in
11:25
a vertical Direction so in this way you
11:28
can join images merge images
11:30
horizontally or vertically using pillow
11:33
library inside python using
11:37
streamlit
11:38
framework which allows you to build
11:41
applications inside python very easily
11:44
so do check out my website as well free
11:46
mediat tools.com which is an
11:50
open-source website which contains
11:52
thousands of tools related to audio
11:55
video and
11:56
image and please hit that like subscribe
11:59
the channel and I will be seeing you in
12:01
the next video
#Programming
#Education