Up next in 10

Javascript Reveal.js Example to Build Powerpoint Presentation With Syntax Highlighting in Browser
Jan 9, 2025
Buy the full source code of application here:
Show More Show Less View Video Transcript
0:00
uh Hello friends welcome to this video
0:02
so in this video I will actually show
0:04
you uh how to actually make a PowerPoint
0:07
presentation a coding presentation with
0:09
syntax highlighting you will see we have
0:12
different paragraphs and we have
0:14
different controls out there you can use
0:16
the keyboard key to navigate to
0:19
different slides so I can navigate to
0:20
the second slide where I show a simple
0:24
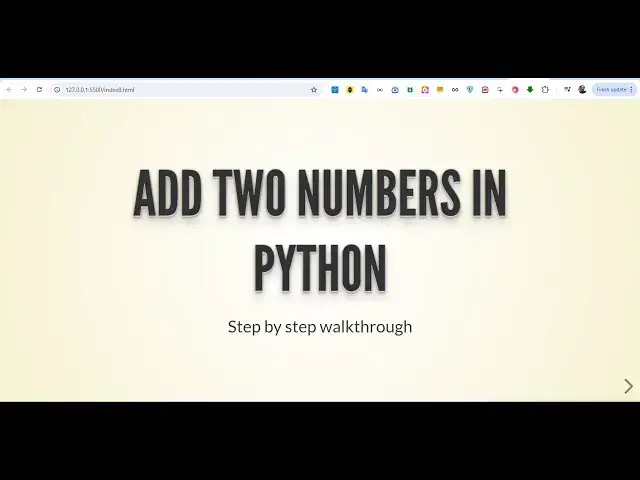
program in Python to add two numbers so
0:26
this is a second slide this was the
0:27
first slide that add two numbers in
0:30
python step by step walk you through so
0:33
I you can see it also have a syntax
0:37
highlighting using highlight JS and we
0:39
are using re reveal JS which is actually
0:42
a JavaScript open source library to make
0:45
PowerPoint presentation which have
0:46
multiple slides with the different
0:49
animation so this is a step two to add
0:51
the numbers a plus b and then we have
0:54
the print result in order to print the
0:58
result in Python so if you want to see
1:00
the full code this is actually the
1:02
complete code and we show this inside
1:05
the syntax highlighting you can see that
1:08
these are
1:09
different I will show you how to build
1:11
this presentation step by step using a
1:14
framework called as reveal JS which is
1:17
actually open-source library in Python
1:20
oh sorry in JavaScript reveal JS so it's
1:23
a HTML presentation framework it also
1:27
has its own editor as well if you don't
1:29
want want to do coding it has its own
1:31
editor as well which is slides.com
1:35
so you can build out beautiful
1:38
presentations right in the browser
1:40
itself it do cost a little little bit if
1:42
you want to purchase the pro version but
1:45
I will show you the free way how you can
1:47
do it
1:49
programmatically using reveal JS so I
1:53
will simply delete everything and write
1:55
it from scratch and how to get started
1:58
so just create a simple index. HTML file
2:01
and just change the title
2:04
reveal JS example so I will show you
2:08
very simple
2:10
example so first of all you uh need to
2:13
include the CDN
2:16
for the Ral JS CSS so just after the
2:20
title paste all these CDN links so it is
2:25
actually including the base styles of
2:28
reveal CSS that you see and it has
2:31
various themes out there we are using
2:33
the bee theme bee. CSS it has various
2:37
themes as well so we included the CDN so
2:40
the all the source code which is used in
2:42
this tutorial is given in the
2:43
description of the video and also we
2:47
need to include for the syntax
2:49
highlighting we are actually using a
2:51
third party package which is called as
2:54
highlight GS so for that also we need to
2:57
include
2:58
the CSS file for that so if you want to
3:03
see
3:04
highlight JS so we are using this
3:08
package for actually highlighting the
3:11
source code this is actually the
3:14
library then we need to write some CSS
3:17
sorry HTML div and inside reveal JS we
3:22
have a class called as reveal inside
3:25
this we we can have various slides in
3:27
the HTML presentation so it is basically
3:32
we need to give it a class this needs to
3:34
be constant so we need to give if you
3:37
want to make a slide we need to give
3:39
this buil-in class of reveal JS which is
3:42
slides in the HTML so presentation
3:46
consist of various slides so this first
3:49
slide will have a section which will
3:52
actually contain a paragraph which will
3:55
say add two numbers in
3:57
Python and the second thing will be a
4:00
simple paragraph which will say step by
4:04
step walk
4:08
through so if you now try to open this
4:12
uh and see it in the browser it will
4:14
look something like
4:17
this we do need to include the
4:20
JavaScript part as well if you want to
4:22
see the presentation as well
4:25
so we do need to include the script tag
4:28
for the reveal GS
4:30
just after the body paste the CDN for
4:33
reveal this is actual JavaScript code
4:35
for integrating reveal JS and also
4:38
similarly we also need to include the
4:40
script t for highlight JS as well for
4:42
syntax highlighting so now in the custom
4:45
JavaScript if you want to see the
4:48
presentation you need to first of all
4:50
initialize reveal JS so for that we do
4:53
have a initialize function that this
4:56
Base Library has inside this we will
4:58
basically pass some
5:00
object which will actually contain
5:03
various properties so if you want to
5:05
Center your presentation so set the
5:07
center option to True hash also to true
5:12
the third option is the transition the
5:14
animation style you can choose it has
5:17
various options you can use slide fade
5:20
convex Zoom animations as well so by
5:24
default slide is chosen and then uh
5:27
that's all
5:30
if you now initialize it you will now
5:32
see this animation this is actually the
5:35
first slide that's why you are not
5:36
seeing any sort of controls in the right
5:39
hand side this is actual first slide add
5:41
two numbers in Python step by step walk
5:43
you through so similarly we can add some
5:46
more slides inside the
5:51
presentation uh we will actually have
5:54
the second slide for this so each slide
5:59
is consistent of this section tag now we
6:02
can define a second slide I can just
6:05
write anything right here I can say this
6:08
is a second
6:11
slide so now what happens you actually
6:14
see this Arrow option right here if you
6:17
see we see this arrow and now we can
6:19
navigate to the second slide if
6:22
I click this this is actually the second
6:27
slide you can navigate back and forth
6:30
by using the keyboard Keys as well so
6:32
this is really useful guys if you are
6:34
working in a company if you are working
6:36
in a college if you want to make a quick
6:38
little presentation you can make it
6:39
using DJs in JavaScript this is actually
6:43
the step by step initialization part how
6:46
to initialize it and now it becomes very
6:49
easy to actually make a presentation
6:51
with syn syntax highlighting as well so
6:54
now in
6:56
the instead of this H1 what we can do
7:00
we can have a we can say step
7:05
one first of all to define the
7:11
numbers and now we'll be using the pre-
7:13
tag in order to have the code tag so
7:18
we'll be giving a class to it of
7:19
highlight JS class which is python H
7:25
ljs so here we'll be writing our simple
7:28
code a is = to
7:35
5 and B is equal to 3 and we will
7:41
actually close the code
7:46
tag so if you see refresh if I navigate
7:49
to the second slide you will see a is
7:51
equal to 5 b is equal to 3 so now the
7:54
code is
7:55
there so it also supports various themes
7:59
SK is reveal JS instead of using be
8:02
theme you can even change it to black as
8:04
well if you change it to Black CSS now
8:07
it actually have the Black theme so it
8:10
supports various themes in
8:14
uh reveal JS you can read the
8:17
documentation which actually has various
8:20
themes that you can
8:23
support
8:25
solarized let me just show you some more
8:28
ones solarized
8:30
so this has different flavors to it so
8:33
you can see this is a solide
8:40
theme then we also have the night theme
8:43
as well night.
8:47
CSS so now it the font will also change
8:50
alongside with the colors and as well
8:53
you can see the fonts has also been
8:54
changed so depending upon whichever
8:57
theme that you like you can change this
8:58
to night. CSS B CSS all that stuff so
9:02
now we have
9:04
this now we can Define another section
9:08
this time this will be the third slide
9:11
and here we actually
9:13
show
9:18
to step
9:20
two we need to add the
9:23
numbers so now for adding it again we'll
9:26
be using the code tag
9:31
so give it a class of
9:33
python
9:40
hjs so we have result is equal
9:45
to
9:51
A+ so you can see result is equal to
10:14
you can see the URL parameter also
10:15
changes like this when you navigate to
10:18
the first
10:27
slide and I think if you see the
10:30
highlighting is not working you can see
10:33
the highlighting is not working this is
10:35
because we do need to initialize
10:37
highlight JS in the JavaScript as well
10:39
so right here after you initialize
10:41
reveal JS there is a simple line of code
10:44
that you need to write H
10:46
ljs and we need to call a function
10:48
called as
10:50
highlight all this is a function you
10:53
need to call and after you write this
10:55
line of code if you refresh your
10:57
application
11:00
you can see actually the highlighting is
11:02
done
11:07
properly so what I can do I can change
11:10
the theme to
11:21
be so you can see a is equal to 5 b isal
11:26
3 and now we can actually
11:30
make another
11:33
uh slide and this time we will actually
11:36
show the complete code to the
11:40
user you can take any example uh
11:43
JavaScript code as
11:44
well so there is no limitation that you
11:47
can even only highlight JS supports
11:49
multiple languages PHP JavaScript Java
11:53
every language it supports you can check
11:55
out the documentation as well
12:06
this contains the Full code AAL 5 b is
12:08
equal 3 result is equal to a +
12:12
b so now you can see that so you can see
12:16
the syntax highlighting is also there
12:17
with different colors this is actually a
12:20
python code and it contains four slides
12:22
this is the fourth one
12:25
third the second slide so in this way
12:28
you can actually make a PowerPoint
12:31
presentation right inside your browser
12:33
without using to use Microsoft
12:36
PowerPoint or any other additional
12:38
software so you can see how much code is
12:42
it so you can actually modify this to
12:46
actually suit your requirement whichever
12:48
slides you are using you can even embed
12:51
images as well so let's suppose if you
12:53
do have
12:54
images you can also embed images right
12:57
here as well alongside with the text as
13:00
well so it supports multiple animations
13:03
if you visit reveal JS the documentation
13:08
is is pretty great and uh they show step
13:12
by
13:14
step so if you do need to research more
13:17
about it you can check out the
13:19
documentation and thank you very much
13:21
for watching this video and I will be
13:24
seeing you in the next one
#Programming
#Clip Art & Animated GIFs
#Educational Software
#Computer Education