Up next in 10

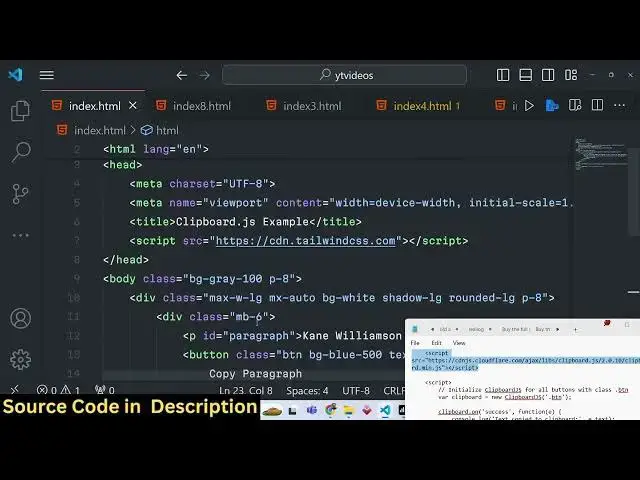
Javascript Clipboard.js Example to Implement Copy to Clipboard Text With Notification in Browser
Jan 9, 2025
Buy the full source code of application here:
Show More Show Less View Video Transcript
0:00
uh hello guys welcome to this video so
0:02
in this video I will actually talk about
0:04
a third party library in JavaScript
0:07
which allows you to implement the copy
0:09
to clipboard operation which you see in
0:12
modern applications let me show you the
0:14
demo right here so this is actually the
0:17
demo and if you click copy paragraph so
0:21
whatever is present in this paragraph
0:23
will be copy to clipboard so whatever we
0:25
do the everyday operations that you see
0:28
right click copy so this operation if I
0:31
click it you will get this notification
0:33
that text is copied to clipboard and
0:35
also in this text area I can simply
0:38
paste this text right here and also in
0:41
the text area as well if you write
0:44
here any Dynamic
0:52
text so this is actually the text that I
0:55
have written so there is simple icon
0:57
which is available which is copy to
0:59
clipboard if I hit this icon again this
1:02
notification will show to me text copy
1:04
to clipboard so now I can simply go to
1:08
anywhere and paste this text you will
1:09
see that I will now show you this uh
1:12
Library which is clipboard JS it has its
1:16
own official website I think clipboard
1:19
if you type this on Google this is
1:21
actually copy to clipboard Library so
1:25
just 3 kilobyte size of this uh third
1:28
party package so so you can use it
1:31
inside the
1:32
browser I will show you step by step how
1:35
to use it so this is
1:41
actually let me just say clipboard JS
1:46
example and we will also be using some
1:48
Tailwind CSS for showing these
1:50
notification messages and for the you
1:53
user interface so simply include the CDM
1:56
script tag of tailent right here so now
1:59
in the body section we will actually be
2:01
giving some classes which is BG gray 100
2:05
padding
2:06
8 and after this we will be having a div
2:09
element which will have a Max size Max
2:12
width of large MX Auto to center it
2:15
background will be white and Shadow
2:18
large it will be rounded and padding
2:22
will be
2:23
eight so right here you will have a
2:26
margin bottom of
2:28
six and we'll be giving an ID of it
2:34
paragraph and we will simply be saying
2:37
uh this is actually some kind of text
2:39
that I will
2:45
write so if you just
2:47
refresh your application you will see
2:50
this heading centered and this is
2:53
actually a paragraph now we will allow
2:56
the user to actually copy this paragraph
3:00
if they click a simple button so you
3:03
will have a button it will simply say
3:06
copy
3:08
paragraph and we will be giving an ID to
3:11
it or just give it a class of it or BTM
3:14
BG blue
3:16
500 text is
3:19
white padding from the X Direction 4 by
3:23
Direction 2 it will be rounded and
3:25
margin top two so we simply have a
3:28
simple Button as well copy
3:31
paragraph and now we have given this
3:35
class of BTM now inside the Java Script
3:38
we will Target all the buttons which
3:41
have this class of BTL now to Target
3:44
this first of all you do need to include
3:46
the CDN for the library just after the
3:48
body paste the CDN of clipboard
3:51
min.js all the source code is given in
3:53
the description of this video and
3:56
basically you'll be having uh get all
4:00
the
4:02
references of all the buttons you will
4:04
be initializing this Constructor
4:06
clipboard JS and we'll be giving this
4:09
class do BTN so if you see in the HTML
4:13
we have attached this BTN class you can
4:16
see to the button so we are simply
4:18
targeting all the elements which have
4:20
this class of BTN and passing this to
4:23
this clipboard JS reference now we can
4:25
use this reference because we have
4:27
included the CDN right here so that's F
4:30
so after we get this reference after we
4:32
attach this so there are various events
4:36
that you can
4:38
listen for this one such event is
4:42
uh we have this on event and one such
4:47
event is success success simply means
4:49
that whenever the uh text is
4:52
successfully copied after this we just
4:55
need to show some kind of notification
4:58
message or we can simply say a console
5:00
log message that copy to
5:03
clipboard so if you just refresh your
5:06
application and try to inspect it and go
5:09
to console click this
5:13
button you will see nothing has
5:19
happened uh clipboard
5:21
JS let me just cross check
5:24
clipboard
5:27
just you need to get the reference
5:35
here and we are actually attaching this
5:38
success call
5:43
back clipboard. on
5:50
success so just refresh
5:57
this hit this button and
6:05
uh let me just see guys what is actually
6:08
the problem which is okay okay sorry
6:10
guys that was the problem if you are
6:13
initializing this package you do need to
6:15
inside your HTML as well just inside
6:19
your button you need to attach a special
6:21
attribute to this button which is called
6:24
as data Dash
6:26
clipboard Das Target so this simply
6:30
means that which element you want to
6:32
copy to clipboard so in this specific
6:34
case we need to get the data which is
6:36
present in inside this paragraph We have
6:38
given this ID to it of paragraph So now
6:41
in this custom attribute data clipboard
6:43
Target we are attacking attaching it to
6:45
this button we need to here give this uh
6:48
ID which is followed by hash followed by
6:52
the ID which is paragraph so whichever
6:55
element you need to copy to clipboard
6:56
you will attach this custom attribute
6:58
data clip both Target and paragraph So
7:01
what it will do now it will actually if
7:05
I click this button it will
7:07
automatically select the paragraph text
7:10
it will highlight it in the console as
7:13
well you will get this message that uh
7:15
the text has been copied to clipboard so
7:17
now we just need to show a notification
7:20
message also for the user to see so this
7:25
will make the things easier for the user
7:28
to see so we we will be having a simple
7:31
div we will give it an ID of
7:35
notification and we will also be giving
7:37
a class of hidden by default it will not
7:40
be shown and it will be appearing in the
7:43
text Center
7:45
position it will have a background color
7:48
of
7:49
green text of white and it will be
7:53
rounded so it will all just say text
7:56
copy to clipboard
8:01
so now to show this uh notification once
8:04
we
8:06
do the success call back right here you
8:08
will show this notification that uh
8:11
you'll get the element by its ID which
8:15
we have given which is notification
8:18
after that we'll simply say
8:19
notification. class list we will remove
8:22
this class of hidden which is a Tailwind
8:24
class to actually hide elements we will
8:26
remove it for two seconds to show this
8:29
use you you'll use a set timeout
8:32
function you will again add this class
8:34
once again using class list. add but
8:37
after 2 2,000 millisecond this simply
8:40
means that after 2 second just hide this
8:43
notification so if you click this button
8:45
now you will see this notification
8:48
appearing for 2 seconds and it will go
8:49
away this is actually the text to copy
8:53
operation is happening in the browser
8:55
and you see this
8:56
notification and it is actually done by
8:59
by clipboard JS it's a very helpful
9:02
Library guys which makes the things way
9:04
more simpler as compared to the
9:07
JavaScript clipboard API which is
9:09
available in all the browsers but it is
9:11
slightly complicated but this third
9:13
party package makes the things really
9:16
easy you just click the element and you
9:18
just need to attach that custom
9:19
attribute that we attached data
9:21
clipboard Target and whichever thing
9:23
that you need to copy paste you need to
9:25
mention the ID here like this so it will
9:28
highlight that so in the same way you
9:32
can even have a text area as well
9:37
similarly if you want
9:39
to just after write this you will you
9:43
can even have a dynamic text area as
9:47
well so if your text is
9:50
dynamic then you can have
9:57
this inside this we can have a simple
10:00
text
10:03
area we will give a ID of dynamic text
10:09
area rows will be four columns will
10:15
be so you can have this text
10:22
area so let me copy this we have this
10:25
text area which actually have given this
10:27
ID Dynamic text area we have Rose four
10:30
with withd W full padding for border so
10:34
if you refresh we have the simple text
10:36
area where you can enter text and now
10:39
for attaching the icon we can simply
10:41
have this
10:44
uh SVG tag which
10:48
actually allows you
10:57
to side by side an icon right here if
11:00
you click this icon uh we do need to
11:03
attach a you'll see again we have
11:06
attached this data- clipboard. target
11:09
this is actually the main attribute of
11:11
this library for any element you need to
11:15
copy to clipboard you need to attach its
11:17
ID so we have attached this ID which is
11:20
dynamic text area we have given this ID
11:22
right here Dynamic text area so in the
11:25
similar way now if you
11:32
let's
11:33
suppose want to write something right
11:41
here click this you will see this
11:44
notification text copy to clipboard and
11:47
it will highlight it and now you can
11:49
copy this text to anywhere any location
11:52
paste
11:53
it so in this way guys you can attach
11:57
copy to clipboard using this clip board
11:59
JS package you can read more about it
12:02
this is their official website it's a
12:04
really little package 3 kilobytes it's
12:07
very popular
12:09
33957 GitHub starts so thank you very
12:12
much for watching this uh tutorial and
12:15
uh please hit that like button subscribe
12:17
the channel for more videos like this
12:19
and I will be seeing you in the next one
#Other
#Other