Up next in 10

Javascript Canvas API Project to Blur or Hide Sections of Image Web App in Browser
Jan 9, 2025
Get the full source code of application here:
https://gist.github.com/gauti123456/c8e9ac20588bc35cb54e9bd7fcc03c2d
Show More Show Less View Video Transcript
0:00
uh Hello friends welcome to this video
0:02
so in this video we'll building a image
0:04
blur kind of application so you will be
0:09
able to blur or hide sections of
0:12
a image so I the interface has been
0:17
built using
0:19
bootstrap we have a choose file button
0:21
where the user will select their image
0:27
file so AI preview will be also be shown
0:31
we have a slider to actually control the
0:34
amount of blur that you want to add to a
0:36
picture so if I increase the blur level
0:39
you will see using the
0:41
slider the image will automatically
0:45
update you'll see the image will be
0:49
blurred so it depends upon how much blur
0:52
you add using that
0:54
slider so once you are done making the
0:57
changes you can click the download
0:59
blurred image but Buton to actually
1:01
download the output image and the image
1:03
will be downloaded now you can check the
1:05
output
1:09
image if you open this you will now see
1:12
the image is successfully blurred you
1:15
can't
1:17
see so this is a really simple
1:19
application it runs in the browser and
1:22
we have haven't used any third party
1:25
Library we have just used JavaScript
1:28
canvas API
1:30
so all these methods are built
1:33
in if you want to blur the image so
1:37
again you can just use these the slider
1:40
to actually blur the section of the
1:44
image so many of times you want to blur
1:49
images so you can just see you can use
1:51
this app so now to get
1:57
started you just need a single IND x.
2:00
HTML file right here so let me delete
2:03
everything and start from
2:06
scratch so for building the UI as I
2:09
already told you we are using bootstrap
2:11
so I included the bootstrap CDM right
2:13
here at
2:15
the HTML
2:17
file so now to make the interface we
2:19
will be using the container class of
2:22
bootstrap inside this you will have the
2:24
card class MX Auto to make it in the
2:27
center position padding four and it will
2:30
have the Shadow and we will be giving a
2:33
Max width
2:34
of 500 pixel and inside this you will
2:39
have a H1 heading I will set image blur
2:43
app I will give it a bootstrap class of
2:46
text Center font size three font weight
2:51
bold margin bottom
2:54
four so if you open this inside the
2:56
browser it will look something like this
2:58
image blur app
3:00
and after that we will have a simple
3:03
form where we will allow the user
3:07
to have a input field input type file
3:11
and we'll only be accepting images
3:14
files and we'll be giving an ID here
3:17
image input and it should be
3:20
required and for styling it we'll be
3:23
using a bootstrap class of form control
3:30
so it will look something like
3:33
this so after that we will have a button
3:37
to submit the form so the label of the
3:40
button will simply but also we will also
3:43
be having a slider for blur
3:49
so simply we will have a label
3:54
here class of form label
4:01
and this will be for choosing the amount
4:04
of blood that you want to add so this
4:06
will be input type range this will be a
4:09
slider and we will be giving an ID to
4:16
it of
4:21
uh blur slider so that we can Target in
4:24
JavaScript and also be giving a form
4:26
range bootstrap class to style it
4:30
and the minimum value will be zero and
4:32
the maximum value of the slider will be
4:34
20 and the current value will be
4:38
zero so it will look something like this
4:40
the
4:42
slider it will look something like
4:53
that and after this we will also be
4:56
showing the value as well right below it
5:00
in inside this div we will have give
5:03
this ID blur
5:05
value and we will be showing it right in
5:08
the center so giving a bootstrap class
5:11
of text
5:13
Center simply say
5:15
blur 0 pixel so we will change this
5:18
value using JavaScript so as the slide
5:21
slider changes this value will change
5:24
automatically so after
5:28
this we will have the
5:31
button or we will show the image to the
5:34
user the output
5:38
image so we'll be giving an ID to the
5:42
image where the user can see the output
5:44
image the blur image will also be giving
5:48
a bootstrap class of preview image and
5:51
by default it will be hidden the user
5:53
can't see this div section when you load
5:56
the application for the very first time
5:58
so
6:00
and outside just below this we will have
6:02
a download
6:06
button and we'll be giving an ID to
6:10
this so we are just giving IDs to all
6:14
these elements so that we can Target it
6:16
inside JavaScript so we will be giving a
6:19
BTN BTN success bootstrap class margin
6:23
top 4 and it will not be displayed so d
6:28
none and download
6:30
as it's a download button so the label
6:33
will be simply
6:38
download blurred
6:40
image and the file name I will give the
6:44
default file name which will be output.
6:49
PNG so this this is
6:52
your interface which looks something
6:54
like this now we just need
6:58
to write the JavaScript code and
7:02
also just outside this
7:08
uh this div section we will also be
7:11
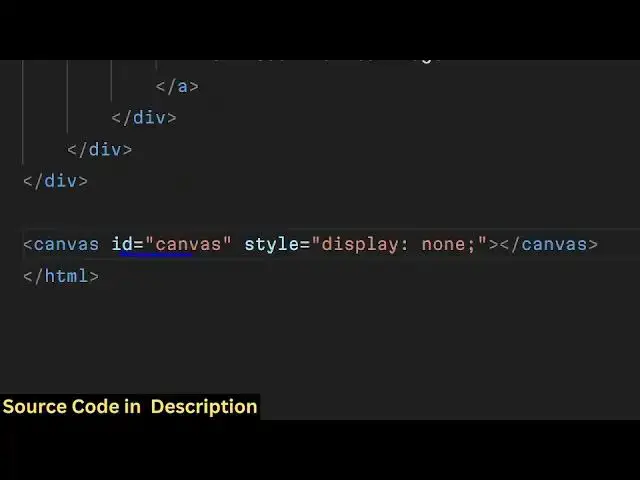
having a canvas
7:13
tag giving an ID to it of canvas and
7:16
this will not be displayed to the user
7:18
we will just be using to actually blur
7:20
the image so we have given the ID to it
7:24
of canvas so that we can Target in
7:26
JavaScript code so now you'll be writing
7:29
the custom JavaScript code we'll be
7:31
including this custom JavaScript file so
7:34
now we need to get references of each
7:36
and every Dom element that we have given
7:39
IDs to so we can Target them using get
7:43
element by
7:44
ID first of all targeting the image
7:47
input element and then the
7:50
slider using the same get element by
7:54
ID method
7:59
then we will get the
8:02
preview element we have given this ID
8:05
preview
8:07
image and the actual value where we will
8:11
be showing the blur value so we need to
8:13
get reference to that element as
8:17
well so we have given that ID blur
8:21
value and the download
8:27
button I've given this ID download
8:30
button so we are just getting references
8:33
of all these elements and lastly we also
8:36
need to get access to that
8:38
canvas element that we declared we given
8:42
an ID here as well and now we need to
8:44
get the context using the canvas we can
8:47
use get context
8:49
here method we need to get the 2D
8:53
context so after getting that
8:57
context you now need to bind a
9:01
event handler to this input field so
9:03
whenever
9:06
user just selects any image file this
9:09
event handler will fire and this call
9:11
back function will execute holding this
9:14
e parameter which is
9:17
event so first of all we can easily get
9:21
the file which is selected by the user
9:23
by e. target. files and we need to get
9:27
the first file like this and here you
9:29
will be check in the condition that if
9:31
the file is valid only in that case we
9:33
will use the file reader Constructor to
9:36
actually read the input file and this
9:40
onload function will execute when the
9:42
file is image is successfully
9:45
rendered and we will simply manipulate
9:48
the source parameter and whatever is e.
9:51
target. result this is actually the base
9:53
64 code of the image which will be
9:56
returned by this uh value and we will be
9:59
showing the live preview of the image as
10:01
soon as the image is selected by the
10:04
user and also we need to make the hidden
10:07
property to be as false we need to show
10:09
the
10:11
image so if you just reload the
10:14
application and click on choose file
10:16
button and choose any image
10:26
file and we are missing one line that
10:29
that's why the image is not showing we
10:31
do need to call this method first of all
10:34
read as data URL and then pass the input
10:37
file that's all so now if you select the
10:40
image the image will show you will see
10:43
that the image is showing right here in
10:44
the live review section so now I need to
10:47
bind a uh onchange event handler to this
10:50
blur slider so as you change the slider
10:53
we need to blur this image so how we can
10:55
do that we need to bind a slider
10:59
event handler to the slider
11:02
so this event is input so whenever the
11:06
slider changes this event will
11:08
automatically fire so first of all we
11:10
need to get the
11:13
text the value of the slider we can do
11:16
this
11:18
using like
11:24
this so we need to we are changing the
11:28
we getting the blood slider
11:31
value you can get this value by dot
11:34
value and then
11:36
pixel so as you now change the slider
11:39
value you will actually see you will see
11:43
this value is changing as we are moving
11:46
the slider so we are doing it using the
11:49
JavaScript dynamically so
11:51
now after we do this we now need to
11:55
create a custom function which I will
11:57
call this as update blur and I will call
12:02
this function
12:05
so so inside this function we need to
12:07
define the
12:09
logic how to blur the image using the
12:11
canvas API so we will Define this
12:15
function update blur so right here we'll
12:17
get the value of the
12:19
blur how much is the value you can use
12:22
the blur slider do value to get the
12:25
actual slider value and then we will uh
12:30
use
12:31
this uh style do SL style. filter there
12:35
is a property right here in CSS you can
12:39
manipulate so this property is
12:44
blur and here we can provide the
12:48
value this needs to be back Teck
12:52
symbol it's a blur is a function and
12:55
here you can actually pass the blur
12:58
value
13:01
as you know blur is a CSS selector we
13:03
are essentially using that CSS selector
13:06
dynamically using Javas script we are
13:07
setting this property do substyle do
13:11
filter after you do this uh you also
13:15
need
13:17
to write here pixel because the values
13:20
are in pixel and then you'll be defining
13:23
another function which will draw this
13:26
image to the canvas
13:30
using this blur
13:32
value so now we need to define the
13:35
second function which will actually draw
13:37
this image to the canvas with this blur
13:43
value so now to draw the image to the
13:46
canvas it's very simple we need to
13:48
instantiate a New Image First of all and
13:51
then set the source parameter to the
13:54
preview image.
13:56
source and when this image is loaded
14:00
this function will execute and we will
14:02
need to make the canvas width is equal
14:05
to the original image
14:07
width same goes with the height as
14:10
well image
14:13
height so after you do this there is a
14:16
function out there in canvas which is
14:20
first of all we need to clear the
14:24
rectangle canvas
14:27
F canvas height
14:31
and then there is a property called as
14:33
filter and here we can set this filter
14:36
to the blur value that is
14:47
provided so this is the blur value that
14:49
we had and then we can write pixel right
14:52
here that's all and now to draw the
14:55
image we have the draw image function in
14:57
this canvas API and we can draw this
15:00
actual blurred image on the canvas with
15:03
x coordinate 0 y coordinate 0 and now we
15:06
need to convert this image to a block
15:09
so it can easily be
15:14
done there is a function right here
15:17
inside Canvas 2 Data URL this is the
15:21
most basic function which is
15:27
used so this actually converts the image
15:31
which is drawn on the canvas to an
15:32
actual PNG image it returns a base 64
15:35
code where we need to provide the MIM
15:37
type which is image/png and then you
15:41
need to set the button link to be this
15:47
link and then we need to unhide the
15:50
button so we will remove that class that
15:52
we given in the HTML dynamically and
15:56
show the download button so that's all
15:58
this completes the application that's
16:00
all that we need to do for this
16:01
application so now if you choose your
16:05
file image file increase the level of
16:08
blur you will now see the image will now
16:10
get blurred as you increase the
16:12
level and now a download button will
16:15
also be shown if you click that download
16:17
button your image will get downloaded as
16:19
a PNG image essentially we are using the
16:22
concept of JavaScript canvas API we are
16:27
changing the blur level of the image
16:29
then we are red redrawing the image onto
16:32
the canvas and then we converting that
16:34
canvas to a actual PNG image file using
16:38
this function which is Canvas 2 Data URL
16:42
this is the main business logic of this
16:44
application main function Canvas 2 Data
16:48
URL and uh after that we are just
16:51
downloading it as an
16:55
attachment so we haven't used any third
16:59
party Library this is all built in
17:03
JavaScript canvas
17:05
API so you can
17:08
try all these tools by visiting my
17:10
website freem mediat tools.com it
17:12
contains a lot more thousands of free
17:15
tools that you can
17:17
use and please hit that like button
17:20
subscribe the channel as well and I will
17:22
be seeing you in the next one video
#Software
#Multimedia Software
#Other