live_tv
Livestream Starting Soon
00
Hours
:
00
Minutes
:
00
Seconds
Up next in 10

How to Setup MySQL Server in VS Code & Automate Commands to Run SQL Queries to Display Data in IDE
Feb 21, 2025
Watch My Visual Studio Code IDE Setup Video For Fonts,Themes & Extensions
https://youtu.be/Bon8Pm1gbX8
Hi Join the official discord server to resolve doubts here:
https://discord.gg/cRnjhk6nzW
Visit my Online Free Media Tool Website
https://freemediatools.com/
Buy Premium Scripts and Apps Here:
https://procodestore.com/
Show More Show Less View Video Transcript
0:00
uh hello guys welcome to this video so
0:02
in this video I will show you how to
0:05
directly use uh your mySQL database
0:08
inside VSS code so there is this
0:10
extension right here that you need to
0:12
install so if you go to vs code just
0:15
open your extensions and just type here
0:17
my
0:18
SQL and the very first extension will
0:21
come here it is developed by this person
0:24
Joan hun it's got almost 2 million
0:27
downloads and uh it's a MyQ management
0:30
tool similar
0:31
to whatever you see inside your
0:34
dashboard so whenever you open PHP my
0:36
admins so we have exam running my on my
0:40
Local Host so I started this Apache and
0:44
my SQL database so instead of going to
0:46
this website every time you want to
0:48
create some kind of database or table
0:50
you can directly connect this inside
0:52
your vs code so just install this
0:54
extension click on the install button
0:57
and as soon as you install it now just
1:00
open this file export by pressing this
1:03
shortcut key control shift p and then
1:06
just simply type my
1:09
SQL and uh
1:11
then here you will see all these choices
1:14
so if you need to get this appearance
1:17
and layout of my visual studio I've
1:19
given the video in the description where
1:22
I explained how I did this vs code
1:24
customization so you can watch that
1:26
video the link is given in the
1:27
description so now if you type my SQL
1:30
you can add the connection right here so
1:34
in the host you will simply type here
1:38
127.0.0.1 which is Local Host so you
1:42
just need to type this and then the
1:45
usern name the default username will be
1:48
root and the password for this exam
1:51
database which comes with this is
1:54
nothing so just left it empty and the
1:56
port number here will be 3306 which is
1:59
actually the default port number on
2:01
which this database is running you'll
2:03
see that
2:04
3306 and as soon as you do this uh this
2:08
certificate file part just left this
2:10
empty enter and now you will
2:13
see it will actually create your
2:16
connection
2:20
so now again just type here control
2:23
shift
2:24
p just hit this keyboard shortcut
2:27
control shift p and uh now just select
2:30
this Explorer focus on my SQL View and
2:33
you will see this
2:34
connection appearing
2:37
127.0.0.1
2:40
so if you refresh you will see the list
2:43
of all your databases which are there so
2:45
if I open my list right
2:48
here so this is actually the same list
2:50
which is appearing right here if you see
2:52
all these databases are now appearing in
2:55
the vs code so it becomes now easy to
2:58
actually individually select the
3:01
database and then select whatever tables
3:04
are there you can see the structure of
3:06
the table and now you can add queries as
3:09
well so let's
3:10
suppose simply right click new query and
3:14
here you will write your SQL code so
3:16
let's suppose I want to drop this
3:18
database so I will simply say drop
3:22
database and then the followed by the
3:24
name of the database which is file share
3:28
and just here right click and you will
3:30
see this option run my SQL query and now
3:34
just
3:35
refresh connection and now you will see
3:37
that database is deleted with the SQL
3:41
command so in this way you can run SQL
3:43
commands directly inside vs code and if
3:46
you want to create a database simply say
3:48
create
3:50
database file share once again run this
3:53
cury and refresh you will see
4:02
so it is saying create
4:04
database file share I think this is
4:08
actually the command here file share let
4:12
me say file share
4:15
two run this
4:25
command so for this you need to create
4:28
this new quy right here just select this
4:31
overall connection right click new query
4:34
and here you need to write create
4:35
database because you are creating a new
4:40
database file
4:43
share semicolon and right click run my
4:47
SQL query and just
4:49
refresh now you'll see the database is
4:52
created successfully
4:55
so in PHP my admin also you will see
4:58
that database is created and now if you
5:01
want to create a table right here it
5:02
becomes very easy select the database
5:05
and right click new query and write the
5:08
query for creating a database sorry
5:10
table so just copy the SQL command and
5:15
just we have four columns here ID will
5:18
be the primary key Auto increment name
5:21
email country age and just run this
5:24
query and as soon as just refresh it and
5:28
now you will see this table is created
5:30
users to and if you refresh your PHP my
5:33
admin you will see how easy it is to
5:36
actually automate this process without
5:38
going to PHP my admin and every time
5:40
interacting with this GUI interface so
5:43
it will be really fast as well it will
5:45
save you a lot of time so just install
5:47
this extension and uh now let's suppose
5:50
if you want to add some data right
5:53
here so we can just put this insert
5:56
command so just select the table
6:03
and just insert into users so just run
6:07
this command so just
6:12
refresh and now just if you want to
6:15
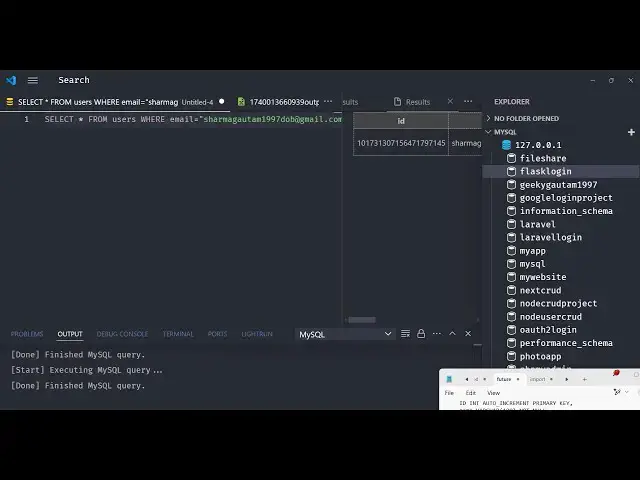
fetch the data just select star from the
6:18
table name which is users
6:20
2 and now if you execute this cury you
6:24
will
6:27
see so you need to select
6:30
any table which has some data right here
6:33
so let's suppose I
6:37
select this flask login
6:42
so I write this query right here and
6:49
uh so now you will see that it actually
6:53
fetches this data and displays it inside
6:55
this table like structure ID email name
6:59
so in this way you can actually fetch
7:02
the data and also display it inside vs
7:04
code and you can put a restriction right
7:07
here
7:09
where email is equal
7:16
to so in this way you can write any SQL
7:20
query insert update delete anything so
7:24
if you run this you will only see that
7:27
email the user which whose email is
7:29
equal to this one so in this way guys
7:32
you can use this extension to connect
7:34
with any database it can be my SQL it
7:38
can be post reql it can be anything and
7:42
it's very easy you can add multiple
7:44
connections so this is one connection
7:46
you can also add another connection if
7:48
you have another database of let's
7:50
suppose post
7:52
cql it can be any company Oracle so just
7:57
need to add the host name username rout
7:59
and then just add the database so Escape
8:03
is to cancel this is it will show this
8:06
connection right here and it will fetch
8:08
all your databases and show right here
8:10
so I personally use this extension a lot
8:13
because I don't want to go to every time
8:16
I make a change I don't want to visit
8:18
PHP my admin I can directly install this
8:20
extension and interact with my databases
8:24
directly inside vs code so thank you
8:26
very much guys for watching this video
8:29
and also visit my website as well free
8:31
mediat tools.com uh which contains
8:34
thousands of tools regarding audio video
8:36
and image and I will be seeing you guys
8:39
in the next video
#Programming
#Development Tools
#Scripting Languages