Up next in 10

Build a Stripe Elements SDK Checkout Form in React with Custom Button Styles & Theme in Browser
Jan 9, 2025
Get the full source code of application here:
https://gist.github.com/gauti123456/01e35d6b171774236d4e62508cf3040d
Show More Show Less View Video Transcript
0:00
uh hello guys welcome to this video so
0:02
in this video I will show you how to
0:05
design this uh stripe checkout form
0:08
which is useful whenever you want to pay
0:11
using your credit card so we have this
0:13
uh form ready inside react Chas we have
0:17
the fields where you will enter your
0:19
credit card number so you see it says
0:21
Visa Mastercard form right here I will
0:25
show you step by step how to design this
0:28
using a built-in p package inside react
0:31
chairs which is specifically there for
0:33
stripe and we are running it on Local
0:35
Host it's a credit card field then we
0:37
can select from the country picker we
0:39
can select your country like this then
0:43
we the expiration date we can select and
0:45
the security code so then we have this
0:48
pay now button you can customize
0:51
everything so this is my code right here
0:54
you can actually change the primary
0:56
color the background color all these
0:58
things you can customize it
1:00
you can change
1:03
the text of the button so I have all
1:07
these options
1:09
available so I will show you how to
1:11
design this step by step so we have this
1:15
pay
1:16
now so we can select any card number
1:20
like
1:22
this then we can select the expiration
1:25
date then we provide the security
1:28
code and and this is
1:32
not the purchase is not done we are just
1:35
showing the UI how to design this UI
1:38
using the stripe elements so stripe does
1:41
offers these two modules if you just
1:43
search for npmjs.com specifically for
1:46
react CH this module is present so it is
1:51
actually using the stripe elements UI to
1:55
design the stripe checkout forms so this
1:57
is actually the module
1:59
react component for stripe JS and stripe
2:03
elements so this is actually the module
2:07
I've already installed it so it has
2:10
almost got 1 billion weekly
2:15
downloads so if you just search for
2:17
stripe elements we are essentially using
2:20
stripe Elements which is custom checkout
2:23
design UI for specifically stripe
2:27
payment Gateway so like something like
2:30
this
2:32
so for doing this we just need to
2:36
install these two modules so just go to
2:38
your command line and first of all
2:40
install this
2:43
npmi and the second module will be this
2:45
one which is actually the stripe
2:48
SDK to connect your stripe SDK using the
2:52
publishable key so just install these
2:54
two modules by this command I've already
2:57
done that so I will just start my
2:59
development server and just make a
3:02
simple functional
3:04
component and this is my functional
3:06
component and what I will do first of
3:09
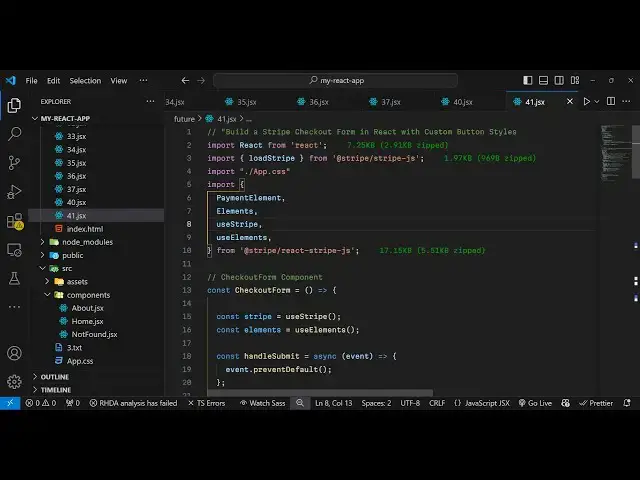
all I will import both the
3:16
modules so using the import
3:20
statement so there is one method
3:22
available in this which is load stripe
3:25
so I will just import this method first
3:27
of all load stripe
3:31
which will be coming from this tripe
3:35
SDK and then we will in basically
3:40
import the other thing so first of
3:43
all all these things will be coming from
3:46
this package so I will just import this
3:49
so this is the payment element elements
3:52
use stripe use elements all these will
3:55
be coming from this package so now what
3:57
we need to do we need to actually
4:01
instantiate the stripe SDK by using this
4:05
hook UST
4:06
stripe and then the stripe elements we
4:10
will invoke this use elements hook which
4:13
is available so one by one we are
4:16
loading it using this custom
4:19
hooks so now inside the jsx we will
4:22
simply have the form stripe checkout
4:26
form so inside this we will actually
4:31
actually include the payment element
4:33
that we imported if you see payment
4:35
element which is a custom component of
4:39
stripe
4:42
so after this inside this we can
4:46
actually have a button to submit the
4:50
form so this button will simply say pay
4:54
now so you can customize everything the
4:57
label of this button so this button type
5:00
will be
5:01
of
5:06
submit and we will be giving a custom
5:09
class which is
5:12
custom submit
5:16
button and it will be disabled by
5:18
default so whenever you submit your
5:26
form so it will be disabled if the
5:29
stripe is SDK is not loaded so by
5:31
default so we are giving this custom
5:33
class name to it so if you try to
5:36
refresh your
5:40
browser so you will not see anything
5:42
because we haven't connected the stripe
5:44
SDK it will show you this error that
5:46
your
5:48
stripe you need to wrap the part of your
5:51
app. call Su stripe in an elements
5:53
provider so just make sure that you do
5:55
this so for doing this you need to wrap
5:58
everything
6:00
inside
6:02
the this is your actual app if you
6:09
see so I
6:12
think yeah so what I will do is that I
6:16
will rename this to
6:20
a checkout form I will call this as
6:23
checkout form this is not not the base
6:27
app component this is the custom
6:29
component that we have written which is
6:31
checkout form a functional component and
6:33
inside this we have the simple form
6:35
appearing so now what we need to do is
6:38
that is we need to create our base
6:41
component and I will just create this
6:44
app component which is the parent
6:46
component and now we will wrap
6:51
everything inside this element
6:55
provider and this elements provider
6:57
inside this we will grab this checkout
7:02
form which we prepared and here we need
7:04
to pass the stripe promise so I will
7:08
just just declare this and also declare
7:11
the options as
7:13
well so this stripe promise here we need
7:16
to make sure that we load the stripe
7:19
SDK so this variable that you pass right
7:22
here stripe promise I just we will
7:25
basically declare this and what does it
7:28
do it will basically use this function
7:31
which is coming from this package load
7:33
stripe and we'll be loading the actual
7:37
here you need to replace your
7:38
publishable key from your stripe
7:41
dashboard so you need to have a valid
7:45
stripe account for
7:46
this so I will just go to my stripe
7:49
account and just paste my publishable
7:52
key so I will just be using the uh
7:56
sandbox mode just go to your stripe
7:59
dashboard and just paste your
8:02
publishable
8:04
key so inside your stripe
8:10
dashboard once it loads so just wait
8:14
there is an option right here at the
8:16
very top test mode you need to toggle
8:19
this option and now I'm just in my test
8:21
mode so now you just need to go to this
8:24
option developers option and just go to
8:27
this API Keys options and right here you
8:29
will see your publishable
8:32
key this is your publishable key so just
8:35
copy this and paste it so I just paste
8:45
it copy to clipboard and then paste it
8:49
so now I pasted my publishable
8:52
key and also we need to define the
8:54
options object that we are passing for
8:58
the checkout form so here here you can
9:01
actually have what is the mode so I will
9:04
just say payment amount you can
9:07
configure
9:09
1099 currency you can configure so I'm
9:12
just paying it in United State dollar so
9:14
USD and then we can basically have an
9:17
object for the appearance of the form
9:21
this will contain some additional
9:22
properties about the form so here you
9:24
can pass your
9:26
theme I will pass stripe
9:30
and uh then I will say the labels will
9:33
be
9:36
floating and then we will have the
9:38
variables for the color the primary
9:42
color background color all
9:45
these
9:46
options I will simply
9:49
pass so you will see the primary color
9:52
background color the color of the text
9:54
font family font fit spacing unit all
9:58
these options once you refresh now you
10:00
will actually see the form
10:05
appearing uh it is saying that invalid
10:07
value for elements amount should be a
10:10
positive amount in the currency subunit
10:13
you specified 1099 sorry this amount
10:18
needs to be
10:20
positive uh I
10:26
think let me just paste it and explain
10:29
to to you this options subject just
10:45
wait so now you can see that uh we are
10:49
having our stripe
10:51
form and uh you can see that so for this
10:56
we are using some custom styles
11:00
just for providing this background color
11:02
so I've written these custom Styles so
11:05
what I will do is that these are just
11:07
the two buttons so you can pause the
11:10
video and just write this we are just
11:13
basically changing this uh adding this
11:16
important right here to actually change
11:19
the background color of the this button
11:21
you can customize this
11:24
and you can also do this directly right
11:28
here we also have this background color
11:31
here so what I will
11:32
do I will just make this
11:36
as
11:42
important uh where it is
11:56
yeah okay so so we return this is custom
11:59
styles for this button so now to include
12:02
this we can simply include this at the
12:04
very
12:05
top import the CSS
12:12
file so once you import this you will
12:15
see the color of the button will be
12:17
changed and you can customize this if I
12:20
change this button basically color to
12:23
whichever color let's suppose this color
12:26
you will see the color will change and
12:29
now now if let's suppose if you want to
12:30
change the text of the button so we have
12:34
all these properties available all the
12:36
source code is given in the description
12:38
so we have these customized we have the
12:41
Strip theme then we can even have the
12:43
night theme as well this is you can see
12:47
the night theme so it has added this box
12:49
Shadow this is another theme right here
12:52
so we have this country picker security
12:54
code expiration date card number we also
12:57
have the flat theme as well this is a
12:59
flat theme if I refresh and now you can
13:02
see it's a flat theme so all these
13:04
options are supported and uh here you
13:08
can control the all these options font
13:11
weight so we have this is a dark theme
13:15
you can control change it to light as
13:20
well so in this way you can control all
13:23
these
13:27
options so in this way you can design
13:29
this using the stripe elements inside
13:32
react
13:34
CHS the stripe checkout form very easily
13:37
and customize everything so thank you
13:40
very much for watching this video and do
13:42
check out my website as well free media
13:44
tools.com which contains thousands of
13:47
tools regarding audio video and image
13:50
and I will be seeing you in the next
13:52
video
#Business Operations
#Software