Up next in 10

Build a SolidJS User CRUD App With LocalStorage Crash Course With Deployment to Vercel in Browser
Jan 9, 2025
Buy the full source code of application here:
https://procodestore.com/index.php/product/build-a-solidjs-user-crud-app-with-localstorage-crash-course-with-deployment-to-vercel-in-browser/
Show More Show Less View Video Transcript
0:00
uh Hello friends welcome to this video so in this video we will be talking about a new framework solid
0:07
JS which is very popular among developers and we will be trying to
0:12
build a user cred application inside this it is very much similar to react but it is very much
0:19
performant it is very effective in terms of uh it doesn't have virtual Dom as
0:25
supposed to react chers we will be looking at a full crash code full
0:30
stepbystep tutorial to how to build this uh CA application so we will be storing
0:35
the user details such as name email address profile picture country and we will be having actions such as you can
0:41
edit the information or delete this so we have a simple form right here where you can actually write uh the name of
0:49
the user then you need to write the email address and from your file system you
0:54
can upload a image file right here and then you can write
1:00
country so now if you click the button uh this alert box will be shown by sweet
1:05
alert library and you will see one record has been added so we are actually using base 64 code to actually embed
1:12
images you will see that so this is the actual state of the application if I
1:18
close this window and again try to go to the same URL you will see that it is
1:23
actually storing these details in the local storage and you can see you can delete this as well
1:33
so if I again open it you will see that these details stay in the browser because it is stored inside local
1:40
storage so in this way you can add some more entries like
1:50
this so we can actually pick
2:01
so one other entry has been added and we have this edit button uh if you click the edit button it will look something
2:06
like this you can change the email address or name let me make the modification click on okay so now you
2:14
can see that the name has been simply be changed right here you will see that name is changed so in this way you can
2:21
add as many entries as you want so it is not stored inside database
2:27
it is just storing in the local storage of the browser of the specific browser I will also show you how to deploy this
2:33
application to versal which is actually a platform where you can deploy your Cloud applications so for building this
2:40
we are using solid JS which is a new framework a reactive JavaScript library
2:46
and it is very much performant it doesn't reender whenever
2:51
your Dom changes whenever your state changes as opposed to react ja which actually uses virtual Dom this solid ja
2:57
doesn't use Virtual domor it doesn't require you to actually refresh your components whenever your data changes
3:04
inside the component so let's suppose uh we actually write some record
3:10
right here we add the record so when we click this add person button
3:18
so it will only update that component which is affected by this data it will
3:23
not renter the entire application as opposed to react CHS which uses virtual dor so this is the
3:31
main uh benefit of using solid JS which is it is very much uh beneficial in
3:38
terms of uh you don't need to rerender the entire application it it
3:44
only uh renders the component which are affected by the data so you will see you
3:50
will be looking at when we develop the application from scratch so the whole source code is given in the description
3:56
of the video so you can purchase it from Pro Cod store com from my website the link is given in the description so you
4:03
will actually get a zip file uh from Google Drive after you make the payment so the link is given this will be the
4:09
directory structure of the source code you will see we will be writing jsx code it is similar to react
4:15
CHS but it uses signals and store so it's a reactive Li
4:22
library and uh it is based upon Primitives and it uses a concept of uh
4:27
create signal signals are very much uh the concept in solid JS which allows
4:34
them to actually update only the components which are affected with the data not reenter the entire application
4:40
so this will be the source code you will be getting after you make the payment if you need the source code so now let's
4:46
start this application from scratch and I will be seeing you in the next section when we start building this
4:53
application uh now guys we will start building the solid JS application so the
4:59
very first step we need to do we need to go to the project directory and there is
5:04
this command which you need to execute npx digit D git T solid JS SL templates
5:13
so it it supports both typescript and JavaScript for this specific tutorial we'll be looking at
5:20
JavaScript sljs template sljs so this is a command npx then you type digit D git
5:29
solid JS / template sljs so you can even write TS as well if you're working with
5:35
typescript but for this tutorial be using JavaScript then the name of your application let me call this as person
5:43
current APP just enter it and it will actually clone the basic solid JS project inside
5:52
your uh this directory person card app so you will see it has cloned this to this directory
6:00
now we can navigate to this directory person cred app so if you see the directory
6:07
structure of a basic solid JS app it will look something like this we have this app.jsx folder it will look very
6:14
similar to react ches and uh it is very much similar you will see that we have
6:20
the app.jsx file we have this index. CSS file which is a global stylesheet file
6:26
then we have index. jsx file which actually contains this render method which is contained inside solid JS web
6:34
and this render method actually wraps your app level component and serves it inside the browser so just we need to
6:42
install these modules so we just need to invoke npmi command this will create
6:47
node mod node modules folder right in the root
6:52
directory then we will set up a Tailwind CSS because we are using Tailwind CSS as a user interface framework so I will
7:00
show you how to set up Tailwind CSS in solid JS it's very
7:05
easy so it will hardly Take 5 to 10 seconds uh installing this and uh if you
7:11
want to check out the documentation just write solid GS and it has a very rich ecosystem and it has great documentation
7:19
as well you can see that uh the references docks are very good and we
7:25
will also be using sweet alert to which is a popup dialog Library this is normal
7:34
alert boxes that you see but it customizes to actually see this
7:39
beautiful looking C popup dialog so we'll be using the sweet too I will show you how to integrate this inside solid
7:46
JS so now it is installed so we just need to say npmi sweet Alert 2 this is
7:55
actually the package we are using it npmi sweet Alert 2 so enter it install this as well so
8:03
after this guys we need to actually integrate Tailwind CSS and for integrating Tailwind CSS just write here
8:11
integrate Tailwind CSS with solid JS so the very first article which comes right
8:17
here simply go to it and they basically give you the instructions here and uh so
8:23
we are actually uh just need to copy this command right
8:33
here so we need to install these dependencies as Dev dependencies npm install DD first is tailin CSS post CSS
8:42
Auto prefixer these are three Dev dependencies which will get added if you check in the package.json
8:50
file so we have this uh dependencies which are solid JS we are using it on
8:56
sweet alert too and solid JS actually works with vat
9:02
development engine you will see that wheat is actually a uh environment for developing
9:09
front-end projects such as react can also be developed view so similarly solid J supports V which is a pretty
9:17
good uh development environment where you will be able to run your project so you will see in the dev dependency
9:23
sections we have installed Auto prefixer post CSS and Tailwind CSS and the next
9:28
step is to actually create a Tailwind config.js file for
9:34
automatically creating it we can actually write this command npx tailin CSS in it- B so this command will
9:42
actually create two files tailin config.js file and post CSS config file
9:48
so just execute this command and you will see in the left hand side it will
9:54
create these two files
10:00
you will see tailwind config.js and this uh post CSS one so inside your
10:08
Tailwind config.js simply copy this code and I will just paste it right here
10:14
it's very easy to integrate tement CSS all the instructions are given and then it is telling to us that inside your
10:20
Global index. CSS file right here this is a file simply copy paste this code
10:26
that's all now you can actually use your Tailwind CSS classes inside your jsx app
10:32
level component so here we can give it a and the very first difference if you
10:37
notice guys in react JS we actually use class name but in solid JS we can use
10:43
class directly like this this makes it very much easy to write jsx because in
10:49
traditional web development we use class so we don't need to write class name
10:55
right here we can directly use class here and then we can use some Tailwind classes
11:00
BG that 500 and we can
11:07
say person CR app in solid
11:15
jss so if you want to run this application uh you simply write npm runev so this will actually start your
11:23
development application at Port number Local Host 3,000 and if you navigate to
11:28
it you will see that so the classes have been successfully applied you will see
11:34
that so so we have W full class as well
11:40
you'll see that so so the very first I think I think I need to show you guys
11:46
the very basic concept of solid JS which actually based upon signals so solid JS
11:52
uses a concept called as signals which is called how the track changes how they
11:58
react to changes in the state so they manage state by using signals
12:05
so first of all I will show you a very basic example so in react JS we actually
12:10
use a state by using U state but inside the solid J we have a hook so let me
12:18
take a very simple example set count set counter and this will look very uh
12:24
familiar to you when you use react CHS but in this we have this create cre signal in react sorry solid JS if you
12:32
type here create signal automatically it will be imported from solid JS if you see that and here you can put a initial
12:40
value this counter is actually a function not a variable in react GS this
12:46
counter is a variable and this out set counter is a function but in solid GS set counter is also a function and set
12:52
counter is also a function and here you can put a initial value of counter let's suppose zero and now we can simply embed
13:00
this value let's suppose count we can say that in
13:06
paragraph the current we can access this using the current value of counter is
13:13
and then in curly bracket we can say counter if you just write like this
13:18
counter if you don't put the parenthesis you will get a error in solid JS you can't directly it will say current value
13:25
counted is zero but this if I change this to to Let's suppose
13:31
five it will still work but the correct way of accessing the
13:37
state this is actually a function so we just need to say here parentheses so
13:43
right now this F also work but this is a recommended way this is all this is a
13:49
function not a variable and now I will simply add a button right here to actually change
13:56
this state we can say add and we can actually bind a on click to it so when
14:03
we click it we can execute this function add we can Define this function like
14:10
this and uh when this button is hit by the user so when this button is hit by
14:17
the user you will see add is not defined so just put a parenthesis right
14:26
here I think now you okay so whenever you call the
14:31
function you just need to write parenthesis it's a function so I'm just telling you if you coming to solid JS if
14:37
you are a beginner you just need to first of all know the very basic concept of signal before we can develop the cred
14:43
app so here when you click this button this function will execute and what this function will do it will actually call
14:49
this function set counter you will see that we are calling this function set counter and right here inside this
14:56
function we will increment the value of counter by by one like this and uh now if you click
15:09
it so I think we have made a mistake right here sorry again if you see guys
15:15
this is not a variable that's why it is creating error because if you see if I click the add button it will simply
15:22
showing the function right here it's not a function it's not a variable so we need to Simply write like this counter
15:29
parenthesis so now this is actually a function we are calling this function right here and if you see as we click
15:41
this so let me see let me rerun the application
15:48
uh npm runev
15:59
uh sorry guys I forgot to do this this is uh we just don't need to write parenthesis here because if you just
16:05
write here parenthesis in the add function it will only execute once if you see the six the value is increased
16:12
by one and if I again click this button nothing will happen so you don't need to write parentheses here we are simply
16:18
calling this function so whenever you click the add button we will call this function programmatically so if you see
16:24
now this will work if I click the button the value of counter will changed and it
16:29
will be incremented every time by one so I just want to show you a benefit
16:34
of the base component will only execute once so in solid
16:40
chairs as compared to react chairs it actually uses virtual Dom but in solid JS we don't use the concept of virtual
16:46
Dom the app component that you see right here it only executes once whenever the
16:52
application starts so let me write a console lock statement right here so let me say app component
17:03
is loading so if you see right here uh this
17:08
ex this statement will be executed in the browser console only
17:14
once you will see that this statement that you see right here app component is loading so this is one if I again click
17:21
it you will see that this function this statement is not repeating again and
17:27
again this is the biggest advantage of using solid JS guys because the component only renders once and
17:36
uh right here if you add one of the static statement this is uh person C
17:48
app because this is a static statement this is not dependent upon this state
17:54
that you are referencing right here which is counter state so this will also execute one
17:59
so let's suppose you can have another function let's suppose you can declare
18:05
another state right here name set name and the initial value of uh create
18:14
signal will be let's suppose you are accessing this one
18:21
uh my name is like this so this state is totally
18:27
different bit to the to to this this state so counter is not related to name
18:34
so if you now execute right here the this this statement will only
18:41
execute once and if you also check the elements right
18:48
here whenever you click the add button the thing that you see this will
18:55
remain constant this H1 tag this Gotham's value static this value is not related to The
19:01
Counter VAR value so that's why it will not re-render solid JS doesn't reender
19:07
it only re rerenders the stuff which is related to The Counter stuff so if I again click the add button only this
19:14
statement will change the current value of counter rest of the stuff will remain constant and it doesn't reenter the
19:21
component so this is a biggest advantage of using solid GS it is very good in
19:27
performance whenever you deploy applications which are very large and complex if you have a lot of components
19:33
then in that case it will be not reender every component from scratch whenever any state changes or any data changes
19:39
inside your application as opposed to react CH so in react CH this is the biggest problem and solid GS solves
19:46
these problems very easily by using the concept of create signals so now if you
19:52
know your create signal one other method is there on Mount which is actually a
19:58
hook which is very similar to use effect this function only executes when you're if you want to do
20:05
something whenever your uh component is loaded so if you check right here this
20:11
on Mount will actually loaded right here if you check the
20:17
console if I delete everything you will see app component is loading and this
20:23
component is loaded so on Mount executes
20:29
as soon as your component loads for the very first time so in inside this section you can do
20:36
something let's suppose if you want to do some kind of configuration related to your application you can do right here
20:42
so I just wanted to introduce to guys solid JS as a framework w why it is
20:48
created and what problem does it solve before we develop C application and in
20:53
the next section guys we'll start building the cred application so I will be seeing in the next
20:59
section uh now guys we will be start building the project so for actually
21:04
building the project we need state or data so we will be defining the state here and uh in defining state in solid
21:13
JS is very simple as compared to react CH we don't need any sort any extra
21:18
Library such as Redux or context we don't you we don't need to use use state
21:24
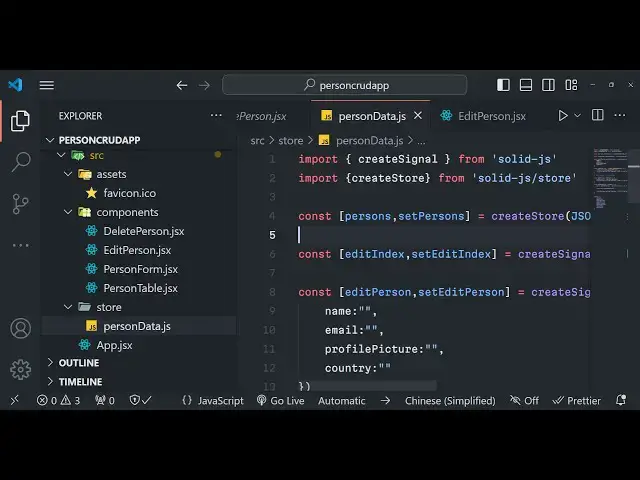
in every file use effect so there is a very simple formula in solid is you create a store in the source directory
21:31
you need to create a folder it can be anything but I'm just calling it as
21:37
store and inside the store you actually create the file let me call this as
21:42
person data.js so you can call this file any name of your choice and uh it can be
21:49
typescript file as well but as you will be working with JavaScript so we called
21:55
this as person data.js so inside this we will be actually be containing all the
22:01
state variables and the methods we will Define it at a at a very single level at a global level so that each and every
22:08
component that we Define later on will access will get access to this file we can simply include this file and uh let
22:15
me just first of all import the create
22:22
store from the solid JS store so this is the basic uh method
22:30
which is provided by solid JS if you want to create a store store is something like State you may call for
22:38
your application which may be accessible by every component you just need to include this file and then you can
22:44
simply access it by the dot symbol I will show you later on so first of all in this case we need to define the array
22:50
here we'll be storing a persons data so this will be persons and we'll be having
22:56
set persons very similar to react but here we will use this create store
23:01
method and right here we will be storing it inside local storage so we will say
23:07
Json dopar local storage. get
23:12
item and we will be defining it as persons so here we will simply say U if
23:18
the local storage is not defined in that case we will be defining a array of
23:26
users so so by default we will have two records available right here we
23:32
can simply Define these records so I will later on show you how to iterate through
23:41
them we can have another JavaScript object right right here this is just a static data so you
23:49
can basically pull this data from API database anything you can do it so the
23:54
concept will remain the same so I just want to show you how to display this data on
24:00
the browser so now you have defined a store guys and right here we defined a
24:07
array of object which contains two objects right here name email country these are three properties and now we
24:14
can simply export this so how we can do that we can simply say export con export
24:21
and parentheses uh squirly bracket and simply export this from this file so now
24:27
this store that you created is accessible by each and every component that it will import so this is the very
24:34
fundamental thing that solid J support it allows you to actually declare state in a single file and then you can
24:41
reference that state in each and every component you don't require Redux you don't require context you don't require
24:46
any special Library which you saw in react CHS no very simple setup you
24:53
define the create store you define your data and now you can actually go to to
24:59
our app.jsx and right inside this file we can create uh two
25:05
components let me create a component here first of all to show this data on a table so we'll be creating this
25:11
component called as person table so right in the source directory just create a components
25:18
folder and just create uh persons person
25:23
table. jsx this will be a simple functional component and person table it
25:29
will return so we can now include this component right here person table so it will imported from
25:36
the components folder you will see that so if you refresh your application if if you go Local Host
25:49
3,000 so if you go to the console uh it is saying that person table l jsx
26:03
oh sorry we accidentally imported react you will see that so we don't need react
26:09
here simply now you will see guys person table is showing right here we are
26:16
actually including components so solute J if you have a large application you
26:21
can split your code into multiple component just create a components folder and just write it is very much similar to react CH it's a functional
26:27
component basically and uh right inside this component we will Loop through our
26:33
users which we defined in the store file if you see we Define this data right here now this data that you define it is
26:41
similarly accessible in this component we directly can simply import
26:47
this import persons and you will see automatically vs code will do the importing you it is
26:55
importing it from the store file person data just make sure that you written the statement export person so that it can
27:02
be importable if you don't write this you can't import this so after that we can simply uh loop
27:11
through so right here we can just write a console log statement
27:16
right here this is a person table component so right here we will actually
27:23
have a table inside this uh
27:28
table tag you'll be giving some classes to it of Tailwind classes minimum width
27:36
full divide uh y divide gray 200 100 margin top I will
27:46
give it eight after that we will say table heading which is
27:54
name which is email and lastly for we will show you profile picture later
28:00
on I just want to show you how to Loop through the data in solid JS so we have
28:06
if you see if you refresh it we have these three columns name email country and now if you want to Loop through this
28:12
data we simply uh right here in the table body so solid JS does
28:19
provide us a for each Loop it has its own conditionals you can use for each
28:26
right here but we'll using the solid JS which is this for Loop that is provided
28:33
it is built in inside solid JS if you see it is imported so this tag inside this we have the each
28:40
statement and here you will provide your persons so we can import this persons right here that we imported as defined
28:48
right here inside the store file so we are referencing directly you will see that we imported just imported it so no
28:54
complex setup we are simply references by including the file of store this is a main Simplicity of solid JS
29:02
you can the state is very simple to Define and include now in the we have
29:08
this person for each person we will have the index variable and this is similar
29:13
jsx we have the loop right here and we can Loop through that TR and we can
29:19
simply say here curly bracket we can say person do
29:25
name like this and then we can say person. email like this so very simple
29:33
so this is all react chers person. country that's all so if
29:38
you refresh so you will see that guys
29:47
uh if you see the data is coming from local storage so for this I need to
29:53
refresh the browser here or you can open your application in a brand new incognito window so that
30:00
the different browser Local Host 3,000 and now you can see that that data that we defined is coming you will see
30:08
that this is the simplistic use of solid JS guys if you want to do this similar
30:14
thing in react CH it will require a lot of code it will require a lot of external Library Redux in some cases
30:21
context API so it's a lot of messy things in react JS but in solid JS it's
30:27
very simple you define all your state all your methods in a separate store file in in similarly that we defined
30:35
right here we export it and now in any component that we defined in the application we can directly import the
30:41
state and directly we can reference it this is the magic of solid GS so it has
30:49
speed it has Simplicity it has everything so it doesn't have virtual
30:55
Dom so you will see the component will render on only once you will see person table component if you make any sort of
31:01
changes it will not rerender because it doesn't involve virtual Dom so this is
31:06
the thing about solid JS so now what we can do we can simply add a form right
31:12
here where we allow the user to actually enter information such as name email country profile picture so we will be
31:19
looking at this in the next section uh now guys in this section we
31:25
will be developing the a simple form where we allow the user to actually
31:31
enter this information name email country look also look at the profile picture as well so for that we just need
31:38
to create a brand new component in the components folder so just create this
31:43
person just follow Pascal case so person
31:48
form jsx so just create this functional component right here and now we can
31:55
include this component right at the top which is person form so we can can see we have included
32:02
that and uh now we can go to that component person form right
32:10
here we can delete this statement react one so right here guys we just have a
32:16
simple form right here to actually for first of all doing this we
32:24
need to actually declare some State variables in this so whatever the user
32:29
will write we need to store that so we'll be again be using Create signal so
32:34
we'll be using name set name and you using Create signal once again so create
32:42
signal is the main you will see a lot of create signals used in solid J it's a
32:48
main recipe of building solid JS application similarly you'll be doing it for email as well
33:04
then we will have for profile
33:10
picture so profile picture so in this we will be storing the base 64
33:17
URL we'll be encoding the base 64 converting AR
33:23
buffer to Bas 64 and then storing it so again we'll be using Create signal and
33:28
initial value will be empty and then we'll be doing it for the country as well set
33:39
country and lastly we do need to have a reference to that image
33:44
input so that whenever we submit the form that input is cleared so form is reseted
33:53
so we will have this again this create signal this time the value will be null
33:59
by default these are the state variables which are required for this person form
34:04
so this is specific to this component that's why we are not writing these in the store file because this is specific
34:11
to this person form component that's why we just need to write this in this file only so after you do this
34:19
uh we just need to have a form right here we can simply write a
34:25
form and uh we can give it a class of space y4 and
34:30
uh so right here you will have a div and inside this you will have a
34:40
label block text font medium so these are all
34:45
Tailwind classes text gr 700 so the label will be simply name so
34:53
here we'll allow the user to actually enter the name and then we will have input text type will be text and uh we'll be
35:02
giving actually this class empty margin top one blog width will be
35:09
full and it will be rounded on medium devices border gray 300 and it will have
35:16
some Shadow on small devices so this is a pseudo class Focus be giving a border
35:23
of indigo
35:29
300 Focus
35:40
rink Focus ring Endo so CSS is not necessary guys I'm
35:48
just writing it to Simply style it you also be giving opacity and it's required so if
35:55
you just refresh your application you will see this name input is added right here if you see that and just make sure
36:02
inside app.jsx just give it a container class right
36:09
here so it will have some container class applied just zoom in right here
36:19
uh so after you do this we just need to MX Auto P yeah MX Auto we also need to
36:26
say Auto P4 so with this applied your form will
36:33
be centered so it it will have some spacing from left and right and now this is right in the center position so after
36:40
you do this uh we will repeat this we will copy
36:47
this repeat this for the email so simply copy this and this time this will be
36:53
type will be email and the label will be email
37:00
so if you see there will be two Fields added name email similarly this will be for the
37:07
third one and fourth one will be country so I will change it to Country input type
37:14
text so this third one will be for profile
37:21
picture so input type file here
37:27
so you will see that so here now you can actually select your profile picture and
37:33
this is country and after that we will have a simple button to actually submit
37:39
the form so you can say add
37:46
person you're giving a class of margin top for PX4 py padding to BG blue
37:56
5600 text right and it should be rounded on medium
38:02
devices you'll have a button right here you will see that so so just button type
38:08
attribute submit and here we need to attach some attributes to these uh input
38:14
elements so one such attribute we will be attaching it to the form right here at the very top so when we submit the
38:22
form there is an attribute right here on submit you used in react also so this is
38:28
same right here in solid JS so we will be executing this function handle submit
38:33
we need to now Define this function handle submit this e parameter will be passed
38:38
here you need to Simply say e do prevent default to prevent the auto submission
38:43
of the form and now for each input element we just
38:49
need to attach a attribute right here this attribute will be the on input so
38:56
whenever you start writing something right here it can also be on change as well we
39:02
will be using on input so you'll say set name to be e. target.
39:10
value this is the on input that we attach similarly thing we need to do it
39:16
for this email as well
39:22
so this time this will be set email
39:31
and for uh profile picture this is actually a input type file here we will
39:37
actually select a media file so for that you just need to attach on change so
39:42
when the file changes in that case you'll be attaching this function handle file change so we now need to Define
39:50
this function right here is simply Define this
39:58
so this e parameter will be passed right here in the argument so apart from that
40:04
we also need to attach a ref attribute right here ref
40:09
that we declared which is set file input this is coming create signal you
40:17
will see so these are all the methods that we defined set name set email set country set file input set profile
40:23
picture so we are actually attaching these create signals to these individual input element so this is so whenever
40:30
their value changes you will actually handle this inside create signal so
40:37
after you do this simil similarly we just need to
40:42
attach it for the country as well as so we'll simply say
40:47
here on
40:53
input set country so here uh e parameter will be
40:59
passed here so e do target.
41:08
value like this so in this way you can uh do it so after you do this we just
41:15
need to if you just refresh nothing will happen if you click the add person button we do need to actually write this
41:22
handle submit function but before that for the profile
41:29
picture in this handle file change method so we just need to get the
41:35
profile picture selected by user so for that we
41:40
just need to declare a file variable and you'll simply store e. target. files and
41:47
uh it will be an array so you'll be storing the first file which is selected by user and here in the if condition we
41:53
will simply check that uh you'll read this by using file reader API which is
41:59
available in browser so reader. onload and this is basic JavaScript code for actually
42:07
reading the file so we'll simply say set profile picture and we'll be reading the
42:12
base 64 code by using this so it will return the base 64 code and we'll be
42:17
using this function read as data URL so this is provided by this file reader
42:23
API now we just need to call that so we this function will get called and
42:31
then when the file is successfully read then we'll be calling this uh signal
42:37
function set profile picture and the F image data will be assigned reader.
42:43
result that's all so now after we submit the form we can
42:49
simply return alert statement right here form is submitted just to
42:55
check if you refresh write something in the name
43:00
email select your profile picture let's
43:06
suppose so you will see form is submitted so the it is successfully
43:12
executing this function so now inside this function we just need to actually
43:18
Define a method inside of a store which allows you to actually add the data in
43:23
the local storage so we will simply go to this file person
43:29
data JS so right here if you see we have this we can delete for now we don't need
43:34
this we can delete this this will be empty array if the local storage doesn't
43:40
contain any data this will be assigned as empty so right here Define a function
43:45
in this file which allows you to actually add a
43:51
person in local storage we will Define a
43:57
add person and this will take person as
44:04
argument so inside this method guys what we need to do we'll say set
44:09
person we'll call this uh create sign create store this function right here in
44:15
order to add a new entry so for doing this we'll call this function and we will say we'll use the spread operator
44:23
dot dot dot this will actually copy the previous person array and then you will add this person to this array this is
44:30
basic JavaScript and the spread operator will actually copy the previous data in
44:37
just present in the array and then this entry will be get added in the person's
44:42
array after that we need to add this to the local storage you'll say local storage set item
44:48
person and then we'll say convert this into Json convert to a Json string json.
44:56
stringify and and then dot dot dot persons person that's
45:04
all so we are setting this in the local storage that's all two lines of code so
45:11
now we need to export this method so simply right here you can say add person so it is that easy so we Define the
45:19
methods which will manipulate the state in a single file and now we can export this method and now we can include this
45:25
method right inside this component we need this method so we can simply say
45:31
import add person from the store file you will see that it automatically get uh imported
45:39
now we can use this method inside this component so first of all we will call this add
45:46
person and here we'll pass the name to be name parenthesis because it's a
45:52
function not a variable so we need to access this using par es so it will get
45:58
this value and similarly email to be email and then the profile
46:05
picture is the profile
46:13
picture lastly the country will be country very simple you
46:18
will see that so after we do this uh Define this we can actually show a alert
46:24
message to the user sweet alert so for that we just need to import the sweet alert package it will automatically get
46:32
imported from suet Alert 2 so it contains a notification message you can
46:37
say success and we can simply say user created
46:48
successfully and then the third argument is the icon that you need to pass right here and uh there are various icons
46:55
available will be showing the success icon and then we need to reset the form
47:02
so you'll say set name to be nothing set email to be nothing and set and then for
47:09
the file input that's why we given that ref attribute to it so now we can simply
47:14
check call this file input right here and just check if the file input is
47:22
there then we need to reset that so file input Dot
47:27
value nothing that's this will reset the input field and set profile picture to
47:34
also be nothing and set country to be also
47:40
be so that's all and uh if you just refresh now hopefully we
47:46
will able to be adding you'll see currently nothing is there so local storage is empty so we will Define a
47:55
record we Define your picture right here
48:02
and you can say user created successfully uh if you see uh you will
48:08
not see profile picture because we in the last tutorial we haven't had it the profile picture if you
48:15
see so now if you want to show the profile picture as well just add this
48:20
entry right here and right here we'll have a image
48:26
tag and Source
48:33
person so we'll be using a base 64 for this uh because uh to actually show the
48:40
picture we will actually be using base 64 code for doing this person. profile picture yeah so we
48:47
can directly reference that so person. profile
48:54
picture and we can actually give it a
49:08
plus so if you see just refresh it the image size is pretty large so
49:16
we're doing this width and height and
49:24
okay so you can see that so now now the image is showing like this we just need
49:30
to add a table heading for that which is profile
49:38
picture so you can see that now the name email profile picture country is showing
49:43
you can add any other record right here in the local
49:51
storage so record is inserted but if you see the form is not
49:57
resetting it if you let me see what is the
50:12
problem so all the things are perfectly showing uh but the form is not
50:19
resetting set name to be
50:27
set name nothing set email nothing if file
50:35
input if you just refresh now this entry will stay if I close this tab and again
50:40
reopen that the local storage is actually the data will stay right here in the browser you will see that so you
50:48
can just write any data
50:54
so so another user us is created so you will see that how easy it is and uh now
51:00
I will show you how to actually edit and delete as well so just inside this we
51:06
will be actually be having uh the addit and delete buttons so this
51:13
will be added button the here will be delete
51:19
button so this I will call this as actions
51:27
so this will go in a separate component so right inside components folder just say here
51:33
edit edit person and similarly you'll be defining
51:40
another component for delete person
51:57
so we can just include this right here in the person table
52:14
component so we can even pass information as a props as well similarly
52:19
as we pass in react CHS for this simple we need to pass this index so that we
52:25
can uh actually added the user by its ID and delete as well so for that we don't
52:31
need to Define this index in the store file we can't do it so that we can directly pass this as a prop so we can
52:37
say that index is equal to index like so we are actually passing
52:44
index to both these components as a prop so now we can receive this very easily
52:50
so we can have this property props available by default in solid Js so you
52:56
can also pass information by props as well to IND individual component if you don't want to Define it in a global file
53:03
you can even pass information as props as well similarly as we did in react CHS as well
53:09
so so now we will be tackling this edit and delete section in uh functionality
53:16
in the next section so now guys in this section we'll be tackling the uh delete button
53:22
so this is a component that we created in the last tutorial so if you see in the last tutorial we actually couldn't
53:29
reset the form after we click the add person button so for that the problem was very simple in the
53:36
person form component we haven't attached the value parameter to the
53:41
input type text parameter we need to attach a value parameter and this will be actual value which is the
53:50
name like this this is the name you can see that we need to we are referencing
53:56
this name right here in the value parameter similar thing we need to do it in the email as well so
54:02
email don't need to do it in we have already attached is the ref parameter so
54:09
this one for the country value parameter and Country so now if you submit the
54:16
form the form will reset click uh basically enter any name
54:22
email so it will clear out the fields so you
54:29
will see the form is successfully reset just attach these value parameters right
54:35
here so after we do this we come to the delete person component so right inside
54:41
this delete component we have a simple button right here so inside this button we will
54:48
simply have a TD tag for we have a
54:55
button so this button will actually will say to the user that
55:03
delete so we'll actually be attaching a class to it of PX4
55:11
py2 BG red 500 text
55:20
white rounded on medium devices so if you just refresh now there
55:26
will be this uh you do need to include this component
55:33
I think I forgot to do this so if you see in the person table
55:41
component right here we have this uh edit person and this is delete person so
55:47
this is delete person right here so just refresh you will actually
55:55
see this delete Buton button is appearing right here so now to actually make this button working we will
56:02
actually attach a on click function right here so when we click this button this function will execute inline
56:09
function which is handle delete and we will simply pass this
56:14
props index so as you can see we are passing this uh property this is the
56:22
from person which we are passing it this index property if you
56:29
see as a property to this component so we can directly say props do index it's
56:36
a function so that's why put parenthesis so now we just need to Define this function right here handle
56:42
delete right inside
56:48
this so it will actually get this uh index passed as as an argument right
56:54
here so with the help of this index we can actually delete the user we can simply show
57:00
a notification message so sweeter 2 is automatically imported so right here we
57:06
have this title are you
57:13
sure and then we have the text uh you won't
57:18
be able to rever this
57:24
so you can also show can warning as well icon then you can even
57:30
show a cancel button to be true so you can also show a cancel button to the user to actually cancel the operation
57:37
and confirm button color these are all CSS we can control
57:44
this so what I can do I can copy paste
57:51
it this you can all control it this hexa decimal colors so confirm button text
57:57
has deleted and uh this will actually return a promise after you make the selection dot then and we can actually
58:05
get the result and right here you can simply say if the user has clicked the delete button
58:13
then we need to delete the user we'll call this function delete so right inside your store file again you'll go
58:20
to that store file and write here you will Define a delete method similarly we
58:26
Define a method for adding a user now we'll be defining a method for deleting the user so index using the index
58:35
variable and here it will just perform filter so this is a array method
58:43
available in vanilla JavaScript yes6 and right here we will say if
58:49
I is not equal to index so you basically get the array which neglect this index
58:58
so that user will be deleted from the array then we'll be updating this by using set persons and passing this array
59:05
update persons and then we'll update the local storage by setting item once
59:11
again again use json. string if I uh updated
59:19
person so that's all three lines of code we actually find out the user which was and then we deleted this we get this
59:26
updated array then we set this persons we call this set person every time when we actually update our state so this is
59:34
coming from create store then we again update the local storage we pass this array as in setting the item in local
59:41
storage that's all this function is important set persons every time you want to manipulate or change state in
59:48
solid JS you call set person and it will in turn call this create store which is
59:53
actually update your state automatically globally inside your application so this
59:58
is the magic of solid JS and if you now go to your delete person right we will
1:00:05
call this function delete person this will be imported if you see
1:00:12
uh sorry what we call this so sorry we do need to actually export this so we
1:00:19
can say delete person like this and now we can import
1:00:25
this so we can say here delete person so it will get imported right
1:00:32
here if you see from the store file and right here we can
1:00:37
simply pass the index to this function after that we can show a
1:00:45
notification message again delete
1:00:52
it person has been deleted and we can show a success
1:00:58
message like this so if you see now we have the ability to delete the user you'll see are you
1:01:05
sure so that user will be
1:01:11
deleted so as you can see we can delete any user so as we are
1:01:19
deleting it the user is getting gone so if you refresh only one user is remaining and if I close the browser
1:01:25
browser reopen it once again so it will stay right here you will see the local storage will actually detect only one
1:01:32
user is available then it will show that user to you so in this way you can perform the delete operation and now in
1:01:38
the next section we'll be seeing the update operation to actually update the details of a specific user uh now lastly
1:01:46
guys we'll be actually be seeing how to update a user this functionality will be slightly complicated because we do need
1:01:52
to show a alert box when we click this edit button to actually allow the user to uh actually edit the details of a
1:01:59
particular user so right here uh go to your edit user edit person component and
1:02:06
right here we will actually have a simple button which will so right here
1:02:13
uh we will have a
1:02:19
button so this one will be simply
1:02:24
edit so we will be giving Tailwind classes to it of margin right two PX
1:02:30
padding from the X direction is 4 padding from the y direction will be two background color
1:02:37
will be a yellow 500 text
1:02:44
white so if you see the edit button is ready now we just need to attach a
1:02:50
onclick listener to this button so when we click this edit button similarly we
1:02:55
need to execute a
1:03:01
function so right here you'll simply say handle edit and here you again pass the
1:03:08
index so Props do index so right here we'll actually be defining the
1:03:22
function index will be passed as an argument right here and inside this
1:03:29
uh here we need to actually again go to the store file so right for the
1:03:37
updating update functionality we do need to actually have uh State variables for
1:03:44
this we need to have storing the index for keep tracking the index so for
1:03:52
keep tracking the index we will Define a edit index and set edit index so which user
1:04:01
the user selects for updating so this value will be keep tracking for that so
1:04:07
here create signal will be again we'll be using Create signal and this will be
1:04:13
null and the second one will be for the
1:04:19
edit person set edit person so this is useful because when we actually click on
1:04:27
this edit button for a particular user these details that you see the previous details which should preop in the alert
1:04:34
box for doing that we need to actually create this create signal and this will
1:04:39
actually hold the buil-in name email the profile picture and the
1:04:48
country this will actually show the old information to the user so that the user
1:04:53
can actually update that so this is name email profile picture
1:04:59
country and after that we'll Define a function in the store for updating the user so
1:05:07
you can see all the business logic which is for the CED application is stored in the single file and now we can reference
1:05:13
this file in various components so we take the index and the updated person as
1:05:19
two argument to this function and we actually first of all call set persons to actually
1:05:26
update passing the index and the updated person this will actually update that
1:05:33
user which has this index and then it will update this uh updated person sorry this
1:05:41
is updated person so it will update this
1:05:48
information which is passed which will be an object which will contain name email profile picture country and it
1:05:53
will actually update that that info with that index number so you can you may say that
1:06:01
various indexes are there 0 1 2 3 so we just need to detect which index the user
1:06:07
has selected so let's suppose the user has selected the first user to be updated so it will actually have this
1:06:12
value index to be zero and the updated information whatever information the user provides so this will manipulate the
1:06:20
state again we are using this uh updated person
1:06:26
this is the data which is coming so again we are calling this function set person so every time we will call this
1:06:33
function set person when we want to delete update or add person this is the
1:06:39
create store function so after we manipulate or
1:06:45
update the state again we need to say local storage set item persons json. stringy file very
1:06:53
simple persons that's all so this is all now we
1:07:00
just need to update all these variables and functions so we'll say update person
1:07:07
we will say set edit index set edit
1:07:13
person so we are updating all this edit index as
1:07:23
well edit person as well so we are updating all this exporting all
1:07:30
this in our export one so now we can import all these variables methods that
1:07:35
we there inside the store file which will manipulate the data for state of the application now we'll move to the
1:07:42
edit person right in the handle edit function we will actually require the
1:07:48
function set edit index so you can see it automatically imported from person data
1:07:56
we will set the index pass this index which is selected by the user and then again we will call this set addit
1:08:04
person and here you'll pass the index persons.
1:08:09
index and then we will again use site alert which is site alert will
1:08:17
show a simple popup message to the user added
1:08:23
person and then we'll be showing a HTML right here and we'll be pre-populating
1:08:29
the old values such as the name country email address and profile
1:08:37
picture so we'll be giving these classes well to
1:08:49
input so we just need to attach this value parameter which will be coming from
1:09:00
so it will be coming from edit person dot it will be a parenthesis because
1:09:05
it's a function not a variable in solid J dot
1:09:13
name and then close the parenthesis so here this added person that you
1:09:19
see we actually got this addit person so this added person that we defined right
1:09:26
here if you see this is a function and it has a property name so we are actually
1:09:32
accessing this using again this parenthesis if you
1:09:38
see parenthesis you'll see do name this value will get X similarly we'll close
1:09:49
this we will copy this repeat this for email
1:09:55
this will be ID will be email and this folder will
1:10:04
be this will be
1:10:10
email this will be for profile
1:10:15
picture
1:10:22
input type will of
1:10:31
five so the value will not be there just delete this for
1:10:40
this then we will have for the
1:10:51
country that's all and uh after you do this uh we will have a
1:11:05
simple so after you do this you will close this you will have another property here
1:11:12
which will be Focus confirm and we will set it to true
1:11:19
false did open this will be a here will be a call back function right here
1:11:31
uh let me just show to you and if I click edit
1:11:39
button I think some error is taking place in the console it is saying persons is not
1:11:53
defined it also need to import the persons as well so the persons is also
1:11:59
imported you will see the persons are actually this one so all these things we are exporting
1:12:06
from this file so we are simply showing
1:12:12
it so if you click the edit
1:12:17
button you will see the details will be prepopulated this is a name email
1:12:22
address this is a profile picture you need to update the you need to Simply you can choose any other profile picture
1:12:28
and this is your country you can change all these values then click on okay so
1:12:34
when you now click okay we now need to actually update this information
1:12:44
so so this is slightly complicated so what
1:12:51
I will do uh I will show you let me just copy this and
1:12:57
then this is all happening in that uh popup window if you
1:13:14
see uh I think let me just paste it
1:13:19
here all the source code guys is given in the description you can directly purchase the full source code
1:13:39
[Music] okay I think this is
1:13:49
creating so here what is doing guys you can see that basically up till now we
1:13:54
written this code right here if you see Focus confirm false and here we
1:14:00
actually for the profile picture we will actually given an ID if you see right here to the profile picture profile
1:14:06
picture we simply targeting this using query selector we are simply if the
1:14:12
profile P picture is selected by user they want to change it then this event
1:14:17
handler will automatically get fired change event handler and then handle file change would be called and here e
1:14:23
parameter will be pass set edit person we will call this function set edit
1:14:30
person so we'll get the value we have given each input field a ID parameter if
1:14:36
you see this is ID Name ID email so we will get all these values name email
1:14:42
profile picture country after if there doesn't please enter all the fields we will show a message so you will read the
1:14:50
profile picture again by file reader API again we'll do the same thing and we'll read it as a base 64 URL and
1:14:58
then we will resolve this promise name email profile picture and
1:15:04
Country and this will return a promise so if the update process buttton is
1:15:11
clicked we will use this function which we Define in the store file update person if you see we are passing two
1:15:18
arguments to this which is the index and the update
1:15:29
we are passing this edit index and result. value so edit index is actually coming
1:15:38
from this function right here you'll see edit index so
1:15:45
whichever whichever user they want to click on edit so now if you want to
1:15:50
change the name click on okay uh let me
1:16:00
see just refresh
1:16:06
here let me inspect element what is there it is saying that update person is
1:16:11
not defined I think we update
1:16:16
person so now this update person will be available to us you will see that so now
1:16:22
if you refresh click on edit if you want to change
1:16:32
this edit index is not defined
1:16:41
okay you also need to import edit index put a
1:16:52
comma so you can see the person has been updated you can also change the profile
1:16:58
picture let's suppose if you want to change it this picture you'll see the profile picture is changed you can
1:17:04
delete a user you can create a user so the advantages of solid JS I already
1:17:11
told you guys in the starting of the video it doesn't contain uh virtual Dom
1:17:17
as opposed to react CH it doesn't rerender the component it only updates the component when it needs to and the
1:17:23
state you can see all the state has been defined in a single file we have created the store file person data all the
1:17:31
business logic is contained in a single file and then we are importing the store file in each of the
1:17:36
component so all the methods that we need we are simply requiring it at the very top and using it so very simple
1:17:45
application very solid ja and uh now if you want to deploy this into a platform
1:17:52
we will also show you the deployment process as well let's suppose
1:17:59
uh I so solid JS supports various platform I will show you versal platform
1:18:06
which is very famous for deployment so we already have account
1:18:14
here and uh
1:18:19
so first of all uh we do need to actually create uh
1:18:25
let me also show you how we can build this solid JS application which is very simple uh in your V configuration you
1:18:34
need to actually install a plug-in right here which is weed plug-in
1:18:39
compression so this is useful if you want to decrease the bundle size so if
1:18:46
you don't include this if you directly build your application by mpm run build
1:18:51
so what should happen basically it will actually create a disc for folder right inside
1:18:58
your will create a disc folder uh you'll see that it will actually
1:19:05
contain this assets folder the size here will be the Base Library size is 95
1:19:11
kilobytes and which is very much lower than react chairs react chairs size is almost 150
1:19:18
kiloby so solid GS libr is almost small so if you g a bit then it will
1:19:25
reduced from 95 to 27 so I will show you how to uh uh just decrease the bundle
1:19:33
size by compressing it with the gzip and broadly which is two famous compression
1:19:39
algorithms so inside assets folder you will actually see this only this single
1:19:45
JS file you will be importing it 94 kilobyte size now there is one plugin
1:19:51
out there in V which you can install it as a Dev dependency which will allow us
1:19:58
to actually decrease the size even further so weed plugin compression this
1:20:03
is the name of the library so npmi Das Das
1:20:10
D so this is the actual Ved plug-in compression simply install this so it
1:20:15
will install it as a Dev
1:20:23
dependency so now I can see it is installed right here if you
1:20:30
check so it is installed as a Dev dependency V plug-in
1:20:37
compression so just move it into the dev dependency
1:20:44
section and again include uh execute npmi that's
1:20:50
all so now inside go to your v config.js file this this is a
1:20:55
file so here we need to actually add this
1:21:07
code so right in the plugin section
1:21:13
uh we will be adding this code right here uh which is uh in the plugin section V compression
1:21:27
so this wheat compression will be coming
1:21:34
from from wheat plug-in compression so you
1:21:40
can see that this will be coming and it takes three options first is the algorithm so it basically supports all
1:21:48
the famous ones which is broadly or gzip so let me show you first of all gzip if
1:21:54
you compress it your bundle size of gz and then the extension here will be do
1:22:00
BR sorry Dot
1:22:06
gzip and we can pass the third option verbos to true so it will only just tell you the
1:22:15
it will print out information about the compression process so if you just write this like this and one more thing you
1:22:23
just need to add this in the build if you so it is already added yes next you
1:22:30
will see that so if you now execute this npm run build
1:22:36
so now the size will be considerably reduced because it is applying this gzip
1:22:42
algorithm so it will now have two files right here two additional files which is
1:22:48
the Z if you check your disc folder
1:22:55
so it has two more files which is gzip file this is your main file 94 kilobytes
1:23:00
this is your gzip file which is created 27 kiloby this is a CSS which is 8
1:23:05
kilobyte and GF file which is 3 kilobyte so by default all browser including
1:23:12
Chrome browser or Firefox Internet Explorer apora Safari supports gzip conf
1:23:19
compression by default so if you deploy to verell it will automatically compress your application using Gip but if you
1:23:26
don't use versal if you just use shared hosting this is very mandatory step that you want to compress your application
1:23:32
using gzip or broadly so let's suppose if you want to now use broadly here you
1:23:38
can simply go to this and just change it to
1:23:44
broadly compress and then do V for broadly so
1:23:50
this is a second algorithm
1:23:57
so the size will even reduced you will see now there will be this
1:24:04
file BR file which is stands for broadly so
1:24:10
even the size is reduced 94 kiloby it is now 24
1:24:15
kiloby so broadly even more reduces your size so it typically depends upon the
1:24:23
server which file it will serve either broadly or G depending upon the configuration of the client so now we
1:24:29
will deploy this application to verel and we can simply write here versal D- PR this will deploy your application for
1:24:37
versal it will ask some questions set up and deploy I will say
1:24:42
yes and which scope you want to deploy to I will say no what's your project
1:24:50
name I will say person C app in which directory look code is located it is
1:24:55
there in the same directory so now it is uploading my want to modify these settings I will
1:25:02
say no so it is actually deploying this project to production
1:25:07
so it will give you this and one more thing you don't you need to delete this
1:25:13
file which is present right here which is this file pnpm block yml so just
1:25:18
delete this file before you deploy your project to versel so simply delete
1:25:24
doesn't rerun your application so so now it will give you your production URL
1:25:30
once it deploys the
1:25:39
application so now your application is deployed very simple solid JS
1:25:46
application just copy the URL and paste it if I refresh my dashboard as well if
1:25:52
you see this file this project is successfully deployed if I
1:25:58
paste the link this is you first of all need to you can see this is a
1:26:03
project you will see that
1:26:12
so so you can see that the application is deployed and is working perfectly
1:26:22
fine so in this way you can deploy and make your solid JS application we can
1:26:29
edit the details like this you can delete
1:26:34
this so the full source code guys is given in the description you can directly purchase it if you want the
1:26:40
full source code with full documentation and directory structure I will provide you full support so thank you very much
1:26:46
for watching this video please hit that like button subscribe the channel as well and I will be seeing you in the
1:26:52
next video
#Computers & Electronics
#Programming
#Software