Up next in 10

Build a React.js Stripe & Paypal Credit Card Payment Form Using react-credit-cards in JSX
Jan 9, 2025
Get the full source code of application here:
https://gist.github.com/gauti123456/701ea0a84e4e9bed66dfa01ce9644fdf
Show More Show Less View Video Transcript
0:00
uh hello guys welcome to this video so
0:02
in this video I will show you how to
0:04
design this awesome looking uh credit
0:06
card form so if you want to accept
0:09
payment from strip P you can use it for
0:12
with any provider payment provider this
0:16
Library specifically for react CH so you
0:19
should see this credit card and we have
0:22
this nice little form designed inside
0:24
bootstrap so as you just inside click on
0:28
this input field you will see it will be
0:30
highlighted you need to now enter the
0:33
card number so as you enter the card
0:35
number you will actually see it will
0:37
automatically detect that it's a Visa
0:40
card and automatically you will write
0:43
these 16 characters of card number and
0:47
it will be automatically printed out and
0:50
then you write your
0:54
name so these are fake details so don't
0:57
copy any of these details so you put
1:00
your CVC number all this stuff expiry
1:03
date
1:03
so so it's a fully UI you will see that
1:07
I'm as I putting right here you will
1:09
see now it also flips out as I hover
1:13
onto the CVC code so as I three digit
1:17
three digigit CVC code you will also see
1:19
it is
1:20
now so it is a great Library it will
1:24
also increase your sales because uh it
1:27
is a nice form it's very engaging form
1:31
so that if the user tries to purchase
1:33
anything from your website it will be
1:36
very helpful for the user and as soon as
1:38
they click the submit button they will
1:40
be redirected to whatever your business
1:43
logic is whatever is your back end so
1:46
it's completely front-end Library it
1:48
allows you to design this awesome
1:51
looking credit card
1:53
form and uh actually the package is if
1:57
you go to npmjs.com and just search for
2:00
this package which is react credit
2:06
card so this is actually the package it
2:10
allows you to design these beautiful
2:12
looking credit card payment forms and
2:15
it's almost got 23,000 weekly downloads
2:18
it's a pretty new package and this is
2:20
actually the command you simply install
2:23
this and uh you can use it with any
2:26
strip paper anything you except ING with
2:30
any payment Gateway so you can use it
2:33
with strip P anything so now to get
2:36
started we also are using bootstrap as
2:39
well
2:41
so so we are using this package react
2:47
bootstrap so it's a bootstrap component
2:50
specifically for react CH so also
2:52
install this as well and apart from that
2:55
the base bootstrap package we also need
2:58
that as well so these three package P
3:00
are needed I've already installed all
3:02
three packages so I will just make you a
3:04
simple example so first of all you need
3:07
to import all the packages which are
3:08
needed using the import statement
3:13
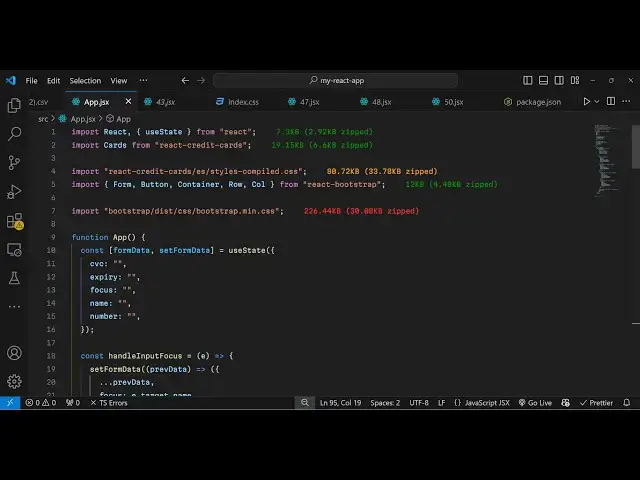
so I will just import this package
3:17
import cards from react credit cards it
3:22
will import this package and also we
3:24
need to import the CSS file as well for
3:27
the styling this package contain the CSS
3:31
file inside this styles.
3:35
compiled
3:36
CSS so it's almost 80 kilobytes of CSS
3:41
which is there you need to include both
3:43
these lines and after that we will
3:45
import the bootstrap for Designing the
3:47
payment
3:49
form so container row you can use it
3:53
with any UI framework bootstrap is not
3:56
necessary that you only use bootstrap
3:58
you can use any UI framework Tailwind
4:00
CSS semantic UI any UI framework you can
4:04
use it is just used for Designing the
4:07
actual
4:11
form so we also include the CSS file of
4:14
bootstrap as well so in this way you can
4:17
import all these things now we come to
4:19
the actual form so in the form we will
4:22
have some form data so I will just
4:25
declare
4:27
this simple State variable I I will use
4:30
UST state for this which is a hook
4:32
inside react here so it will be an
4:35
object which will contain all these
4:37
information which is CVC expiry Focus
4:40
name and the credit card
4:42
number so in the back end you will store
4:45
all these details when the user submit
4:47
it so I will just show you the front end
4:50
thing right here in this video so now we
4:52
come to the GSX so
5:00
inside we can put parentheses here so
5:07
that so now in the jsx we wrap
5:10
everything inside your container
5:12
bootstrap
5:16
component we give it a class of margin
5:19
top
5:22
five and we have a
5:27
row we use this justify content Center
5:31
to make everything in the center
5:32
position and then
5:34
call these are all classes requirement
5:37
for aligning the content to small
5:43
medium and then we have the div we give
5:46
it the ID to this form payment
5:52
form and I will just give it a bootstrap
5:55
class of mb4 this ID you can also
5:58
eliminate this this is is not mandatory
6:00
so just eliminate this so inside the div
6:04
we actually use this component now which
6:06
is the cards which we
6:10
imported so this is actually the credit
6:12
card form which I'm talking about so if
6:15
you you can directly import this uh we
6:18
are embedding this component and it
6:19
takes some options first is the CVC
6:24
number and it will be equal to the form
6:27
data variable and it have C we see so we
6:31
just attaching these
6:34
variables form data.
6:38
expiry and when we focus the actual
6:42
credit card we
6:44
will form data Focus name of the person
6:49
which is contained form data. name and
6:52
then the credit card number so form
6:56
data do number
6:59
so if you refresh now you will actually
7:01
see the form will be rendered out so
7:03
this is actually the
7:05
package so as soon as you write
7:07
something in the form this credit card
7:09
will be activated and it will detect
7:12
whichever card your number is it can be
7:15
Master card Visa or American Express so
7:19
it will automatically detect so this is
7:21
the speciality of this package it will
7:24
automatically detect your credit card
7:26
and depending upon that it will show the
7:29
user their actual type of the card so
7:33
after you embed this now we need a
7:35
simple form payment form which we can
7:37
design using
7:38
bootstrap so we will use these bootstrap
7:43
components so I will just give it
7:46
a class name of
7:49
bootstrap so here you can use any UI
7:52
framework it's not mandatory that you
7:55
use bootstrap but I think bootstrap
7:57
works the best I personally tested
8:00
bootstrap to be the best it's very
8:04
simple in the
8:06
syntax so here you provide your
8:10
type which is a telephone number so
8:14
here you the user will write the credit
8:17
card number card
8:20
number and the value will be simply form
8:25
data DOT
8:27
number I'll also find and on change so
8:30
when the value is changed we will
8:32
execute this handle input change
8:34
function and on Focus once again a call
8:38
back so when you focus in this input
8:41
field then also we need to Define these
8:43
two functions so right here first for
8:46
the
8:49
focus which is handle input
8:53
Focus e parameter will automatically be
8:58
passed and and then for the change in
9:01
the value again e parameter will be
9:06
passed so for the focus what we need to
9:10
do we need to set the form
9:13
data so whatever is your previous data
9:17
we need to update
9:19
that like
9:22
this we use the dot dot dot symbol to
9:26
copy everything which the user has
9:28
written in the
9:30
array and same thing we need to do this
9:32
for the handle input change as well so
9:35
whatever is the value
9:36
written we are simply updating the
9:40
array so what happens now if you see
9:43
this card number if you write it you
9:44
will see automatically it will detect it
9:46
it's a VISA type number and it will map
9:49
every character that you write in this
9:51
input field in the card so the user
9:55
clearly sees their card number appearing
9:58
and same we will be in put having fields
10:00
for other controls as well such as the
10:04
name so I will just copy this now just
10:07
to save some time
10:15
so so after this we have all these
10:21
controls
10:28
so now we put your name whatever name
10:31
that you want to
10:33
put then you put
10:36
your expiry date then the CVC so as soon
10:39
as you click the CVC the card will be
10:42
flipped and you will see this nice
10:44
little animation so you put your CVC and
10:47
it will appear right here so this
10:49
increases the user engagement because of
10:52
this nice little interface that it
10:55
has so it's quite a nice payment form
10:59
and and lastly we have a
11:03
button to submit the form so after
11:08
this we have the button right here if
11:10
you see so here when the user clicks the
11:14
submit button you can have your back end
11:16
as well you can connect your back end
11:18
using
11:20
this this app here so all the source
11:23
code I will give in the description so
11:25
if you have any doubt you can copy paste
11:28
everything
11:31
so you can connect your back
11:35
end so once the user clicks the submit
11:37
button button so you can connect all
11:40
this information will be coming
11:43
so once they submit the form so you can
11:46
capture this information and make the
11:47
payment in the back end so this was a
11:50
tutorial guys how to design this
11:51
beautiful looking credit card and if
11:55
allow the user to pay through either
11:57
through stripe or PayPal you can connect
11:59
it with any payment
12:00
Gateway so thank you very much for
12:02
watching this video and do check out my
12:05
website as well free mediat tools.com uh
12:09
which contains thousands of tools
12:11
regarding audio video and image and I
12:14
will be seeing you in the next video
#Software
#Credit Cards
#Web Services