Up next in 10

Build a React.js FFMPEG WASM Video Timeline Editor to Trim & Cut Videos in Browser Using Javascript
Jan 9, 2025
Buy the full source code of the application here:
https://procodestore.com/index.php/product/build-a-react-js-ffmpeg-wasm-video-editor-to-trim-cut-videos-in-browser-using-javascript/
Official Website:
https://freemediatools.com
Show More Show Less View Video Transcript
0:09
uh hello guys welcome to this live stream so in this live stream I will actually building a video editor inside
0:16
react CHS using fmpg web assembly library and uh I have deployed this tool
0:24
on my website freem mediat tools.com so you can check out the live demo of this
0:30
tool and basically it's a video editor kind of application where you can actually select your MP4 Avi all
0:38
extensions are supported you just need to select your video file and uh if you go to free
0:45
mediat tools.com this is actual latest tool that I added on the website if you navigate to the bottom side section of
0:52
the website you will see this is actually the tool right here Advanced video trimmer and cutter editor if you
0:59
just go to this tool so this will be the UI of the tool user interface and you
1:04
will have this choose file button and here you need to select your video file
1:11
so the maximum amount of video that you can upload is 2 gigabyte so this is
1:17
actually the limit of fmpg web assembly Library so you can select video files up
1:25
to 2GB so let me simply select a video file so as you will see as I selected
1:32
the actual video file it has shown the input video file in a video player and
1:37
also we have a simple timeline here where you can simply select whichever portion that we want to trim or cut
1:44
inside this so the nice thing about this editor is that it allows multiple cutting operations you can just
1:53
cut whichever portion that you want by using the mouse here you can drag this timeline here let's suppose I want to
2:00
cut this portion from you will also see the start duration and the end duration right here if you just navigate these
2:06
sliders right here let's suppose I want to cut this portion right here and you will need to click this button of add
2:13
section so if you click this button you will basically see one section has been there now you can do another section
2:19
right here you can do multiple trimming right here at simultaneously at one time let's
2:26
suppose I want to cut this portion as well simply click add section so now there are two sections out there
2:33
now again I need to cut this portion as well from 411 to 434 so three sections are there and
2:40
lastly I want to cut this portion as well you will see overall we have provided four trimming operations that
2:48
need to be processed by fmpg so fmpg will go one by one first of all it will
2:54
process the section one then section two then section three then section four and then it will concatenate and merge all
3:00
these trimming that you have done into a single video so that you can download it
3:05
so now you simply need to click this trim and merge button so you will see this alert window appearing that
3:11
processing your video is being processed by fmpg so please wait on this page so you will see this uh notification will
3:18
come your video has been processed successfully and now if you see this output file will be there so the length
3:25
of the output file will be 1 minute 21 second you will see exactly what you have
3:30
trimmed here you can calculate here so this is actually uh if you play this file
3:36
here you will basically see you can play this file in this video
3:43
player let me turn on the volume is also present I increase or
3:49
decrease the of the of theft with this application I have you can see that
3:55
multiple trimming is allowed here you can just uh cut multiple sections if you
4:01
want to concatenate into a single video file we don't need to upload every time just trim portion so this allows
4:08
multiple trimming you can do it inside timeline just select the portion click this button of add section and it will
4:15
add all these sections right here and then simply click this button of trim and merge so it will basically process
4:21
each section and we are doing it inside react CHS it's a fully fleshed single
4:27
page application and you don't need any third party editor or a desktop application you can process your videos
4:34
entirely in the browser by navigating to this address uh this application that I
4:39
deployed here and in this live stream I will show you step by step on how I developed this application from scratch
4:45
so if you also need the full source code with with documentation you can purchase the full source code from my website
4:52
procot store.com the link is given in the description of the video so after you purchase you will be automatically
4:58
be redirected to Google Drive where you will actually get the documentation and how to use this project how to deploy
5:05
that each and every instruction will be there you will get a zip file and this is actually the source code of this you
5:12
will see that it's a pretty lengthy project around about 300 265 lines of
5:18
code is there so it's a lendy project so if you need to purchase you the link is
5:24
given in the description so now I want to tell you the techn
5:29
techologies that I used for building this so the very first thing I used is react Chas as you all know it's a UI
5:36
library for building user interfaces number one Library UI framework so we are building
5:42
it inside react chairs and also we are using fmpg web assembly Library fmpg as
5:48
you all know it's a open source audio and video processing Library available
5:53
in the command line but this fmpg do web assembly allows you to use this awesome
6:00
library right directly in the browser so you don't need fmpg installed in your
6:05
machine you can directly use it in the browser using this software called as fmpg web assembly we will be using this
6:12
also these are the two technologies we will be using in this project so now let's get started by building it so I've
6:19
already created this react Chase project using a v development environment so what I will do is that I will simply
6:26
delete everything from here let me just create a file right here uh
6:33
just store this and just delete everything from
6:41
app.jsx just make his functional component and simply write here hello world so if you just refresh now it will
6:48
automatically refresh and if you go to Local Host 8173 by default it runs in this for
6:57
number so just need need to refresh it npm runev we are developing it in the
7:02
local environment 5173 sorry this is 5173 so you will see hello world is
7:09
printed out so if I show you the package.json file we are just using One external
7:15
dependency to for the sliders that you see inside the application the name of the LI library is no UI slider Das react
7:25
this is specifically made for using these sliders that you see if you select your input file in order to this is
7:31
actually the timeline these are the sliders that you see right here so now to use this we do need to install this
7:38
third party Library so if I show you the package name which is no UI slider that
7:44
Dash react so it specifically made for react Shar so this is actually the
7:49
command here simply navigate to the command line and simply install this package npmi no UI slider this is actual
7:58
command so after you do this simply start your
8:04
development environment so we will basically write step by step guys so just I navigate to
8:11
app.jsx so so the very first thing we need to do right here in this project is we need
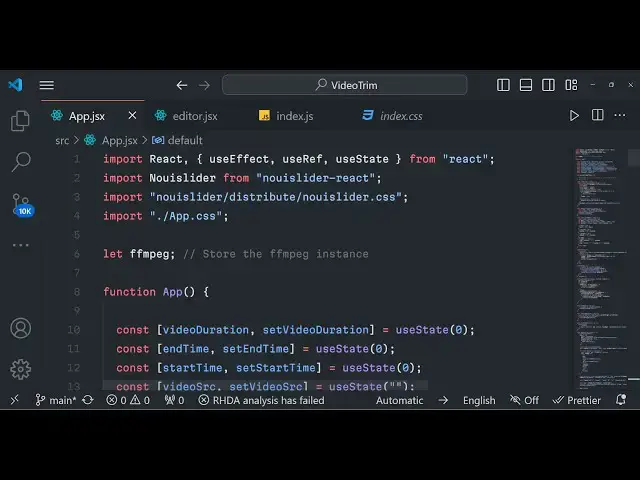
8:19
to import all the libraries so the very first Library we will import is no UI
8:24
slider from no UI slider - react for the sliders and also we need to uh import
8:31
the CSS f file as well so this is present no UI slider. CSS we have
8:38
imported that also that's all so after this we just need to declare a global
8:44
fmpg variable so we will be initializing the fmpg web assembly Library so for
8:50
that you just need to declare this Global variable outside your app level component so just declar that and now we
8:57
will go to the jsx part right here and we will simply be using Tailwind CSS
9:02
I've already included uh inside our HTML file the CDN of Tailwind CSS so just
9:09
include CDN or you can simply copy paste all the minified code of Tailwind CSS CDN so just included inside index HTML
9:17
so that we can directly use it inside our react Chase project so we'll give it
9:22
some Tailwind classes right here which is app padding 6 P6 background color will
9:29
be gray the shade will be 100 minimum height screen Flex Flex column item
9:37
Center and inside this we will actually be having a simple
9:45
heading The Heading size will be 3 XEL and font will be
9:50
bold and margin bottom six the color of the text will be in
9:59
light gray text Gray shade will be 800 and uh the heading will be simply
10:05
video trimmer editor so if you just reload your
10:11
application you will basically see here this heading is showing you right
10:17
here at the center of the screen and we have a light background gray color as well so the nice thing about Tailwind guys
10:25
you don't need to write external CSS you just need to there they have readymade classes available so you just need to
10:33
directly attach these classes to the HTML so no need to write external CSS
10:38
this saves a lot of time in development and after this you need to have a input
10:44
field where we will allow the user to actually select your video file and
10:49
we'll give it a class name of margin bottom 4 padding to and we'll give it a
10:56
border the color of the Border will be GRE 300 and uh it will be rounded on medium
11:04
devices and also Shadow on medium devices small devices so responsiveness
11:10
is also built inside these classes you can build responsive websites using Tailwind CSS as well no need to write
11:17
external CSS so it will be margin bottom four and also we also need to attach on
11:25
change event handler as well so whenever you select any file this event this function will automatically trigger
11:33
handle file upload you can name any anything of your function I will name it handle file upload so I just need to
11:40
Define now this function right
11:46
here so this event will be passed
11:52
automatically so now we just need to Define our state variables guys which we will be using for this application first
11:58
will be the end time you will be using UST State hook for managing the state of
12:04
react Chas application so it will be zero and similarly you'll have the start time as well set start
12:13
time these are all the state variables you using new state again zero initial value will be
12:20
zero and video Source this will hold actually your input file
12:25
Source initial value will be nothing
12:31
and then it will be video file value set video file value so this is
12:37
responsible for storing the actual input file which is selected by the user again
12:43
the initial value will be nothing and then we will have uh a Boolean parameter simply check if the
12:51
fmpg script is loaded in the browser or
12:57
not so the initial value of this Boolean parameter will be false because we
13:02
haven't loaded our fmpg library so this will be
13:08
false and uh then we will have a video trimmed URL the output that we will show
13:14
to the user when the processing is done this will be stored in this variable so the
13:21
initial value here will be null
13:27
again so then we will also be having a way to actually store all those sections
13:34
that you add if you want to add multiple sections we need to add them so this
13:39
will be a simple array the initial value will be empty array so this will be empty array when you load the
13:45
application for the very first time so this will be responsible for storing all the trimming operations that you will
13:51
perform inside your input video so this will be a empty array and lastly we also
13:58
need to have a video f a reference to our input video for that we will be using the US ref hook of react chairs so
14:05
you will see at the top it will automatically be imported from react the Base Library so you will see that so
14:11
these are all the state variables that we have declared guys for react CH application for managing the state of the application and apart from that we
14:19
also need a one more variable which is initial slider value so whenever you
14:25
select your slider value uh this initial value will be zero whenever you open the
14:30
application for the very first time so we have declared all these variables one more thing we need to initialize our
14:36
sweet alert Library as a global
14:41
variable so if you don't know about sweet Alert 2 it's basically a alert
14:47
Library all these alert messages that you see the the video is processing the
14:52
video is processing done so this alert message that you see it is brought to
14:58
you by a sweet to library so we are actually imported the
15:05
CDN of this Library so you just need to copy paste the CDN of both JavaScript and CSS inside your index.html I've
15:13
already included the CDN and that's all we just need to declare this uh comment
15:19
right here if you don't declare this comment you will get a error so just declared this comment right here at the
15:24
very top to prevent some errors so
15:31
just as it is write this that I'm writing right
15:39
here so again this will be a global variable Global
15:46
swell so just write these two common lines in order to use your alert
15:52
boxes uh now we just need to load the fmpg web assembly library in the same
15:58
channel guys in the previous video I use the fmpg web assembly library to
16:04
actually code a gif editor if you haven't watched that video please watch that video I basically started from
16:11
scratch I just told you how what is fmpg web assembly Library how I loaded that
16:17
Library so I will not repeat this same process once again it's
16:23
a it's not uh it will basically waste time so I will simply copy paste this
16:28
code you will get all the source code whenever you purchase it so we are actually using the use effect hook guys
16:34
you will see that use effect will you need to import it from The Base
16:41
Library so I developed that code at GIF editor right inside react Chase so if
16:46
you haven't watched that video it's a hour long video so watch it first of all before watching this
16:53
so in that video also we I use the same code right here to actually load the F
16:59
of MPG web assembly library from this URL and uh we now need to actually make
17:04
this function which is load script so this will essentially will actually make
17:10
a simple Dynamic script element and load this uh Source rare right
17:15
here so we will simply Define this method you will see that it is taking
17:20
the source as an argument and returning a promise making a script element dynamically and making it a async deer
17:28
and setting this Source attribute like this so and then lastly we are adding this
17:35
element to the Head element that's all so essentially we have used the same code in the previous video as well so if
17:42
you want to watch it the previous video that I uploaded on this channel so watch
17:47
that before watching this so now if you reload your
17:53
application go to the browser you will actually see go to Local Host 51
18:00
73 and uh if you go to inspect element you will basically see the fmpg core
18:07
library has been loaded we are using version 0.1.2 11.2 so all these core libraries
18:15
have been loaded in the browser inspect you will see that so this confirms we
18:21
have successfully loaded the fmpg web assembly library now we need to write
18:26
this handle file upload so whenever we select the file we need to sub first of
18:31
all e. target. files get access to the file that we selected and then we need
18:37
to convert that into a blob URL using url. Create object URL so this is
18:44
available for every browser this method we take the file and convert this
18:49
into a blob and now we'll simply set this set video file value to be the file
18:55
and set video source to be back ual blob URL so here the this video Source it is
19:04
simply set by using this uh usate hook method now we need to display this video
19:09
Source in a image tag so that whenever we select any file this video file will
19:16
be displayed to the user coming back to the jsx we will simply be writing a
19:22
simple condition right here inside cly bracket we will have this condition
19:30
if the video Source variable is there then only execute this code inside
19:36
parenthesis so we will have this and inside this we have the video
19:42
tag and so the source is equal to video
19:49
Source reference we will provide the video ref that we declare
19:54
variable I'll give it a class name so these are all tailin classes margin bottom W full Max width on medium
20:03
devices it will be rounded Shadow LG it will be having the
20:10
controls of the video player such that you can play the video pause the video all that stuff view the video in full
20:17
screen mode as well so there is uh if you just reload your
20:24
application choose any video file and now you will see that the video is displayed in the video player so that
20:30
the user can clearly see which video the user has selected so it is displaying
20:35
this conditionally so whenever you select the video it is displaying it in the video player so the now the next
20:42
task is that you need to Simply attach this ontime update event handler so I
20:49
will simply call this function as handle pause video so just need to make this function
20:54
right here essentially what this function does is
21:01
actually let me write this function right
21:17
here so for the time being just declare this function we will come to later on
21:23
so after this video we also need to display a slider as well for the timeline to actually trim the video so
21:30
just write after this uh video tag just after
21:38
this we will have another div tag right here and this time we will give it a class W full the slider will have full
21:46
width you'll use this Library which is no UI
21:53
slider and it has some options right here in this Library we have some options which is the behavior which will
22:00
be tap drag the step value will be I will
22:06
select as one the range so range is important you need to select the minimum value that
22:12
you can select is zero and the maximum value you can select is present inside the video duration
22:30
so max value will be video duration or two so this variable video
22:37
duration we need to declare and also the start it will be
22:43
started from zero up till the video duration so video duration will actually
22:50
hold the total number of seconds which the video has connect and also it has a on update as
22:58
as well so whenever the value is changed of the slider this function will execute
23:04
uh just calling this function as update on slider change so whenever you change
23:10
the slider value decrease it increase it this value will this function will automatically trigger now we need to
23:16
Define this function right here on update slider
23:41
and for this duration variable that you seeing right here this video duration we need to actually write a use
23:51
effect hook right here again a use effect hook this time this will be
23:56
dependent upon one variable so inside second parameter so this will be holding
24:01
video source so this is dependent upon the video source so whenever you have
24:08
selected the input video file then only this use effect will execute so this is dependent upon this
24:14
video source so whenever this variable has some value then only this use effect will execute and now inside this use
24:20
effect we now need to actually get the input video
24:25
ref and if video ref if the current video has the current property right
24:31
here in that case only this code will execute and we will get access to the current value current video which is
24:38
selected by the user by using this current property and then we will calculate the duration of the total
24:45
video so we have this uh event right here on loaded
24:51
metadata we need to find the metadata about the video set video duration so I think we
25:00
missed a state variable which will be responsible for storing the video
25:06
duration so just declare it video duration and set video
25:12
duration initial value will be zero so here we are calling this function right
25:18
here set video duration and we are basically saying current video
25:25
duration and also we are setting the ending time as well set end time to be again current dur the duration of the
25:33
video that's all so now this uh video duration that
25:38
you are accessing right here it will be
25:43
available so if you just see if you select your video file they will see
25:49
basically uh it will actually the slider will be prepopulated with the total
25:55
number of uh seconds that the video EX so the video is 6 Minute 20 seconds long
26:01
video so automatically the slider will be having the end time equal to 6 Minute 20 seconds so then you can actually
26:09
navigate to whichever portion that you want to trim your portion this is actually the logic
26:15
behind it you do need to prepopulate your slider to the total duration of the
26:21
video and after doing this guys we also need to initialize this update slide
26:28
change value so whenever you change your slider this automatically these two
26:33
variables will be passed inside this function values and handle and then we need to Simply say
26:40
set video trimmed URL to be nothing and then we will simply read the
26:46
value from the slider and if handle has some value in
26:51
that case we will read the value we initialize this read value to be values
26:56
handle or zero and we will simply check that if
27:02
the end time is not equal to the read value this simply means that uh if the
27:10
slider value is less than equal to end time of the video then simply set the end time to
27:16
be read
27:22
value or if the handle doesn't have any value in that case the read value
27:28
will be coming this is slightly complicated code guys but we are simply fetching the
27:34
value which the slider that you move from left to right so we are simply
27:40
setting the end time and the start time in this function so you simply say
27:46
initial slider value which we declared this variable we
27:51
have declared early on if you see inside here initial slider value is zero this
27:57
is the start time that we are setting here we are Simply Having a if condition that if it is not equal to the read
28:03
value then in that case initialize it to the read
28:09
value and simply have a if condition right here video
28:14
F video ref do current and then we'll simply say video
28:21
ref dot current dot current time is equal equal to read value and
28:29
then we need to set the start time as well like this set start time to be read
28:36
value so we have set the start time and the end time you will see that in this function that's all that we want in this
28:44
function and also after we said this we also need to show the live preview of the slider
28:51
whenever we change the values we also need to show what is the start time what is the end time that the user has
28:57
selected so right here just after that you have the
29:06
slider just after this you again have another div so here you will show the live preview of the start and
29:19
TR and we have the start
29:25
duration and for this we need to declare a simple function guys we need to Define
29:31
we need to convert this into this format hour minute second so here we need to
29:37
pass the start
29:42
time this is actual code right here so let me copy
29:48
this so it will say the start duration and the end duration so for this we need to actually make this method which is uh
29:55
convert to so this method is responsible for converting your time that you select
30:03
into this format our minute and second so just declare this method
30:13
uh like this is actual method so it will return this uh time in this format in
30:19
the specific format that we want so if you just refresh now simply select the video and if you
30:27
change right here you will basically see the start duration it will show 1.45 end duration is exactly equal to
30:35
the total duration of the video so that's exactly I'm talking about so if you also change the end duration it will
30:42
decrease as you decrease the slider value if you increase the slider value will increase and also it is reflected
30:49
here also so our state variable side binded here inside react Chas
30:54
application now we simply need a button to actually trim this portion using web assembly library of fmpg so after you do
31:04
this we also need to have a trim button so
31:12
that just after this we will also be
31:25
having a button which will be first of all there will be a play button if you want to play the
31:32
video so whenever we click this button we will Define a function which
31:37
will actually start the video handle play we'll give it a class name PX4
31:45
P2 background will be blue BG blue 500 text will be on white color
31:53
rounded these are all Tailwind classes it will have Shadow
32:00
so when we over onto this button it will change to
32:06
600 so we inside this we just need to Define this handle
32:15
play and just after this button we also have a second Button as well which uh
32:22
basically allows to add the section
32:31
so we have this
32:37
uh inside this div sorry so just the buttons will appear side by
32:44
side so these are two buttons for playing and then adding the section handles add section so we need to Define
32:51
this function as well
33:00
so these two functions are responsible for actually playing the video so for playing the video it's very simple we
33:06
will first of all getting reference to the video ref if the video ref contains the
33:13
current property then we need to Simply play it so video. current. playay there
33:19
is a play function which will actually play the video file whenever you click this button and then the second function
33:25
is uh handle add section so here here we will simply use the hook function of set
33:30
sections and we will simply basically adding it to the empty
33:36
array will dot dot dot so this is actually the previous array and we will add it this object which is having the
33:44
start property which will contain the start time and the end property will
33:49
contain the end time and the third property in this object will be the actual file
33:54
name which will be Dynamic
34:03
section it will look something like yeah section and then we have
34:10
this sections. length +
34:16
one do MP4 this is actual file name we are
34:21
dynamically putting a file name as a third part argument in this object and
34:27
we are adding it to the sections array which is empty by default so we are actually adding it whenever you adding a
34:33
section using this button if you just see you will see now the there are two buttons out there if you simply need to
34:40
add the sections one section will be displayed there will be two sections now we need
34:46
to display these sections right in the browser how we can do that so just after
34:52
this we do this we have the jsx right here
34:58
so right here we will have this condition curly bracket we will simply
35:04
say if sections do length is greater than zero then in that case we need to display the total number of sections so
35:13
here we will actually be using a for Loop mb4 text
35:23
grate and it will be 700 and W full
35:28
Max width medium the title here we need to give it a title right here which is
35:44
sections text Gray 800 so now inside uh after this h2 tag
35:54
we need to have our UL tag and here we will we simply map sections. map and for
36:00
each section for each section we will have
36:07
the Alli tag right here and we will basically give it a key here which is
36:12
index and here we will have our section we will display the section right
36:17
here index + one and then we will basically be simply
36:24
be displaying uh what with which duration you have selected the
36:29
section which section you want to trim so again we'll call this function to actually display the time so section do
36:36
start there is a start property as I showed you so whenever we were inserting
36:42
the values in the array we have three properties start end and uh the third
36:47
one will be the file name again we have convert to this time section.
36:54
end so we are displaying the start time and the end time and uh if you just reload and select your video file and
37:02
let's suppose you want to select this portion click on ADD section one section will be displayed so again the second
37:10
section the second section will be displayed you will basically see 1.01 to
37:18
1.33 there will need to be as little bit space right here so what we need to do
37:25
right here
37:54
so if you just reload right here
38:03
so now you can see it is displaying perfectly so you have selected this portion 2.12 to 2.25 so the section one
38:11
is selected if you want to now trim another portion this portion the second
38:18
selection will be there 3.55 to 4.08 so now we need to have a third button
38:24
displayed right here after this to actually trim this and concatenate to a single file and trim this video based
38:32
upon the section selected now after this we will be
38:38
having a button right here right here after this
38:59
so if you see basically here uh just after
39:04
this we will actually be having a button right
39:14
here just after this there will be a simple button and uh the text will be
39:20
simply trim and merge and we are basically attaching this onclick event handler to it so whenever you click this
39:25
button now we need to simp l define this function which is handle trim so we will
39:31
Define this handle trim so whenever now you click this
39:38
button we actually need to assign the use the fmpg web assembly library to
39:46
actually go all the sections one by one and actually concatenate the video so
39:52
for the very first time we'll simply say if the script is loaded if this value is true in that that case we will simply
40:00
show a alert message to the user by using sweet alert and here we will simply show the title here which is
40:06
processing dot dot dot and the second property here will be
40:16
HTML please wait while the video is being
40:23
processed allow outside click this property will be false we we don't want
40:29
to use it to close this and lastly we have did open and this will actually
40:35
start the show loading function that's all so
40:42
if you see now uh basically select a video and
40:51
uh click on that you will see this window process processing please wait while the video is being processed so
40:57
now we need to hide this also when whenever it is finished so for hiding it first of all we need to do the
41:03
processing so we need to actually extract the name from the video file
41:09
value and we'll extract the name of the file and then just make it Asing
41:14
function this is actually a Asing
41:21
function just write here so it's Asing function so that we
41:26
can use it a here so it contains a file system module inside fmpg web assembly
41:32
so we will be writing the file in the memory with this name and then you'll simply say window. fmpg do fetch
41:39
file to actually F fetch this video file value the actual value the actual video
41:45
file which is selected by the user so we are fetching it and writing it in the memory so here we don't have any sort of
41:52
backend server fmpg web assembly Library works in the memory so it actually fetches the file input file and read it
41:59
write it in inside it using this function which is file system after this we now need to
42:06
actually go to all the sections that we selected sections is actually a array we
42:11
will Loop through each section and actually fetch the start time end time and the actual file name of each section
42:19
like this and then we will simply run the command of there is a run function right here in fmpg web assembly
42:26
similarly - I we will provide the input name of the file and then there is this
42:33
Command right here- SS for starting time what you need to trim and you will
42:39
simply need to trim you will convert this to the time period
42:45
start and uh we will simply say again this flag will
42:52
be dash2 again you will convert this to end time
43:00
like this and this is really important we don't need to re-encode the video so you'll simply say- C colon V and inside
43:08
this we'll copy the settings so this will speed up the process we don't need to re encode the video in fmpg so it
43:14
will speed up the process we just need to write copy right here and then the output file name so output file name
43:21
will be file name that we put right here file name you will see this this
43:27
will be this for each section we are actually executing this
43:32
command so after this Loop right here we will simply need to
43:38
concat or merge all these sections into a single video and then show it to the
43:45
user so it's very easy you'll simply say concat list and sections. map and for
43:53
each section we will simply be you will simply say
44:03
file and inside section. file
44:08
name in single quotes this is actual thing how we can
44:15
concatenate and then we need to write just use the join function to actually
44:20
do it in a single line so we are simply appending the new line character
44:25
so this will actually form this file and now we need to write this file in the
44:30
memory so file system once again we'll write this file write file and we will
44:36
basically give it a file name concat list.txt and the actual data which will be concat
44:46
list so it will go to each section and it will basically do this every time and
44:53
then we will write this file concap list.txt to with
45:00
this so after this for merging it it's very easy a Wait fmpg
45:06
run- f we'll use the concat filter and dash save
45:13
z- I concat list.
45:24
txt Dash C again for encoding we need to copy it and lastly the output file name
45:30
which is output. MP4 you can call this anything and then we need to show this output file name in the browser so
45:36
you'll simply say file system you will read this file because now we are reading the file
45:42
we are not writing it so that's why we'll put read file right here we reading the file the output file name is
45:48
output. MP4 and then we are simply need to convert this into a blob URL so we
45:53
again use url. create object URL new blob and this time it will be data.
46:02
buffer and then it will be type parameter which is a MIM type video/ mpp4 that's all lastly we need to set
46:10
the video trimmed URL to the actual blob URL which we constructed URL that's all
46:17
and now we need to Simply close the alert box sweet alert bars and then
46:23
simply show a notification message to the user that done your file has been processed
46:30
successfully your video has been processed
46:36
successfully icon we can put the icon of success confirm button text we can
46:44
say it's
46:50
okay so again this property allow outside click I will set to two flaws
46:55
that's all so the user can't click or uh close this alert box it should press the
47:01
okay button only that's all guys in this function this function is complete now
47:08
if you reload your application the file will not be displayed the output file in the next
47:14
section we will do this let me just show you if I add this section add this
47:19
section as well click on this button you'll see processing if you go to inspect element you will see all the
47:25
processing is going on in the Soul the fmpg is doing its
47:31
job it is saying concat list txt no such file or
47:37
directory uh I think I made some kind of typo mistake guys concat
47:45
list concat
47:51
list uh I don't want to waste your time guys so I will simply copy paste this function so I just make some type of
47:58
mistake right here that's why I will simply copy this function
48:03
once
48:19
again so just paste it so this is actual function and you will see all the code
48:25
is same I just made I think a too mistake you will basically get all the source code in description so don't wor
48:32
don't worry about it you can purchase it you will see that you will now need to
48:37
click on ADD section multiple sections you can say and trim merch so you will see the
48:43
processing is going on so you can see that it's really fast
48:50
because we are not re-encoding the video so you will see this notification message your video has been processed successfully now we need to also display
48:57
the output video so that the user can download the output video inside your local machine so it's very easy we have
49:04
uh need to display it inside the jsx just go to the HTML part right here and
49:10
right after the trim button if you see so there will be a simple condition
49:18
right here if you see after this button after this div tag you will have
49:24
this condition video trimmed URL if if it value exist in that case only execute
49:29
this code and uh we'll give it a class margin top
49:35
4
49:46
H2 these are all Tailwind classes guys and merged
49:55
video merged and trimmed
50:01
video so we'll have a video tag and
50:16
uh so inside this video tag it will have the source tag and
50:22
Source we have a source property as well so it will be with
50:28
video trimmed URL and the type here will be video/
50:39
MP4 that's all so that I think this completes the application guys and uh if
50:44
you just see right here it's a very awesome application that we developed simply select your video file you can
50:50
insert multiple trimming you can do it add section from here then you can add
50:56
from here here if you want to do bulk editing at once click on that and now your video is
51:02
processing and the video time stamps that you mentioned based upon that fmpg will do its processing one section by
51:09
one and it will build out your output video you can play this output video right here 1 minute
51:18
06 so now you can download this file by simply clicking these three buttons
51:23
download button your pl Play the output file in the video
51:30
player so you can try this application I have deployed this tool guys on my free media tools website you can try out
51:36
before purchasing the full source code you can you will have full commercial right after you purchase it you can
51:42
deploy this inside your website as well you will get full documentation on how to deploy this and you will get full
51:48
support of me if you face any sort of problem as well you can basically modify this code extend this code functionality
51:56
as well so this will be a very good project so please hit that like button subscribe the channel and I will be
52:02
seeing you guys in the next video Until then thank you very much
#Flash-Based Entertainment
#Online Video
#Software
#Multimedia Software
#Video Sharing