Up next in 10

Build a React.js Drag and Drop Tag Input Component With Autocomplete in JSX Using react-tag-input
Jan 9, 2025
Get the full source code of application here:
https://codesandbox.io/p/sandbox/react-tags-l65545
Show More Show Less View Video Transcript
0:00
uh hello guys welcome to this video so
0:02
in this video I will show you a library
0:06
specifically designed for react ches so
0:08
if you want to input taxs inside your
0:12
application so there is a special
0:14
Library available for you
0:16
so this this works like this so if you
0:19
want to add some tags right
0:21
here with auto complete so you can add
0:25
the tags you will see that there will be
0:27
this input field and you will be able to
0:29
add TXS
0:31
and it also supports uh autocomplete as
0:35
well you can take any example so I have
0:38
these country names already coded so
0:41
that's why you are seeing these
0:42
autocomplete right here you can select
0:44
any country and then add a tag right
0:47
here so in this way this package
0:50
supports to add tags so if you want a
0:54
tag input inside your react CH
0:56
application this will be a perfect
0:58
package for you so I'm just having these
1:01
countries pre-coded if you see I've
1:03
created this typescript array and I copy
1:06
pasted the list of all the countries
1:08
which are there and that's why that you
1:11
are seeing this auto complete so
1:13
whenever I am just writing the country
1:15
name you are seeing this auto complete
1:16
so in this way you can add or remove
1:20
any country you can see this from TAG
1:25
input so essentially you give tags
1:28
inside your application can be anything
1:30
it can be to a video or anything so in
1:33
this way you can if you want to clear
1:34
out
1:36
everything so you can add these tags
1:38
like
1:40
this so this is essentially this package
1:44
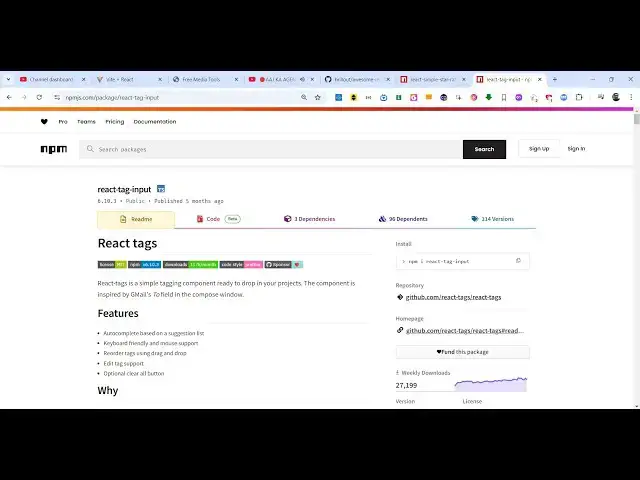
uh which is react tag input so if you
1:48
just go to npmjs.com and just search for
1:51
this package react tag Das
1:54
input so this is a very good Library
1:59
which allows you to take input from the
2:02
user if they want to submit tax
2:04
something like this this is actually the
2:07
command uh there I've already installed
2:09
it and it is almost having 27,000 weekly
2:13
downloads so I've just hosted this
2:15
example on quote sandbox I've given all
2:18
the source code in the description so
2:20
you can get this full source
2:23
code of this example so now I will show
2:27
you the actual example
2:30
so essentially in order to use
2:37
this if I just refresh now
2:41
uh you first of all need to install this
2:44
by executing this command so once you
2:46
install
2:52
this you need to include this module
2:56
and let me sign in to actually addit
2:59
this
3:19
so the installation part is very simple
3:21
uh they also given an complete example
3:24
here also but this is actually a working
3:27
example if you see uh
3:31
let me update it so you will see nothing
3:33
here so I will type
3:36
here so now to include
3:48
this so wherever you need to include
3:51
this module so first of all you add this
3:53
import
3:57
statement and which is coming from the
3:59
this Library react tag input so this
4:02
will be coming so you just need to add
4:04
this import
4:05
statement and also this import statement
4:08
as well to add a single
4:12
tag so now we will embed this component
4:15
right here
4:20
uh so we have this component react tag
4:24
input react TXS
4:30
so as I add this component if you see
4:32
this input field has been
4:35
added so now to actually allow the tax
4:39
to be added will be it takes and
4:41
property called as
4:42
tax so here you need to specify the tax
4:45
that you want to add so I have just
4:47
created this local
4:49
variable if you see we have this array
4:52
of object each object contain these
4:54
three properties such as the ID text and
4:57
the class name
5:00
so now if you refresh you will see these
5:02
tags being
5:05
added you can individually add tax as
5:08
well for this you need to add a property
5:11
the second property here which is the
5:14
input field
5:16
position so here you can give any
5:19
position of your choice I will give top
5:21
position and then it gives suggestions
5:24
as well so if you also want the
5:26
suggestions to be coming in the auto
5:28
complete so so if I write something
5:30
right here you will also see the
5:31
suggestions coming in the auto complete
5:33
so it also supports that option as well
5:36
by you can specify the suggestions
5:38
object and I've already created these
5:43
suggestions so I've created the separate
5:45
file uh countries. typescript file which
5:48
contains all the countries and just I'm
5:50
mapping through using the map function
5:53
and which contains these three
5:54
properties so you can even provide
5:56
autocomplete suggestions as well and
5:59
then we have a series of functions that
6:01
you can attach for adding the tag
6:03
deleting the
6:05
tag so for adding at the tag we have
6:10
this function you can attach handle
6:16
Edition so essentially here we are just
6:18
adding this tag so whenever you add
6:20
something this will be added in the UI
6:23
so in this way you can add a new
6:26
tag then similarly for deletion we also
6:29
have this handle delete function so when
6:33
you click click the cross icon that tag
6:36
will be deleted so this is for the
6:38
deletion operation so if I click the
6:41
cross icon that tag will be deleted so
6:43
this is
6:44
a for the
6:47
deletion and if you also want the drag
6:49
in draw functionality as well it does
6:51
offer this option of handle drag and
6:54
here you can specify a function
6:59
so now you can even track the tags as
7:02
well like
7:09
this so if you want to make
7:12
it editable you can directly attach this
7:16
Pro property so now you can even edit
7:19
the TXS as well by just clicking on them
7:23
you can change their value so there is
7:25
this this property that you need to
7:27
attach it and then for clearing out all
7:30
the tags we also have this clear all
7:32
button so if you put this property this
7:34
clear all button will come and you can
7:36
clear all the tags by clicking this
7:39
button so for this we do need to Define
7:41
this call back function on clear all so
7:44
when you click this button
7:46
uh now we need to delete all the tags so
7:49
we have defined this function on clear
7:52
all so when you click this button all
7:55
the tags will get deleted
7:57
so if you add some TXS right here and if
8:01
you click this button clear all all
8:03
these TXS will be deleted so this is
8:06
this property is also supported and also
8:09
you can put a restriction let's suppose
8:11
you only want to the user to add the
8:14
seven tax so Ive just puted this
8:16
restriction right here using this
8:18
property maximum tax I put seven so now
8:22
as the user add seven tax there will be
8:25
this restriction which will be coming
8:27
which is tag limit reached the user will
8:30
see this message and they can't enter
8:32
the eighth tag so you can even put a
8:35
restriction as
8:37
well and that's all the options that it
8:40
supports and also one last option it
8:44
supports the addition from directly copy
8:50
pasting so you can also copy paste the
8:54
data and directly put right here as well
8:57
so these are all the options it support
8:59
it's a very handy plugin you can use it
9:01
I've shown this complete example the
9:03
link is given in the description I given
9:05
the link of this example you can
9:07
directly uh fog this and run this
9:11
example online and also save it inside
9:15
your local machine as well so this was
9:17
the example of tag input inside react
9:21
shs so thank you very much for watching
9:23
this video and do check out my website
9:25
as well free mediat tools.com uh which
9:29
contains thousands of tools regarding
9:31
audio video and image and I will be
9:33
seeing you in the next video
#Programming
#Software
#Internet & Telecom