live_tv
Livestream Starting Soon
00
Hours
:
00
Minutes
:
00
Seconds
Up next in 10

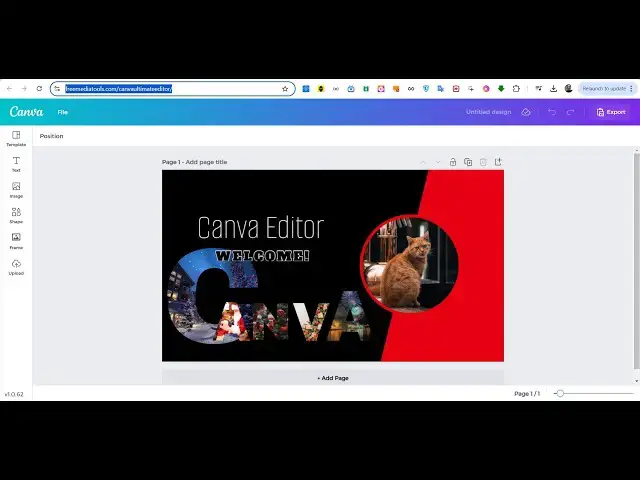
Build a React.js Canva Ultimate Image & PDF Editor Clone in Browser Using Node.js & Express
Jan 9, 2025
Buy the full source code of application here:
https://procodestore.com/index.php/product/build-a-react-js-canva-ultimate-image-pdf-editor-clone-in-browser-using-node-js-express/
Hi Join the official discord server to resolve doubts here:
https://discord.gg/cRnjhk6nzW
Visit my Online Free Media Tool Website
https://freemediatools.com/
Buy Premium Scripts and Apps Here:
https://procodestore.com/
Show More Show Less View Video Transcript
0:00
uh hello guys welcome to this uh
0:02
tutorial so in this tutorial I will
0:04
actually show you a ultimate canva clone
0:07
uh image and PDF editor that I developed
0:10
inside my website freem mediat tools.com
0:13
so I basically build a tool right here
0:16
and if you visit freem mediat tools.com
0:18
you will actually find this tool which
0:20
is canva clone Ultimate Image and PDF
0:23
editor so if you go to this Tool uh the
0:27
interface will look something similar to
0:29
canva you will basically if you visit
0:31
canva.com
0:32
if you visit their editor it is same to
0:36
same you will see that the menu Remains
0:39
the Same the logo if you see this is
0:41
actually the side menu all these things
0:43
all the shapes all the images are there
0:46
so these are the images that you can
0:49
select it is all coming from pexels
0:52
unsplash API so you can see that these
0:55
are the different text that you can use
0:58
and uh these are all the elements that
1:00
you can see you can delete elements you
1:01
can add more pages as well so if you
1:03
click this add page button a new page
1:05
will be added this is the official canva
1:07
editor if you want to create a
1:10
design so if you visit the canva editor
1:13
it it will look something like this you
1:15
will see very similar this is our own
1:18
tool right here so this is I made this
1:21
tool using uh react CHS nodejs and
1:24
express and if I just uh show you the
1:27
images panel you can upload your own
1:29
images as well simply upload and here
1:32
you can select your own custom PNG or
1:35
jpg images which are there inside your
1:37
computer so you can drag and drop it's
1:40
very feasible you can see the interface
1:43
it's very much like canva right here you
1:45
can add multiple images you can add text
1:47
as well so you can just edit your images
1:53
you can see that just you can resize
1:56
your images like this so it is drag and
1:59
drop and then if you want to add some
2:01
text as well you can even add the text
2:03
as well so simply drag your text and
2:06
write here double click and just edit
2:09
your
2:11
text so it is very simple you will see
2:14
that you can drag and drop in which in
2:17
whichever position you want to place
2:18
your text so once you done if you want
2:21
to export this design to a PNG file you
2:25
can have this export button rimed if you
2:28
click this export button your image will
2:30
be downloaded as a PNG image and if you
2:34
try to open this uh okay I think this is
2:37
a first page so what you need to select
2:40
here go to the file menu and here you
2:42
will select export page two as PNG and
2:45
now your only the second page will be
2:47
exported and now you can see the image
2:49
is successfully exported to a PNG file
2:52
and now if you want to export this to a
2:54
PDF file as well you can even do that
2:56
the select this option all pages as as
3:00
PDF so now all the pages that you design
3:03
will be converted to
3:05
PDF
3:07
so if I show you basically delete this
3:10
page so only a single page is there and
3:14
if you
3:20
now so you can even locally run this
3:22
application if you see we are running
3:26
this application Local
3:28
Host 5173 I think we are also running
3:32
this application no okay we can start
3:36
this locally uh the application is
3:38
available so the link is given guys of
3:40
the source code if you want to purchase
3:43
this I have given the link in the
3:45
description so you can go to my website
3:48
proot store.com and you will actually
3:50
get after payment you will be redirected
3:52
to Google Drive where you will actually
3:54
get the zip file and the very first
3:56
thing you need to do after you get the
3:58
zip file you need to extract all the
3:59
content and this will be the actual API
4:02
folder which will be the backend code
4:04
which will be written in nodejs and
4:05
express you will see that and this is
4:07
the front end which is written in
4:09
typescript and react chairs so the job
4:12
is very simple you need to open the
4:14
folder and first of all install the
4:17
react CHS module so just type this
4:19
command npmi so this will create this
4:21
node modules folder and it will install
4:23
all the modules of this reacts front end
4:29
so this will hardly take 15 to 20
4:32
seconds depending upon your computer
4:34
speed and uh after that you need to
4:36
navigate to the API folder to actually
4:39
install all the backend
4:41
modules so this will just complete right
4:45
here so before purchasing it on the
4:48
checkout page I have given the live demo
4:50
link so you can try out the application
4:52
before purchasing it now you can go to
4:54
the navigate to the API folder and then
4:57
execute the same command which is npmi
4:59
so this will also install all the
5:01
modules which are mentioned in the
5:03
package.json file you will see that we
5:04
are using these
5:07
dependencies and uh if you see this is
5:09
our app.js file and uh now I basically
5:13
written a script in the package.json
5:15
file in this folder concurrently so it
5:18
will actually start your backend server
5:20
and the front end server concurrently at
5:23
the same time so just navigate to the
5:25
root folder and just type this command
5:28
npm Run start this will actually start
5:31
the front end and the backend server at
5:33
the same time so now your server is
5:36
listening 5173 you just need to navigate
5:40
to this endpoint Local Host 5173 so now
5:43
your application will open locally on
5:46
the Local Host
5:48
5173 so you can go to file here and you
5:51
can just see if you want to export this
5:53
to a PNG file you will see your ex
5:57
design has been exported to PNG if you
5:59
want to export it to PDF so now now the
6:03
same thing will be exported to the PDF
6:05
file as
6:11
well so this is
6:16
actually it will be exported
6:19
so I don't know why it is not working on
6:21
my machine but you can try so this is
6:23
actually the fully fleshed editor you
6:25
can see all these images are coming
6:27
through uh
6:30
and unsplash and pixels and all these
6:34
shapes you can also see you can add new
6:36
page as
6:38
well so you can see
6:41
that you can add all these shapes and
6:43
basically you can change the color as
6:45
well any color you can see so you can
6:48
see that guys we have developed this
6:51
canva clone from scratch we haven't used
6:53
any third party dependency it is all
6:55
written in typescript react CH nodejs
6:57
and express so we haven't used any third
7:00
party library or third party uh
7:02
subscription Library we have written
7:04
this from scratch so you can use this as
7:07
unlimited number of times so there is no
7:10
need to replace any API key or you don't
7:12
need to actually go to any third party
7:15
website or develop your account so it is
7:17
written entirely in from scratch so you
7:20
can see that uh you can
7:22
also control the opacity as well all
7:26
these things you can individually log
7:28
the elements as well so there is a lock
7:30
option now this position is has been
7:32
fixed because we have locked this
7:34
position or you can unlock as well and
7:37
then these are the multi-layers so the
7:39
these are different layers you will see
7:41
that you can
7:43
just if you add multiple elements on the
7:47
page so this is actually the text that
7:49
you have added so you can control the
7:53
positioning of the text you can also
7:55
control the font so various fonts are
7:57
available so you can see that all these
7:59
fonts are available from Google fonts so
8:02
you can see as you drag down multiple
8:04
fonts will be there you can change to
8:07
whichever phone that you
8:12
like so you can see that just select and
8:15
automatically it will change you will
8:17
see that and after this you can even
8:20
change the background color as well to
8:22
whichever background color you want you
8:24
can see that so
8:26
gradient here you can change individual
8:29
usually select your favorite color from
8:30
the Color Picker similarly for the
8:32
gradient as well so after you are done
8:35
you can simply place your
8:37
text and now for changing the text color
8:40
there is this option right
8:44
here you can change to any color of your
8:48
choice you can see that simply select
8:51
the text and now the color will be
8:55
changed so you can see that so
9:00
this so you can control this uh
9:02
accordingly guys uh to actually make it
9:05
is very useful for making any sort of
9:08
thumbnails you're making for social
9:09
media website such as Facebook Instagram
9:11
YouTube thumbnail you can also make you
9:13
can control the alignment of the text
9:15
you can place it in the center left
9:17
position so the link is given guys you
9:20
can directly purchase it and from my
9:22
website you will get this directory
9:24
structure I have shown you step by step
9:26
how to actually start this application
9:28
on Local Host you can even deploy this
9:30
this application as well if you see
9:33
there are various effects all this box
9:36
box Shadow effect you can see that all
9:40
these effects is there thickness you can
9:42
control offset direction of the Shadow
9:46
so I'm not comfortable in uh making
9:50
thumbnails so I can't show you all the
9:52
features so if you are a pro in
9:54
developing thumbnails you can try this
9:57
application so you can go to link free
10:00
media tools SL canva ultimate editor so
10:03
you can try out this tool before
10:05
purchasing it just see all the features
10:08
which are there you can see
10:12
that so you can as you can see if you
10:15
want to have multiple Pages click on ADD
10:18
page so now you can have multiple Pages
10:20
as well so the there are templates also
10:23
available so if you want to use these
10:25
templates simply click on them and it
10:27
will also you can edit this templates
10:30
replace it with your own company name if
10:32
you want to make a logo as well you can
10:34
also do it simply change the text right
10:36
here and then click on export and it
10:38
will actually export this to
10:40
a PNG file image
10:43
file so you can also see the live
10:46
preview as well by clicking the preview
10:48
button from the file menu and
10:54
uh then you can also control the opacity
10:57
as well position
11:00
ing is well if you and if you have
11:03
multiple elements multiple things you
11:07
can control it the position of it by
11:10
going to position and
11:12
then you can
11:14
see by the mouse you can control the
11:16
positioning so this is multi-layered
11:19
editor so if you have multiple elements
11:22
you can control their
11:24
position like this
11:29
so these are all the images coming from
11:31
third party website and you can also
11:34
search for if you want to get computer
11:37
related images simply
11:45
select so the support for your own
11:48
images are also there so you can select
11:51
your own images which are
11:57
there simply drag and your image will be
12:01
there so it's ultimate editor guys for
12:04
actually building any sort of things and
12:06
if you want
12:08
to download this design to a Json file
12:11
you can even do that as well so if you
12:13
want to save your work let's suppose you
12:15
can see it your design has been saved as
12:18
a Json file now you can import this
12:21
design as well by simply importing
12:24
it so you can import this design
12:26
directly
12:31
so if you save it you can import it as
12:33
well by selecting the design that
12:39
you
12:42
so I think we saved it using file name
12:47
so
12:50
yeah you need to import the same file
12:52
that you downloaded you will see file 3.
12:54
Json so you need to import the same file
13:04
so then you can
13:05
even if you want to have a custom size
13:09
so 1280 x 720 if you are building a
13:12
YouTube thumbnail click on create new
13:14
design so you will see your canvas will
13:16
be resized the width will be 1280 and
13:19
the height is 720 so you will see that
13:21
so now you can control the canvas size
13:24
by going to file create new design or
13:26
you have various templates as well if
13:28
you want to develop a Facebook post so
13:31
if you select it automatically the
13:32
canvas will be resized then we have
13:36
Facebook cover Instagram post so all
13:38
these social media networks have
13:40
pre-made sizes so we have configured it
13:42
automatically for you but still if you
13:44
want to make a custom size you can
13:46
provide the width and the height right
13:48
here and click on create new design and
13:51
you will be see
13:54
so it's a very good editor guys you will
13:56
see that
14:00
each and everything you can control and
14:02
customize right here and uh full source
14:05
code you will get and if you still face
14:08
any problem you can contact me on my
14:09
email address and phone number which is
14:11
given on my website
14:14
so this was
14:16
the editor guys so if you are interested
14:20
the link is given in the description of
14:22
this live stream so can check out these
14:26
are the different templates which are
14:28
there if you go to the template section
14:30
these will be different templates which
14:33
are pre-designed for you so not a lot
14:37
but still I think it's uh 12 templates
14:40
are there so if you want
14:43
to use any of these template simply
14:45
click on it and it will show the live
14:47
preview you will see that so now you can
14:50
individually just change the text you
14:52
can see that you can change your
14:56
text all these elements are customizable
14:59
you will see
15:02
that uh you will see that all these from
15:06
the position as well simply go to the
15:08
position and in the template all the
15:11
elements right here you can also replace
15:13
this image as well
15:18
accordingly control the opacity of this
15:20
image you will see that and here the
15:24
text property you can change it increase
15:26
the font size of the text you can change
15:28
to ATT
15:29
you can underline the text
15:32
uppercase you can apply various effects
15:35
to this text you can change it apply
15:37
some Shadow you will see that so each
15:40
and
15:41
every sh effect is there guys you will
15:44
see
15:48
that
15:50
so then we also have these uh different
15:54
kinds of frames available alphabetically
15:56
numbers as well so if you want to use
15:59
these frames you can even use that as
16:01
well
16:07
so it can be a mini canva clone I it is
16:11
not the full canva clone but still it
16:13
has the most features that canva support
16:17
so it's a good
16:19
editor you can see that now the PDF is
16:22
working I still yeah so if you go to
16:26
export this page as PDF now if you open
16:30
this PDF file you will see that the PDF
16:32
has been successfully exported
16:35
so this is just my internet connection
16:38
was not working so now you can try this
16:41
on your own computer now the PDF is also
16:44
working you will see that so if you want
16:46
to export this into a PNG file or you
16:48
can export this to a PDF file as well
16:51
all the two options are working so the
16:54
source code guys is given in the
16:55
description you can directly purchase it
16:57
from procode store.com the link is given
17:00
and before you purchase it I have on the
17:02
checkout page I have given the live demo
17:04
link you can navigate manually as well
17:07
by going to free media tools canva
17:09
ultimate editor and try this before
17:11
purchasing it and still if you have
17:14
problems after purchase you can contact
17:16
me and I will help you setting up this
17:18
project and if you want to deploy this
17:21
project it's very simple by purchasing
17:23
domain name you can simply build this
17:27
project react Chase project by simply
17:30
executing npm run build this will create
17:32
a disc folder like
17:36
this you can see that the project
17:38
project is building it will create this
17:40
disc
17:43
folder like this so this will create the
17:46
minified code for you so you will see
17:50
that the project has been built it will
17:53
create this assets folder which will
17:55
contain the minified CSS and the
17:56
JavaScript code and that's all all so
17:59
this is the front end code will be there
18:01
and now this is a backend code so now
18:03
you just need to upload the API folder
18:06
into the hosting plan and then this disc
18:11
folder so still if you have issues in
18:14
deployment after you purchase it you can
18:16
contact me I will help you deploy this
18:20
application to a real domain name so
18:22
thank you very much guys for watching
18:23
this video please hit that like button
18:26
subscribe the channel and I will be
18:28
seeing you in the next live stream
#Design
#Multimedia Software