Up next in 10

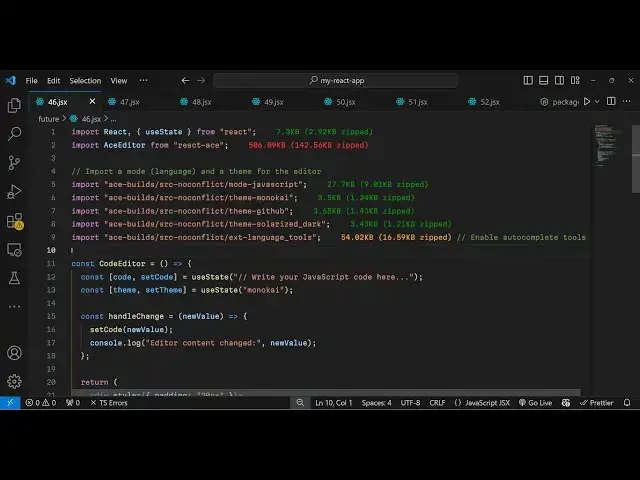
Build a React.js Ace Code Syntax Highlighter and Editor in Various Themes and Languages Using JSX
Jan 9, 2025
Get the full source code of application here:
https://gist.github.com/gauti123456/791c534701b510d9d48afb7d10449308
Show More Show Less View Video Transcript
0:00
uh hello guys welcome to this video so
0:03
in this video I will show you another
0:06
syntax
0:07
highlighter which is used very
0:10
prominently which is called as a react
0:13
Ace editor Ace editor is actually a very
0:16
famous syntax highlighter high
0:18
performance code editor for the web and
0:21
this is their official website and it do
0:23
offer a package specifically for react
0:25
CH application you can integrate this
0:27
nice little code editor
0:30
uh where you can write code in any
0:33
language so I'm just taking an example
0:36
of JavaScript or typescript any language
0:39
you can paste it and as I paste you will
0:41
see the full syntax highlighting with
0:45
line numbers as well with custom phones
0:48
and we have different themes this is
0:50
your GitHub theme this is a monokai this
0:53
is Soliz dark and you can check out the
0:57
documentation to include more themes as
0:59
well so this is a complete example I
1:02
will show you step by step how to
1:03
integrate this and uh first of all you
1:07
need to go to npmjs.com and just search
1:10
for this package which is react
1:14
dasas so you just need to install this
1:16
package which is react components for
1:20
Ace
1:21
editor it's almost got 421,000 weekly
1:25
downloads so this is the command here
1:27
simply install this I've already
1:29
installed it so I will just show you the
1:32
simple example so just make a simple
1:34
functional component and then you need
1:36
to import your package component which
1:38
is using the import statement so you see
1:42
a editor which will be coming from this
1:46
react
1:49
is it's almost 56 kilobytes package so
1:52
it's quite a big package and then you
1:55
import this and after this you need to
1:58
import the CSS
2:01
files for the different themes that I
2:04
will be using here so I will just copy
2:06
pasting these themes right here so this
2:08
is the monokai GitHub theme solarized
2:11
talk and this is for autocomplete and we
2:15
are using JavaScript language so that's
2:17
why we are including the file for
2:19
JavaScript so I've given all the source
2:21
code in the description so no need to
2:23
worry about it so now in the jsx you
2:26
just need to embed this component so
2:29
wherever you want want to embed this so
2:31
I will just give it a style of padding
2:34
of 20 pixel just to create some
2:37
space and inside this I will embed this
2:41
inside the h2 tag I will say react Ace
2:46
editor and then you have
2:51
actually a field here uh this will be a
2:54
simple select field where we allow the
2:57
user to
3:01
select the
3:04
theme they can select whichever theme
3:07
that they want so you will have this
3:09
label and simply say select
3:12
theme and we basically
3:16
say select your theme so you'll have a
3:19
simple select
3:21
tag and for this we just need to declare
3:24
some variables here State variables so
3:26
first of all for writing the code we
3:28
will have a variable
3:30
so where the user will write the code so
3:33
we have this variable initial value
3:35
we'll be using UST State hook will be
3:38
nothing and then you will actually allow
3:42
the user to Simply select the theme for
3:44
this I will actually have this variable
3:46
theme sets theme and again use State and
3:50
the initial theme will be monokai which
3:52
will be selected so these are the two
3:54
State variables and now in the select
3:57
field
4:00
select tag I will just give some
4:02
attributes to the select tag first is
4:04
the value this will be the theme
4:07
selected and then you will give it a
4:10
style here which will be
4:13
padding 5 pixel and then we have the
4:16
Border
4:18
radius of 4 pixel and then I just also
4:22
give bind an onchange event handler so
4:24
when you change this value so what
4:27
happens right here we call the set tee
4:29
function once again e. target.
4:34
value and we will Define this function
4:38
right here so whenever you change the
4:39
theme this function will execute handle
4:44
theme and we update the theme using
4:49
this sorry I
4:54
think okay inside this on change we
4:58
directly we can modify this we don't
5:01
need to so you're directly calling this
5:03
function set theme if you see you're
5:05
directly calling it and updating the
5:07
value so whatever value user select so
5:10
inside this select field we will have
5:11
three options you can add more
5:15
options as well so we have three themes
5:18
options so if you refresh your
5:20
application you will see three options
5:23
appearing so these are the three themes
5:26
now to embed the actual editor we can
5:29
come out of this div and then inside
5:32
we'll put the a
5:34
editor and we'll put this component if
5:36
you directly put this you can now write
5:39
write the code if you
5:40
see but no syntax highlighting will be
5:43
there so here you need to specify which
5:45
language you are talking about so it
5:47
takes some options here you need to
5:49
specify the mode so I will be moding for
5:53
JavaScript you can provide any other
5:55
language that you're working with and
5:58
theme here you need to provide so I will
6:00
just provide the theme so now if you
6:03
provide these two options you will see
6:05
the theme will be applied I can change
6:07
the theme Here
6:09
accordingly and then we can even bind a
6:12
onchange event handler as well so
6:15
whenever you change the code this
6:17
function will execute handle change so
6:20
we can update the code as
6:22
well I can Define this function handle
6:25
change
6:30
so we'll have the new value and then we
6:32
can simply set the code
6:38
to so if you also
6:41
want if you want to disable the line
6:44
numbers if you don't want to see these
6:46
line numbers appearing you can disable
6:48
it as well uh there is an options you
6:50
can pass set options object so here you
6:54
need to specify if you don't want the
6:56
line numbers you will simply enable line
7:00
numbers there is an option right here in
7:02
this show line numb sorry show line
7:06
numbers and you can put it to false so
7:09
now if you see the line numbers will not
7:11
be shown to you so but I want the line
7:14
numbers
7:15
so I will put it to
7:18
true so there is apart from that you
7:22
also have additional options to control
7:24
the look and feel of the editor which is
7:27
auto completion true Auto life
7:29
completion to enable slipids through tab
7:32
size
7:33
2 so now if you see you will also see
7:36
the auto completion also there as you
7:39
write the code so you can change the
7:42
language as well uh we can control the
7:45
height width you can provide the width
7:47
to be
7:48
100% you can control the height as well
7:51
which is 400
7:52
pixel so I'm just doing it uh you can
7:56
also control the phone size there is a
7:59
phone size option as well 16 I will
8:05
provide and uh that's all I think uh if
8:08
you see the phone size is
8:11
constructed and this is for JavaScript
8:13
if you want to change the language let's
8:15
suppose PHP as well you will put PHP
8:18
right here and PHP now will be
8:21
highlighted so if you refresh
8:23
now so now you will see PHP order
8:27
completions will come
8:30
so you can do this for any
8:32
language it supports all the languages
8:35
and the themes as well you can check out
8:37
the docs so I have shown this example
8:40
guys in the description of this video so
8:42
if you need the source code you can go
8:44
get this and thank you very much for
8:46
watching this video and do check out my
8:48
website as well free mediat tools.com
8:51
which contains thousands of tools
8:53
regarding audio video and image and I
8:56
will be seeing you in the next video
#Programming
#Other