live_tv
Livestream Starting Soon
00
Hours
:
00
Minutes
:
00
Seconds
Up next in 10

Build a Facebook Messenger Group Chat in Node.js & Express Using Socket.io & MongoDB in Browser
Jan 9, 2025
Buy the full source code of application here:
https://procodestore.com/index.php/product/build-a-facebook-messenger-group-chat-in-node-js-express-using-socket-io-mongodb-in-browser/
Show More Show Less View Video Transcript
0:00
uh Hello friends welcome to this video so in this video we will be actually be building a Facebook me messenger
0:08
chatting application group chatting application inside socket.io in nodejs
0:13
and express and uh you can actually see this is actually the application and if
0:18
you land on this group chat application you need to enter your username you can pick any username right here and all
0:25
this information we will be storing it inside mongodb database I've already created a database called as group chat
0:31
if you see right here this is a database and right after I select my username I
0:37
can give any username of let me give my name and click on okay and uh now you
0:43
will basically see this message will there goam you can see the username that
0:50
you enter has successfully joined the chat notification message will be sent to all the clients which will be
0:56
connected to this uh application this chat so this is actually the URL we are
1:02
running it to Local Host 3000 and the beauty about socket.io is that you can
1:07
actually open this in different windows and again this will be another client
1:13
another socket so you may just imagine whenever you deploy this application
1:20
whenever someone opens it's a new connection so it's a different user which here you can provide another
1:27
username and now as I provide the user username you will actually see in this
1:33
window also that notification message will also say that John has joined the chat so it is broadcasting this event in
1:41
to all the clients that certain event has happened a new client has joined the chat so side by side let me show you the
1:49
chatting here and let's suppose if I send some kind of message right here from this window you will now see it
1:56
will be broadcasted to both the clients you will see now now this is actually the username followed by the message
2:03
text message so here I will say hello and now send it and now you will see
2:10
this is actually the username that you selected in this window and now you can see so these are two different people
2:16
talking to each other because I'm on the same computer so I just open new two new
2:22
browser windows which are actually communicating with each other so now we also have the option to actually send
2:29
image PDF or videos any sort of attachments right here you will see choose file
2:34
button is there and right here you can actually select any images that you want
2:39
to send so let me select this image and click on send you will see in both the
2:46
windows the image will be sent and if you see it's a fully fleshed image you can open this image in new tab so this
2:53
image is sent right here and uh in this way you can send any image in the chat window you can see that so we are
3:00
actually storing all these images in the uploads directory if you see these images are stored in the server using
3:06
malter and also we are storing the paths in mongodb database so these are all the
3:11
tables which will get created these are the messages table these are the users table which are there
3:18
in so there are currently two users chatting with each other you can see that the
3:23
username and these are the messages that they have exchanged you will see this is a text message
3:30
this is the image message here we are storing the path of the image file right here so similarly you can send uh any
3:37
file uh it did not have to be image you can send PDF file any file that you want
3:43
to send SVG file you can even send right here so if you click Send so now if you
3:51
see dasvi file is also showing right here so if there if this is not if this
3:57
is not a image file in that case the file will have a downloaded link so
4:04
you will see that we are sending a webm file and now you will see in both the
4:10
windows the video file has been sent and now anyone can click on it and they can
4:16
download their download this file inside their computer and view this file so in
4:21
this way you can exchange messages you can exchange files as well in this group
4:27
chatting application and we also also have notification messages so let's suppose if someone leaves this chat
4:35
there will be this notification message that John has left the chat similarly
4:40
whenever someone Jo joins it once again we will again get this message that John
4:46
has joined the chat so all the basic functionalities of a group chatting application that you see online the
4:52
notification messages you can exchange media as well so all such things you
4:58
will see that and uh you can just connect as many clients as you want you can have a third client
5:05
connected so we are opening another new window so again it will be a same user
5:11
connected because we are storing the username in local storage that's why you will not see every time the alert box so
5:19
if you uh just opening the application for the very first time then we are
5:24
actually storing this username information in the local storage and then we are actually
5:30
inserting in the database so you will see the local storage right here and uh
5:36
right here the username value is stored in the local storage so every time we are not showing user the alert box to
5:43
actually enter the username for the very first time they select the username and we just uh store it in local storage and
5:49
then we store it in the users table in the database so this is the logic and we
5:55
are storing media files right here you you see in the uploads directory
6:00
so now in the next section guys I will show you how to code this application from scratch and uh if you are watching
6:08
it for the very first time please hit that like button subscribe the channel as well and uh for building this we are
6:15
actually using some of the Technologies which is socket.io which is a web RTC
6:22
Pro library for implementing these uh bidirectional low latency communication
6:28
between the client in the server for building these chatting applications so we are using this socket.io library and
6:36
this is their official Doc documentation and the website you can read more about it and then we are actually using
6:43
expressjs for building the backend server so just you can write Express
6:49
this is the backend server we are using and uh in nodejs and for uploading files we are
6:56
using this Library called as molter which allows you to actually store all
7:01
the images that you sent in the chatting application so 4 million weekly downloads and also we are using ejs
7:08
template engine which is allows you to actually render uh JavaScript templates inside
7:15
your HTML so 13 million weekly downloads so these are all the packages we are
7:22
using it EGS Express molter socket.io and lastly we are using Mongo's package
7:28
to actually connect with the mongod database which acts as a driver so it
7:34
actually is a library which allows you to connect with the mongodb database and store all this information so 2 million
7:40
weekly downloads so now in the next section we have start coding this Facebook Messenger group chatting
7:47
application so if you need the full source code the link is given in the description you can go to my website
7:52
procore.com and purchase the full source code with full documentation and support from me so the link is given you will
8:00
actually get a zip file after the payment is done you will be redirected to Google Drive where you can actually
8:06
get all the source code files which are there in this tutorial this is a custom CSS so I will not write all the codes
8:14
such as this custom CSS because it's not about CSS this tutorial so it's better
8:19
that you purchase it to actually better follow along with the tutorial so I will be now be seeing in the next section uh
8:27
now to get started guys I am navigating to the project directory and right here
8:33
I will simply make a new folder and I will simply call this as Facebook
8:38
Messenger clone and I will navigate to this
8:45
folder CD into this Facebook Messenger clone
9:01
let me see what I call this
9:06
Facebook so now I will open this folder inside vs code so first of all what we
9:12
need to do we just need to create a empty package.json file with the default options because we need to initialize
9:20
our so we'll simply say npm in it- F so
9:26
this will actually create your package.json file if you see on the left hand side now we need to install the
9:32
modules which are required for this application so we will install the Express package for our web server we
9:41
will install the socket.io EGS mongus and malter so all
9:46
the five packages I talked about in the previous section Express for backend server socket.io for implementing the
9:54
chatting functionality for bidirectional communication between the client and the server ejs is a template engine for
10:01
rendering JavaScript in HTML for interacting with mongodb database and
10:06
molor for uploading image files these are the five packages which are required
10:11
so simply install these so after that we will start writing
10:18
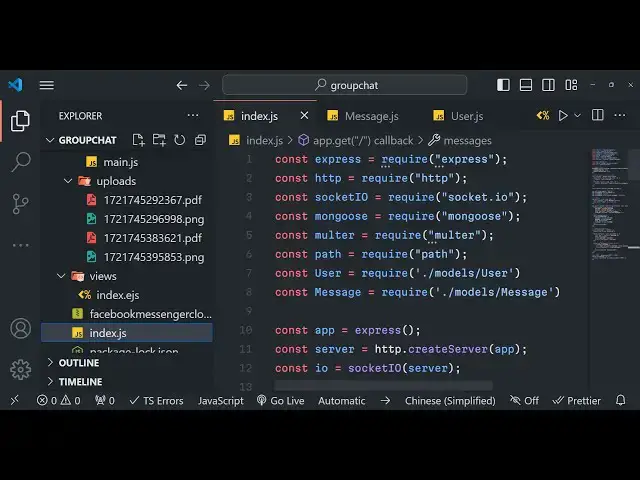
the starting point of the application so write in the root directory create your index.js file
10:36
just create your index.js
10:46
file uh now guys we will actually create the starting point of the application which is in the root directory create
10:53
your index.js file and right inside this file we will actually import all the
10:59
pack packages first of all and we will simply start the express
11:04
server first of all we will require it and for working with socket.io we do
11:09
need to include the socket IO package as well we require it
11:16
socket.io and uh the thing with socket.io it doesn't work with Express
11:23
directly you can't pass the reference of Express directly in socket.io you do need to actually include the built-in
11:31
package of HTTP which is in there in nodejs for creating HTTP server so you
11:38
just need to require the buil-in module of HTTP and then we can actually pass the
11:44
reference so we will create a new app of Express and uh then we will be creating
11:51
a server which will be HTTP do create server and here you need to pass your
11:58
reference of this app app variable right here in this uh app right
12:04
here so you can't directly pass socket.io to express you do need to do
12:11
this like this and then we'll be creating a input output variable of
12:16
socket.io and pass this server like
12:22
this this is a thing with socket.io and you just need to do right like this and
12:28
now we can start this HTTP server which have the express you can listen this on
12:34
port number 5,000 and just in the Callback you can give a console lock
12:40
statement that app is listening on for 5,000 and now in the development
12:48
package.json we can add a script Dev script and which will start
12:55
nodon index.js nodon if you don't know it restarts your server every time if
13:01
you make a change you can install it globally like this npmi dasg nodeb so it
13:09
will restart your server whenever you make any sort of changes and we simply
13:14
added a script Dev Dev script nodon index.js so we can simply now npm run
13:21
Dev so automatically it will restart the server you will see app is listening on
13:28
Port 5,000 and you'll actually console loog statement is coming so now after we
13:35
did it is done we just need to require the Mongo's library for actually
13:42
connecting it to the mongodb database so we just need to require this library and the connection setup is
13:49
pretty simple we are using a community based UI GUI which is called as mongodb
13:56
Compass you can even download this on Google just type mongodb
14:01
Compass so it's available for Windows and I think it's available it's
14:08
a crossplatform software so you can even try out mongodb Atlas which is online version but
14:16
mongodb it's available for you can see Linux as well Mac every operating system
14:23
it's available so once you install it you can uh start this and this will actually give you this connection string
14:30
that we need this mongodb colon // localhost this is actual port number it
14:37
listen on uh let me start this zoomit application so that I can zoom in on the
14:44
actual thing so by default the mongodb listens
14:51
on this port number which is 27017 this is the connection stream now you need to
14:56
click this button of connect so after that you can click on this create a
15:03
database so we can create a database called as
15:08
Facebook messenger and then we just need to give
15:14
it a sample connection so you can give any name of to your table or collection
15:21
click on create database so this is required to actually create a basic collection whenever you're creating a
15:27
database so once you create your database you will see it it will created like this so now we can actually connect
15:35
to this database by using uh we will just write a comment right here mongodb
15:41
connection code so we can simply say
15:48
so you can just you can even write it in a different file but I will for
15:54
the sake of this tutorial I will write it in this same file so mongodb colon K
16:00
local has 27017 followed by your database name so
16:05
Facebook messenger and then we can use new use
16:13
new URL parcel to be true and use
16:19
unified topology to be true as well
16:29
so if you do this uh you will actually
16:38
see so nothing is giving error so now we are successfully connected to the
16:44
database so after we do this we just need to create a public folder right here and
16:51
here we'll be just storing the St static assets so you can just create uh CSS
16:58
folder and then we can create the JavaScript
17:06
folder inside this public so this one these are two different folders uh first
17:13
one for storing the CSS files and then the second one for storing the
17:19
JavaScript files which are on the client side so these are two different folders
17:24
and the third folder we will create it for actually storing the media files so
17:30
whichever media files that you upload in chatting application you'll be storing it in the uploads folder this is a
17:36
directory structure and right after that we will be actually creating a views
17:42
folder where we'll be storing the index. ejs file which is a template engine that
17:47
we installed it so we can now set this template engine right
17:54
here you can simply say app. set view engine and and we can set that view
18:00
engine to be EGS that we installed apart from that we also need to make this
18:06
directory which is of the public directory as static so for that we'll use a app.use and pass the middleware
18:13
express static function that is provided by Express to actually make any directory as public we are making this
18:21
public directory as static and also we need to include Express Json these two
18:28
middle and express. URL encoded extended to
18:33
false so this is necessary while we are working with forms in order to get the
18:39
values the user selects in the form so these two things are necessary this is
18:44
specifically done for body parsel middleware which is built in an Express just write these two middleware
18:50
lines so now after that we also need to set up the malter so we can require this
18:57
malter package as as well after that we also need to set
19:02
up the monitor storage engine so right here you can set up it after doing this
19:09
you can simply say
19:14
configuring molter so we can just make a storage engine so molter provides you with the
19:22
dis storage so right in the inside this it
19:27
takes two options first is the destination destination object
19:33
state so where you need to store your files so this will be a call back function and you'll be storing it
19:42
inside the public SL uploads directory that we created and the second option is
19:48
take is the actual file name what file name that you want to give to your uploaded file so we'll be giving it
19:55
a random name by using date do now and whatever is the path of the file
20:02
so in order to get the path we will be using the buil-in package provided by
20:07
nodejs which is path so just require it and right inside
20:14
this method this module contains a method called as path. extension name and we'll
20:21
be getting the original name of the file using this property file. original name
20:27
that sols with this will be the random file name which will get assigned this is your storage you can directly pass
20:34
the storage to molter you can create a upload variable
20:40
and you can simply pass to molter whatever the storage that we assign you can assign it to light this is just a
20:47
configuration code for molter if you have ever worked with molter you will see what I'm doing right here we
20:53
configuring the molter to where you need to store your files and which file name
20:58
and and then lastly we are providing this the storage object to the storage
21:03
this is your middleware which is ready now you can actually make some routes
21:09
for our application so first of all we'll make a get route so let's whenever
21:15
someone goes to the homepage what sort
21:22
of information that you see on the screen so we have the app variable right here we can simply
21:29
make a get request right
21:34
here so when someone goes to the homepage we will be loading this template of
21:40
EGS response. render index so now in the index. ejs file we
21:48
can write any valid HTML code so you can change the title to Facebook Messenger
21:55
group chat so we you can simply write a simple heading on the
22:05
screen so it will automatically restart and if you navigate to Local Host 3000
22:11
in the browser hopefully you will see sorry I'm running it on Local Host
22:18
5000 you will see this heading right here Facebook Messenger so we are
22:24
successfully loading this index. EGS template so now the thing we need to do
22:29
right here uh we need to include socket.io in the client side as
22:38
well so for we will be doing this in the next
22:43
section so now guys in this section we will be importing the
22:49
socket.io package at the client side as well so you will see we have imported
22:54
this at the server site in Express we are including this right here HTTP create server we have
23:02
made a backend server and then we are using this input outputs we are passing
23:08
this reference of this server to the socket.io so we successfully configured
23:13
this on the server side so now to do it on the client side socket.io do offer a
23:21
library we need to include this script T and uh we can include this/ socket
23:28
SL so/ socket.io socket.io dogs so if you see in your
23:37
nodejs module folder whenever you install the socket.io package this will be present if you see
23:44
this is the folder which is present so we are directly loading this/ socket.io
23:50
and inside this we are simply loading this
23:56
file it does Prov provide you with this client JS automatically it is present
24:04
socket.io so you can directly open this path in the file I think it is
24:10
present Local Host 5000 socket.io /o. io.js if you directly open
24:18
this path in the browser it will give you this minified code right here this is actually the client library of
24:25
socket.io that we are loading it indirect in using the script tag so now
24:30
after that we will be loading another script this time this will be the custom
24:39
JavaScript which will be located in the JS folder and uh it will be I will call
24:46
this as client JS so now I will go to the public directory and
24:52
uh in the JS folder you'll create a file called as client JS this file uh is uh
24:59
will this will contain the JavaScript code which will be executed so we will
25:06
be simply be adding the event listener so this event listener is Dom content loaded so when all the elements are
25:12
loaded we just need to load the
25:17
socket.io library for loading it it's very simple we create a variable and
25:22
initialize it to input output So it's b directional communication with between
25:28
the client and the server and socket.io provide both the libraries at the server side and the client side so we can
25:35
console loog this information socket so if you see if you connect it if you open
25:41
your application and uh inspect element go to console you
25:47
will see this actually returns a object about the socket socket I told you it's
25:53
a client it's a it refers to any individual that is opening a browser it
26:00
refers it has various properties like this the ID of the socket or the client
26:06
of the browser which basically contains browser information so each and every browser so
26:14
now we can also bind events we can
26:19
uh send events emit events between client and server so by directional
26:25
communication so you can simply write here input output and it does provide you on function so
26:34
the there is built-in events right here which is connection event so whenever a
26:40
new client is connected this event will automatically fire and a new socket will
26:45
be connected so we can actually say a message on the console and we will say a
26:51
new client is connected so this console log message will come in the right right
26:57
in the server client you will see that a new client is connected similarly we
27:02
have another option whenever someone leaves we also we can bind
27:09
it to the socket so socket. on disconnect event is also pre-built so
27:16
let's suppose if someone leaves the chat you can just console loging
27:23
message a client disconnected
27:28
so this will only fire whenever someone Clos the browser you will not see only
27:34
this message is showing right here so again if someone opens the browser for
27:39
the second time it will treat it as a new client you will see two messages are
27:45
there now if I close
27:50
it so if I close this you will now see a client disconnected this is B
27:57
directional communication happening between the client and the server using socket.io and using this communication
28:04
we will build our chatting application so now in the next section or I can
28:12
develop the interface in this section itself it's very simple uh I will not
28:19
write the CSS code so what I will do uh I do have
28:24
the CSS code which is available inside so what I will do
28:31
uh it's available inside uh this CSS folder so this is Styles
28:40
file right here so what I will do I will simply copy this and paste it so all the source code is given in
28:48
the description so you can purchase it this is a styles.css file and right we
28:54
can directly up include this file
28:59
which is in present in the CSS folder styles. CSS and now uh we can directly write the
29:07
HTML right here we will have an diff which will have the chat container div
29:13
inside this we will have a simple form where the user can write
29:19
messages or select attachments as well so message form we have given an ID and
29:24
then inside this we have the input type first of all it will be a hidden field
29:32
and we will be giving a name attribute of username and an ID as well of username so this EV this input field
29:39
will not be seen by the user it just for storing this information in local
29:45
storage and the second one will be for input type text here we will allow the
29:51
user to enter the message text message we'll give it a name attribute of
29:56
message and an ID of message as well we give it a placeholder enter or type a
30:05
message and if you refresh you will actually see we have already pre-made the classes
30:12
you will see this input field is added right here and after this we will simply have
30:20
another input type file and we'll give it a name attribute of file and ID of
30:26
file as well so here we will allow the user to actually upload files so a choose file
30:33
button will be added right here lastly we will have a button to actually submit
30:39
the form so I will call this as send button you will see a green button is added
30:46
right here send button this is a chat container right here so this is all which is available
30:53
in the user interface now in the next section we will start writing the code for
30:58
implementing this chat application so I will be seeing you in the next section uh now guys in this
31:06
section we will start building the functionality in the chatting application first of all we will tackle
31:11
the username so whenever you land your application we will allow the user to actually select the username which will
31:18
be used in the chatting session and for doing this we actually
31:23
need to include a third party package sweet Alert 2 which will will actually show you a alert message where the user
31:30
can enter the so it's actually an alternative to the normal alert boxes
31:35
that you see in the browser it's a very good uh alert Library so we can simply
31:41
include their CDM so installation go to installation
31:48
and simply include this script tag and go to your HTML file index.
31:56
EGS right right at the top side include the CDN right here
32:02
now you can use the sweet alert package inside your CLI JS so first of all what we will do we
32:10
will get get reference to all the elements in the Dom so we'll be
32:17
getting reference to the username
32:24
input so document. get element by ID usern name we have given an ID in the
32:30
HTML and that's all for now we will only be tackling the usern name so that's all
32:37
we'll be declaring a global variable we will be keep track of which username the user
32:43
selects so we have declared a variable right here so after that as I already told you
32:49
we'll be storing the username in the local storage so here we'll have if condition if local storage has an
32:57
existing user has has an existing idid so this is actually called as key
33:03
parameter in local storage so so here we are checking in this if condition that if the username is already present in
33:10
the local storage then we will get that username and store it in the variable
33:15
local storage dot get item username so we are getting the item
33:21
from the local storage and assigning it to the username input
33:29
username and right here this is actually the client site we are sending an
33:36
event to the server site so we can send events as I already told you in
33:42
socket.io from server to client or client to server it's a b directional protocols web RTC so socket the variable
33:52
that we declared you will see it has input output reference it contains a
33:57
function called as Emit and here we can name your event whatever so in this case
34:03
I will call this as join and we will pass a payload in the
34:09
second AR argument in this case we will pass the username you can pass an object you can
34:15
pass an array but in this case we will pass a variable which is the actual username like this now we need to catch
34:23
this event in the server site so right in the this block of code where the
34:29
client is connected so we'll simply catch this event in the server site by
34:36
simply invoking socket. on and we here we can catch
34:43
events which the client sent so here we are sending the uh event called as join so we can
34:50
catch this event in the server site called join so we'll be asynchronously
34:56
we're getting the username right here so whatever username the user passes we will get this in the server site we are
35:04
console logging it so it's very
35:09
simple so right here we will simply if the username is not present in the local
35:16
storage in the else condition we will show a alert
35:21
message so for the alert alert message you'll use the sweet alert so as W it
35:28
contains a function fire and it basically just expect you to give it a
35:35
title so we'll simply say enter use username we'll give it a input field
35:41
where the user can enter a text value and you'll simply input placeholder
35:46
you'll simply say to the user usern name input
35:51
validator so here the value will come after you enter it in this variable
35:58
so you'll simply check if the username is not ex typed by the user in that case
36:03
you will show message to the user that you need to enter you need to write
36:12
something so if the user doesn't write something you'll just return a
36:17
message so this function returns a promise you can handle this using dot
36:22
then and after that it Returns the value result and now you'll simply if the
36:28
result do is confirmed property comes out to be true in this case this simply
36:33
means that if the user clicks the okay button after entering the username this
36:39
condition will evaluate to True after that we be getting the username value using result.
36:46
value again we'll be doing the same process setting the username input do
36:52
value to be the actual username that is selected and also you'll be setting this
36:59
time in the local storage you'll use set item to actually set the item in the
37:04
local storage we will put a key parameter username and pass username like this and lastly we need to again
37:12
emit socket. emit again call the same event and pass the
37:21
username so now if the user clicks the cancel button in that case you will simply say
37:29
username is required to join the
37:35
chat and then you will just
37:41
uh reload the page or I think it's not necessary for now let me just see what
37:46
happens if I land on the page you will see automatically it will detect no
37:52
username is present in local storage so you will actually see a alert box of
37:57
sweet alert to and here you need to enter your username so whatever I enter right here
38:03
I will get this in the console server site console so for that I need
38:10
to yeah so we are actually listening on Local Host 5,000 in the so whatever I
38:18
type right here whatever username I type you will see I'm getting it in the
38:25
console so the interaction is happening
38:30
successfully from client to server we are returning the information from the browser of the user to our server so
38:39
this is the communication which is happening directly if you see from client and the server
38:57
so now in the next section guys we will look at how to actually set this information in
39:04
the database uh now guys we will be writing the server site code to actually
39:10
save that username in the mongodb database so whatever username user right
39:16
in this event this event right here after console logging it we need to
39:22
actually store this username in the database so for doing this we will simply say await as this is a async
39:29
function we will simply say user and for actually uh saving this information we
39:35
do need to actually create a schema first of all so write in your root directory create a models
39:41
folder so models will be the actual data which will be storing it so first of all
39:46
create user.js so this will actually hold information
39:52
about the user so we'll be importing the package we will require it and for
39:59
constructing the schema we will be declaring a variable user schema new
40:05
Das schema and actually it contains an object username we'll be
40:12
storing it which is of type string and we'll also be storing the Tim stamp as
40:18
well which is of type date and uh the default value of it will
40:27
be the the current date and time date.
40:32
now and then we just need to create the collection using this model using the
40:40
schema so do model and we'll name our collection as user so this user
40:46
collection will be created using the schema that we provided now lastly we just need to
40:52
export this file so module. exports. user
40:58
so similarly you need to create another file for messages as well so the number
41:04
of messages will be storing it we do need to create their own schema for that also so again require the
41:16
library and here we need to select the schema
41:22
for so the messages so each message will comprise
41:32
of so it has each message will have a username which username has sent the
41:39
message and then the actual message which will also be a type string and if
41:45
any image or file has been selected by the user then that file will also be of
41:50
type stream file type will also be of type stream the extension of the image
41:56
file and lastly the Tim
42:01
stamp which is of the type date when the message is sent so default
42:09
value will be date do now so we don't need to manually pass
42:17
the time stamp it will take the default value the current date and time and
42:22
uh the same thing after we need to actually create the table for this
42:29
also do model and call this table as
42:35
message using the schema that we provided and then we need to export this
42:41
file as well module exports message so now we have both these model
42:47
files ready user and messages so now we can successfully import this
42:53
file by simply calling
42:59
so first of all what I need to do
43:07
uh okay so right here we will be creating a new object of that
43:14
user model class so it will automatically get imported vs code will
43:20
automatically import from Models folder if you see we creating a new object of
43:26
it and passing right here the actual username value in the cly bracket you'll
43:31
see that and then we will simply say socket. username is equal to username we will
43:39
initialize a property to the current socket we will add this property of username to the actual past
43:46
username and then we will again now emit a event to the
43:53
client similarly when we send information from clients to ser now we can send information from server to
43:59
client so for now we will use input. I IO variable which is This Global
44:06
variable so whenever you want to send information from the server to the client we'll use
44:11
I/O not socket so input output. emit so this will some emit this event to all
44:19
the clients which is connected so this will to all clients which are connected
44:27
it will actually broadcast this event that this username is join the
44:32
chat so we are sending this payload as a second argument now we need to catch this in the client
44:39
site so how we can catch this it's very easy so right here if you
44:48
see we have this uh outside this if condition we will simply
44:56
say socket Doon user joint and we'll get the username the
45:03
user uh server passes So based upon this event now we
45:09
can update the UI we can actually have a message on the chat
45:14
board that this username has been joined so we will simply create a dynamic
45:21
element of Li and we'll simply say new message
45:27
do inner HTML we will simply say in back teex
45:33
symbol that this username
45:38
has joined the chat and after that we need to add this
45:46
message to the message container so we do need to get a
45:52
reference to the message container
46:04
like this so we need to I think we haven't
46:10
added in the you'll see uh in the chat container just before
46:18
this we do need to add uh HTML for
46:24
this where we'll be storing the massage Mees so we will just had a UL
46:30
element just unordered list we will give it an ID of messages we just targeting this UL
46:36
element and right inside this messages
46:44
container we will append this
46:49
child of new
46:54
message that's all so now if you see guys if you refresh
47:04
now so it is saying that message container is not
47:11
defined I think some error is there uh message
47:18
container message container uh sorry let me call this correctly
47:25
message container so now you will actually see a
47:31
message on the screen John has joined the chat so it already detected that uh
47:37
a local storage variable has been set you'll see that the username that you
47:42
give if you check your database a table will be created or the user table and it
47:50
has a value if you refresh it it doesn't have
47:55
any value let me see what is the problem uh we are getting the message but we
48:03
haven't inserted information in the database
48:09
so think I need to refresh it or something wrong with the connection
48:16
if you see we are actually getting this information in the
48:22
console and the index.js
48:30
okay we forgot to call the save method guys that's why the problem is
48:37
occurring okay after we initialize it we need to call the user. save method of to
48:44
actually update this information and save it simply call the save method as well and uh refresh it now if you check
48:53
your database uh
48:59
so entry will be added right here with the username of John if you see the time stamp will take the current
49:06
time date and time so the username is successfully inserted and
49:12
uh now in the next section guys we will be tackling the messages if you type any
49:17
message on the screen so this is working for every client if you open this window in a
49:25
different client a different incognito window so this will treat it as a
49:30
different person which is logging inside your application so again it will show you this alert screen so let's suppose
49:36
if I enter a different username
49:42
uh I call this as Smith so now you can see in both the
49:48
windows it has been broadcasted that this user also know that this user has
49:53
joined the chat so now if you refresh there will be two users in the
50:02
database John Smith in the users
50:11
table so now in the next section we will be
50:17
tackling about the messages uh but before that guys we just
50:23
need to implement one other functionality so whenever someone leaves the chat we need to delete this username
50:29
from the database let's suppose uh there are two clients connected so once
50:35
someone leaves we also need to show a notification message that Smith has left the chat if I close this
50:42
window I also need to delete this username from the database as well so how we can do that it's very simple
50:48
again we will in the socket. on disconnect event right here we will
50:54
simply say if socket do username evolutes to true because we
51:01
actually added a property called as socket. username here we are checking that if
51:06
the username is already set in that case we need to remove it we will simply
51:12
again call the user model class and this contains a function delete
51:18
one and here you will be saying
51:23
username just delete that username which is present in socket
51:29
username just make this function async after this we need to globally
51:37
tell each and every client again you'll be using input output emit this time
51:43
this will be user left and we'll pass the actual username
51:48
socket. username that's all this is a logic very simple when the socket
51:54
disconnects we actually look out for if the username exist then we delete that user from the database and send out a
52:01
event back to the client user left now we need to catch this event in similarly
52:07
similar Fashion socket. on user
52:12
left and we will actually get the username and we can actually again show the same
52:19
message this time the message will be has left the
52:25
chat that's all so you will see you will get a message
52:32
for joining and if you
52:44
now if you say Smith Smith has joined the chat and
52:49
let's suppose if I close this window you will now see Smith now has left the chat
52:55
and that entry will also get deleted so now you will
53:04
see that entry will not be there it's only there once because the
53:11
for the second time we deleted it so now in the next section we'll be
53:18
tackling the messages if you type any message we need to show it on the screen so for doing it it is now you see it is
53:25
automatically uh submitting the form so we need to tackle this in the next section uh now
53:32
guys in this section we will be implementing the last functionality in the application which is the messages or
53:38
we'll be handling the attachments so for doing this uh we need to go to our client JS file and right here we need to
53:46
get references of all the elements so first is a message
53:53
form so when you submit the form you need to get the reference here whatever
53:58
ID that we have given to the form which is message form also we need to get the
54:03
message input reference here in this field we'll be entering the actual
54:08
message that needs to be sent I have given an ID to it of message and lastly
54:14
the file input so this will be the attachment we given an ID of file so
54:20
both these Dom elements both these three Dom elements and here we will be binding
54:27
message form and add event listener so when the
54:32
form submit this event handler will automatically execute e parameter will
54:37
be passed just make this function as asynchronous and you'll be preventing
54:44
the auto submission of the form by e. prevent default after that we will simply check
54:51
in the if condition that if the username do if the user doesn't enter the
54:58
username if the username doesn't contain a value then in that case we will show a
55:08
message that uh username is required to send a
55:19
message and we will not execute the application just write the return statement so the application will exit
55:27
similarly if the username doesn't enter a message or neither it's he selects a
55:35
actual attachment file input do
55:45
files dot
55:51
length comes out to be zero in that case we will say simply say to the
55:58
user you need to enter a message or selective file to
56:06
send also you'll simply return so one other scenario will be
56:12
there if the user selects both the things if they also write a message and also select the attachment
56:21
as well in both these scenarios and condition is there
56:26
so in this scenario also you'll simply say to the user that you can't select both the
56:33
things you can only send a message or a file not Mo
56:40
both you can allow the user to send both but in this application I will not so we
56:46
have added these three conditions so if the all these conditions are met in that
56:52
case this now code will be executed we will simply construct a form form data object new form data and we'll be
57:00
passing the whole form message form as an argument so this form if for this form
57:08
data to work you need to give these name parameters we have given if you see we
57:13
have given the name parameters username message file so this is very important
57:18
you need to give name parameters for form data to work after that in this TR catch block
57:25
we can actually make a fetch request to the slash upload this will be
57:32
a simple post method we'll be sending the full body as form
57:39
data so inside your try catch if any sort of error take
57:53
place so this actually uh will return either okay response so if response.
58:00
okay in that case we need to reset the input field so we simply say message
58:06
input.
58:12
value or file input. value so we are resetting that whenever form submits
58:22
successfully so now we need to write this uh backend request inside your
58:29
main.js file so just shift this code right at the
58:39
top just after here you can just see so now after the get request you can just
58:45
write app. poost SL upload and first of all we will simply
58:51
say upload do single and you can see we have given this name parameter of
58:56
file we have given this to the input element where to the attachment right here here
59:04
we simply making this route and simply allowing the user to actually upload the file if any file was selected by the
59:11
user molter will successfully upload that file in this middle we so this will be asynchronously
59:20
function this Middle where we already configured early on if you see this is coming through
59:27
sorry you need to declare it early on right here just write here declare it
59:33
now we can access this middleware we are passing this as a request upload do single
59:40
file so now we can simply get the
59:46
message we instantiate a new reference of the message class message model class
59:52
it will be imported and here we'll be sending four properties the actual username
59:58
which will be getting request. body. username the actual message request.
1:00:04
body. message if the message is not available in that case we will be
1:00:10
setting it to nothing if the user has selected a file
1:00:16
in that case we'll say request. file we'll use a tary operator if the file is
1:00:21
selected then request. file do file name we'll get the file name using this if
1:00:28
the file name is not selected in that case we'll say to nothing lastly the file type is the
1:00:34
extension so if the file is selected in that case we will get the file type using request. file do MIM
1:00:43
type or nothing we have getting these four
1:00:50
parameters now we can simply save this inside mongodb so we'll say await
1:00:56
message. save save the message and then again we'll be emitting globally this
1:01:02
event to all the clients new message we'll call this event as this and in the
1:01:08
payload we will be storing we will be just declaring this object message
1:01:16
dot user username and the actual message which
1:01:21
will be message do message
1:01:27
file message. file and uh file
1:01:34
type message. file type so we are sending this whole object
1:01:41
as a payload to the client and lastly we'll be sending a 200 status request so when
1:01:50
the CL it is automatically done you're sending a status of 200 which is
1:01:55
successful so this is our backend request now in the client GS we are getting this
1:02:01
response. okay to be true
1:02:06
so we need to catch this event that we that we are sending from index.js you
1:02:13
will see new message we need to catch this event and update the
1:02:19
UI so now to catch this again we will be using the same logic right here
1:02:27
s.on new message and we'll get the data object
1:02:33
right here you can console log it just to cross check if I refresh now and type
1:02:40
any message hi click on send just refresh
1:02:51
here so here you'll see nothing will happen if you check the console you will we get an object right here which will
1:02:58
have four properties a username which has sent the message which is John the message is actual High file type and
1:03:07
file you will actually get all this so it is saying response is not
1:03:15
defined uh I think in
1:03:23
the and the line. JS it is telling us that response is not
1:03:30
defined sorry I call this as it needs to go inside it sorry I just
1:03:39
right here we need to call this so now if you write any other
1:03:44
message right here refresh it just clear out the console hi
1:03:53
hello click on send you will get this object right here now if you want to again it will
1:04:00
reset if you want to select the image file you select the image click on send
1:04:06
now it will be a image you will see that the message will be empty now we are getting the image path the file type
1:04:14
which is image/png and the username so we are actually getting the actual information that we need now we just
1:04:21
need to update the UI and if you check in the
1:04:26
a table will be created of messages in the bongod DB database and we are storing all these messages in the
1:04:33
database so that when we refresh the page all these messages will come back
1:04:38
and show it in the screen so now to update the UI is very simple
1:04:44
uh go to your client JS in the new message
1:04:50
event we will simply create a new message variable
1:04:56
we'll create a dynamic Alli tag once again create element
1:05:03
Ali and we will be manipulating the inner HTML of It new message inner HTML
1:05:09
and we will be simply be having the strong tag and inside this we will have a span
1:05:15
tag so inside the span tag we will be giving a class to it of
1:05:22
user so here you'll be embedding the
1:05:27
actual username and we'll simply be saying we giving some styling right here
1:05:34
let me just copy paste it so you will see we have embedding the
1:05:41
message right here and the actual username we have
1:05:46
given some styling right here after you do this you need to actually add this to
1:05:54
the Dom so we you'll simply say messages container append child and new
1:06:03
message so if you just refresh now type a
1:06:09
message you need to enter a message of select a file
1:06:16
so uh nothing happens let me see what is the problem um new message in an HTML
1:06:27
uh I messages container message sorry I
1:06:32
call this message container so that was a problem so this was message
1:06:41
container so if I type a
1:06:46
message just refresh now now you will see the message will
1:06:52
come on the screen as well you can type any
1:07:00
message so you can see that so if you select image I think the image will not
1:07:06
come because we didn't handle the
1:07:11
image so the image will not display because we do need to handle a case for this we do need to actually have a if
1:07:19
condition right
1:07:24
here so you will simply have if condition
1:07:30
that if the data has a file attribute attached to it then in that case we need
1:07:35
to display image file so we'll be creating a dynamic div
1:07:40
element which will
1:07:46
have data. file type property that we have so here we'll be checking that if
1:07:52
the file type starts with image slash so here we simply know that
1:08:00
if it starts with image slash then it's a image file and for that we will be
1:08:05
actually be creating a image element IMG tag and image. Source will
1:08:15
be equal to SL upload slash followed by the actual file data.
1:08:24
file and then we will be adding this div to the image tag like
1:08:38
this so if you now check uh I think the image should show if
1:08:46
I go
1:08:52
to if I select image file
1:08:58
the image is not showing let me see data. file uh the error was guys the
1:09:04
image was not showing because we haven't added this file diff to our message
1:09:10
container so this is the actual problem so we do need to add this to the new
1:09:15
message right here that we are creating so right here we need to say new message append child and then we need to append
1:09:23
this child which is file div here we'll be showing our image file if the message is a image that the user is
1:09:30
sending so now if you navigate to your application if you try to send a
1:09:36
message which is a image file not a text so you can see you can test you can
1:09:44
send text messages and now if you want to send a image file you can actually select
1:09:51
to image file let me go to the downloads folder
1:09:59
and here if I select any jpg or file click on send and now you can see that
1:10:05
guys the image is sent and if I try to open this in a new
1:10:16
window so this is a second client which is connected this is so let's suppose if
1:10:23
I send a message right here you will see Smith has joined the chat if I click hi
1:10:29
you will see the message will be prompted you will see Smith is saying hi so if I send out image from this this
1:10:38
client so now you can see that the image is sent to both the clients and now you can simply chat with one other by
1:10:45
sending text messages or you can send out images so one other thing is that if you don't want to send image if you want
1:10:51
to send any other file so that the user can download it on their end so this is very easy you can just write else
1:10:58
condition right here you can write here if the image is not of the type uh image
1:11:03
then we just need to show the link to the user so that the user can download it so we can simply say we need to
1:11:10
create a element here a anchor element and right here we will simply say link.
1:11:17
HF is equal to SL upload slash followed by the data. file and we need to make it
1:11:26
downloadable so we will say link. download. dat. file and link. text
1:11:31
content and it will be shown the data do file whatever is the name of the file
1:11:37
and we will lastly we will be appending this file append Child Link that's all
1:11:43
we will add this link hyperlink to this file div and lastly we are appending it to a new message like this now if you
1:11:51
try to send any other file up which is not a image file let's suppose you are sending a PDF
1:11:58
file click on send and now you can actually see I need to send
1:12:07
uh I think let's suppose if I send right here this file
1:12:13
uh a video file uh but it is not showing let me see
1:12:19
what is the problem uh object is returned to us you will see that it is
1:12:25
file type is is saying video/ MP4 so the video is not
1:12:31
showing I think there is some kind of error which is
1:12:41
there uh link. HF data.
1:12:50
file let me just copy this guys and show to you
1:13:06
so let me just remove this so This is actually the code the link is given guys I think I made a typo mistake right here
1:13:13
this is the case for the image file if the image if the data type file type starts from image
1:13:19
slash so now if I try to do this
1:13:25
if I send a you will see basically now if I try to
1:13:33
send the image uh a video
1:13:47
file uh now guys the all the things are correct you will basically see we have
1:13:52
the if block else block there was not a problem in the code it was just internet connection problem now you can see that
1:13:59
I'm just running this application local h 3000 and if I try to open another incognito window Local Host
1:14:05
3000 you will actually see it will tell me to actually give a username and we
1:14:11
see Smith has joined the chat and uh if I just make it these window side by side
1:14:18
you can just exchange text messages if you type
1:14:25
hi you will basically see uh this is Local Host 3,000
1:14:36
sorry so if you Ty high and you will basically see it is return here you can
1:14:42
exchange text messages you can exchange let's suppose if you want to send a PDF file you will see the link will be there
1:14:50
and now the user can simply click and they can download this PDF file inside their machine
1:14:55
like this and if you want to send images you can even send PNG jpg image you see
1:15:01
the imag is reflected in both the windows so it can be multiple clients connected with each other chatting with
1:15:06
one other so it's a Facebook Messenger clone guys you can see how this if I
1:15:12
left left you'll basically see uh Smith has left the chat again if I join it you
1:15:17
will see it will detect the local uh local storage Smith has joined the chat
1:15:25
and if if I leave it from here Gotham has left the chat and again if I
1:15:32
join so Gotham has joined the chat so you will basically see it's a mini Facebook Messenger clone and also if I
1:15:40
refresh the application if I refresh the chat all the previous messages will be staying right here how I how we are
1:15:47
doing it so just go to your home route where you are actually loading inside
1:15:52
your main index. J is in the server site code so here we will simply we need to
1:15:59
uh we are simply finding all the messages you will see that message. find so this method find will actually
1:16:07
return all the messages previous messages which are there and we will be actually be rendering it in the EGS
1:16:13
template we will be sending this variable messages which will be an array here which will contain an array of
1:16:19
messages and now in the index.js template you will see we are storing all these PDF image files right here in the
1:16:25
uploads directory and right inside your views folder we will simply make a
1:16:31
simple Loop right here if you see in this Loop right here we are
1:16:37
actually using the for each Loop for each message we are displaying the username we are displaying the actual
1:16:42
message and we are again having this if condition If the message is of the Type image then we are simply showing it in
1:16:49
the if condition we are showing this image tag if the image If the message is not a image then we are showing the link
1:16:55
right here very simple message. file so downloadable link so when you reload the
1:17:01
application let's suppose if you close it want to reload once again the previous messages will show so you will
1:17:07
see that all the previous messages are showing right here so this chat can support multiple clients multiple users
1:17:13
can chat with one another simultaneously using this Facebook Messenger clone if you need the full source code guys the
1:17:19
link is given in the description you can directly purchase the full source code with fall documentation and support from
1:17:24
me and uh the link is given you can directly go to procore.com and you will actually get the zip file from Google
1:17:30
Drive after you purchase the full source code and please hit that like button guys subscribe the channel as well if
1:17:37
you like this video and I will be seeing you guys in the next video
#Email & Messaging
#Text & Instant Messaging
#Voice & Video Chat
#File Sharing & Hosting