Up next in 10

Javascript Google Maps API Example to Track & Add Markers of Location Using IP Address in Browser
Dec 11, 2025
Buy the full source code of the application here:
https://procodestore.com/index.php/product/javascript-google-maps-api-example-to-track-add-markers-of-location-using-ip-address-in-browser/
Show More Show Less View Video Transcript
0:00
Uh hello friends, today in this tutorial
0:02
I will be showing you that how basically
0:04
you can convert IP address to an actual
0:07
location and plot it on a Google map
0:09
using Google maps API in JavaScript. So
0:13
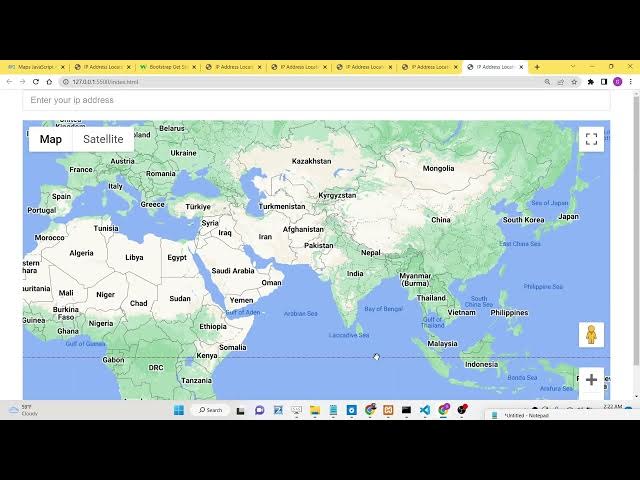
basically you'll see this is basically
0:14
whenever you load the application it
0:16
will uh get your current location. It
0:19
will first of all get your IP address of
0:21
the internet connection and it will
0:23
convert that IP address to the current
0:25
location. So you can see Gazyabad, Uttar
0:27
Pradesh, India. So this is my current
0:28
location and now it is plotting this
0:30
location on the Google map. Here you can
0:32
see that basically it has plotted this
0:34
location on the Google map. So now what
0:38
is happening? So basically this is the
0:40
input field which is given here. So here
0:42
I can uh [clears throat] enter any sort
0:44
of IP address. So let's suppose I write
0:46
a IP address here. Let's suppose 190 78
0:52
56 67. So it's a valid IP address. Now
0:55
if I just onchange event will trigger
0:59
and you can see that now it will if you
1:02
see basically it will add this marker
1:04
here. So the location is uh La Victoria
1:09
Venezuela. Basically you can see it's a
1:11
location inside the world which has got
1:13
this IP address. So it automatically
1:16
converts this IP address to a location
1:18
using a API that we are using and then
1:21
it plots this location on the Google
1:22
map. This is basically the whole
1:24
application that I'm showing you. Now
1:27
let's suppose if I show you in real
1:30
time. Let's suppose I change this to
1:32
56.7898.
1:36
This is the And now you will see you can
1:39
see it is plotted this. This is uh
1:41
Chicago United States. You can see so if
1:44
you nice thing about this if you now
1:46
click on the marker it will also tell
1:48
you more information about this inside a
1:50
info window. You can see that if I click
1:53
this, you will now see more information.
1:56
So you will get to know about a lot of
1:58
things related to Google maps API and
2:01
how to convert your IP address to an
2:03
actual location and then you how you can
2:05
track that location on the Google map.
2:08
Let's suppose if I change this location
2:10
67
2:12
any IP address you can write here any
2:14
valid IP address. And now you can see
2:18
whenever you enter undefined invalid
2:20
email address then it will come
2:22
undefined undefined. So now I will
2:25
change to you will see that New York
2:27
this is United States you will see that.
2:29
So it's a very fun little application
2:32
you can uh copy paste anybody IP address
2:35
into this field here like this. Now you
2:39
can see Bel Florida United States. So
2:42
it's a very good application. For this
2:44
application, we are using uh Google Maps
2:47
API. So, if you go to Google Cloud
2:49
Console, you need to create your own API
2:51
key. And uh I have given all the source
2:54
code in the description of this video
2:55
which I'm using right here. You can go
2:57
to my blog post. So, step-by-step
3:00
instruction is given and all the source
3:02
code is also given. So, you can just
3:04
copy paste the source code. The link is
3:06
given in the description of the video.
3:08
So, now let's get started. For building
3:10
this application, you will require
3:12
basically a simple index html file here.
3:14
Let me delete all the code and start
3:16
from scratch. So basically guys
3:21
uh you just need to copy paste the CDN
3:24
of what we require here. So just go to
3:26
the blog post. You will require the
3:28
bootstrap CDN. It is just required for
3:31
the styling purposes and also we will be
3:33
requiring this Google maps JavaScript
3:36
API. So here you just need to replace
3:38
your own API key. So simply I will
3:40
simply go to my and simply replace this
3:43
API key here.
3:45
And also guys you just need to enable
3:47
your own AP uh Google maps JavaScript
3:51
API also. So [snorts] I will replace
3:53
this. And in order to enable this uh API
3:57
you need to go to library section and
3:59
here you just need to enable the Google
4:01
maps JavaScript API. So just search for
4:04
your API here which is Google maps
4:07
JavaScript API. So this is the API you
4:11
can see this is the API that you need to
4:13
enable. So simply enable this API of I
4:16
have already enabled this. So now we
4:18
will write the code here. So here we
4:20
will initialize a event out there guys.
4:23
Whenever the body is loaded this event
4:25
will execute which is called as init
4:28
map. So this function we need to execute
4:31
whenever this will say. So now what we
4:34
can do is that basically we can write
4:36
the JavaScript code inside. So we can
4:39
define this function which is init map.
4:42
So basically guys inside this function
4:44
what will happen as soon as your
4:46
application loads this function will
4:49
execute. Now you can see hype statement
4:52
is there because of this onload event
4:55
handler. So now inside this we just need
4:58
to display our Google map but uh we will
5:01
first of all just complete the HTML that
5:03
we require. So we will use the container
5:05
class of bootstrap. Inside this we will
5:08
have to use form group class and here we
5:11
will allow the user to add the IP
5:13
address. So here user can add their own
5:16
IP address. So here we will say enter
5:18
your IP address.
5:21
So this will be required and basically
5:24
guys uh we will be giving a class to it
5:28
bootstrap class which is form control.
5:30
So if you now refresh you will now see
5:33
enter your IP address. So here the user
5:35
will enter the IP address. So we will
5:38
basically
5:39
um have a section out there where we
5:43
will display the location of the user.
5:45
So this we will add a id to it location
5:48
text. This will be a simple div. And the
5:51
second div we will attach a map. So here
5:53
we will be displaying the actual Google
5:56
map. So here we will be adding a style
5:58
attribute which will be we will be
6:00
giving a height to it of 500 pixel.
6:02
That's all. So now guys we just need to
6:05
display the actual Google map when we
6:07
load the page. For displaying the Google
6:10
map it's very simple. We will display we
6:12
will just make a map variable and inside
6:15
this we will initialize the map which is
6:17
very simple. new Google maps dot map and
6:22
here we will pass basically the
6:24
reference which we have given which is
6:26
this we have given the ID here of map
6:29
here that's why we are using it right
6:31
here [snorts] and after this guys we
6:33
just need to pass some options here
6:35
first of all the zoom level zoom level
6:37
you can pass here four let's suppose and
6:40
then scroll wheel so this option
6:42
basically it's a boolean option it
6:44
allows you to scroll in and out of the
6:46
map here zoom in zoom out with your
6:48
mouse wheel and the third option is
6:51
basically the center. So here you can
6:54
pass the location latitude you can pass
6:57
here - 34
6:59
397
7:01
and then you can basically pass sorry
7:04
this needs to be dot 397 and longitude
7:08
will be
7:11
150.644.
7:14
So
7:16
now if you load the application you will
7:18
see your map is loaded out there. You
7:20
will see that our Google map is
7:22
successfully loading out there inside
7:25
this location. So [clears throat] it is
7:27
now displaying it. So now we simply need
7:29
to basically convert the IP address
7:31
guys. We first of all need to get our
7:33
own IP address of the user which is
7:36
connected to your website. So now to get
7:38
that IP address we will use basically a
7:40
website which offers a free API. We will
7:43
make a simple fetch call. So it will get
7:46
get the current user IP address. So we
7:49
will make a call here which is uh
7:51
ipfi.org.
7:54
This is the website and here we will
7:57
make a simple call and we will get the
7:59
response inside JSON. So you can see
8:01
this is basically the API that we are
8:03
using here. If you just copy this
8:05
address and try to paste this inside the
8:08
browser, what will happen? it will
8:11
return the uh current IP address of
8:13
mine. So this is my own IP address which
8:15
is 103.46201217.
8:19
This is a IP address. So I just need to
8:22
simply make a fetch call to this get
8:24
request. So this will simply return a
8:27
promise which is den. So we will first
8:31
of all need to convert this response to
8:33
JSON. So response dojson
8:36
and then again it returns the promise
8:38
which will hold the data to us.
8:40
So inside this guys we will get the IP
8:43
address which is data do IP and then we
8:47
will simply say call a function which
8:50
will actually show the location on the
8:52
map. We will first of all pass the IP
8:55
address as well as the map variable this
8:58
variable that we are passing here. So
9:01
now we need to define this function
9:03
guys. Basically this function will
9:05
actually
9:07
uh first of all find the location using
9:10
the IP address and then it will plot
9:12
that location on the map. So here we
9:14
will receive the IP address and the map
9:16
here. So first of all guys what we will
9:18
do is that so we will use this IP
9:21
address which is there. We will again
9:23
make a simple fetch call and this will
9:25
be a different website. This will be
9:27
https
9:29
ipapi.com
9:32
sorry.co co slash and then you pass your
9:35
IP address
9:37
and then basically /json
9:42
slash. So now this is a separate website
9:45
guys. This was IPI. This is IPI. So
9:49
these are two very utility based
9:51
websites where you can if you go to this
9:54
website it offers a free API which is
9:56
ipapi.com. You can see if you pass the
9:59
IP address, it returns the location of
10:02
the user. It basically returns the
10:04
state, city name, country name, IP
10:06
codes, zip code, time zone, currency.
10:09
It's a very good API. So we are using
10:11
this API to make a simple get call.
10:15
And uh then after that it returns the
10:18
promise. We just need to basically
10:20
convert this to JSON.
10:25
So we will simply say here the response
10:28
that we are getting.
10:31
So we simply need to convert the
10:33
response to JSON and then it will again
10:36
have the data inside us. [snorts] So
10:39
what we need to do guys we will get that
10:42
this data here. If you check if I
10:45
console log the data. So what it will do
10:47
basically if I now open this and try to
10:51
inspect element go to console you will
10:54
see basically object is there it
10:56
contains a lot of property which is city
10:58
name is Gazyabad. You will see continent
11:00
code is as country is in which is India
11:05
area all this information is there
11:07
latitude longitude. So we the we need
11:10
these coordinates here which is this
11:12
coordinates to plot the location on the
11:13
Google map. So that's all we need here.
11:18
So now to basically get the latitude and
11:21
the longitude it's very easy. we will
11:23
simply get the latitude. We will declare
11:26
a variable which is data dot latitude
11:31
and similarly we will get the longitude
11:36
uh data dot
11:40
longitude and then guys we will simply
11:43
get the location. We will simply say
11:46
data dot city
11:48
put a comma and then we will concatenate
11:51
data dot region
11:55
and then we will also concatenate the
11:59
data dot country name that's all country
12:02
name that's all this is the location and
12:05
now we simply need to add a marker on
12:07
the map so now to add the marker guys we
12:10
will simply declare a marker variable
12:13
and then new dot google maps dot marker
12:17
this is a method by which you can add a
12:18
marker to the map so here you just need
12:20
to pass the position
12:23
So position basically guys this will be
12:25
an object latitude will be equal to the
12:27
latitude that we got and longitude will
12:30
be longitude that's all. So we are
12:32
passing these two coordinates that we
12:34
got from the result and the next option
12:37
is the actual map. So we are getting the
12:39
map here inside the second argument we
12:41
are passing it and the third one is the
12:43
title. So title basically is the
12:46
location that's all the location that we
12:48
got here like this.
12:52
So [snorts] now if you see guys what
12:54
will happen if I open this you will see
12:58
it will add this red marker on the map
13:00
here on Gazyabad you will see it
13:02
pinpoints the location of mine this is
13:05
you can see that now we also need to
13:07
display this location on the screen guys
13:10
where the user is located.
13:12
So also when I click this window when I
13:16
click this marker I need to basically
13:18
show a info window. So now to add that
13:20
info window it's very simple. We use
13:23
this method which is new Google maps dot
13:26
info window.
13:29
This is basically the method. So info
13:32
window and here we will simply pass the
13:34
content which is location. That's all.
13:37
So now if you see
13:39
nothing will happen because we need to
13:41
basically if I click this uh marker
13:45
nothing will happen because we need to
13:48
add a event handler.
13:51
Similar when we click the button we
13:54
first of all need to attach a event
13:55
handlers. So similar case we need to add
13:57
a listener to the marker. So whenever we
14:00
click the marker we will attach this
14:02
event handler. this call back function
14:04
will execute and then we will simply say
14:07
info window we need to open that window
14:09
and simply pass the marker that's all so
14:13
now what will happen guys if I now open
14:16
this
14:19
click this you will now see Gazyabad
14:22
Uttar Pradesh India so it will show this
14:24
information to you so it's a very
14:26
helpful kind of info window that's all
14:29
now guys we simply need to add the text
14:32
on the screen So, so user can simply
14:35
say,
14:37
so we can simply say location
14:41
text,
14:42
we will get the reference
14:44
document.getelement by id. So we have
14:46
given the id you will see location text.
14:48
So we will getting the reference here.
14:52
After this we can simply say location
14:55
text inner html.
14:57
This is equal to location. That's all.
15:00
So now what will it it will do? It will
15:02
show this location on the top of the
15:04
screen. If you see basically
15:10
uh I think some error has taken place.
15:14
Let me see. If you inspect the element
15:18
in various cases you can do this
15:23
I think. Oh yeah you can see that
15:26
Gazyabad, Uttar Pradesh, India. You'll
15:27
see the location is showing here. And
15:30
now the thing is remaining guys if I
15:32
enter this inside this location.
15:36
So when the onchange event handler we
15:38
just need to update this. So what we can
15:41
do is that inside this input field we
15:44
can attach a onchange event handler. So
15:46
when the value is changed we will simply
15:49
plot info. We will call this method
15:52
which is uh automatically execute when
15:54
this value is changed. Here we need to
15:56
now execute this function. So we will
15:59
execute this plot info.
16:05
So right here inside this function guys
16:07
what we need to do basically we need to
16:09
call the same function which is the show
16:11
location on map
16:14
and this time basically the IP address
16:17
will be changed here.
16:19
So this time we will simply say
16:22
document.getelement by ID. So we have
16:25
given this ID if you see we have given I
16:28
think yeah IP address we have given the
16:31
ID. So we will first of all get the
16:33
value.
16:37
So here we will pass the updated value
16:39
of the IP address and then the map
16:41
reference that's all.
16:45
So now if you see guys basically
16:48
if I now change this IP address.
16:55
So now if I on change you will now see.
16:59
So this uh basically it will add the
17:01
marker automatically whenever the values
17:04
changed here. Now if I try to change
17:07
this to this one
17:10
you can see that now if I change this to
17:14
5678
17:15
98 34
17:20
it is undefined. So you let's suppose
17:23
144.67
17:25
8786.
17:29
So now you can see that. So in this way
17:31
guys you can build build out this
17:33
awesome little application where you can
17:35
track the location of an IP address and
17:37
plot that location on the Google maps
17:39
using Google JavaScript API inside the
17:42
browser. All the source code is given in
17:44
the description of this video. Please
17:46
hit that like button, subscribe the
17:48
channel so that more and more people can
17:50
watch this video and thank you very much
17:52
for watching this video.