Up next in 10

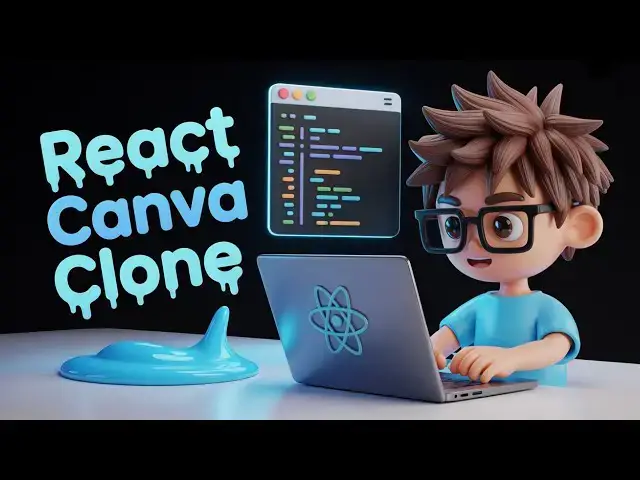
Build a React.js Canva Clone Video Editor & Recorder in Browser Using FFMPEG WASM in TypeScript
Dec 18, 2025
Buy the full source code of application here:
https://procodestore.com/index.php/product/build-a-react-js-canva-clone-video-editor-recorder-in-browser-using-ffmpeg-wasm-in-typescript/
Watch My Visual Studio Code IDE Setup Video For Fonts,Themes & Extensions
https://youtu.be/Bon8Pm1gbX8
Hi Join the official discord server to resolve doubts here:
https://discord.gg/cRnjhk6nzW
Visit my Online Free Media Tool Website
https://freemediatools.com/
Buy Premium Scripts and Apps Here:
https://procodestore.com/
Show More Show Less View Video Transcript
0:00
Uh hello guys uh welcome to this video.
0:02
So in this video I'll show you I built
0:04
out a video editor similar to Canva
0:08
uh which is actually built in ReactJS.
0:11
So we are running this application
0:12
locally just to show you the demo right
0:15
here. So if I show you the directory
0:17
structure, this is actually the full
0:19
directory structure of this React video
0:21
editor project similar to Canva. It also
0:24
can record your videos as well. So we
0:26
are using the latest version of react
0:28
here which is 18. We are also using HTML
0:31
to canvas. Also we are using ffmppg web
0:34
assembly library.
0:36
So it's a single page application. It
0:38
directly runs in the browser. We are
0:39
running this locally as you can just see
0:41
here. It's also very easy for you to
0:43
deploy this. The link is given. You can
0:45
directly purchase it. Uh so after
0:47
purchasing it, you will get the code
0:49
from Google drive. And the application
0:53
is divided into multiple components.
0:55
Each component is fully customizable.
0:58
It's coded inside TypeScript. So every
1:00
file is customizable. You can customize
1:02
this video editor. So let me first of
1:05
all show you the video editor. So here
1:07
you simply click the choose file button.
1:11
So whatever video file you want to edit.
1:14
So this timeline editor will open
1:17
similar to Canva. So here you can play
1:19
the video.
1:21
So now the video will play in the video
1:23
player right here. And you also get this
1:26
section to trim the video. So right here
1:30
you basically get these sliders which
1:32
makes it easy for you to trim out the
1:34
necessary portion. So you simply select
1:37
whatever portion that you want to trim
1:38
out. And after that just click this
1:43
export video button. After that once you
1:46
click this f ofmppg will start
1:48
processing it. you click the export as
1:50
MP4 and now the processing will start
1:54
and it will actually trim out your
1:56
video. So once it reaches 100%
1:59
automatically the output video will get
2:00
downloaded.
2:03
So it's a complete project that I
2:05
developed from scratch in ReactJS. If
2:08
you're interested in this, the link is
2:09
given in the description. You can
2:11
directly purchase it
2:13
and it will save you a lot of time
2:15
because you no longer need a special
2:17
software. You can actually do the video
2:20
editing similar to Canva directly in the
2:22
browser.
2:25
So all the files are customizable as you
2:27
can just see here.
2:37
You can even add zoom levels. You can
2:39
also add text as overlay as well. I will
2:42
show you.
2:44
So just wait for the processing to
2:46
complete. And I just want to show you
2:48
the fully you can even manipulate the
2:51
settings as well. Here you can control
2:54
the settings. You can even change the
2:55
quality of the video as well. So you
2:58
will see the video is successfully
3:00
downloaded. This is your output video
3:02
file which is successfully trimmed out.
3:06
And now let's suppose you want to apply
3:08
some zoom effects to the video. So many
3:10
a times you do need to apply zoom
3:12
levels. So you have this zoom effect
3:15
button available. So simply click this
3:17
and as soon as you click the zoom level
3:20
will be automatically applied at that
3:22
location. So here you can actually
3:25
change it the duration of that zoom
3:28
level
3:29
by simply
3:33
here you can check out the position here
3:35
just
3:41
so you can just see how easy it is using
3:44
the timeline.
3:47
So just select.
3:51
So you can select whatever position you
3:54
want to zoom in. You can also scale it
3:57
as well. How much zoom you want to
3:59
apply.
4:01
And uh you can select the transition
4:04
either it can be smooth or instant. And
4:07
now if you play the video if you see so
4:10
it will first of all zoom in and then
4:12
the video will play. So you can apply
4:15
multiple zoom levels as well. So again
4:18
at this location you want to apply a
4:20
zoom level. You basically select this
4:22
location and then
4:26
you can adjust this location. And now
4:29
what happens if I play this you will see
4:31
that
4:36
so professional looking video editing is
4:39
basically done. And similarly we also
4:42
have the feature to actually apply a
4:44
text overlay. So at any location you
4:47
want to apply a text overlay. You
4:48
basically click and simply if you want
4:51
to add your watermark.
4:53
So here you can select the background
4:55
color everything you can customize it as
4:57
you can just see here the text color
5:00
everything. So everything is
5:02
customizable. You can just see here
5:06
you can control the phone size
5:08
everything.
5:11
you click the add text button as soon
5:13
you can control the position as well. So
5:16
you just need to place it accordingly.
5:20
So once you uh do this you can just see
5:24
here
5:30
after that you click the export video
5:32
button and after that again you repeat
5:35
the process and
5:38
now for this it will take a longer time
5:40
because because it is re-encoding the
5:42
video because you have applied multiple
5:44
filters to the video. So for this period
5:47
you do need to wait for some time. So
5:50
once it reaches 100% automatically your
5:52
output video file will get downloaded.
5:55
So that's the
5:57
actual Kalma clone video editor that I
6:00
developed.
6:02
So here you can add your Zoom level text
6:04
overlay. Everything is customizable. The
6:07
full project you can purchase it. The
6:09
link is given in the description.
6:12
And uh if you face any sort of problem
6:14
after purchase, I will definitely help
6:16
you.
6:18
So it's actually having all these
6:20
features. So
6:24
so basically it is encoding frame by
6:26
frame. So it's actually using this
6:30
library. If you don't know about ffmpg
6:32
web assembly, so we have used this
6:34
library to actually execute ffmpg
6:36
directly in the browser. So we are
6:39
actually using this library in our react
6:42
project to actually build out this Canva
6:45
clone video editor.
6:47
So here you can also adjust the preset
6:51
the fallback speed ultra fast.
6:55
Everything is customizable. You can
6:56
change the quality of the video as well.
6:59
You can change the frame rate as well.
7:01
So it's fully customizable. So apart
7:05
from that we also have
7:08
let me also show you we also have the
7:09
screen recorder as well. So if you see
7:13
we have the screen recorder you can also
7:15
do screen recording as well. Very simply
7:19
you basically allow
7:23
you can basically do your screen
7:24
recording as well. So recording started
7:26
successfully. So you can just see here
7:28
you can actually do your screen
7:30
recording and then stop.
7:36
started successfully. So, so you can
7:38
just see here you can actually do your
7:40
can basically do your screen recording
7:41
as well. So, recording started
7:43
successfully.
7:44
So, you can click the download MP4
7:46
button to actually save the recording as
7:49
an MP4. So, it's a fullyfledged
7:51
professional looking Canva clone video
7:53
editor and recorder that I built
7:56
entirely in browser. So, if you're
7:58
interested guys, the link is given in
8:00
the description. Definitely purchase it.