Up next in 10

Build a Image Gallery CRUD App in PHP & MySQL Database Using FancyBox Library in Javascript
Dec 21, 2025
Buy the full source code of application here:
https://procodestore.com/index.php/product/build-a-image-gallery-crud-app-in-php-mysql-database-using-fancybox-library-in-javascript/
Show More Show Less View Video Transcript
0:07
Uh hello friends today in this tutorial
0:09
we will be building a image CRUD kind of
0:11
an application. So we will be displaying
0:13
all the images uploaded images in the
0:15
form of a gallery. So basically you can
0:17
see that this is the application we will
0:19
be building here and for storing all
0:21
these images inside the MySQL database
0:24
guys we will be uh storing all these
0:26
images the title of the image the actual
0:29
image path here we will be storing it
0:31
inside a table. So this is the MySQL
0:33
table that you can see on your screen
0:35
here all the information is stored
0:36
inside the table and we are basically
0:39
displaying the images inside a gridlike
0:42
structure. So we have this cross buttons
0:44
out there. If you click this button, the
0:45
image will be deleted. And you can even
0:48
add a new image. You just need to put a
0:49
title. Choose a particular image file
0:52
and click on the upload button. So let's
0:54
suppose I select a title sample image.
0:57
Click on choose file and let's suppose I
1:00
want to upload this image. Simply click
1:02
the upload button. You will now see
1:04
upload of image is successful. So we
1:06
have successfully uploaded this image.
1:08
You can see this is my uploaded image.
1:11
So in this case guys, you can do that.
1:13
And if I click this image, let's suppose
1:15
if I want to delete this image. If I
1:17
click this, you will now see deletion of
1:19
image is successful. So we are also
1:21
displaying the alert box as well. You
1:23
can now see we can delete all the images
1:26
like this. If I refresh this, you will
1:28
now see it will stay because we are
1:29
storing we are if I browse the table,
1:32
you can now see we are deleting the
1:33
records from the MySQL table uh table.
1:36
So we are this is a current kind of an
1:38
application guys. image cut you will be
1:40
able to create images delete images
1:43
display all the uploaded images right
1:45
here inside your PHP and MySQL database
1:47
so this is the PHP code which is running
1:49
in the back end which is controlling
1:51
this application so let's suppose if I
1:54
start from scratch you will now see
1:55
nothing will be present here the table
1:57
will be empty so this is the actual
2:00
MySQL table guys ID is the primary key
2:02
of the table it is holding this is
2:05
integer temp
2:07
then we have the title of the image
2:08
which is the Vchart value. Then we have
2:10
the actual path of the image which will
2:12
again be a var value 255. And then we
2:15
have two timestamp variables here. Time
2:18
stamp created at updated at time stamp.
2:21
So this is the actual table in which we
2:23
are storing all the uploaded image files
2:25
and also we have the uploads folder
2:28
guys. So basically on the local disk we
2:31
are actually storing these image files
2:33
right here inside this folder with the
2:35
help of PHP. So let's suppose if I start
2:38
from scratch. Let's suppose I give a
2:39
title sample image and click on choose
2:42
file here and let's suppose I upload
2:45
this image. You can now see inside my
2:47
uploads folder this image will be
2:49
uploaded right here inside my local disk
2:51
using PHP and also we have imported this
2:54
entry so that we can display this entry
2:56
on the web page. So this is the entry
2:58
which is added here title image all that
3:01
stuff. If I simply upload another image,
3:05
click on upload. You will now see three
3:08
two images will be there.
3:10
Three. So it is taking the shape of a
3:13
gridlike structure guys. So basically we
3:15
are using some CSS to display these
3:18
images in a grid-like structure. So you
3:20
can now see. So also guys we are using a
3:23
very special library called as fancy box
3:25
inside JavaScript to basically give this
3:28
in a shape of image gallery. So fancybox
3:32
is a basically a jQuery lightbox
3:34
alternative library fancybox.net. We are
3:37
using this library to show these images
3:39
like this. So if I click this images
3:42
that suppose if I click these individual
3:44
images I will I will be able to do it
3:47
inside a gallery like structure. So this
3:49
is actual way by which you can view the
3:51
images in a larger size with the help of
3:53
these fancy box library. So in this case
3:56
you can also see a cross button as well.
3:58
So if you click on individual images,
4:01
you will be able to see the image in a
4:03
large size. So in this way guys, you can
4:06
build out this image gallery inside PHP
4:08
and MySQL. So if you're watching it for
4:10
the very first time, then please hit
4:11
that like button, subscribe the channel
4:13
as well. So we will be able to build
4:15
this application from scratch in this
4:17
tutorial. So for this I have given the
4:19
full blog post link that I have written
4:21
on my website.com.
4:24
So here I have explained each
4:26
instruction in detail alongside with the
4:28
source code and all the images. So let
4:30
me just give this blog post link in the
4:32
live chat. So basically you can download
4:35
all the source code.
4:38
So get the full source code. I have
4:40
given this source code in the live chat
4:42
guys. You can go to it and simply copy
4:45
paste all the source code. So now let's
4:48
get started guys. For this we just need
4:50
to make uh you need to install exam
4:53
control panel guys. This is Apache
4:55
control panel which comes with MySQL
4:57
database installed. So you just need to
5:00
install it. Just go to google.com and
5:02
type here exam control panel and
5:05
[snorts] uh it is a crossplatform
5:07
software. It is also available for Linux
5:09
as well and
5:11
Mac operating system as well. So simply
5:14
download this for your operating system.
5:16
Start the Apache server and MySQL
5:18
database. Go to the admin section and
5:20
here guys we need to create a new
5:22
database. So we will be creating a image
5:25
CRUD database DB. This is the name of
5:29
the database. Simply create and now guys
5:32
we need to create a table. So for
5:34
creating the table we will simply say
5:36
image
5:38
table. We will call this as image table.
5:40
And we will need to have five fields out
5:42
there. Click on go. So first of all we
5:45
will have the id which is the primary
5:47
key length will be 10 and this should be
5:49
auto incremented because it will auto
5:52
increment. This is the primary key. This
5:54
field will be unique. Then we have the
5:57
title of the image guys. This is a
5:58
varchar value. Simply select this 255.
6:02
Then we have the actual path of the
6:03
image which will be stored. So simply
6:05
again select here vchar length will be
6:08
255.
6:10
And then we have to create it guys here.
6:13
basically created at and updated at.
6:15
These are two timestamps variable.
6:18
It is not mandatory that you give it but
6:20
just for the clarity purposes we will do
6:23
it. Time stamp there is a field out
6:25
there which is called as timestamps. So
6:27
let me say yeah this one time stamp and
6:30
time stamp this is basically the uh in
6:34
order to just store the time where the
6:36
when the record was created and delete
6:38
it. So here you need to provide a
6:41
default value which is current time
6:43
stamp current time stamp. So you don't
6:46
need to insert insert this value. MySQL
6:49
always automatically insert the default
6:52
time inside these fields created and an
6:54
updated at. So this is your table guys.
6:56
Simply now you need to simply save this
6:59
table. So table is created. You will now
7:02
see it will contain five fields ID,
7:04
title, image, created at and updated at.
7:06
So you have successfully created the
7:08
table. So now exam is stored inside your
7:12
uh exam folder guys. So uh C drive and
7:16
inside exam ht docs you just need to
7:18
create a new folder here. So create a
7:22
new folder uh which is image crud
7:24
project cd into this
7:29
and open this inside your visual studio
7:31
code. Let me just close the previous
7:33
project and start from scratch. So first
7:36
of all guys we need to say dbconfig
7:39
dotphp. So here we will write the
7:41
connection code for our uh connecting to
7:43
the database. So inside your PHP code
7:46
you will simply write here uh mysqli
7:50
and uh basically here you will write
7:53
your connection code.
7:58
So for the connection code is it is very
8:00
simple guys. Basically uh this will be
8:03
let's suppose I write it at MySQL I and
8:06
this will be equal to new MySQL I and
8:10
here you it will it will take four
8:12
options first is the host name which is
8:14
in this case is local host username is
8:16
root password is empty and database name
8:19
that we have created which is image crud
8:22
app I think let me cross check uh image
8:26
crud db sorry image crud db so here you
8:30
just need to replace the database name
8:32
image cur DB
8:34
semicolon put the semicolon that's all
8:37
so this we have created the connection
8:38
to the database simply close this file
8:41
now we just need to create our index
8:42
dotphp file for our project [snorts] so
8:46
right here guys first of all we just
8:48
need to start the session sess as we
8:50
will be using the session variables
8:52
right here so now to start the session
8:53
we will simply write session start so
8:56
this will start the actual session so
8:59
now guys we need to import the
9:00
dependencies which we will be needing
9:02
for this project. So I have given all
9:05
the source code in my blog post
9:07
description. So simply download this. So
9:10
here we are you can see this is the
9:12
actual title image gallery example. So
9:14
we are including the bootstrap CDN for
9:16
CSS. We are including the fancy box
9:18
actual library CSS. We are also
9:21
importing the jQuery CDN and also jQuery
9:24
fancy box min.js. Simply include all
9:26
these CDNs from my blog post. And now
9:29
inside the body guys we will simply
9:31
showing a simple form to the user where
9:33
they can upload the image files. So
9:35
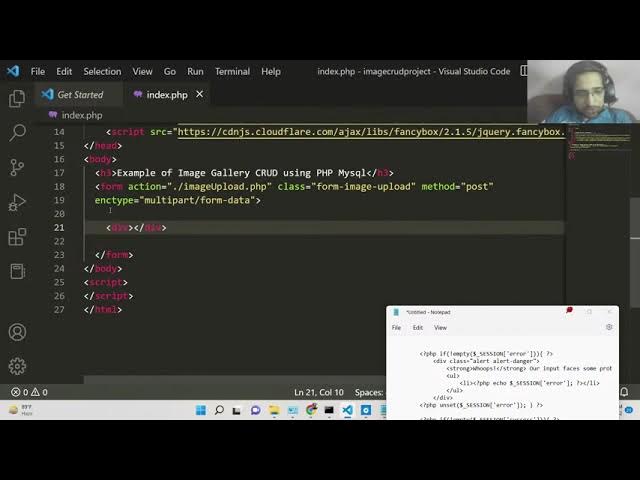
inside this H3 tag we will simply say
9:38
example of image gallery cred app using
9:42
PHP
9:44
MySQL.
9:46
That's it. And after that guys you will
9:48
have a simple form here.
9:52
So this form will be going to a action
9:55
guys which will be equal to we will
9:56
create this file in the root directory
9:58
which will be image upload
10:01
dot PHP. So here we will write the
10:03
upload code. We will be giving a
10:04
bootstrap class to it of form
10:08
image.
10:10
So these are this is I think it's a
10:13
custom CSS class that we will giving
10:15
here form image upload
10:18
[snorts] and uh basically the method
10:21
will be post here because we are
10:23
uploading the images. So method post and
10:25
also one other attribute which is
10:27
encoding type which is multiart
10:31
form data. So this is the attribute we
10:34
need to give. So inside this form
10:36
element guys we will be having uh some
10:39
input fields. So, so first of all right
10:43
here we will have a section to show the
10:46
alert message. So if the file is
10:49
successfully uploaded or not. So for
10:51
this we will be giving a bootstrap class
10:54
which is alert alert danger.
10:57
And inside this we will be basically
11:01
uh showing the message. So inside the
11:03
strong tag
11:06
if any sort of error take place you will
11:08
say whoops our input
11:12
faces some problem like this. So if any
11:15
sort of error take place then it will be
11:17
displaying this error message.
11:20
So inside li tag guys basically we will
11:24
be rendering out the dynamic PHP
11:26
variable of session variables like this.
11:29
So we will be uh sending this uh session
11:32
variables in the PHP script. So if any
11:34
sort of error take place, we will be
11:36
rendering it like this. You can now see
11:39
session error. And similarly guys uh I
11:43
think uh yeah sorry this needs to bind
11:47
like this. So now we need to close this
11:50
div
11:54
[snorts]
11:55
and similarly we also need to unset this
11:58
session variable. So we can do it inside
12:00
PHP like this.
12:08
Uh I think this is the whole code here.
12:11
So let me paste it.
12:14
This is only for the any sort of error
12:16
take place guys basically inside PHP. So
12:19
we are entering out this error. So if
12:23
first of all we will check if the
12:24
session variable is not empty. In that
12:27
case we will show the error and also we
12:29
will later on unset the session
12:31
variables using the unset method inside
12:33
PHP.
12:35
So similarly we will be doing it for the
12:37
success as well guys. Basically this is
12:39
for the success.
12:42
So we will also be sending out a success
12:45
message as well from the session
12:46
variables inside the PHP file. So we are
12:48
just checking it for if the session
12:50
variable of success is set. In that case
12:53
we will be showing a alert dot success
12:55
class of bootstrap. So in this case we
12:57
will showing the alert danger class but
12:59
in this case we will be showing the
13:01
alert success class and uh you can now
13:04
see we will have a simple button to
13:06
close this alert box. So after this guys
13:09
we will show a simple
13:12
input field where we can enter out the
13:14
information.
13:17
So we will have a simple div tag here.
13:20
So
13:22
we will have a simple call empty five.
13:25
So these are all bootstrap classes here.
13:30
So inside this we will have a strong tag
13:33
here. So this will be the label here.
13:36
[snorts] So here we will simply say that
13:38
enter the title of the image. So after
13:40
this we will have a simple input field
13:42
here. We can enter the title here. So
13:45
the name attribute is very much
13:47
important. We will be using it inside
13:48
the PHP. So we also need to give it the
13:51
bootstrap class which is form control.
13:54
And it should be required
13:56
the user must write this unless if it
14:00
doesn't write then we will be showing
14:01
the error message to the user. So
14:03
placeholder will be simply
14:06
enter title.
14:10
[sighs]
14:11
So similarly we will have another input
14:13
field for uploading the image.
14:18
So this will also have the same classes
14:20
of bootstrap
14:22
call MD5.
14:31
So this time the label will be image and
14:34
then we need to again this time input
14:36
type parameter will be file because we
14:38
are uploading a file and name will be
14:41
image
14:44
and class will be again form control.
14:47
This is bootstrap class.
14:56
So after this guys lastly we will have a
14:59
simple button to submit the form.
15:03
So [snorts] class call MD2.
15:08
So we will have a simple button to
15:11
submit the form.
15:16
So we need to give it a type parameter
15:18
to it of submit here. And uh there are
15:21
some bootstrap classes which are there
15:23
which is btn btn success
15:26
and the label of the button will be
15:28
simply upload that's it.
15:32
So I think if you just refresh the
15:33
application if you go to the browser
15:35
here and localhost uh
15:39
image gr app
15:45
I think the folder name is image cred
15:47
project. So if you just type here image
15:50
CRUD project.
15:52
So now you will see there's two input
15:54
fields out there for the title and this
15:56
is for the image file. So if you simply
15:58
click choose file your pop-up window
16:01
will appear and here you will able to
16:03
choose any image file and there is
16:05
upload button out there.
16:08
So also I have given some custom CSS
16:11
that you can apply to this just to look
16:14
little bit prettier. So I have given
16:15
this CSS code here in the blog post.
16:20
So right here if you go to the bottom of
16:22
the blog post you will find the CSS
16:24
code. So simply just
16:28
it's just a few lines of code here. So
16:30
simply copy this code here
16:34
and just before the body tag you just
16:36
need to paste it here.
16:39
So if you just apply the CSS it will be
16:41
perfectly aligned here. it will give
16:44
some border effect to it.
16:48
[snorts] So now we just need to upload
16:50
the image. As you see if just we are
16:53
submitting if we click the upload button
16:55
it it is sending this file to this PHP
16:57
script here which is image upload.php.
17:00
So we need to create this file here in
17:02
the root directory which is image
17:04
upload.php.
17:05
[snorts] So inside this file guys we
17:07
will be writing the code for actually
17:08
uploading the image file to the uploads
17:11
folder.
17:13
So right here you just need to make a
17:15
uploads folder guys inside the root
17:17
directory. So here we will storing all
17:19
the files which will be uploaded by the
17:21
user
17:23
and first of all we just need to start
17:26
the session session start and we need to
17:30
also require the file which is uh
17:32
dbconfig for the database connection
17:35
dbconfig.tphp PHP
17:38
and here we will be having if condition
17:40
guys if is set we will be just be
17:43
checking if the submit button is clicked
17:45
or not. So here we will simply say if
17:48
dollar post and we will simply check if
17:54
the user has entered or uploaded files
17:57
or not. So this is checked in PHP using
18:00
the files array. So image name we will
18:05
be getting the actual name of the image
18:07
using the syntax
18:09
and also we will be doing the same thing
18:11
for the title as well
18:17
because the method is post that's why we
18:19
are writing here post here because it is
18:22
all coming through the post method so
18:25
here we will be giving the name
18:26
attribute that you have given so that's
18:28
why I have talked about that Name
18:31
attribute is very much important. You
18:33
need to give this name attribute. This
18:34
needs to be the same here.
18:37
So [snorts and clears throat] inside
18:38
this if block, so if all these things
18:40
are set to true, then we will be
18:42
uploading the file. So first of all, we
18:44
need to get the name of the image. So
18:47
now to get the name of the image, it's
18:48
very simple. We will be using the dollar
18:51
files [snorts]
18:53
and here you will say image name. So
18:56
this will get the name of the file and
18:58
then from this name we need to extract
19:00
the extension and also the
19:04
actual name without the extension. So
19:06
for this there is explicit method
19:08
available inside PHP which is explode
19:10
method. So here we will simply pass the
19:13
name here.
19:16
So this will give you the extension and
19:18
also the title or the base name of the
19:22
image. So let's suppose for example we
19:24
have the image sample.png.
19:27
So what did this function will do? PHP.
19:31
[snorts]
19:32
So in the earlier step you can now see
19:34
guys we have ex successfully extracted
19:37
the extension of the file. And now to
19:40
construct the image name we are using
19:41
the time method. And for concatenation
19:44
in PHP use we use the dot symbol and
19:48
inside dot and then we will be
19:52
uh concatenating the extension like
19:54
this.
19:56
So this is your image name which is
19:58
constructed and then we will be having
20:00
the temporary location.
20:03
So this is actual logic guys inside PHP.
20:05
So whenever you need to upload any file
20:07
in PHP we first of all move the image to
20:10
a temporary location. And this temporary
20:12
location we can get using this temporary
20:15
name which is there inside the files
20:17
array. So first of all we need to move
20:20
this image to a temporary location. So
20:22
we will use this method which is called
20:24
as uh move uploaded file. This is a
20:27
built-in method which is there in PHP.
20:30
So we will pass the location to which we
20:32
need to which is a temporary location
20:36
and we need to pass it to the actual
20:39
location which is uploads dot the actual
20:42
image name that's it. So this will
20:45
actually move the file to the uploads
20:47
directory guys. So this function so it
20:50
this returns true or false. So if it if
20:53
the upload process is successfully
20:55
happened, we will be
20:58
uh first of all let me check uh let me
21:00
select the image. Let me give it a
21:03
title. Choose the image file. Click on
21:05
upload and uh let me see. You can now
21:09
see if I see this image is successfully
21:11
uploaded in the uploads directory. You
21:13
can now see. So this is successfully
21:15
done. So now let me delete this file
21:18
here.
21:20
And also guys, we need to insert the
21:22
path here of this image to the MySQL
21:24
database so that we can display it
21:26
inside the browser. So we also need to
21:28
insert this entry inside the MySQL
21:30
database. So for doing this we will
21:33
write some uh SQL code here SQL query
21:35
which is insert into and the table name
21:38
in this case is image gallery.
21:42
Uh let me see the table name. I think
21:44
the table is different. Image table
21:47
sorry this is image table. So image
21:50
table [snorts] and here we need to give
21:53
the column name which is title image
21:56
because id is the primary key it will
21:58
automatically get uh included and here
22:01
we just need to give it the values
22:04
the actual values which needs to be
22:06
inserted. So inside parenthesis you will
22:09
just write in single quotes.
22:13
So this is slightly complicated in PHP.
22:16
So whenever you do stuff here,
22:21
so here first of all we need to
22:25
uh insert the title which will be coming
22:27
through dollar post title
22:31
and dot for concatenation
22:37
and after that put a comma here and
22:39
similarly we just need to insert the
22:42
image. So simply copy the first one and
22:45
simply paste it here.
22:47
So here simply change here image. That's
22:50
it.
22:55
So after that simply put a semicolon
22:58
because semicolon is required after each
23:00
statement in PHP. So if you don't put it
23:02
you will receive error. After this guys
23:04
we just need to execute this query. So
23:06
we will simply use the MySQL
23:09
query method here and uh simply pass the
23:13
SQL statement. So this will execute this
23:15
statement here. And now if you let me
23:19
just execute the application. If I go to
23:22
the homepage. If I just enter the title
23:26
choose image file click on upload. So it
23:29
is saying that undefined index image
23:50
dollar post image.
24:04
undefined image on line 17. So on line
24:08
17 we got a error here.
24:11
I think you need to shift this into a
24:13
single line. We don't need to split
24:15
this. So just write it in a single line.
24:17
this PHP code here.
24:20
Again, just refresh your application.
24:41
Sorry, this is image name we need to
24:43
insert not the other post.
24:47
So we have successfully in uh created
24:49
that variable which is image name. We
24:51
need to insert the image name not the
24:53
dollar post title. So that was the
24:55
error. So if you just replace it by the
24:58
variable that we have given which is
24:59
image name. We have successfully
25:01
constructed the image name which is
25:04
automatically will be random every time
25:06
because we are using the time method
25:08
here. So it will return the current
25:09
time. So the file name will be random.
25:13
So just replace it by image name. So,
25:20
so if you now give the title here and
25:23
upload the image, click on upload. So,
25:24
nothing happens. And let me just see the
25:27
table. So, you will see a entry is
25:29
created here. And uh
25:34
the image you can now see it is inserted
25:37
in the table. We have got the ID which
25:39
is the primary key which is every time
25:41
unique one two. We have inserted the
25:44
title. This is the image field here
25:47
created at updated at.
25:57
So let me change this table name.
26:01
Our table name is image table.
26:10
Let me delete this rows here and start
26:12
from scratch.
26:17
So once again just give it a title and
26:19
choose the image file. Click on upload
26:23
and uh refresh it. Now you will see the
26:25
actual image is also uploaded. You will
26:27
now see the image has a random name
26:29
attached to it. So every time you upload
26:32
image a random name will be given to us
26:35
to that image. alongside with the
26:37
extension. Either it can be PNG, JPG,
26:40
GIF or any sort of image extension.
26:45
So now the task remains is to display
26:47
this uploaded image in the browser. So
26:50
for displaying it, we just need to use a
26:52
simple for loop. So again just move to
26:55
the index dot PHP file here. And uh just
26:58
just after your form is ending right
27:00
here,
27:02
we need to shift downwards here.
27:09
>> [snorts]
27:10
>> And here we will be using some bootstrap
27:12
classes. So div class and inside the row
27:16
class here we will be showing all the
27:19
images.
27:22
So we will be attaching list group class
27:24
of bootstrap and also the gallery class.
27:31
So these are all bootstrap classes and
27:34
here we will be binding writing the
27:36
dynamic PHP code here. So we will be
27:38
running first of all we need to require
27:40
the dbconfig file dbconfig do.tphp
27:45
and then we need to write a simple SQL
27:47
query guys which will be
27:51
we don't need to close it
27:53
and here we need to write a simple
27:55
select query guys. So now now we need to
27:57
fetch some data from the table. We are
28:00
not inserting the data. So now to fetch
28:02
some data we will be writing the select
28:04
query here. So select star from the
28:07
table name. Star simply means that we
28:09
need to get all the information from the
28:11
table. So the table name which is image
28:15
C table. [snorts] Simply put the
28:17
semicolon here. Let me cross check the
28:19
table name.
28:21
image table sorry image table.
28:26
So this is the simple query we have
28:29
written. So it will fetch all the table
28:31
which fetch all the information which is
28:32
present inside the table. Now we just
28:35
need to store this result inside a
28:39
variable mysqli
28:41
query. In order to execute the SQL query
28:45
here we will pass this as argument.
28:49
After this guys, you'll get all these
28:50
images inside this images folder.
28:55
Sorry, this needs to be a dollar sign
28:57
here. So now we just need to loop it in
29:01
a while loop. We will use the while loop
29:04
here. And first of all, we need to uh
29:07
change it to associative array. In order
29:10
to change it, we will use the fetch
29:12
associative. This is the PHP method
29:15
which is available.
29:18
So this will be changing this array into
29:21
associative array.
29:23
Here we will close the PHP tag.
29:28
And here we will be writing this call
29:30
SM4. This is all Bootstrap classes.
29:35
Call MD3. Just to make it responsive,
29:39
we are giving these classes.
29:44
[snorts]
29:48
And then we have this thumbnail fancy
29:51
box. So this is actual library that we
29:54
are using to see the images in large
29:58
windows.
30:03
And here we will be attaching the href
30:05
attribute guys of the image.
30:12
[snorts]
30:12
So href attributes.
30:22
So this will be equal to the address of
30:24
the image which is stored. So let me
30:26
just show you the address. So as you can
30:28
see the images are storing inside the
30:30
uploads folder in the root directory. So
30:32
how we can access that? We can simply
30:34
type here http localhost followed by
30:38
your folder name. In this case, my
30:40
folder name is uh image CRUD project.
30:43
So, image CRUD project.
30:47
By default, if you open this, it will
30:48
open the index.php file.
30:51
But now, you need to go to your uploads
30:53
folder.
30:56
So, you can see all these images will be
30:58
shown here. You can go to a specific
31:00
image. This is actual address.
31:03
So, this thing is constant here. We just
31:06
need to write this thing here like this.
31:11
So inside this loop while loop
31:15
inside this a tag.
31:20
Let me paste this thing right here.
31:26
After this uploads, we will be having
31:29
dynamic PHP code running here. Dollar
31:31
PHP.
31:34
And here you need to echo out the actual
31:36
image names. So echo and then the actual
31:40
image name which will be image
31:43
image
31:49
and close this PHP tag right here.
31:53
And also you need to
31:59
close it in double quotes.
32:11
So this is your actual HF tag
32:21
and right here inside this HF tag guys
32:25
we will be embedding our image which
32:27
will be uploaded. So we have the image
32:29
tag. So we need to give it a fixed width
32:32
of let's suppose 800 height of 800
32:38
and we will be giving a bootstrap class
32:40
of it of image responsive
32:43
[snorts]
32:48
and then the most important attribute
32:50
which is the actual
32:53
source attribute. So here the image will
32:55
be shown here.
32:58
So source attribute is nothing again
33:00
this will be the whole address http
33:02
localhost
33:05
uh image grud project / uploads
33:11
and then you need to write the
33:16
dynamic name
33:18
which will be again be coming from the
33:20
PHP block
33:25
echo and then image image image.
33:33
Close this.
33:37
So [snorts] that's it. So now if you
33:40
just refresh your application guys, what
33:42
will happen? Now go to the homepage. So
33:44
now all the you will now see if you
33:46
click this image. Let me open this in
33:49
new tab.
33:57
I think you need to write it in the same
33:59
line.
34:27
Let me open this now. It is 403
34:30
forbidden. You don't have permission to
34:46
let me paste this code once again guys.
34:49
I think I made a typing mistake here.
34:57
So here you just need to change your
34:59
folder name. So in in my case the folder
35:01
name is uh image CRUD
35:06
project.
35:19
So we are embedding the image and title.
35:21
Let me now refresh it.
35:30
Trying to access array offset on value
35:33
of array.
36:10
As you see here guys on line 82 the
36:13
error has taken place.
36:15
So we are not getting the images. So I
36:18
think there is somewhat wrong inside
36:21
the SQL query. So
36:39
uh let me write this full.
36:48
So I have written this. You can now see
36:50
uh we need to change the table name
36:52
which is
36:54
image table.
36:57
Let me cross check
36:59
the image table that we created. Yes,
37:01
image table. This is the name.
37:08
And here also we need to change the
37:11
folder name which is image CRUD project.
37:32
So now if you try to uh
37:37
refresh this. So now you can see your
37:39
actual image is displaying here
37:41
alongside with the cross button and this
37:43
is the title. If you click on this
37:45
image, this image will be displaying
37:47
here. This is the actual address. So
37:49
that was just the typing mistake. So you
37:51
can this can happen in PHP because some
37:54
semicolons are not present and you will
37:56
get an error. So you just need to simply
38:01
go to the blog post and just copy paste
38:03
the correct code. So that's why I've
38:05
written the blog post so that you can
38:08
get the correct source code. So now one
38:11
operation is missing guys. So when you
38:13
click this cross button, we just need to
38:15
delete this image from the database. So
38:17
this red cross button that you see right
38:19
here on the image. When you click this
38:20
button, this image delete.php file is
38:24
not found. So we need to create this
38:25
file here in the root directory. So
38:27
simply create this file here which is
38:29
image delete dot PHP. So this file will
38:32
be pretty simple. Here we will be
38:34
deleting all the files in the uploads
38:37
directory as well. Let me start from
38:39
scratch
38:42
and also
38:44
delete all the entries from the table as
38:46
well. So
39:04
>> [snorts]
39:05
>> So no entries are present right here.
39:09
So if you're watching it for the very
39:11
first time, then please hit that like
39:13
button, subscribe the channel. So if you
39:14
now refresh it, nothing
39:17
uh I think this is previous one. Let me
39:20
open the
39:23
if [snorts] you open the homepage, no
39:24
entries will be present right here.
39:29
So for the delete dot PHP file guys uh
39:34
here basically first of all once again
39:36
we need to start the session. So session
39:38
start. So at the top of each PHP script
39:42
we need to start the session. [snorts]
39:44
And again we need to require this file
39:46
which is called as dbconfig.php for the
39:48
database connection. And here once again
39:51
in the if statement we will use the
39:53
dollar post method. And here we will
39:56
first of all check
40:00
if the fields which are sent from the
40:02
HTML form are not empty.
40:05
We are sending two information. First is
40:07
the ID of the image and also we are
40:10
sending the
40:14
the name of the file. So name of the
40:17
image file.
40:19
So these are stored inside these two
40:20
fields. We are just checking this. So if
40:23
these fields are set to true then we
40:25
will be actually be deleting the image.
40:27
So for deletion we have this delete
40:29
statement a variable inside SQL
40:32
statement delete from image table
40:36
where
40:37
id is equal to
40:43
the past id which we have passed here.
40:46
So this will be dollar post
40:51
id. [snorts]
40:54
So we will be actually uh deleting that
40:56
file from the table. Deleting that path
40:59
not the actual image. So now we just
41:02
need to execute this query. So MySQL I
41:06
query and we will pass the SQL
41:08
statement. So this will actually delete
41:10
the path which is written in the MySQL
41:13
database. So now we just need to
41:14
actually delete this image from the
41:16
uploads folder. So there is a built-in
41:19
method inside PHP.
41:22
First of all, we need to construct the
41:24
path. So this image is present inside
41:26
the uploads directory
41:28
and then the name of the file which is
41:31
present inside dollar name.
41:35
So we have actually got the path of the
41:37
image. Now we just need to use the
41:38
simple method which is available inside
41:41
PHP which is unlink.
41:43
So this actually deletes the file using
41:46
the path. So here we will pass the path
41:48
here like this.
41:51
And then we will be constructing a
41:53
simple session success var variable. So
41:58
here we will simply saying here deletion
42:02
of image is successful.
42:16
>> [snorts]
42:17
>> So now after this we will redirect the
42:19
user back to the homepage. So header in
42:23
order to redirect we type like this
42:25
location and then provide the PHP script
42:27
which is index.php.
42:29
So this will redirect the user back to
42:31
the homepage.
42:34
So instead if any sort of error take
42:36
place if the variables are not set we
42:39
will
42:40
set a error variable please select image
42:43
or write file write title and we will be
42:47
again be redirecting back to the
42:49
homepage. So now if you refresh the
42:51
application try to upload image
42:59
and once one other thing guys go to
43:01
image upload. We again need to say just
43:04
do the same operation here. We also need
43:07
to show the error sorry success message
43:09
when the image is uploaded.
43:15
So here also we will be setting a simple
43:18
success variable uploading of images
43:21
successful.
43:23
So if any sort of error take place we
43:25
will be
43:30
displaying a error message that
43:32
uploading of image is failed.
43:39
>> [snorts]
43:39
>> So this needs to come in the same file
43:46
[snorts]
43:47
like this. So
43:51
if the user has selected let's suppose a
43:54
video file then we will be showing error
43:56
message please select image file only.
43:59
So at the end we are redirecting back to
44:02
the homepage. So
44:05
if you now upload image you will get a
44:07
notification as well alert message that
44:09
you your file is upload is successful.
44:12
You can now see this is bootstrap alert
44:14
message. So if you now click on this
44:16
image we also need to initialize the
44:19
fancy box library. But if you now click
44:22
this cross button your image file will
44:24
be deleted.
44:32
If you check the database,
44:37
no records will be present right here.
44:53
And now to initialize your fancy box
44:56
library guys, I have given that source
44:58
code also in the description.
45:01
So this requires a simple two lines of
45:04
JavaScript code here. So at the bottom,
45:07
so inside your script tag,
45:13
simply copy this to clipboard
45:29
image project. Let me also change this
45:32
folder name as well.
45:43
>> [snorts]
45:43
>> So just refresh your application now.
46:09
If you choose a file here, click on
46:12
upload. Now if you see this fancy box is
46:15
also configured properly. You can now
46:17
see. So in this way guys, you can make
46:19
build a fully fleshed image gallery
46:22
inside PHP and MySQL database using
46:24
fancybox library.
46:27
So if you have liked this video then
46:29
please hit that like button, subscribe
46:31
the channel and I will be seeing you in
46:33
the next tutorial.