Up next in 10

Build a Google Maps Embed in IFrame Code Generator Without API Key in HTML5 & Javascript
Dec 10, 2025
Buy the full source code of application here:
https://procodestore.com/index.php/product/build-a-google-maps-embed-in-iframe-code-generator-without-api-key-in-html5-javascript/
Show More Show Less View Video Transcript
0:00
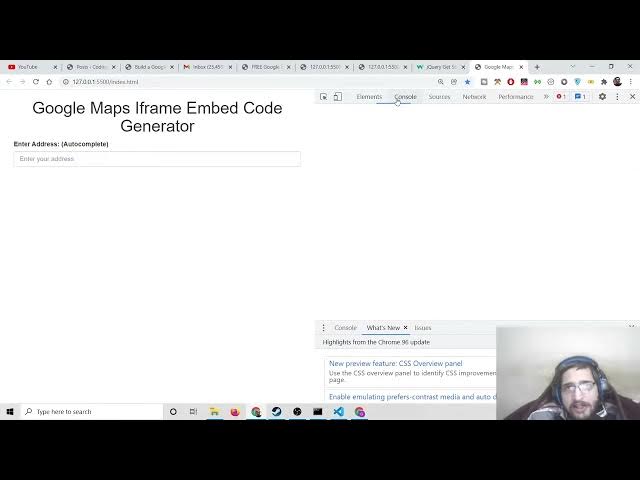
Uh hello friends today in this tutorial
0:02
I will be showing you a new service that
0:03
I added on my website
0:04
freemediatools.com. So basically this
0:07
service allows you to embed Google maps
0:09
embed inside iframe. So the link will be
0:13
there inside video description. So if
0:15
you go to this service here you will
0:16
simply have your widget code here. So I
0:20
will be this tool will give you the
0:22
iframe code here. Simply you need to
0:24
copy this code and simply you can embed
0:27
Google maps inside your website simply
0:29
using this tool. So this contains a very
0:31
simple interface here. You will put a
0:33
location here inside the world. So this
0:35
is autocomplete. You can put any
0:37
location here. So if I type here any
0:40
location here you will see Los Angeles.
0:42
If I select here you can see the map
0:44
will change dynamically. If you change
0:46
the location and then accordingly it
0:49
will give you this code here. Simply you
0:50
need to copy this code and paste it. So
0:54
we are first of all extracting the
0:55
latitude and longitude from a given
0:58
address and then we are converting it to
1:00
a iframe so that you can embed it inside
1:03
your website. So you can see this is a
1:05
map here. You can scroll it accordingly
1:08
like this.
1:10
So any location any pinpoint location
1:12
you can also submit here. Let's suppose
1:15
I submit here my location here.
1:21
You will see some more locations. You
1:23
can submit pinpoint locations
1:26
and accordingly you can just save this.
1:33
So this autocomplete makes it very much
1:36
easy in order to write address because
1:38
without it you need to manually type the
1:40
address and this will take a lot of
1:42
time. But due to this Google
1:44
autocomplete we are making use of Google
1:46
API. So for this you need to having a
1:49
Google cloud console account to submit
1:51
your API key and then you can see you
1:53
can pinpoint the address here
1:55
accordingly it will just uh make the
1:58
dynamic Google map and if you want to
2:00
embed this on your website simply you
2:02
need to copy paste this code here simply
2:04
static code for this I frame tag you
2:07
don't need any sort of API key you just
2:10
need this I frame tag and let me just
2:12
show you a example here if you need to
2:16
embed this inside a website. What you
2:18
will do is that you will create a static
2:20
folder. Let me just create it static
2:24
map. I will go to the into this
2:26
directory. And now to embed this, it is
2:29
very simple. You just need a simple
2:31
index html file. So wherever you have
2:34
placed your website file simply you need
2:36
to copy paste this iframe tag. Don't
2:38
need to do anything. Just open this with
2:40
live server and this is your map here
2:43
which is ready here inside your website.
2:45
So simply you need to copy paste this
2:47
code which this tool gives you after
2:49
entering the location. And you can also
2:51
dynamically just uh decrease or increase
2:55
the height of map like this. You can
2:57
change the width and height as well. If
2:59
you want more height, you will see more
3:01
height will be there. You can just
3:03
scroll more height. You can see you can
3:06
decrease it as well like this. So
3:08
accordingly it will the code will
3:11
change. Again you copy this. And now if
3:13
you paste it you will have uh the code
3:16
will be very less. You will see this is
3:19
a map here which is reduced to the 700
3:22
in height. So you can just play with
3:25
this tool accordingly and [snorts] you
3:27
can generate any sort of Google map and
3:29
then you can embed that I frame inside
3:31
your website. So basically this is
3:33
Google maps iframe embed generator. So
3:36
we will be building this tool from
3:38
scratch in this tutorial. So let's get
3:40
started. First of all, what you need to
3:42
do is that I need to be showing you. You
3:44
need to be having a Google cloud console
3:46
account
3:47
and uh for that let me just show you
3:50
what you need to do is that I have
3:53
already have a active Google cloud
3:55
console account. For that you need to
3:57
add your credit card details and after
3:59
that you just need to first of all
4:01
search for Google cloud console.
4:04
This is the cloud console account. You
4:07
need to sign sign up here. Just simply
4:09
enter your payment details for a free
4:11
demo. Once you have started, simply you
4:14
need to go to the Google map section
4:16
here. Create your own API key. Don't
4:19
copy mine because at the end of this
4:21
video, I will disable it. So, you can't
4:23
use the API key. Simply copy your own
4:25
API key. Paste it. And inside this,
4:29
first of all, we need to have a simple
4:31
template here which will be just change
4:33
the title Google Maps iframe.
4:41
embed code generator. So basically guys
4:44
if you want the full source code of the
4:46
tutorial of the tool this this is a tool
4:50
if you want the full source code you can
4:51
go to the video description link where I
4:53
have written step-by-step blog post this
4:55
is my blog post the link will be there
4:57
inside video description so you can just
4:59
go to this first is this real tool here
5:02
if you click it you will go to my tool
5:04
then we have a single index html file
5:07
here this is actual code of this tool
5:09
here simply inside this uh code here you
5:12
need to just replace your API key right
5:14
at this juncture here in the key
5:16
section. You just need to replace your
5:18
own API key which is I shown you how to
5:20
obtain this using Google cloud console
5:23
account. So first of all guys what we
5:25
need to do is that we need some
5:27
bootstrap in order to build this
5:29
application. So we will search here
5:31
bootstrap CDN. So we need to go to
5:33
w3schools.com
5:35
and go to get started. And here we only
5:38
need the CSS part. So simply copy this
5:40
CSS part. After the title, paste it. And
5:44
we also need the jQuery as well. Simply
5:47
click the jQuery section. Click on get
5:49
started. And also copy paste the CDN.
5:52
And here you after the body, paste it.
5:55
And uh if you go to my blog post, we
5:58
also need this script tag of the Google
6:00
API.
6:01
So here you paste it here after the
6:05
script tag. So here you need to replace
6:07
your own API key guys. So inside the API
6:10
key section, I will replace my own API
6:13
key. Simply copy this
6:16
and paste it.
6:18
So I will disable this API key. So don't
6:20
copy my API key to make request.
6:23
So you can see just replace my API key.
6:26
That's it. Now in order to load a simple
6:29
map, it is very much easy. This is for
6:31
just autocomplete section. This is not
6:33
actual loading for a map. This is just
6:36
for just making for this this one
6:40
autocomplete. So for this autocomplete
6:42
to work we are copy pasting our own API
6:44
key. So for this guys we will use the
6:47
container class. So bootstrap inside
6:49
this we will have the heading in the
6:51
center position. We will say
6:55
Google sorry let me write it once again.
7:01
The heading will be once again the same
7:03
Google maps I frame embed code generator
7:13
and then we will have a simple form. We
7:15
will give it a ID which is form
7:24
and inside this we will have a input
7:26
field and we will be giving it a id of
7:29
uh search address
7:34
which will be of type text here and here
7:36
the placeholder will be enter your
7:38
address.
7:40
We can also give it a label.
7:45
Enter address
7:51
and then in the bracket we can say this
7:53
is autocomplete field
7:56
and uh we can also give it a attribute.
7:58
It should be required. You need to fill
7:59
out the address
8:03
and we need to surround this guys with a
8:05
bootstrap class or form group and
8:08
container also. So just surround this
8:11
inside the div here. That's it.
8:15
We also need to give it a class of form
8:18
control which is a again a bootstrap
8:20
class. So now if you open your browser
8:23
you will see this autocomplete field
8:24
here. So if I type address here nothing
8:27
will work because we haven't written the
8:28
JavaScript code. So for that we need to
8:32
write some code here. So just after this
8:36
make a script tag. And now to initialize
8:39
the autocomplete is it is very simple.
8:43
We need to write we need to get the
8:45
reference here of the field here. So we
8:48
can use
8:51
document getelement by id. So here we
8:54
can pass the id which we have given to
8:56
this uh input [snorts] field. We have
8:58
given the id which is uh you can see
9:02
search address. So we can pass that id
9:05
search
9:07
address. So after getting the reference
9:09
it becomes very much easy. What you need
9:11
to do is that
9:15
we need to initialize the code here. So
9:19
we have google dot mapaps dot
9:24
event dot
9:26
add event listener. So whenever we are
9:29
working with the Google API we have this
9:31
add event listener. So inside this we
9:33
will pass
9:35
the window object
9:39
and we have the load method. So whenever
9:42
it is loaded inside
9:44
we will call this
9:47
this function will automatically execute
9:49
the third argument
9:54
and inside this we will make another
9:57
variable which is places.
10:00
And now we will initialize here new
10:04
Google
10:05
maps.places
10:09
dot autocomplete.
10:15
And here you need to pass your uh
10:17
reference which is stored inside the
10:19
address variable. That's it.
10:25
And basically if I console log it places
10:28
here
10:31
and now if I refresh it.
10:34
So you need to right click and click on
10:36
the console here. So it is saying to us
10:38
that inside this this is not a function.
10:43
Let me just see if you go to the blog
10:45
post here. If you just see here
10:54
Google Maps, let me just cross check.
10:56
Google do maps doevent
10:59
dot add domer. Sorry, this is this needs
11:03
to be add DOM listener dot not add
11:05
eventlister. Add DOM listener.
11:09
And now if you refresh it guys, you will
11:10
see
11:13
in the console this object is returned
11:15
to us which gets all the properties
11:18
here. If you type anything here, nothing
11:21
will be printed or you will see the
11:22
autocomplete which is there which is
11:25
appearing here. You will see all these
11:27
autocomplete suggestions are there. So
11:30
we have successfully binded the
11:31
autocomplete. Now we simply need to get
11:33
the results which the user had typed
11:35
here. For that we have another event
11:37
here.
11:39
which is uh google.maps.event
11:43
dot addlister
11:46
and we have a listener which whenever
11:48
the uh places is changed so we will
11:52
first of all provide the places as the
11:53
first argument and then the event name
11:56
which is called as place changed place
11:59
underscore changed. So whenever the
12:02
place has been changed in inside the
12:04
input field this automatically the third
12:07
argument would be call back function and
12:09
here we can just console lock the place
12:13
that's it.
12:15
So every place has some coordinates
12:17
latitude and longitude. If I just uh
12:20
clear out the console if I write a
12:22
location here in the world and now you
12:25
will see place is not defined. I think
12:28
is it needs to be we need to call it
12:30
sorry it needs to be places not place.
12:33
So just change it to places and once
12:36
again clear out the console here and
12:38
type your location and you will see
12:40
every time it will return to us this
12:42
object. Now to get the actual place guys
12:45
it is very simple. We need to get the
12:48
actual place dot get place. So this is a
12:51
method we need to call it get place. And
12:54
now it will show you the actual place
12:56
that the user has typed. So if you
12:59
refresh it, if you once again clear out
13:01
the
13:02
you will see now this is the actual JSON
13:05
response which is returned to us
13:07
alongside with all the information that
13:08
we will need. Icon icon background color
13:11
name of the place here photos it will
13:14
also return all the photos as well. All
13:16
that stuff we don't need the space uh
13:19
photos. We just need the location here
13:21
which is uh which is latitude which is
13:24
there you can see the latitude and
13:25
longitude properties. So for this we
13:29
will get the latitude and longitude in
13:32
this. So now we will need to declare
13:34
some variables right here at the top
13:36
where lat long and then address that's
13:40
it.
13:43
So after that we can initialize the lat
13:45
which is we can get the latitude by this
13:47
statement which is place dot geometry
13:51
place dot geometry
13:56
and inside this property guys there is a
13:58
location property
14:00
dot lat this is a method and similarly
14:03
for long which is place dot geometry
14:06
dot location dot long that's it so
14:10
respectively it will get sorry this
14:12
needs to L and G latitude and longitude
14:15
and it will store it inside our uh the
14:18
respective variables. If I just console
14:20
log it, you will see what I meant by
14:22
this.
14:25
So if I refresh it, you will see
14:29
if I type a location here. Let's suppose
14:31
this location. So it will it is saying
14:34
place is not defined. So oh sorry, we
14:37
haven't stored this reference. So we can
14:40
just declare a variable here. place
14:42
places dot get place
14:47
and now this will be the error will be
14:49
removed. So if I once again clear out
14:50
the console
14:53
and now you will see it will print out
14:54
the latitude and longitude. Now we
14:56
simply need to just plot this latitude
14:59
and longitude and just show the map to
15:01
the user. It is very easy. Now we need
15:04
to have uh the address here. We have the
15:08
value here which we have declared the
15:09
variable. So this will be template
15:12
string here where it can allow us to
15:14
write multiple lines of code. So here we
15:16
will have the iframe tag here
15:20
and inside this iframe tag guys we have
15:22
a width property. So for now we will be
15:26
having width to 500 and height to 500.
15:29
This is the height and the width of the
15:30
map Google map which will be stored on
15:33
the shown to the user. So then we have
15:36
the source property. source property we
15:39
have [snorts] and inside this source
15:42
property guys what we need to do is that
15:44
we need to write this
15:44
httpsmaps.google.com
15:46
google.com
15:48
and then we need to place so right here
15:51
/maps
15:52
and question mark Q is equal to and Q is
15:57
equal to the latitude. So where here we
16:00
need to place our latitude which is
16:02
latitude.
16:05
So lat variable
16:07
and then we need to put a comma and then
16:11
we need to place our longitude which is
16:13
dynamic which is coming from the user
16:16
and then we need to have and symbol
16:19
which is hl
16:21
and then we have is equal to es. So this
16:25
is just the static code that you need to
16:27
write here. Semicolon Z is equal to
16:32
14
16:34
and symbol
16:37
and then we need to say output
16:41
is equal to embed. That's it. So we are
16:44
just embedding the map on the website.
16:46
So that is a property. And now lastly we
16:48
need to close this iframe tag iframe. We
16:52
need to close it.
16:55
And now after having this we need to add
16:58
this to the DOM. So it is very simple.
17:00
We need to declare inside our index HTML
17:03
after the form we need to have a result
17:06
uh result div. So inside this ID here we
17:09
will target it using jQuery a dollar
17:14
result and we will change the HTML and
17:17
we will pass the address that we have.
17:21
You can see like this.
17:24
And uh now basically the maps will show
17:27
if I just show you. If I type a
17:30
address here and now you will see
17:33
dynamically the map will show here. This
17:34
is a location.
17:36
If I type here, if I change this to Kat
17:39
Place, New Delhi. And now you can see
17:42
the map will change here to Canot Place.
17:44
You will see this is the address which
17:46
is mentioned here. You can also see the
17:48
larger map as well by going to the
17:50
Google website here to show their
17:52
website on the official website to just
17:55
see the larger map. So this is the way
17:58
guys. Now we can also make this width
18:01
and height dynamic in nature by having
18:03
the input field so that the user can
18:06
select. So just move to this
18:10
and after that we will have another let
18:13
me format this document.
18:16
So after that we will once again have
18:18
form group and container. So inside this
18:21
we will have the
18:26
input form control
18:30
and this will be type range because this
18:32
is will be a slider where the user can
18:34
select the width and the height. We will
18:36
give it the ID of width and the max
18:39
value will be of
18:41
1500. The minimum will be of 100 and the
18:46
value is will be of
18:49
let's suppose 800.
18:52
And now guys if you just see here you
18:54
will have the slider here which is for
18:56
the width. So we can provide a label
18:59
here simply of uh label width width of
19:03
map.
19:05
That's it. And similarly we will have
19:08
for the height as well.
19:11
So we can say label
19:14
for height. So we can say height of map.
19:20
So once again this will be a slider. So
19:22
the user can select input type range and
19:28
the id will be of simply of height
19:32
and uh once again we will give it a
19:34
class of form control.
19:38
So once again we need to attach the
19:39
properties which will be of max which
19:42
will be let's suppose in this case will
19:44
be 900 the min will be of 100 and the
19:48
value will be of 600
19:52
and now you will see we have the width
19:55
width and height of the map here similar
19:57
to this one.
19:59
So now we simply need to plug this
20:02
values also we need to get these values
20:04
inside the JavaScript. It is pretty
20:07
simple. So whenever we initialize this,
20:10
so we will declare two more variables at
20:11
the top width and height which will
20:14
store the width and height of the map.
20:17
So instead of passing the static lo
20:20
width and height, we can pass dynamic
20:22
simply we will replace here.
20:26
So we will target it by the ID which we
20:28
have given to us width and we will get
20:30
the value by dot. That's it. And for the
20:33
height as well we will pass it the
20:35
dynamic value which is uh
20:41
height dot val that's it and now guys
20:45
you will see
20:50
wherever the application let me just
20:52
refresh it so basically if I enter
20:54
address here let's suppose I enter this
20:56
address you will see the map is loaded
20:59
and now if I want to change the width
21:03
It is not changing. You can see if I
21:05
change the slider, it is not changing.
21:08
But
21:09
in the next time if I enter the address
21:12
you will see the width will be changed.
21:14
You will see the width is larger. Now if
21:16
I change the slider the wid the map is
21:19
not changing because we haven't written
21:21
the code because whenever this uh slider
21:25
changes this fire event. So we need to
21:27
write the event here which will be
21:29
simply dollar dot
21:32
and inside this we will say width and
21:35
there is a change change event here
21:38
which will be fired automatically when
21:40
this value changes of the slider. So
21:44
this we need to repeat it for the height
21:45
as well. So we will say height
21:49
change and here we need to write for the
21:52
height as well. So we need to simply
21:55
copy paste this code which we have
21:56
written here. Simply what we need to do
21:59
is that
22:01
we need to copy paste this code here.
22:02
Simply copy and paste
22:07
paste it. And here also that's it.
22:12
And now if you refresh it guys you will
22:14
see if I write address here
22:18
if I change the width here you will see
22:19
the width will change. If I change the
22:21
height the height will change.
22:24
So now this thing is already working.
22:26
Now we need to show the code actual code
22:28
which will be shown to the user inside
22:30
the text area just below the map. So
22:33
just declare after this uh uh div here
22:37
we need to declare a text area. So
22:40
inside this we will wrap this inside
22:42
form group and container text area and
22:45
we will give it a id of code. That's it
22:50
code.
22:52
And we will give it a ID of oh sorry
22:55
the placeholder will be
22:59
so inside this we will give it a label
23:01
not a placeholder. So we will say
23:05
code Google map widget
23:11
embed code
23:14
like this
23:18
I frame widget code.
23:21
So now if you see this will have this.
23:23
So we haven't give it a class of form
23:26
control. So we would need to give it a
23:28
class of form control.
23:31
And now it is looking good here. So
23:34
simply we need to
23:38
so whenever we are displaying this we
23:40
need to inside this script section
23:43
whenever we are getting this code here
23:44
we need to
23:48
we have given this id of code here. So
23:54
we need to target it and the value will
23:56
change here to simply address. That's
23:58
it. So whenever we are doing it for the
24:01
width as well for the height as well. So
24:03
just do it at the bottom code dot value
24:08
will be changed to address that's it.
24:11
And here also when we are doing it for
24:14
the very first time so right here at the
24:16
at the bottom which is code dot val will
24:20
be changed to address.
24:22
And now you will see if I enter any sort
24:24
of location in the world here. If I type
24:28
this, you will see now at the bottom you
24:31
will get the iframe code here. Simply
24:32
copy this code and paste it inside your
24:34
website to embed the Google map. This
24:37
Google map [snorts]
24:40
and this will change accordingly. If you
24:42
write a different address
24:45
like this, the code will change. If you
24:48
also change the width and the height,
24:50
you will see the width will be changed
24:52
automatically. If you decrease the
24:54
height, it will change the height
24:56
accordingly. So now the application is
24:58
working guys. So the simple thing is
25:00
remaining. If I load the page for the
25:02
very first time, it is not loading any
25:04
sort of Google map. So this is very
25:06
easy. Simply copy paste any code of your
25:09
choice, any latitude and longitude and
25:12
simply you need to paste it inside your
25:14
from my blog post. You can do this.
25:17
Simply copy paste this iframe tag. So
25:19
whenever you load it for the very first
25:21
time, simply paste it
25:24
uh just paste it after this
25:30
uh height. Simply paste it
25:34
and also inside this uh
25:37
sorry you need to paste it inside this
25:39
div section which
25:42
and also you need to paste it inside
25:44
this text area also. Simply paste this
25:47
code here. That's it.
25:50
And uh
25:56
if you just refresh it for the very
25:58
first time, you will see some kind of
25:59
Google map there and also this code as
26:02
well. So now you can change, you can
26:03
write any address of your choice and the
26:06
map will change. So this was the
26:09
application guys. Hopefully you like
26:10
this application which is Google maps
26:13
iframe embed code generator. If you want
26:15
to use my tool, you can go to the video
26:18
description link
26:19
freemediatools.com/googlemaps
26:21
iframe where you can use this tool. And
26:24
thanks in much for watching this video.
26:26
If you want the full source code, you
26:27
can go to the video description link
26:28
where my blog post. Just copy paste the
26:31
source code. Please like the video,
26:33
subscribe the channel and I will be
26:35
seeing you in the next