Up next in 10

Build a Google Drive Clone Using PHP & MySQL Database With Authentication in Browser Using JS
Dec 21, 2025
Buy the full source code of the application here:
https://procodestore.com/index.php/product/build-a-google-drive-clone-using-php-mysql-database-with-authentication-in-browser-using-js/
Show More Show Less View Video Transcript
0:02
Uh hello guys, welcome to this uh live
0:04
stream. So in this live stream, I will
0:07
basically show you uh a Google Drive
0:09
clone that I developed inside PHP and
0:12
MySQL database and it runs in the
0:15
browser and it has full authentication
0:18
and full features of a Google Drive
0:21
application where you can actually
0:23
upload, download or share your files
0:26
with other people as well. So this is
0:28
actually the login screen right here. If
0:31
you have a exist existing account in
0:33
this application, you can login by
0:35
entering your email address and password
0:37
or there is a sign up option as well. So
0:40
if you click the sign up button, you can
0:42
create your account right here. And
0:44
right here you can basically fill out
0:47
the information first name, last name,
0:49
email address and password. So let me
0:51
just register a new account in this
0:53
application. So in this MySQL database
0:56
you will basically see guys there are
0:58
three tables. First table is for the
1:00
files and this is actual structure we
1:04
are basically storing the file ID which
1:06
is actually a primary key of the table
1:09
which is a foreign key and user ID file
1:12
name the path of the file and the size
1:15
of the file and the uploaded date of the
1:18
file. All these properties we are
1:20
storing it in the files table. The
1:22
second table is for the permission. So
1:24
whenever you share your file with other
1:26
users, this permissions table will come
1:28
to come into the picture. And the third
1:30
table is the user table. So we are
1:33
storing information about the user such
1:35
as the ID of the user, email, password,
1:38
the first name and the last name. So all
1:40
these four details we are basically
1:43
fetching from the user, first name, last
1:44
name, email address and password. Let's
1:47
suppose if I enter it,
1:51
you can see that we are entering the
1:53
first name, last name and then we are
1:55
basically getting the email which is let
1:58
me write here [email protected]
2:00
and password 1 2 3 4 5 6. If I just
2:04
write here validation will also be
2:06
there. Your password length is six. Your
2:08
password must be at least 8 characters
2:11
long. So there is also this validation
2:14
which is also available to you. So let
2:16
me just enter a 8digit password
2:21
and enter. And now you can see that if I
2:23
refresh the user table a record has been
2:26
inserted. If I just show you gotham at
2:29
the redgmail.com password is 123 first
2:32
name last name. So you can see that. So
2:35
now I can simply log here and simply
2:38
type here botamgmail.com
2:42
1 2 3 4 5 6 7 8. So you will see that we
2:46
will basically login inside our Google
2:48
Drive clone application. It's a mini
2:50
clone. It's not a full clone that you
2:52
see in Google Drive, but it's has the
2:54
full functionality, full minimum
2:57
functionality that Google Drive offers
2:58
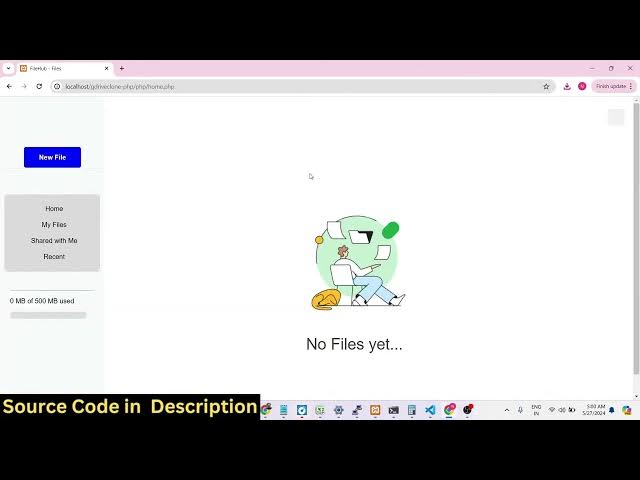
you to actually upload files. Uh
3:01
basically just see all the files right
3:04
here. If I upload the files right here,
3:07
this you can see the file has been
3:09
uploaded there. You will see this
3:11
notification. And now you can actually
3:13
go to your my files and your file will
3:16
be you can see that if you refresh the
3:19
file will stay because we are actually
3:21
storing the path in the files table.
3:23
Right here you will see the file has
3:25
been uploaded and it has been inserted
3:27
in the MySQL table. This is actual file
3:30
name. This is the full path here where
3:33
the file has been stored. This is the
3:35
file size and the upload date. So all
3:37
this information we are displaying it on
3:39
the browser as well which is a date and
3:41
time. So there is a download button if
3:44
you want to download this file. So the
3:46
down if you click download the file will
3:48
get downloaded. This is actual image
3:50
file that we uploaded. We also have a
3:52
delete button dustpin icon. If you click
3:54
on this individual image you can see the
3:56
live preview of the image that you
3:58
uploaded right here. This is your image
4:00
that you are having
4:03
and we can upload some more images like
4:06
this.
4:07
Now there will be two files if you
4:16
so two files have been uploaded. You
4:18
just need to refresh. So you will see
4:20
that you can see if you want to upload
4:23
the same file then it will show this m
4:25
message to you that already that file is
4:28
present. You can see that. So if you
4:31
refresh
4:34
so you can see that there are three
4:37
files right here. You can even delete
4:39
this file as well. Now if you refresh
4:41
the files table there will be three
4:42
entries which will be added right here.
4:45
You can see that we can even
4:47
individually delete the file as well.
4:49
Now that file has been successfully
4:51
deleted. If you refresh the table as
4:53
well that file will get removed right
4:56
here. So this is actual file that we
4:58
uploaded. This is the first file.
5:02
So now let's suppose I want to share the
5:04
functionality. If I click the share
5:06
button, there will be in Google drive
5:09
you have the sharing functionality as
5:11
well. If you want to make your file
5:13
public, you can share it with friends as
5:15
well. So there is a functionality as
5:17
well. Here also if you click the share
5:19
button, you can enter the email address
5:21
to whichever person that you want to
5:23
share this file to you. So let me
5:26
register a new account right here. Let's
5:28
suppose in a new tab I put again sign up
5:32
for a new let's suppose I say niha and
5:38
then I'll register account email address
5:41
like this
5:46
password
5:49
create account. So if you refresh now
5:51
there will be two accounts right here.
5:53
If you go to the users table, there will
5:55
be two accounts [email protected].
5:58
And now we have two accounts right here.
6:00
So if you basically search for this
6:02
email, just type here. If you just
6:05
search for a random email which doesn't
6:07
exist, you will see this error. Email
6:09
not found in database. And if you
6:12
basically write the correct email
6:13
neargmail.com,
6:16
click on share. So basically you will
6:18
see that you have successfully shared
6:20
the file and you will be redirected to
6:22
the homepage. And now if you loging with
6:24
this account right here,
6:28
enter the email and the password. Click
6:30
on login and go to this option shared
6:33
with me. So if you go to this option
6:36
shared with me, you will basically find
6:38
this file guys which you have shared
6:39
with this account. If you
6:44
basically see
6:46
this file has been shared with you, you
6:48
will see that. So
6:52
there is also a recent option as well.
6:57
You can see that
7:00
if you click share again go to this
7:01
option. So you can see that. So in this
7:05
way if you refresh now there will be
7:07
this uh entry will which will be added
7:10
right here which is go to the
7:11
permissions you will see this entry will
7:13
get added. So this permission you can
7:16
see that the user can download the file
7:18
as well. If you go to shared they can
7:21
download the file as well. So you have
7:23
granted the permission to the user that
7:25
they can download the file and you can
7:26
see that the other user can actually
7:29
download your file and they can view
7:30
their file as well. So it's a great
7:32
functionality of Google Drive that you
7:34
see inside Google Drive they can share
7:36
your files as well.
7:47
So
7:49
you can also see this uh 2.41 mgabytes
7:53
of 500 MB used. You also see this uh
7:57
progress bar in Google Drive as well.
7:59
whenever you want to upload files. So
8:02
this has also been seen right here.
8:06
So now there will be three files you
8:08
will see that
8:10
you can add some more files right here.
8:14
Again you can share this file again with
8:16
the same email address. Click on share.
8:20
And now if you refresh there will be two
8:23
files which will be shared with this
8:25
person. You will see that. So they can
8:28
delete this file. Permission entry
8:31
deleted successfully. So there will only
8:34
be single file remaining. So they can
8:36
even delete the file as well. So
8:40
in this way guys you can see that.
8:46
So now inside the home section I can in
8:49
this account we can basically upload a
8:51
file right here. So there will be this
8:54
file which will be there.
8:58
So
9:02
you can see you can see that guys there
9:05
is also a unshare option as well. If you
9:08
want to unshare this uh file right here.
9:10
If you don't want to share this we can
9:12
click the unshare option and now that
9:14
file will get removed from this section.
9:17
So now there is no file available right
9:19
here. So in this way you can do that.
9:22
You can download delete everything you
9:24
can do. You can also delete this file as
9:27
well. Share this file. It's a mini
9:29
Google Drive clone. If you want this
9:30
script guys, the link is given in the
9:32
description. You can directly get the
9:34
full source code of this PHP and MySQL
9:36
Google Drive clone. And uh uh the link
9:40
is given. You can purchase it from my
9:42
website Google procordstore.com.
9:45
After you purchase it, you will be
9:47
redirected to Google basically Google
9:49
Drive where you can actually download
9:52
the zip file and you can extract it.
9:54
This folder structure will come in which
9:56
will get the CSS code, JavaScript code.
9:59
This is a PHP code. All the scripts are
10:00
available. This is the actual index.php
10:04
script which will get executed. For
10:06
executing it guys, you do need exam
10:08
control panel or any hosting platform
10:10
that you are basically hosting your
10:12
website. So this is actually a
10:14
cross-platform software to actually
10:16
execute PHP and MySQL applications. So
10:19
just write exam control panel. If you on
10:22
Google you can simply download this
10:25
before executing it. So by default it
10:28
gets installed in the C directory. If
10:30
you install it, go to the C directory
10:33
and there is will be exam directory
10:35
available HT docs folder and right here
10:38
upload your zip file and extract it and
10:41
simply you can access your local host
10:44
Google drive clone whatever folder name
10:46
that you have given your application
10:48
right here. Simply open and then you can
10:50
login with your credentials whenever you
10:52
register a user. First of all we need to
10:54
register a user by clicking the sign up
10:56
button and then you can login your user.
10:59
So now I will basically show you guys
11:01
how I
11:04
uh configure the database. So what I
11:06
will do is that I will simply delete
11:07
this database by going to the SQL
11:10
section drop database
11:13
file share. So whenever you will be
11:15
downloading the zip file after the
11:17
payment. So the very first step you need
11:19
to do you need to create the database uh
11:22
for this specific application you need
11:24
to call this in the we have this SQL
11:27
file given to you. You need to directly
11:29
import this file in the database. You
11:31
need to call your database as fileshare
11:33
because we have mentioned this database
11:35
right here. If you call it another name
11:38
then that will create problem. So just
11:40
create uh go with the default name which
11:42
is fileshare
11:45
in all small letters. Click on create.
11:48
Your database has been created. After
11:50
that we need to click on the import
11:51
option. And then you need to import the
11:54
SQL file that you got. Just go to your C
11:56
directory wherever you have extracted
11:59
the project.
12:02
So right here we will basically import
12:04
this file which is a SQL file. Click on
12:06
import. So you will see all the tables
12:09
will get imported. This will be the
12:11
files table. This will permission table.
12:13
This will be the user table. And you can
12:15
see that. So
12:19
these are all the tables right here. And
12:21
after that what we need to do we just
12:23
need to go to your login page
12:26
click on sign up and let's suppose
12:34
you give the first name email address
12:40
password click on create accounts and
12:42
you will basically see in the users
12:44
table
12:46
one entry will be added you will see
12:48
that hers at the rate you can login
12:54
If you write incorrect password, you
12:56
will basically get this notification
12:58
that your password is incorrect.
13:06
So you are successfully logged in and
13:08
now you can upload your files.
13:23
So you can see that now the file has
13:26
been uploaded.
13:30
You can see the live preview. And if you
13:32
see in the files folder, the entry has
13:36
been successfully added. And uh we can
13:40
add some more files as well.
13:44
So it's a very good project guys if you
13:46
are in a company if you are in a college
13:48
then it's a very good project to show
13:50
you to your teachers or to your employer
13:53
it's a very good mini Google drive clone
13:56
in PHP MySQL if you are interested the
13:58
link is given in the description you can
14:00
directly purchase it from my website
14:02
procodestore.com
14:04
and uh if you're watching it for the
14:07
very first time please hit that like
14:08
button subscribe the channel and again
14:10
if you go to the next app you You can
14:13
register a new account. Click on the
14:14
sign up button. All this authentication
14:17
is there. You will see that.
14:27
So now you can login with this account.
14:33
So [snorts] now we are successfully
14:34
logged in.
14:37
We can basically
14:40
so the file is uploaded. You can see
14:43
this is actual file with live preview.
14:46
And now if you want to share this file,
14:47
click on the share option and then you
14:49
can basically search for the email
14:51
address hersthegmail.com
14:53
and just click on share. So you will
14:56
basically see
15:02
uh some
15:03
okay I think we put the email address is
15:10
we will also see 2.45 mgabytes of 500
15:13
megabytes use.
15:20
So now you can see that I shared this
15:22
file. You can even share this file as
15:24
well. You can see we have shared this
15:25
file with this email address which is
15:27
nhathegmail.com.
15:29
If you go to this email address and go
15:31
to this shared with me section, you will
15:33
see the file has been shared with you
15:35
and uh you can see that
15:38
you can even unshare this file as well
15:40
if you want to. Let's suppose if you
15:42
want to also share this file
15:47
this this file as well, you can simply
15:49
share it as well. Share
15:55
So click on unshare. You can basically
15:57
unshare your file. And now that file
16:00
will be removed. There will only be one
16:02
file available. It will be I think it
16:04
will be removed. Yeah.
16:06
So no file has been there.
16:13
So you can see unshare option is there.
16:16
So you can upload a new file.
16:21
if you want to share this file also.
16:31
So this is the thing guys if you are
16:33
interested in purchasing this project
16:35
the link is given in the description.
16:36
It's a fully fledged Google Drive mini
16:39
clone and thank you very much for
16:41
watching this video
16:43
and uh I will be seeing you in the next
16:46
live stream. Until then thank you very
16:48
much.