Up next in 10

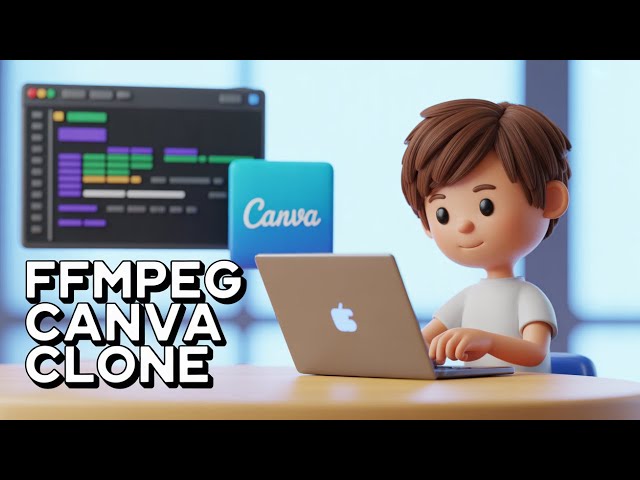
Build a FFMPEG Canva Clone Video & Image Editor in Browser Using Fabric.js & GIF.js in Javascript
Dec 13, 2025
Buy the Full Source code of Application here:
https://procodestore.com/index.php/product/build-a-ffmpeg-timeline-video-editor-in-browser-using-fabric-js-gifencoder-js-in-javascript/
Show More Show Less View Video Transcript
0:00
Uh hello guys, welcome to this video. So
0:02
in this video I basically uh designed
0:05
this uh uh video editor and uh it's
0:09
advanced image and video based editor
0:11
with timeline. You can call it as Canva.
0:14
Canva as you know it's a very famous
0:16
website which allows you to do image and
0:19
video editing inside their website. So
0:21
it's a browser based application guys
0:23
and it is it is making use of ffmpg and
0:26
various libraries in the background and
0:28
uh it is also using fabric js nmjs
0:33
a lot of libraries are installed in
0:34
making this complex application. It's
0:36
entirely coded in JavaScript HTML and
0:39
CSS. So no serverside code is involved
0:41
right here. It's entirely works in the
0:43
browser and this is actual interface. So
0:45
first of all let me walk you through the
0:47
actual uh application. This is actual
0:50
timeline that you see with live preview.
0:52
This is my canvas. This is actual
0:54
timeline that you see. We can basically
0:56
play the video and then we can export
0:58
the video to actually webm video. We can
1:01
export it to a animated GIF file or we
1:04
can also export this to a static image.
1:07
So if you're doing image editing so so
1:09
let's suppose if I want to change the
1:11
background color we can open this color
1:13
picker and then we can change the color
1:15
background color of the canvas whichever
1:18
color that you need to say you can
1:20
basically select whichever color let me
1:22
select this color and also in the canvas
1:25
settings we do have this duration
1:27
property. If I set it to 8 second
1:30
because this is this value is in second
1:33
and you will see the duration of the
1:35
canvas will now be 8 second.
1:39
So then we can also manipulate the size
1:43
of the width. We can control it by this
1:45
value. If you want 100 by you can see
1:48
that. So automatically it changes live
1:50
preview is there. So whichever design
1:54
that you are designing a logo image
1:57
actually you're doing a gift you are
1:59
animating the videos you want to edit
2:03
your images all you can do it in a
2:05
single tool let's suppose we have
2:07
various presets available as well if
2:09
you're designing it for particular
2:12
social networks let's suppose you're
2:14
doing it for YouTube so 16x9 so this is
2:17
actual aspect ratio for this 9 by6 will
2:20
be for Instagram
2:22
vertical video and 9x6. This is and uh
2:27
4x3 all these portrait mode you can see.
2:31
We will select 1280 720 which is for the
2:35
YouTube thumbnail if you're designing
2:36
it.
2:38
These are the different controls. You
2:40
can zoom out, zoom in and also drag your
2:44
canvas by this hand hand tool. Redo
2:47
operation, undo operations are also
2:49
available. If you want to clear out
2:51
everything, there is this clear button.
2:52
You can clear out everything and it will
2:55
reset to the default mode. And then we
2:58
can automatically change
3:02
like this. And uh now I will actually
3:05
show you to how to uh add a text here.
3:08
So if you just want to add some text in
3:09
the canvas, you can add this like this
3:12
very thin. You can add this. So,
3:27
so this text we have added guys and now
3:30
you can see we can control everything
3:32
here. alignment properties
3:36
and uh you can see you can control
3:39
everything.
3:42
If you want to align it in the left
3:44
direction, center,
3:46
right.
3:48
So then we can basically have
3:50
properties, itallic, you can underline
3:52
the text like this.
3:58
We can also have various fonts available
3:59
for us. So if you want to select the
4:02
phones so the link is given guys if you
4:04
need this application I you can purchase
4:06
the full source code the link is given
4:08
in the description. So it's a very
4:10
special piece of software that I
4:12
developed. So if you are interested the
4:14
link is given in the description. After
4:16
that you will actually get this the zip
4:18
file guys. The code is entirely written
4:20
in JavaScript HTML CSS. You will get the
4:22
zip file. After that you need to extract
4:24
the content of the zip file. You will
4:26
get this directory structure and you
4:28
just need to install it on any web
4:30
server that you are uploading your
4:32
website and this application will work.
4:35
If you need some doubt regarding you can
4:37
contact me at my email address. So you
4:40
can also control the opacity of the text
4:42
as well. You can see that letter spacing
4:44
as well control it. Everything is
4:47
customizable guys. So you can change the
4:49
color
4:51
of the text color of the text right
4:53
here. can control it.
4:57
I think my favorite color combination is
5:00
black background and black background
5:04
looks cool. And uh
5:08
and basically you can now also have a
5:11
shadow as well. You can provide a shadow
5:15
to the text.
5:21
If you want to have a border, you can
5:24
also provide a border.
5:27
Change the color.
5:30
So, this will also provide the border to
5:32
the text like this.
5:35
I think it's not looking good. I'm not
5:37
good at designing, guys. So, just bear
5:39
with me.
5:41
I'm very terrible in designing so I
5:42
don't design my thumbnails of the video.
5:45
So that's why you can see the fact here
5:48
and here this is actual position that
5:50
you see it automatically updates that
5:52
you see position X Y the width height
5:56
you can also rotate your thing at a
5:58
various angle 45°
6:05
this is layer based thing guys. So
6:07
you'll see this is a single layer which
6:09
is available and if you see uh it
6:12
appears for 4 seconds. This is the
6:14
actual thing right here. Now if you want
6:16
to export this to a uh video file click
6:20
on this button download. It will render
6:22
your video uh using ffmppg and uh in the
6:26
browser and you can open this video
6:27
right here. So this video will play
6:29
right here. It's a webm video and it
6:32
will play it. So it will work for 4
6:36
seconds and then it will go away.
6:39
Animated GIFs as well. Click on start
6:41
and it will basically render this as an
6:43
animated GIF file and uh then
6:46
automatically it will download as a GIF
6:48
file right here.
6:51
You can also download as a static image
6:54
PNG JPG.
6:56
So let's suppose I want to download as
6:58
JPG image. So similar to Canva guys,
7:01
Canva also provide the same
7:02
functionalities with timeline video
7:05
editor. This is one text right here. You
7:08
can add multiple text images uh as well.
7:11
So these are different templates which
7:13
are pre-built right here. You can also
7:15
have my template, save it inside,
7:17
import, export, everything you can do.
7:19
And you can upload your own media as
7:21
well. And uh let's suppose I want to
7:24
import some images from my file system.
7:27
So I can simply import this image. Just
7:30
drag it and you will see that the image
7:33
will drag right here.
7:35
And this is has its own timeline that
7:37
you see in the image. And we can resize
7:40
the text to just fit fit right here.
7:49
Then resize the image right here.
7:56
So there is also this animated text also
7:59
available guys. Let's suppose uh right
8:03
here you can just filter with the
8:06
brightness, contrast level, you can edit
8:08
this image accordingly. Saturation,
8:11
vibrance, all these things you can
8:13
control. Various filters are also
8:15
available. Grayscale, surfia, black and
8:18
white, every retro feel,
8:21
vintage,
8:23
so invert. So all these filters pre-made
8:26
available guys you can try out and you
8:28
can also crop your image. Select any
8:30
portion that you want to.
8:37
So there is this crop option available
8:39
to you. You can crop any any portion
8:41
that you want.
8:46
Click to crop. So now your image is
8:48
cropped. You will see that. So there is
8:51
also the support for cropping the image
8:53
as well. So after you do this, you can
8:55
place your image right here.
8:58
Let's suppose I want to appear the image
9:01
later. So I can just adjust the
9:03
timeline. So now
9:06
the image will appear later.
9:11
Now you can see the image is appearing
9:13
later.
9:16
You can just download as a video and uh
9:20
it totally depends upon your designing
9:22
part guys. I'm not good at designing so
9:24
I can't design a good thumbnail but you
9:26
can see the power of this software. You
9:28
can ultimately design any video, text,
9:31
anything you can design using this
9:32
software.
9:35
This is a very awesome application and
9:37
you can see that it uh image appears
9:40
right after the text. Same goes with the
9:43
you can control the quality you can one
9:46
to 256.
9:48
So
9:53
and a GIF as you all know guys it loops
9:56
through for ultimate number of times it
9:58
will loop through. So it will repeat un
10:01
uh it will repeat this GIF animation
10:04
totally depends upon your length. So if
10:06
you want to download as a static image
10:08
you can also download this as a PNG
10:10
image.
10:12
Uh for that to appear uh I think we do
10:15
need to put for the image to appear
10:21
you can design ultimate fun little
10:23
thumbnails using this software you can
10:24
see that it's a complete Canva clone
10:27
guys. So if you need this the link is
10:31
given you can directly purchase it and
10:33
there is also one little cool little
10:35
stuff shape shapes are also there you
10:37
can have your shapes different kinds of
10:39
shapes that you can have to design the
10:42
thumbnail if you want to do like this
10:46
and then you can change the color of
10:48
this.
10:49
So shapes basically makes the thumbnail
10:51
far more very easy.
10:54
You can have customizable shapes
10:56
available. So you can put emojis as
11:00
well. These emojis makes the thumbnail
11:03
far more easy. And uh you can have
11:06
control the colors right here. And uh
11:10
these thumbnails are also there. We have
11:13
support for if you see it is coming
11:15
through pixabay pixels all these third
11:17
party websites providing free
11:22
stock photos. So these photographs are
11:24
copyright free. So you can safely use
11:26
these photographs and it's coming from
11:28
Pixabay and pixels API and uh you can
11:32
enter just search for here inside search
11:34
bar. If you want to have laptop images
11:37
it will search for you laptop
11:40
you see that orientations you can say
11:43
colors black and white categories you
11:45
can select which categories you want
11:48
images to appear and it will show show
11:50
you to you. So photos are provided by
11:53
Pixab Bay, Pixels, all these things.
11:56
Same goes with videos. You can also have
11:58
stock footage available for you which is
12:00
provided by Pixabay and Pixels. These
12:03
are all coming through the pixels and
12:05
pixel bay API. And uh you can also
12:07
upload your own audio file as well guys
12:10
for this video. You can have this option
12:12
right here or you can use the test audio
12:14
files available for us which is Pixabay.
12:17
You can also use these audios copyright
12:19
copyright free
12:21
and you can also generate QR code as
12:23
well like this. You can embed this QR
12:26
code inside your video files or uh
12:29
thumbnail files as well. If you want to
12:31
design your thumbnail as a QR code, you
12:34
can also do it as well. So if can
12:37
download this as a P image file, your QR
12:40
code. So when somebody scans this QR
12:43
code, it will directly go to this URL.
12:45
So you can basically control whichever.
12:52
So right here.
12:58
So you can put here whichever URL
13:02
you can go httpsg google.com. So you can
13:06
put your own website. It can have
13:08
rounded. Can I put a label as well label
13:11
color you can change it.
13:20
So this is the thing guys and uh
13:26
this is a full editor demo that I showed
13:29
you guys. Uh now let me put uh you can
13:32
see all these objects are there. You can
13:34
hide this and then design it with
13:36
freedom.
13:38
You can also have light mode. This is uh
13:41
dark mode, light mode, all these things
13:43
are there. The link is given guys. You
13:45
can directly purchase it. The source
13:47
code is given and you can directly
13:50
basically launch the live server. After
13:52
you get this index html file, you can
13:54
simply open this with live server in VS
13:56
code. You can directly have this
13:58
application
13:59
and uh you can save this work by going
14:02
to this uh
14:06
uh you can save your work uh in the
14:10
templates. You can basically save this
14:12
work. Just save it. So now your template
14:15
is successfully saved right here. So
14:17
anytime
14:19
if you want to design from where you
14:22
left you can go to the my template
14:24
section and just you can import that
14:29
template or you can export this as a
14:30
JSON file. So anytime let's suppose
14:33
you've lost your work if you are opening
14:36
it in a new window
14:38
new incognito window.
14:42
So here your templates are not there. So
14:45
what in this case what you will do?
14:56
So right here if you see
15:00
go to my templates and just import your
15:02
JSON file that you saved. So now you can
15:05
see all your work is now there because
15:07
we just imported my template. So in this
15:10
way guys you can import your export your
15:13
templates using this method. It's very
15:16
good method. So now let me show you the
15:18
actual code guys and uh we are actually
15:21
using if you see in the JavaScript we
15:23
are actually using fabric js jQuery
15:25
plugins and uh these are things it's a
15:29
custom thing here you can see that we
15:31
are using pixels API key and uh pixabay
15:35
which is actually returning photographs.
15:38
We're making a simple get request to
15:40
actually fetch those stock footage,
15:43
stock photos and uh it is doing its
15:46
process. So it's a full application
15:49
guys. You will get the documentation,
15:50
CSS, everything. If you still face some
15:53
doubt, you can contact me at my email
15:55
address. I will provide you with full
15:56
assist and support and uh this is actual
16:00
application. So if you are interested
16:01
guys, the link is given. Please hit that
16:03
like button, subscribe the channel and I
16:05
will be seeing you guys in the next
16:07
video. Until then, thank you very much.