Up next in 10

Angular 14 LightGallery.js Example to Create Responsive Lightbox Image Gallery With Editor in TS
Dec 22, 2025
Get the full source code of application here:
Show More Show Less View Video Transcript
0:02
Uh hello guys. Uh today in this live
0:05
stream we will basically talk about how
0:07
to integrate the light gallery JS
0:09
plug-in inside your angular 14
0:12
application. So in the last live stream
0:14
I have talked about how to create
0:16
integrated in the browser but now I will
0:19
be talking about how to integrate in
0:21
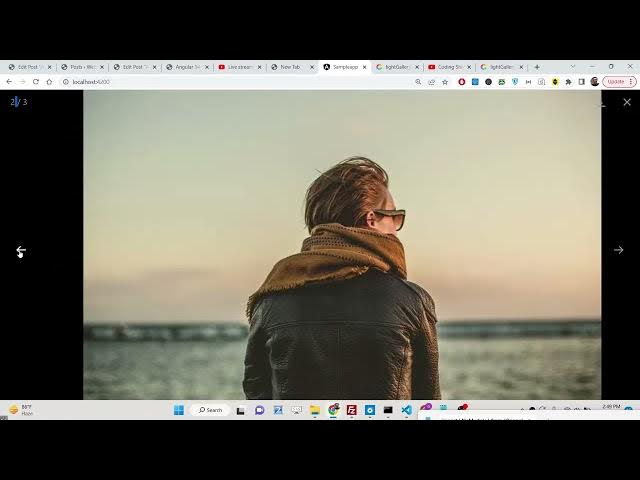
inside angular 14. This is basically the
0:24
same images that I will use here for
0:27
this tutorial also. You will see
0:29
basically this is the gallery here and
0:32
uh the user can navigate to the previous
0:34
image next image with these controls out
0:36
there and the thumbnail of the images
0:38
will be shown here at the bottom side
0:39
corner of the screen and also we have
0:41
all the controls out there. We can
0:43
rotate images and any direction
0:45
anticlockwise direction clockwise
0:46
direction. We can flip images like this
0:49
also. So with cool little transition
0:52
effect you can see that we can also
0:54
share images with Facebook, Pinterest,
0:56
all these social media networks with a
0:58
single click. We can also zoom images,
1:01
we can download images. So these are all
1:03
the controls out there which is
1:04
available in the form of plugins. We
1:06
have talked about in the last live
1:08
stream. So I will be showing you how to
1:10
integrate this inside Angular 40. So if
1:13
you go to this their official website
1:15
guys which is light galleryjs. This is a
1:17
very popular responsive image gallery
1:21
module for JavaScript
1:24
and uh it can be integrated with Vue.js,
1:27
Angular React. We will talk about how to
1:28
integrate it Angular 14. This is their
1:31
documentation. So I have written a
1:33
complete blog post on my tutorial
1:35
website how to integrate this step by
1:37
step. If you face any sort of problem,
1:39
you can go to my blog post. The link is
1:41
given in the description of the video.
1:43
So now let's get started by building
1:45
this application. So I have already
1:47
started this project on localhost 4200.
1:50
Let me just delete that code and start
1:53
from scratch. Let me just delete all
1:55
this code.
1:57
Let me delete all this and start from
2:00
scratch.
2:02
So the very first thing you need to do
2:04
guys, you will see nothing will be
2:06
there. Now if I refresh it, go to
2:08
localhost 4200, nothing will be shown.
2:11
So if you make your angular project
2:13
guys, you need to install this module
2:14
which is MPMI light gallery. So if you
2:18
just install this module by this MPMI
2:21
light gallery, I have already installed
2:23
it. So I will now start this application
2:26
by ngserve. So the very first step you
2:29
need to do right here you need to go to
2:31
app domodule.ts file. This is basically
2:34
the file you need to go to. And after
2:37
this here we need to copy paste this
2:39
line or write this line
2:42
import. And here we need to import this
2:44
from light gallery
2:48
and this
2:50
/ angular
2:52
and basically uh we need to integrate
2:54
this module which is light gallery
2:56
module.
2:58
That's all. So
3:03
it has this light gallery module and
3:05
inside the imports array we need to add
3:07
this light gallery module. That's all.
3:10
So after you add this guys close this
3:12
file now you need to move to
3:13
app.component html file and here you
3:17
will define all the images that you need
3:19
to show here. So inside your light
3:21
gallery widget light gallery widget here
3:25
you will basically pass the settings. So
3:28
settings basically is the settings that
3:30
we will define it in the TypeScript
3:32
code. So just write here settings here.
3:34
We will define this variable later on.
3:37
And here you need to basically paste all
3:39
the images guys that you will see inside
3:41
your uh gallery. So what I will see I
3:44
will simply paste it. You can use any of
3:46
the images guys local images also. Just
3:49
pass the address inside href attribute
3:52
that's all. We are using it using a
3:54
pixum images from the internet. That's
3:56
all. So if you just refresh this
3:58
application guys, nothing will happen.
4:01
You will see it is saying settings is
4:03
not defined.
4:05
If I eliminate the settings here and try
4:08
to refresh it, you will see basically
4:13
I just need to refresh it. So three
4:15
images will be shown here guys. You will
4:17
see that automatically uh this module is
4:21
defined here. You will see automatically
4:23
this counter is showing. This is the
4:24
first image. I can navigate to the
4:26
second image. I can navigate to the
4:27
third image. So in this way you can see
4:29
guys we have successfully integrated the
4:32
light gallery module. Now to show all
4:34
those buttons that we saw in the
4:36
starting of the video we need to add
4:38
some plugins. So now to add those
4:40
plugins we need to go to app.component
4:43
CSS file. So let me just add the
4:46
settings here. So now to add those
4:49
plugins just go to your app.component
4:51
component CSS file and here we need to
4:54
add those code here for each of the
4:56
plug-in. So I have given all the CSS
4:59
code guys which is required for this. So
5:01
you can go to my blog post and simply
5:03
copy paste this these CDN links simply
5:07
paste it. So this is basically the CDN
5:10
link for each of the plug-in that we see
5:13
zoom video share rotate thumbnail light
5:16
gallery. Simply paste all these CDN
5:19
links guys and just close this file. Now
5:22
we need to go to app.component.ts
5:24
file. Need to define the settings
5:26
variable. So inside your settings
5:29
variable guys, we will basically
5:32
define
5:35
we will let me just define this
5:36
settings. This will be a simple object
5:39
which will contain
5:41
the plugins. So plugins basically it's a
5:44
array and here we can uh define any of
5:47
the plugins and now to basically
5:50
individually import the plug-in we need
5:52
to do it LG zoom so this basically comes
5:55
slide gallery/plugin/
5:58
zoom so similarly now to add this
6:00
functionality what we can say we can say
6:03
lg zoom that's all so now your zoom
6:07
button will be shown guys if you see
6:09
local host 4200 you can see This is your
6:12
zoom button. You can see that
6:16
zoom button is present right here. We
6:18
can zoom the image like this.
6:21
And similarly, we have all those plugins
6:23
guys. We can follow the same approach.
6:25
We can say LG thumbnail
6:28
from light gallery plugins thumbnail.
6:33
And then we can add this inside this
6:35
array which is LG thumbnail.
6:39
So you will see guys the thumbnails will
6:41
also be shown here.
6:45
We can navigate through clicking on the
6:47
thumbnail.
6:51
And similarly we have the plug-in for
6:54
rotating the images. We will say LG
6:57
sorry share. Let me first of all do the
7:00
share one. Light gallery plugins share.
7:04
So if you want to share the images we
7:06
can add this plug-in also.
7:11
So you can add the share button. You
7:13
will see that
7:18
similarly we can have the rotate as
7:21
well.
7:26
So if you want to rotate your images you
7:28
can also add this plug-in.
7:34
So all the rotated rotated buttons will
7:36
be added here. You can flip the images
7:38
in any direction. Top, right, left,
7:41
right corner, top, bottom.
7:44
And last, lastly, I think we also have
7:47
the full screen plug-in as well. If you
7:49
want to view your uh image in a full
7:53
screen, you can also do it.
8:07
So you will see we have the full screen
8:09
I think. Uh
8:12
full screen you will see you can now
8:14
view your image in full screen.
8:18
So in this way guys you can inte uh
8:20
integrate this light gallery.js
8:22
responsive library inside your angular
8:24
14 application. I have given all the
8:26
steps in my blog post. You can go to the
8:29
description of this live stream and copy
8:31
paste all the source code. Please hit
8:33
that like button, subscribe the channel
8:35
and I will be seeing you in the next
8:37
one.
#Jobs & Education