Up next in 10


Have questions? Ask in the Chat!
Don't forget to check out Odyssey Custom Vans latest build currently For Sale here: https://www.odysseycustomvans.com/
Whenever you’re ready, there are 2 ways we can help you:
1. If you need a vetted parts list, download our → FREE DIY Van Build Cheatsheet to help you save time and money on Van Parts and Gear: CLICK HERE: https://vanbuilderhq.com/
2. If you want to get Done-For-You Van Build help, book a → FREE Consultation with my Calendly Link: CLICK HERE: https://calendly.com/odysseycustomvans/intro-call
Show More Show Less View Video Transcript
0:01
[Music]
1:19
hey everyone welcome back to the live stream tonight we're going to be finishing up our acrylic panel that we were uh upholstering last night and then
1:27
we're also going to uh move camera and then we're going to come over here to this side and we're going to work on the
1:34
driver rear door carrier so we got one from Flatline vanco uh let's see I'm going to go ahead
1:41
and pull that up so not sponsored but I did want to
1:48
kind of tie the whole van in with the whole van uh flatl vanco theme so we get a lot of interior parts if you guys have
1:56
not seen the build on the van that we're currently working on but the components we got work from fline
2:02
vanco so let me show you the Tire Rack that we're going to be working with it's
2:08
this Transit rear tire carrier so we're going to be putting that on the van
2:14
tonight and uh I've already started probably moved um halfway through it and
2:21
there's some challenges that you guys might face when you're installing it so I wanted to make sure that I cover those
2:27
it has to do with the door brackets and then we're going to go through on some rest preventative stuff that I had to
2:33
grind and then repaint uh the drill drill location for
2:38
the door you have to actually drill through the door to bolt the tire carrier and all that stuff so we're
2:43
going to do it after we finish up with the upholstered panel so let's go ahead
2:48
and jump on over there so this is where we were uh yesterday afternoon and if you
2:57
guys can see we we actually have the the upholstered panel epoxied
3:03
in uh I did uh a first run of epoxy try to clean all this
3:10
up you know there's work getting done when there's just like a mess everywhere so I almost don't get mad at it because
3:17
it's it means progress um let's clean all this up
3:23
here so let's see let's see if the camera can zoom in just a little bit so
3:29
I can show you guys what I'm talking about all right so here's our
3:36
panel and what we did yesterday was we finished upholstering the whole entire
3:41
panel so that it looks uh nice and neat all over edges are super clean and we've
3:48
got our screw holes covered up which we are going to cut out today to mount it
3:53
uh I already took off the protective plastic so now we just got the clean
3:59
piece of acry IC and I went through last night and I did a first pass of epoxy
4:05
now the reason I'm doing two passes is because when you have Fabric and you're working with
4:12
um uh you know upholstery in general it's going to absorb the adhesive or
4:17
anything you put in there that's you know essentially like a liquid so when you use these uh JB Weld clear weld
4:25
sticks and you're putting it through here if you put too much uh you can
4:31
overwhelm the fabric and it's going to absorb it and it actually might come out the other side it'll just keep sucking
4:38
it up and then it'll come out the other side and that's really bad you've ruined your whole panel so you don't want to do
4:43
that so instead what I do is I do a first pass and it kind of it'll set the
4:48
piece of acrylic and then we'll come back and then I can fill up the channel one more
4:54
time and then that uh sets everything in there and it's not going anywhere
5:00
because the way to do these panels there's no room to nail or have some type of finishing cover on it because uh
5:08
it would just it's just too much uh this worked out really well uh and the Marine one pan
5:14
conversion that we did for Thomas and so I'm doing it for this build as well the exciting part today is we get to put
5:22
on the vinyl graphic so our Odyssey custom vans etched glass vinyl so this
5:29
is a simulated etch glass and the way that you would get um the Graphics
5:34
Company in your local area to do something like this is you say I want the ET glass vinyl and then reverse it
5:44
or like kind of invert it because what you want to do to have this effect is you want the adhesive on the front of
5:51
the letters so that when you put it on the vinyl is behind the acrylic that's
5:57
the that's the secret that's how it makes it it look like it's you know uh like laser laser etched into the
6:05
panel um so what we're going to do today besides everything I was just saying is
6:11
we're going to show you how I Square this up which is is pretty
6:16
straightforward but you know something like this where you get so far you don't want to mess up uh I'll show you what
6:23
I'm doing to not mess up uh we're going to put the logo here
6:28
so we'll need to clean it I've got this piece of tape up here to indicate the top of my panel just so I
6:34
don't forget the orientation because our screw holes that are covered here we got to remember these screw holes underneath
6:41
here um they're hidden so we'll have to cut them out with a raiser before we actually install the panel and its final
6:49
home but I went ahead and took the panel put it in the van and these pieces of blue tape is where the 8020 bar runs
6:56
across the panel so I want to make make sure that I know what that offset is and
7:02
that way I can start measuring how far I want to come off this Edge and up to do
7:08
my height and then I'll do my left to right and then once we know that's where it's
7:14
at we'll we'll do is we'll WP this down with Windex we'll clean everything up
7:19
we'll tape our graphic down on this side
7:24
and then we'll kind of start from the right go to the left and then just kind
7:30
of lay it on um yours will probably be newer this has
7:37
been sitting for a while so I'm hoping that uh the adhesive is okay on this
7:45
part because um it's been on the shelf for a minute uh but the thing is it's a vinor
7:51
graphic so if it messes up we can uh we just get we can just peel it back off
7:57
get another one printed but yeah that actually kind of been open a little bit I just now saw that all right well we'll
8:03
see how we do so that's the first thing we're going to do in this panel then we're going to cut out the holes and
8:09
when we're done I'll move the camera and we'll jump on to the uh rear tire
8:16
carrier and we'll start messing with it so the rear tire carrier is looks like
8:25
this this is what it looks like so we have a bracket up here on the
8:30
top bracket on the bottom there's a little supporting bracket that I'll show
8:36
you uh this part right over here on the right side this little bracket this is
8:41
the complicated part
8:48
um and that goes inside the door so yeah that'll be pretty cool oh
8:56
yeah so go and do this acry TRC panel I don't know if I have showed you a video
9:01
this is going in the uh spec build van for the shop so it has a different it
9:08
has the Renegy power system so what this panel is going to do is it's going to uh
9:13
cover the victron links distributor the uh
9:19
the Renegy Rigo 3000 watt inverter and the two DC todc Chargers so it actually
9:26
it's not the Eco ecoflow system yet um but I may do acrylic on the Eco flow
9:34
so I think you've already given me that idea now do the do the signature acrylic
9:40
uh because it looks pretty cool not sure yet but yeah tonight we're the acrylic
9:45
is for the Renegy system I will look into doing it for the uh
9:55
ecoflow anyway this is our tire carrier and we've got a kind of B B everything up so the goal is by the end of this
10:02
live stream tonight I will get that tire carrier bolted up and I can check it off my to-do list um and in the meantime you
10:10
guys are here to ask all the questions that you would uh uh like to ask if you have any any
10:18
questions but um we're going to hop over here to this camera and let me let's see here okay
10:26
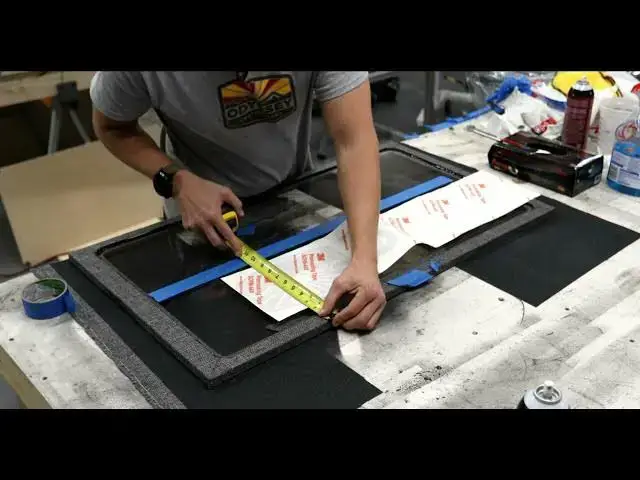
I'm going to start measuring so so everything's good nothing crazy over
10:33
here what we're going to do now is we're going to make sure we got some painters
10:38
tape uh we're going to take our measuring tape and I just want to get a rough estimate of how high so we've got
10:46
8 and 1/2 Ines so it's 8 and 1 12 inches right there and then it should be 8 and 1/2
10:53
right here okay bingo so we got 8 and 1/2 in that is
10:59
is this direction so our two pieces of tape are Level which makes sense they
11:05
should be we we didn't do anything crazy when we were uh building this all the
11:11
measurements are very very simple so now what I'm going to do is I'm going to lightly take a piece of
11:18
tape I'm going to tape it from this end to this end and we don't want the middle
11:25
to stick yet kind of want it to
11:30
we want to lay down because this is what we're going to use to reference off
11:36
of so let's see here we're measuring from the top not what I did before so this
11:42
measurement is going to be different so I got 10 and an e and 10 and an
11:50
eighth
11:57
so let's check our
12:05
middle okay so that is we can set this in
12:12
place all right this is what we're going to use uh we're going to do one more piece
12:17
of tape um and that will come up off of
12:23
this and that we're essentially just centering this
12:39
all right so we got a half inch there and let's do a half inch on the
12:46
top so it looks like we're going to leave it just like
12:52
that so we're only going to use the bottom as our reference and then we'll
12:57
do our left or right because we have um an half an inch plus
13:03
one two three four so we got 58s on the top right here and then we've got half inch here
13:10
above the bar but I I'd rather have this uh down just a hair because when
13:16
you look at a graphic if this is too high cuz you're going to be looking up high and it'll be at an angle so if we
13:24
move it down a little bit lower it's going to actually look like it's actually more
13:31
correct if that makes sense all right so we're going to do
13:36
that let's go ahead and get some tape and I'm going to measure a/ inch
13:44
up from here and we want to be careful we've taken our protection off of the acrylic
13:52
so we don't want our our tape measure scratch scratching this
13:57
up okay so there's our half
14:04
inch forgot to go to Home Depot and get more tape so I'm using the extra tape
14:10
from yesterday yesterday's live stream okay so that's our B base of our
14:23
graphic all right just make sure this thing does not snap back
14:29
let's lock lock the tape measure it's going to come under
14:36
here all
14:42
right so I'm sure if you did this you'll have completely different measurements but if you guys are curious I'm at
14:49
nine 9 and 1 12
14:57
in
15:07
okay so our top to Bottom's good now we just need to get our left to
15:27
right
15:51
this one's going to be tricky because I folded this up
15:57
and
16:02
it just it's kind of it's wrinkled the graphic's fine but it's I'm just it's
16:08
been on the shelf for a couple months actually if you can believe
16:18
it all right so this is the ball this is
16:27
ballpark
17:00
you guys can also see why I like masking tape instead of painters tape painters it just doesn't
17:06
hold it's
17:23
annoying just need to slap some tape on here
17:45
it's an inch and a half and an inch and
17:55
38 inch and 38
18:16
yeah this is where the process gets tedious all right so let's pick this
18:27
up this right side is the main this is the
18:33
main side that I want to worry about I'm not really worried about the back side so we got this at an inch and a
18:57
half
19:18
because what I'm going to do is I'm going to find where I need to be on the right side I'll put a piece of tape and then I'm just going to I'll just go from
19:26
there just kind of have to go for it all right so
19:37
this okay we got an inch and a
19:57
quarter
20:16
all
20:27
right
20:56
so what I'm doing here is I'm trying to to get my line for my inch and
21:03
38 starting
21:10
point which is not easy right
21:21
now okay actually that looks good okay so we got
21:27
an engine 38 eight two and
21:48
78 2 and 78 2 and 78 okay so now we finally got
21:54
our our Corner over here that's good
22:11
n and a half n and a half 2 and 78 2 and 78
22:26
okay
22:54
all right let's see how many people we got in the chat tonight all right not bad or the live
23:02
stream I think most people don't get on till about 9: anyway if you guys are just joining us
23:08
we are working on an acrylic panel that we are doing some vinyl graphics on with
23:13
the company logo for a custom van build and we are just cleaning
23:20
everything up so that we can uh apply the graphic
23:25
we have a etched glass of my company
23:33
logo and this one's going to be a little bit more challenging than the other one simply
23:38
because I let this get wrinkled uh on the shop
23:45
shelf as I was doing other things and yeah it's not going to be as easy as the
23:52
first one which I could have when you're working with Graphics it's it's it's good to to if you uh can tape the whole
24:00
graphic down and then as you work with the graphic you begin to
24:07
uh you know peel it off and then and then align it but this one I got a couple of things
24:14
going against me
24:19
um let's see here the way that they put the paper on it inch and a
24:26
half inch and a half see that's not so they cut this outside paper
24:34
random so I was trying to get a straight edge and I kept messing up over here and the reason is this top piece actually
24:42
kind of goes up this bottom piece is down and then goes up at a taper and
24:48
this backs side has like a slash to it so really all I have to go off of at the
24:55
current moment is going to be this um
25:02
uh my actual logo you you'll see it when I peel this
25:07
back um yes let me clean this one more time make sure we got a
25:13
really clean lintree
25:26
surface
25:35
okay already got some goop over
25:45
here don't know what that
25:56
is
26:06
there a little drop of epoxy
26:12
probably okay there we
26:18
go all right next thing you want to do is go wash your hands get all your get
26:23
all the oils off your hands as much as you can
26:50
I don't like to put gloves on CU I like to feel the material uh cuz the gloves can kind of
26:55
they just get in my way so if I just make sure my hands are really clean and not oily or greasy I just go with
27:04
that all right here we go let's move this
27:12
down I'm G move the camera don't worry guys just need this a little bit closer to me
27:18
for so I don't mess
27:26
up
27:56
for all right here we go let's put the graphic
28:04
on measured twice cut whats right so we get 9 and A2 9 and A2 9 and
28:12
A2 we are coming off of this thing at 2 and 78 all right so two and 78 over
28:21
there what was this thing measuring at 2 and 78 and the graphic is
28:32
actually 31 in 31 is right
28:46
there see so I'm starting this at an inch let do
28:56
it just need to mark one more
29:07
thing so down here in the bottom I'm going to mark an inch and a
29:12
half okay and then over here I'm going to me measure an inch and a
29:21
half because the paper is not what we're going off of the graphic is what we're going off of and so
29:27
where you can actually start to mess up is you start following the paper not the graphic trying to get the paper
29:35
straight and because we were paying attention uh the paper is not
29:41
right so what's this going to look like if we do
29:56
this okay so what I'm going to do is I'm
30:02
going to put a piece of tape going put one more piece of tape
30:08
here and that tape needs to be just like this other one
30:20
so so let's put this up here so we can mark on it all right so I put this at an
30:25
inch and a half and then right here we need another
30:32
dot inch and a half okay then we're going to have a piece of paper and now when I put the graphic on here I'm
30:39
putting this edge of my logo right on the piece of tape and then I'm just going from
30:47
there that way I don't mess myself up all right there we
30:55
go so now we should be kicking
31:02
butt all right so the final triple check is going to be this
31:09
is fine over here it's this uh part of our logo that we want to be Center between the
31:16
8020 so we've got 3/4 of an inch there and I have a half an inch oh wait
31:22
no I already we already talked about that half an inch here
31:32
so half an inch
31:39
and 58 not 3/4 58s so we are we already
31:44
talked we're good
31:51
okay now when we take this off we're going to roll the uh
31:58
we're actually going to take it under off under this way and then we'll just
32:03
get this uh this will be our anchor kind of like
32:09
that and then we'll just we'll just work the graphic down like
32:15
this and unfortunately in this case we have to make sure that we don't use our
32:20
white piece of paper as the what we're doing to uh
32:28
level this out because it'll it'll steer us the wrong
32:39
way okay so what I'm going to do is get a couple more pieces of tape and I'm just going to hold this
32:44
down
32:51
temporarily okay I'm trying to set this up to teach
32:58
you guys and do it at the same time so give me just one
33:08
minute okay looking good let's take this
33:22
out so what I'm doing is I'm giving me little bit of room to start to work with
33:27
so now we've exposed the graphic and we're going to get ready to put it on and we're going to do this in
33:33
one go because we don't want to have bubbles so once it goes down we're not lifting back up to to to fix anything or
33:39
straighten
33:55
anything
34:06
man this is not like the other
34:25
one
34:55
okay I'm unfortunately I'm going to have to use the piece of paper right here it's straight on this side I
35:25
just
36:04
okay the problem I have is this right here is fine this is straight perfect but now as I come across what you want
36:11
to do is you don't want to have the graphic drift left or right and because they didn't cut this Square I needed to
36:18
measure where it says custom vans and make sure it's the same from the top down so hopefully if you are getting
36:25
your vinyl graphics done you don't run into this problem make sure that they cut it nice and
36:30
even uh because this is just a kind of pain in the butt as you guys just saw um
36:35
not having a place to actually uh a way to actually lock this
36:41
in square so I'm just putting tape on here
36:48
so I it doesn't
36:55
move
37:17
just remembered I have my uh Amazon kit that I ordered for the the graphics and
37:23
we've got these nice really nice felt scrapers
37:34
so I'm going to use my hands and then I'll come back with the felt uh let's do a little update let's
37:41
check the other
37:50
side okay still looks
37:55
good
38:07
and the only reason we're taking our time is air bubbles we don't want any
38:13
air getting in
38:25
here all right our tape gave up on us so
38:31
hopefully let's just measure what we just did so far so we got our little place right
38:38
here and that's at
38:47
s s and an eighth let's come over
38:55
here
39:25
for one two three four 58 sorry can't read
39:30
seven and 58s seven and
39:37
58 seven
39:55
five8
40:04
so now we're making sure that this this uh dashed line is 7 and 5/8 from
40:10
here and right
40:25
there now when we get to the end we're going to want to release the tape because what
40:32
the problem that'll happen is uh this roll will be in there and we
40:37
need to make sure the Y comes up before we get to
40:44
it a little check
40:50
in
40:55
okay
41:25
for
41:55
for
42:25
for
42:55
that
43:25
that
43:47
there's a point to where you can't really fix what you did and you can just rip it off and go
43:54
but uh I'm just going to they it nice and
44:25
easy all right so I did get a I got a little
44:31
bubble on the S right
44:41
there ah it's not a bubble dang it hold
44:47
on we got a piece of trash in there all right let me see if I can show
44:53
you guys how to okay okay we're going have
45:01
to to do it from the top
45:24
here
45:51
nah we're not going to be able to fix it we can fix it when we come back we'll
45:56
we'll go back and we'll go back and clean it
46:04
up I'll take one of those razors and do a little surgery on
46:14
it but I was saying earlier is when you're this close to the
46:20
end you really can't change the angle or anything I mean you're already done you're done with the graph
46:36
we almost had it perfect almost had it perfect we can still fix it but you
46:42
know I would like to it to have been a Flawless just
46:50
application okay so let's see if we can flip this up
46:55
you you probably can't see anything until I take it off here you
47:03
go there's our etch and looks like we did
47:10
okay just going to measure a couple things can't do anything about it but I just wanted to see if it
47:16
actually came out 13 and a quarter okay yep I
47:23
think all right so we're now we're going to peel off
47:28
this backing uh piece of
47:37
paper just make sure all of our stuff is down and then we're going to come in
47:43
and see if we can fix that that
47:50
s but here is the reveal
47:59
so I'm going just do this let's see where is that bump you don't want to hit the bump so it's down here at the base
48:06
of the S right here okay so I'm just going to mark
48:11
that right here the worst thing you can do is take this and run over a bump because you
48:18
could tear it we're just going to come in and make sure we want to make sure that our
48:28
graphic is fully stuck on there because we don't want to remove any part of the graphic if it's like a little letter or
48:34
an ie or like a dotted eye because when we take this paper
48:39
off uh the pre-masking tape it could actually pull up what we
48:46
just did so all right the reveal here we
48:54
go
49:07
in a minute you guys will see why I was so tedious with
49:13
this or hopefully you'll see it see
49:24
why
49:51
and just watch as you peel this off cuz if you accidentally catch an edge you can push it back down before you
49:57
actually tear it and really mess it up things like S's and stuff like that
50:02
tend to sometimes mess up now on
50:10
this s we're either going to do one of two things going to do the old school
50:15
and just pop it with a little bit of a razor blade or we're actually going to see if we can fix it
50:24
um of course now I don't even see where it
50:31
is oh it's on the other yeah it's the other
50:50
side okay so right where is
51:05
that I don't want to say it disappear but I
51:10
can't you don't see it where' he
51:24
go
51:54
okay I'm just pushing on this e because
52:01
we and this n cuz we pulled up on it and probably shouldn't have done that
52:08
but we we did all right there you
52:13
go that is our etched
52:18
glass think it looks freaking awesome got a little bump right there a
52:24
little bubble
52:29
okay so one little micro bubble there I'm probably going to leave
52:38
it yeah okay let's get let's get this tape off and then do a proper
52:54
reveal
53:07
okay for the moment we're not going to clean that cuz just don't don't mess with what you
53:14
just did yet just give it a
53:20
second all right
53:26
camera we're going to be looking at this
53:54
anyway
54:24
for
54:31
okay we got our six holes um grab I think I kept the bolts right over
54:41
here that's okay we got a ton of them over here we go
54:54
grab
55:59
all right guys what I'm going to do is I'm going to end the live stream I'm going to reset the camera we're going to
56:05
pop up into a new live stream um that way it's just easier if you guys want to
56:10
go back and watch the videos it'll be they'll be separate uh before we end I wanted to go over quickly the DIY van
56:17
build cheat sheet this is a an Excel sheet that I made over 250 curated items
56:23
of parts that I've bought while working in the shop so if you're looking for parts for your DIY build and you want a
56:30
list to start from this list is completely free you can download it right here on the website just put your
56:35
name email address it'll come straight to your inbox and yeah just real quick it's an Excel sheet of all these items that I
56:42
bought on Amazon and they're all organized electrical Fasteners Hardware hbac Roofing solar and the most
56:50
important section is the tool section so if you guys are interested in this sheet all you got to do is go to fuer hq.com
56:58
or click in the link in the description below and you guys can get this free uh always adding to it it's always going to
57:05
grow um throughout the years so download it to uh yeah help you with
57:11
your van build start and then last but not least this is
57:17
also Odyssey custom vans brought to you by Odyssey custom vans my van building business which I'm doing right
57:23
now if you guys want to check out the van that we've been working on which is this uh a drive four Transit High roof
57:31
we took it to the adventure van Expo in Chattanooga
57:37
Tennessee so there's a video walkr if you guys want to hop on the website and check out a video walking through the
57:43
van we got a couple more things we're finishing up on it but if you're interested in looking further we got all
57:49
the details on the website we've got photos here of the build and and if you're interested in
57:55
purchasing this because it is for sale you can contact me here at sales Odyssey customs.com that's my phone number
58:03
easiest way is to click on the calendar link and pick a day and a time hop on a
58:09
call with me and we'll walk through this build also if you're looking for a professional build you can click on the
58:16
same link and cck on this left tab and it'll give you some instructions on how we put together a consultation for you
58:22
to start working on putting the project together if you're interested so easiest way but that's going to wrap it up for
58:28
finishing up this acrylic panel to go over in the battery system if you guys want to see the final version just go to
58:36
the uh next live stream after this video um and we will be continuing the build
58:42
working on the rear tire carrier uh and then that will be the end of our shot live shop build tonight so thanks so
58:48
much for uh staying T this far into the video If you like this video uh give us a thumbs up make sure you guys are
58:54
subscribed to Van Builder hq's YouTube channel if you have any questions put those in the comments below and uh yeah
59:00
I'll see you guys in the next live [Music]
59:16
stream
#Campers & RVs
#Crafts
#Home Improvement